
Related Manuals for Firich Enterprise AM-1015

Summary of Contents for Firich Enterprise AM-1015
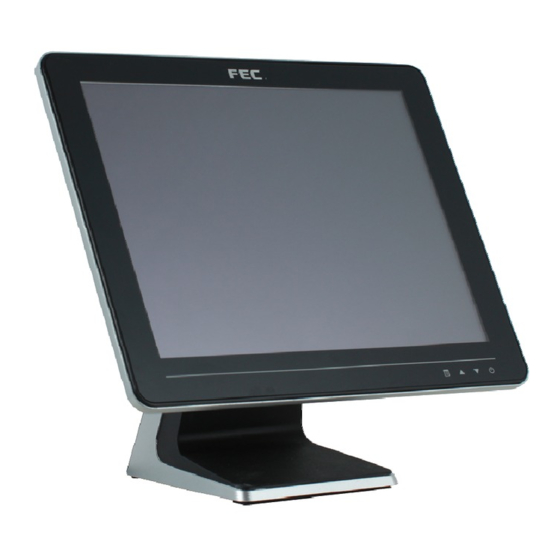
- Page 1 AerMonitor AM-1015 Aer Monitor Aer Monitor User's Manual User's Manual Version-0.1...
-
Page 2: Copyright Notice
Firich Enterprise Co., Ltd. Information provided in this manual is intended to be accurate and reliable. However, Firich Enterprise Co., Ltd assumes no responsibility for its use, nor for any infringements upon the rights of third parties, which may result from its use. -
Page 3: Safety And Warranty
AerMonitor AM-1015 Safety and Warranty 1. Read these safety instructions carefully. 2. Keep this user's manual for later reference. 3. Disconnect this equipment from any AC outlet before cleaning. Do not use liquid or spray detergents for cleaning. Use a damp cloth. -
Page 4: Table Of Contents
AerMonitor AM-1015 Table of Content Chapter 1 Introduction AerMonitor ( AM-1015 ) Introduction ..................1 A Quick Tour for AM-1015 ....................2 AM-1015 Dimension ..................... 3 Rear I/O Panel Connectivity ....................4 Aer Monitor AM-1015 Packing List ..................4 Chapter 2 MSR / Finger Print Reciever / RFID / i-Button Installation ............ -
Page 5: Introduction
[鍵入文字] Introduction AerMonitor ( AM-1015 1015 ) Introduction AerMonitor is a 15 inch bezel free monitor that is slim, compact, erMonitor is a 15 inch bezel free monitor that is slim, compact, but tough and durable enough for t tough and durable enough for any environment. -
Page 6: A Quick Tour For Am-1015
A Quick Tour for AM AM-1015 ” Touch Display Display OSD Power Switch / Status Power Switch / Status Blue LED: Power ON Power ON Red LED: Power Off / Standby Power Off / Standby u item up select, item... -
Page 7: Am-1015 Dimension
AM-1015 Dimension H: 315mm W: 367mm W: 210mm 195mm... -
Page 8: Rear I/O Panel Connectivity
Aer Monitor AM-1015 1015 Packing List Standard Optional & Peripherals Optional & Peripherals 15” AM-1015 Aer Monitor Touch Terminal 1015 Aer Monitor Touch Terminal MSR / RFID / Finger Print Receiver MSR / RFID / Finger Print Receiver I-Button 12V 50W Power Adaptor... -
Page 9: Msr / Finger Print Reciever / Rfid / I-Button Installation
MSR / Finger Print Reciever Reciever / RFID / i-Button Installation Installation 1. Remove the plastic cover Remove the plastic cover at the back of Touch Display Module 2. Insert the MSR / RFID / Finger Print Receiver / I- button Module into USB A USB A- Type Connector. -
Page 10: Pole Type Vfd / Lcm Installation
Pole Type VFD / LCM Installation Assemble the 2 screen with pole type with 2 screws Assemble the 2 Screen with pole type to Terminal. Plug in VGA and DC 12V cables... -
Page 11: 15" 2 Nd Display Installation
15” 2 Display Installation Installation Remove the VFD plastic plastic cover Assemble the 2 screen screen with bracket with 4 screws Assemble the 2 Screen Screen with bracket to Terminal. with bracket to Terminal. Fasten 3 screws (1 on top, 2 underneath) Plug in VGA and DC 12V Plug in VGA and DC 12V cables... -
Page 12: St Touch Display Installation & Swapping
15” 1 Touch Display Touch Display Installation & Swapping Release 2 thumb screw at the thumb screw at the back side of Display Lift the Display Module up to Lift the Display Module up to disassemble from the main disassemble from the main unit of terminal Display and main body units Display and main body units... -
Page 13: Osd Function And Adjustment
OSD Function and Adjustment OSD Function and Adjustment OSD function and adjustment Back Light Power (finger touch for 5 seconds) 5 seconds) Back Light Power On – Blue LED indication LED indication Back Light Power Off – LED indication LED indication Menu item up select, item value increase and auto Menu item up select, item value increase and auto tune... -
Page 14: Software Installation And Setup
Software Installation and Setup AM-1015 comes with a variety of drivers for different operating systems. You can download all the necessary drivers and utilities from http://www.fecpos.com. FEC AUO Project–Capacitive Touch Utility(Raydium controller) FEC Projective – Capacitive Touch Utility Introduces: 1. Mode of FEC Capacitive Touch Panel and default settings 2. - Page 15 Mode setting can be done in the utility: 1. Execute the touch utility 2. Keep the Value of Vid as “8137” ; Value of Pid as “1”, then Click “Link” Button (before it links, if it is factory default setting Mouse Mode, please keep Pid Value as “1”; if it is set as touch mode, please make Pid Value as “3”) 3.
- Page 16 4. after the successful connection, Click “Read” button, it will show some default status of touch utility P-Capacitive Touch Sensitivity The P-Capacitive Touch Sensitivity is relating to humidity of environment, humidity of finger tips or touching area size of finger tips. Thus, if the application requires more or less touch sensitivity, it can also be adjust by utility.
- Page 17 2. After key in a proper Value, Click “Erase” “Set” “Burn” step by step, then the certain value of sensitivity is applied into touch controller. Reboot the system to finalized utility setting. Right Click Function Setting The FEC P-CAP touch is simulating a USB mouse; therefore it has also the right click function of normal mouse.
- Page 18 2. After key in a proper Value, Click “Erase” “Set” “Burn” step by step, then the certain value of sensitivity is applied into touch controller. Reboot the System to finalized the utility setting. Double Click Function Setting Due to the application and user preference, the timing of double click is always required differently.
- Page 19 2. However, if F/W needs to update, first Click the square button (circled in red as following) to locate the path of proper BIN file. 3. Choose the proper BIN file from the correct path, then “open” 4. Then Click “Connect” button for further step...
- Page 20 5. A new windows will pop out, please close this pop out windows and back to the utility. 6. Click “Copy” and wait for 1 minute for the new F/W applies into the controller and re- calibration. 7. Firmware updated, Click “OK” and reboot the terminal to finalized the utility setting.
-
Page 21: Fec-Auo Capacitive Touch Calibration
FEC-AUO Capacitive Touch AUO Capacitive Touch Calibration This Capacitive Touch has auto calibration controller via USB interface. There are two different Capacitive Touch has auto calibration controller via USB interface. There are two different Capacitive Touch has auto calibration controller via USB interface. There are two different methods which can initiate the touch auto calibration: (1) Reboot the Terminal. - Page 22 4. Choose “None” and Click Next for further installation process 5. Click OK to close the pop-up dialog. 6. Click “Support Multi-Monitor System” and then Next to continue.
- Page 23 7. Click Next and choose a program folder to “Touch Kit”, then “Next” 8. Touch Controller found in USB, then Click Yes...
-
Page 24: Eeti Touchkit Installation For Windows 7
9. Click OK and turn off the computer and turn off the computer to restart your system again. After the system finish rebooting follow the After the system finish rebooting follow the instruction to calibrate the Touch screen. to calibrate the Touch screen. EETI TouchKit Installation for Windows 7 stallation for Windows 7 1. - Page 25 4. Un-tick “Install RS232 interface driver” and Click “Next” tick “Install RS232 interface driver” and Click “Next” to go for further process. go for further process. 5. Click “Yes” and confirm the USB touch controller is plugged. Click “Yes” and confirm the USB touch controller is plugged. 6.
- Page 26 7. Click Next Click OK and turn off the computer and turn off the computer to restart your system again. After the system finish rebooting After the system finish rebooting follow the directions to calibrate the Touch screen. follow the directions to calibrate the Touch screen.
-
Page 27: Touchkit Control Panel
TouchKit Control Panel This section explains the different options in the TouchKit control Panel. General tab The general tab allows you to: • Manage the touch screen controller you installed. Tools tab The tools tab allows you to: • Calibrate the touch screen with the 4 Points Calibration button. -
Page 28: Specifications
Specifications AM-1015 Specifications Aer Monitor AM-1015 Stand Type LCD Display Size 15’’TFT LCD Max. Resolution 1024 x768 Max. Color 16.2 M Contrast Ratio 700: 1 Touch Main Projective- Touch Screen Specifications Capacitive 5W Resistive (Tempered Glass Panel CCFL CCFL Brightness... - Page 29 PLUG / Power12V USB Dimension W367 x H326 x D188 Mounting VESA 100 x 100 Aer Monitor AM-1015 Bracket / Pole Type LCD Display Size 15’’TFT LCD Max.Resolution 1024 x768 Max.Color 16.2 M Contrast Ratio 700: 1 Main Touch Screen...
-
Page 30: Troubleshooting
Troubleshooting Please note that the following troubleshooting guide is designed for people with strong computer hardware knowledge or Engineers and Maintenance. Touch Panel Does Not Work Check “Touch Display Module” is connected well with terminal. Check HID USB touch device is detected by OS. (Resistive Touch) Check if the EETI driver or the TouchKit driver has been properly installed.
Need help?
Do you have a question about the AM-1015 and is the answer not in the manual?
Questions and answers