Table of Contents
Advertisement
Advertisement
Table of Contents

Related Manuals for Generic ZION


Summary of Contents for Generic ZION
- Page 1 OWNER’S WNER’S MANUAL...
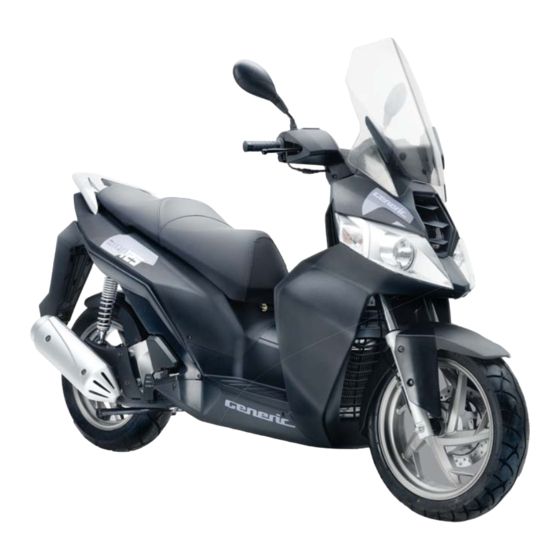
- Page 2 Congratulations on your purchase of the ZION. This model is the result of a vast experience in the production of fine sporting, touring, and pacesetting racing machines. It represents the high degree of craftsmanship and reliability that have made a leader in these fields.
- Page 3 Particularly important information is distinguished in this manual by the following notations: Failure to follow WARNING instructions could result in severe injury or death to the scooter operator, a bystander, or a person inspecting or repairing the scooter. A CAUTION indicates special precautions that must be taken to avoid damage to the scooter.
- Page 4 MAINTENANCE AND GOOD RIDING SKILLS, WILL ENSURE YOUR SAFETY RIDING AND INCEASE THE PRODUCT RELIABLITY OF THIS SCOOTER. *Product and specifications are subject to change without notice. ZION OWNER’S MANUA...
-
Page 5: Table Of Contents
SAFETY INFORMATION ........1-1 Parking ..............4-3 Sparkplug ............5-9 Other safety riding points ........1-5 Fuel tank check and replace ........ 4-5 Carburetor ............5-9 Location of labels ..........1-6 Engine oil replacement proces ......4-5 Tyre inspection ..........5-10 DESCRIPTION ........... - Page 6 THIS SCOOTER ARE TWO -OTED IN THIS OWNER’ please follow the maximum WHEEL SINGLE TRACK SMANUAL. VEHICLES. loads limited of operator OBTAIN QUALIFIED TRAI SAVETY OPERATION and passenger. MAY IN DIFFERENT RESULT -NING&LEGAL LICENSE Most of accident on the BY THE USE OF PROPER FOR OPERATION RIDING TECHNIQUES...
- Page 7 the intersection. • Operator should with face shield to protect • Keep proper distance with up-right with two hand your eye from dust and other Motorists, and let hold on handle bar, rain drop them aware your foot oorboard The wear of proper jacket, location.
- Page 8 with accessories. Below are Cargo accessory Modifications some general or accessories. weight should be kept as Modifications made this Here are some guidelines to close to the scooter that not approved by, or follow if loading cargo or adding scooter as possible. Make removal original accessories to your scooter:...
- Page 9 use on this scooter. If need, weight and not interfere GASOLINE HIGHLY please contact with can not test on steering the vehicle. all other accessories, you must FLAMMABLE: This vehicle is for personally be reasonable for • Always turn the engine off the proper selection, installation On-Road transportation...
-
Page 10: Other Safety Riding Points
and remove the key from water. the main switch. When parking the scooter, please Other safe-riding points note the following: Turn the signal before • The engine and exhaust making turns. system remain hot. When raining or across on Therefore, park run on the wet road, Iron scooter in a place where... -
Page 11: Location Of Labels
Location of labels There is an anti-tampering label in helmet box of the 125cc scooter , which could be seen after opening the seat. 1. LABEL, ANTI-TAMPERING... - Page 12 Controls and instruments (1) Rear brake level (2) Left handle bar switch (3) Meter assy. (4) Right handle bar switch (5) Front brake level (6) Throttle grip (7) Ignition switch (8) Hook...
-
Page 13: Left View
Left view (9) Side stand (10) Main Stand (11) Air cleaner... -
Page 14: Right View
Right view (12) Exhaust Muffler (13) Luggage box (14) Battery (15) Rear carrier... -
Page 15: Instruments
Instruments The indicator will be flashing against (1) Tachometer Tachometer indicate engine the position when right turn signal is on. rev/min. (7) Fuel Indicator (2) Left turn indicator Indicate oil capacity in fuel tank (The The indicator will be flashing against main switch at “... -
Page 16: Ignition Switch
Ignition switch handlebar is unlock automatically. Never turn the key to “ ” or OPEN position, cushion “ ”while the vehicle is moving. Otherwise, the electrical systems will opened. Do not energize downwards! be switched off, which may result in Oil sensor loss of control or a acci t. - Page 17 switch is at position, at the nd tail light will turn on at the same time. beam will on meanwhile th blue tell-tale meantime, grip the brake, the engine Turning the light sw itch “ ”, headlight, for high beam will flash. can be star ted.
-
Page 18: Storage Box
osition. be open. Put down the cushion and press Attention: its rear slightly, the box could be locked. A The maximum load of helmet box is helmet could be hung on the pin (1) as the WARNING: 5kgs. following picture. Please make sure use the turn signal Keep the following points in mind when while turning or changing... -
Page 19: Battery
(1) Battery specification: 12V/6AH. Replacing the fuse NOTE: Battery is in the rear of the lugg Some helmets cannot be stored in box. the storage compartment because of (3) Take out the battery: The fuse holder is located behind battery their size or shape. -
Page 20: Catalytic Converter
WARNING: Don’t use other fuses not fitted the required specification or lead such as the brass wires to replace. Otherwise it may cause serious negative effects to the circuit system, even cause fire, lamp failure, loss of engine power. Catalytic converter This model is equipped with 2 catalytic converters in the exhaust system. -
Page 21: Starting The Motorcycle
Start the motorcycle be started successfully because of using components may be damaged by idling 1. Inspect engine oil capacity by oil gauge, advanced electromagnetism start for a long period as for high temperature. check the gasoline volume and coolant. carburetor. -
Page 22: Acceleration And Deceleration
(2) Release brake lever speed, turn the throttle grip in direction (a). During this period, prolonged full-throttle To reduce the speed, turn the throttle grip operation or any condition that might result in direction (b). in engine overheating must be avoided. WARNING: After releasing the brake lever, can not 0 ~ 150 km... -
Page 23: Braking
Parking When close to the parking lot: please CAUTION: open turn indicator, observe rearview If any engine trouble should occur mirror, and pay attention to the past during the engine break-in period, vehicles with deceleration slowly. Close immediately have a dealer check the throttle, and then apply front and rear vehicle. - Page 24 ATTENTION: WARNING: WARNING: cannot determine Since the engine and exhaust Do not enable the spark plug to breakdown, please contact with the system can become very hot, park approach the spark plug hole that at sales promptly, because they have the in a place where pedestrians or the forehead of the air cylinder or best technology and the corresponding...
-
Page 25: Engine Oil Replacement Proces
Fuel tank check and refill To choose high quality oil and replace oil exchanging capacity is 0.8L; Make sure that there is sufficient fuel in the regularly is very important to prolong the The oil capacity can’t less than the fuel tank. -
Page 26: Speedometer Inspection
ground; please added more oil till reaching the and clean the brake light cover if any Screw off the engine oil gauge when upper limits line . damaged or dirty. the engine is off; A .oil drain bolt B. oil filled bolt Turning light inspection Put a pan under the engine drain bolt;... -
Page 27: Rearview Mirror Inspection
If any tire is broken or exceeds to the limits Turn the main switch to position’ ‘ and press horn button to check whether horn of tire groove depth, replace it with a new sounds normally one. Rearview mirror inspection When the tire middle groove of the front Inspect and adjust if angle of the rearview tyre is less than 1.6mm and rear wheel... - Page 28 Variomatic belt, ATENTION: The inspection intervals are required, 1000 km or 4000 km or 7000 km or 10000 km or 13000 km or fly wheels, spark pluge, fuel otherwise, no guarantee can be granted 1. month 6. month 12. month 18.
-
Page 29: Adjusting The Free Play Of Front And
Adjusting the free play of front Brake power regularly • When checking the fluid level, and rear brake Drive on the dry road, decelerate and make sure that the top of the master To ensure safe riding, please perform the check the front and rear brake power is ok cylinder is level by turning the handlebars. -
Page 30: Brake Pad
PERIODIC MAINTENANCE AND MINOR REPAIR Do not drive immediately, after the brake Brake pad pad just replaced. Hold and release the brake lever several times to recover the normal extension of the hold hands, and the brake fluid cycle stably. At the same Check the brake pads whether wear to the time, drive in low speed then brake to limit indicator mark or not. -
Page 31: Coolant Maintaining Methods
Coolant maintaining methods and injecting coolant to the radiator 1. Start the engine, warm up the final transmission oil by riding the scooter (recommend to use the filler to add water). When add coolant, please screw the for several minutes, and then stop the engine. -
Page 32: Components Lubricate
for the cause. llowing pictures: “Z” 3.Main stand contact bolt and spring hook “Z” 4.The gear shaft bearing speedometer “Z” 5.Throttle cable “Y” .Front brake lever bolt “Z” 7.Speedometer pivot “Y Recommended final transmission oil: Castrol 80W WARNING: omponents lubricate After 1,000 running-in,... -
Page 33: Plot Pipes
make plug drawn from the plot pipes, and CAUTION: discharge the stored oil in the pipeline. The standard spark plug for this vehicle ATTENTION: After that, insert the plug into the plot lines. specified chosen Finally, release t he hoop lower and clamp points with “... -
Page 34: Tyre Inspection
then stop the throttle, open the luggage WARNING: a Release locknut box and adjust the idle bolt (can adjust by After the adjustment of throttle cable, the following drawing icon (1) )right and left check the throttle grip rotatio n. Please b Rotate adjusting screw to adj ust the... -
Page 35: The Type Of Bulb
ability decrease, e asily skid and out of control. Make sure to keep the tire pressure required limit. Tire pressure adjustment should be done at low temperature. WARNING: The tire pressure a nd abrasion is very important to the vehicle performance and security. -
Page 36: Headlight Bulb And Front Turning
ATTEN TION: electrolyte and then initially recharge, in this way, prolong the battery and the sales When replacing the bulb, should clean the do this job. Make sure to use the original grease an d dust on the bulb by clean electrolyte. - Page 37 The battery is at the rear of the helmet injection battery, pull down ATTENTION: barrel. Remove the battery should be electrolyte container, break the seal film in Re-install the battery; battery wires must according to the following process: the electrolyte container’s inserted orifice, be properly connected.
-
Page 38: Maintenance Of Aircleaner
F. The six sealed plug on the cover aim at the WARNIN leaner. battery with six infuse orifice, make sure the When battery take chemical reaction, it is 3) Disassembl e the air cleaner case cover end of sealed plug inserted into the injection and remove th e air filter. -
Page 39: Troubleshooting Chart
WARNING: Clean the papery filter element, make sure not spot the grease or water. Or else the filter will be no use. Recommend this job to be done by the sales. Troubleshooting Although Our company’s scooters receive a thorough inspection before shipment from the factory, trouble may occur during operation. - Page 40 5-16...
-
Page 41: Clean The Scooter
Clean the Scooter CAUTION: Do not use high-pressure washer, We do not suggest to use the acidic steam cleaner since it will cause water Clean of the scooter in proper and suitable cleaners seepage and deterioration on axle way will make it attractive, extend it’s life c l e a n i n g b u t s u c h... - Page 42 salt-sprayed roads WARNING: Since sea salt or salt sprayed on the roads during winter are extremely corrosive in Make sure that there is no oil or wax combination with water, carry out the on the brakes or tires. If necessary, following steps after each ride in the rain, clean the brake discs and brake linings near the sea or on salt sprayed roads.
-
Page 43: Storage
Storage the hard engine start afterward. Pour the cylinder wall with oil.) drained fuel into the fuel tank. e. Remove the spark plug cap from the Short-term spark plug, and then install the spark Always store your scooter in a cool, dry 3. -
Page 44: Specifications
Specification technical parameter To prevent damage or injury Engine model QJ153MI-2, 4 stroke, water-cool Piston displacement 124.6ml from sparking, make sure to Nominal displacement 125ml ground the spark plug electrodes Bore × Stroke 52.4mm×57.8mm Compression ratio 11:1 while turning the engine over. Maximum power 8.5KW/9000r/ min Rating power... - Page 45 Recommended type: Castrol 80w-90 Engine Engine type: Air filter Liquid-cooling 4-stroke Air filter element: Cylinder arrangement: Wet element Forward-inclined single Fuel cylinder Recommended fuel: Displacement: Regular unleaded gasoline 125cc or 151cc NO. 90 or above. Compression ratio: Fuel tank capacity: 10.4:1(125cc) 8.6±0.2L 11 :1 (151cc)
- Page 46 Spark plug (s) Size: Right hand operation Manufacturer/model: 140/60-14 64S Recommended fluid: NGK/CR8E Manufacturer/model: DOT 3 or 4 Spark plug gap: (CASTROL SUPER DISK CST C-922 0.6-0.7 mm Tire air pressure BRAKEFLUID DOT 4.) Clutch (measured on cold tires) Clutch type Front: Rear brake Dry, centrifugal automatic...
- Page 47 12 V, 5.0 W x 1 Charging system: Front position lights Magneto 12V, 5W x2 Battery Oil level warning indicator light 12 V, 3 W x 1 Manufacture Fuses YUASA Main fuse Model 15.0 A YTX7A-BS Voltage, capacity 12 V, 3.0 Ah Bulb voltage and wattage x quantity Headlight...
-
Page 48: Vehicle Identification Number
VEHICLE IDENTIFICATION NUMBER The vehicle identification number stamped into the frame is used to identify your motorcycle and may be used to register your motorcycle with the licensing authority in your area. Record the vehicle identification number information in the spaces provided below for assistance when ordering spare parts from a dealer or for reference in case the vehicle is stolen. -
Page 49: Wiring Diagram
WIRING DIAGRAM... -
Page 50: Warrant Information
WARRANTY INFORMATION Information on warranty claim Please carefully read the instruction manual of your vehicle before operating it in order to make yourself familiar with its handling. We explicitly point out that the instruction, maintenance, and care instructions given in the operating manual have to be complied with in order to sustain your claim towards warranty. -
Page 51: Service Plan
SERVICE PLAN The warranty can be granted only if the vehicle has been serviced in accordance with this service plan. 1000km or 1.month 4000km or 6. month Stamp / Signature Stamp / Signature 7000KM or 12. month 10000km or 18. month Stamp / Signature Stamp / Signature 13000KM or 24.
Need help?
Do you have a question about the ZION and is the answer not in the manual?
Questions and answers