Table of Contents
Advertisement
Quick Links
Advertisement
Table of Contents

Related Manuals for Maclaren Grand Tour LX


Summary of Contents for Maclaren Grand Tour LX
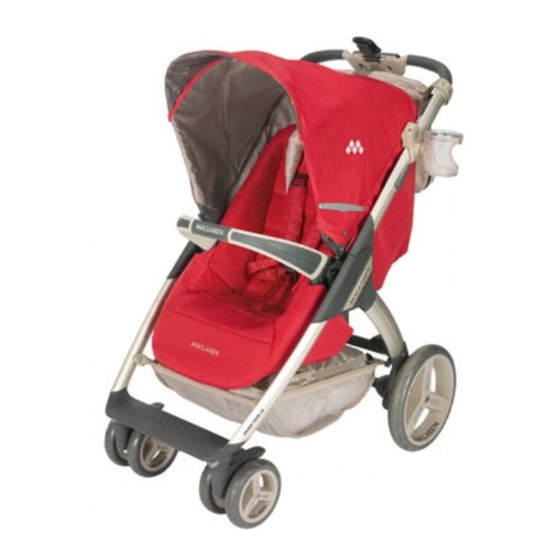
- Page 1 owner’s manual...
- Page 2 go see the world...
- Page 4 contents of carton frame + wheels soft carry cot raincover mosquito net...
- Page 5 convertible seat with hood console with clock and bumper armbar, headhugger temperature gauge and shoulder pads storage cover shopping net + bag cupholder dashbag organiser strollometer ®...
- Page 6 open the product attach the seat instructions for use attach the hood operate the brake 8 –9 attach the operate the front bumper arm bar wheel swivel units general information and safety soft carry cot – warnings maintenance and repair washing and care instructions recline the seat adjust the...
- Page 7 -holder 26 –27 fit the carrycot standard warranty information lift the maclaren sovereign warranty headhugger and shoulder pads...
-
Page 8: Fall Hazard
• Any damage caused by the use of accessories not pacifyer cords. Do not suspend strings over the soft carrycot supplied by Maclaren will not be covered by the terms or attach strings to toys. of our warranty. - Page 9 Velcro. The carrycot must not be used without all stiffeners installed. Maclaren reserves the right to make design changes to any of their products as part of their continuous development programme. This product is designed and manufactured to comply with ASTM...
- Page 10 1 to open the product A Push the locking lever down. B Lift the handle until it “CLICKS” into the fully up position. This will automatically engage both primary and secondary locks. IMPORTANT Ensure that all locking devices are engaged before use. 2 to attach the seat This seat must only be used with the GRAND TOUR LX chassis and is suitable for use when...
- Page 11 IMPORTANT Test that the Bumper Bar is firmly fixed before transporting your child. DO NOT lift your child in the GRAND TOUR LX or in the seat alone using the Bumper Bar. It is NOT designed to function as a carry handle. The bar is not a substitution for the safety harness which should ALWAYS be used when the child is in the seat.
- Page 12 5 to recline the seat Lift lever and tilt to desired position – 3 recline positions are available. Check for security before use. 6 to adjust the height of the handle A Press the two buttons on the handle arms. B Raise or lower the handle until it “clicks”...
-
Page 13: To Operate The Brake
7 to operate the brake A To apply the brake press the centre pedal on the lower cross bar down with your foot. Check that the brake has been correctly applied before leaving the stroller. B To release the brake raise the centre pedal on the lower cross bar with your foot. - Page 14 9 to adjust the shoulder straps The shoulder straps should be adjusted to suit the size of your child. Ideally for the active child the straps should enter the seat just below the height of your child’s shoulders when sitting in the upright position. 3 alternative positions are provided. A Unzip the rear of the seat cover to gain access to the back of the seat body.
- Page 15 to operate the lights To use the lights for the first time it may be RECOMMENDATION When turning “off” the lights, necessary to remove the isolating strip in the please make sure the “master ON/OFF” switch battery compartment - see instruction 12. beneath the footplate is used. This “powers down” the entire electronic system so that no battery The lights are provided as a safety feature to “drainage”...
- Page 16 to change the battery NOTE Children should be kept clear when changing batteries. Batteries, covers and isolat- ing strips are small items which could constitute a chocking hazard. Ensure covers are replaced securely. on the stroller: A Unscrew the small screw on the lid of the battery compartment underneath the footplate.
- Page 17 Your Maclaren Grand Tour Transport System is provided with useful instruments which can be viewed by unclipping the hinged cover on the housing in the centre of the handle. Two instruments are provided – a thermometer and an analogue clock.
-
Page 18: Rear Wheels
to attach detach the strollometer ® A To attach slide on the hinged holder at the top of the Instrument Panel until it “CLICKS” into position. B The hinged Strollometer® bracket should be raised when the Strollometer® is in use and hinged down behind the instrument panel when not in use. - Page 19 to remove the front wheel swivel unit The front swivel unit can be removed for easy replacement or storage . A To remove, press the round wire clip on the underside of the swivel unit and simultaneously remove the unit. B To replace, push the unit fully on to the swivel pin until it “CLICKS”...
- Page 20 to fit the raincover and mosquito net The raincover and mosquito net will be found in the pockets on the rear of the seat. A Open the Hood fully and ensure the Visor is folded back. B Place the raincover/mosquito net over the front hoop of the hood. C Attach the raincover/mosquito net by the two buttonholes to the hood pivot moulding. D Attach the front of the raincover/mosquito net to the pegs on the underside of the footplate using the button-holes in the cover/net.
- Page 21 to attach the dashbag organiser Pass the Velcro straps around the handle tubes and thread through the loops. Seal the Velcro to itself to secure the dashbag. IMPORTANT NOTE The maximum load that should be carried by the dashbag organiser is 1 kg (2.2 lbs).
- Page 22 This Soft Carrycot must only be used with the GRAND TOUR LX chassis and is suitable for a new born baby. A Ensure the seat is in the rear facing, fully reclined position and the bumper bar is removed.
-
Page 23: To Fold The Stroller
to fold the stroller The product may be folded with all items attached however to achieve the best fold without removing the seat, turn the seat to face forward and place it in the most upright position. Do NOT seat a child in the product when it is being folded. A Ensure the Strollometer® is folded behind the instrument compartment. - Page 24 to remove and refit the seat cover A Unfasten the harness (see instruction10) and remove the shoulder straps from the waist clips. B Release the 6 elasticated loops. C Undo the zip. D Undo the poppers. E Remove the waist straps by twisting the buckles and feeding them through the seat back and the cover fabric.
- Page 25 A storage cover has been provided to keep your GRAND TOUR LX clean during periods when not in use. Remove the bumper bar and place the cover over the folded package. Ensure elasticated bottom is beneath the wheels.
- Page 26 Buggys purchased from authorised retailers can be Service Centre/Service Agent. Alternatively, if you are registered for Sovereign Lifetime Warranty™; see shipping your buggy to an Authorised Service Centre/ adjacent information. Service Agent, free shipping under Basic warranty needs to be authorised by Maclaren Customer Service prior to shipping. Basic Warranty Benefits The Basic 1 Year Warranty is honoured by our For full and complete details on how to qualify and Authorised Service Centres/Service Agents, upon...
- Page 27 Where it applies How to activate The Sovereign Lifetime Warranty™ is recognised All Maclaren 2008 Collection and subsequent anywhere in the world where there are Maclaren collection Buggys purchased at an authorised retailer Authorised Service Centres/Service Agents. Whether qualify to be registered for the Lifetime Warranty. They you’re at home or abroad, you can find a list of local must be registered online, at maclarenbaby.com within...
- Page 28 France T +44 (0) 1327 841300 F +44 (0) 1327 842208 T +33 (0) 1 48 63 88 81 F +33 (0) 1 48 63 88 35 Maclaren Maclaren USA INC USA INC Outlet and Service Centre Authorised Repair Centre 25 Van Zant Street Unit 13A 150 Wooster Street Norwalk, CT 06855 New York, NY 10012 T +1 877 442 4622 T +1 212 677 2700 F +1 877 504 8813 F +1 212 677 6767 The words MACLAREN and Grand Tour ™ LX and associated logos are trade marks. All rights reserved. © MACLAREN 2008 MS07957/B 0908USA...
Need help?
Do you have a question about the Grand Tour LX and is the answer not in the manual?
Questions and answers