Sign In
Upload
Download
Table of Contents
Contents
Add to my manuals
Delete from my manuals
Share
URL of this page:
HTML Link:
Bookmark this page
Add
Manual will be automatically added to "My Manuals"
Print this page
×
Bookmark added
×
Added to my manuals
Manuals
Brands
Ctera Manuals
Storage
C400
User manual
Ctera C400 User Manual
Ctera c-series
Hide thumbs
1
2
3
4
Table Of Contents
5
6
7
8
9
10
11
12
13
14
15
16
17
18
19
20
21
22
23
24
25
26
27
28
29
30
31
32
33
34
35
36
37
38
39
40
41
42
43
44
45
46
47
48
49
50
51
52
53
54
55
56
57
58
59
60
61
62
63
64
65
66
67
68
69
70
71
72
73
74
75
76
77
78
79
80
81
82
83
84
85
86
87
88
89
90
91
92
93
94
95
96
97
98
99
100
101
102
103
104
105
106
107
108
109
110
111
112
113
114
115
116
117
118
119
120
121
122
123
124
125
126
127
128
129
130
131
132
133
134
135
136
137
138
139
140
141
142
143
144
145
146
147
148
149
150
151
152
153
154
155
156
157
158
159
160
161
162
163
164
165
166
167
168
169
170
171
172
173
174
175
176
177
178
179
180
181
182
183
184
185
186
187
188
189
190
191
192
193
194
195
196
197
198
199
200
201
202
203
204
205
206
207
208
209
210
211
212
213
214
215
216
217
218
219
220
221
222
223
224
225
226
227
228
229
230
231
232
233
234
235
236
237
238
239
240
241
242
243
244
245
246
247
248
249
250
251
252
253
254
255
256
257
258
259
260
261
262
263
264
265
266
267
268
269
270
271
272
273
274
275
276
277
278
279
280
281
282
283
284
285
286
287
288
289
290
291
292
293
294
295
296
297
298
299
300
301
302
303
304
305
306
307
308
309
310
311
312
313
314
315
316
317
318
319
320
321
322
323
324
325
326
327
328
329
330
331
332
333
334
335
336
337
338
339
340
341
342
343
344
345
346
347
348
349
350
351
352
353
354
355
356
357
358
359
360
361
362
363
364
365
366
367
368
369
370
page
of
370
Go
/
370
Contents
Table of Contents
Bookmarks
Table of Contents
Table of Contents
Introduction
About Cloud Attached Storage
About Your CTERA Cloud Attached Storage Appliance
In this Chapter
Contacting Technical Support
CTERA C200 Specifications and Installation
Package Contents
Rear Panel
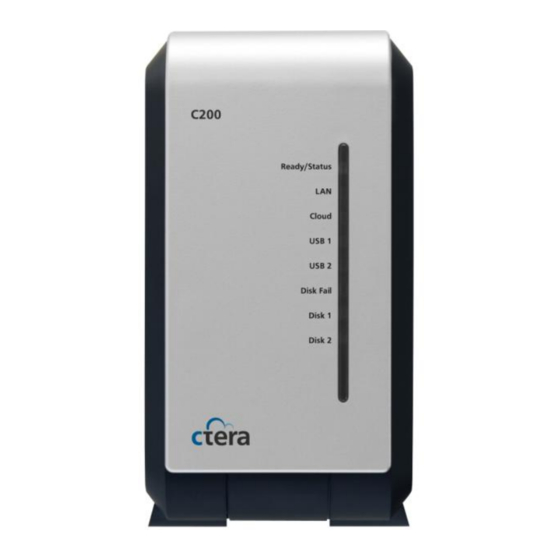
Front Panel
Technical Specifications
Requirements
Installing the CTERA C200
Installing a SATA Hard Drive in the CTERA C200
Removing a SATA Hard Drive from the CTERA C200
Connecting USB Drives
CTERA C400 Specifications and Installation
Package Contents
Rear Panel
Front Panel
Technical Specifications
Requirements
Installing the CTERA C400
Installing a SATA Hard Drive in the CTERA C400
Removing a SATA Hard Drive from the CTERA C400
Connecting USB Drives
CTERA C800 Specifications and Installation
Package Contents
Rear Panel
Front Panel
Technical Specifications
Requirements
Installing the CTERA C800
Installing a SATA Hard Drive in the CTERA C800
Removing a SATA Hard Drive from the CTERA C800
Connecting USB Drives
Hot Swapping Power Supplies
Muting the Power Supply Alarm
Getting Started
Connecting to the Web Interface
Mac os
Logging in to the Web Interface for the First Time
Logging in to the Web Interface
Using the Web Interface
The Configuration Tab
Opening Menu Sections
Navigating between Table Pages
Refreshing Page and Table Contents
Accessing the Home Page
The Files Tab
The My Computers Tab
The Status Bar
Accessing Online Help
Setting up the CTERA Appliance
Logging out
Using Cloud Services
Connecting the Appliance to Your CTERA Portal Account
Viewing Service Information
Modifying Your Services Connection Settings
Reconnecting to Services
Disconnecting from Services
Accessing Your CTERA Portal Account
Using Remote Access
Enabling/Disabling Remote Access
Configuring Remote Access Settings
Using Cloud Drive Synchronization
Selecting Cloud Folders for Synchronization
Viewing Cloud Drive Synchronization Status
Managing Storage
Overview
Workflow
Setting up Storage Using the Storage Setup Wizard
Manually Setting up Storage
Adding and Editing Arrays
Deleting Arrays
Scheduling Automatic Data Scrubbing
Manually Starting Data Scrubbing
Adding and Editing Logical Volumes
Deleting Logical Volumes
Scanning and Repairing Logical Volumes
Working with Iscsi Targets
Adding and Editing Iscsi Targets
Deleting Iscsi Targets
Installing a SATA Hard Drive
Safely Removing Hard Drives
Hot Swapping a Disk in a RAID1, 5, or 6 Array
Enlarging a RAID1 Array
Working with Volume Snapshots
Overview
Terminology
Workflow
Scheduling Automatic Snapshots
Understanding Snapshot Retention Policies
Manually Taking Snapshots
Viewing Snapshot Information
Viewing Snapshot Contents
Deleting Snapshots
Restoring from NEXT3 Snapshots Using Windows File Sharing
Sharing Files
Overview
Workflow
Managing Network Shares
Deleting Network Shares
Managing Network Shares in the File Manager
Removing Network Shares from Folders
Configuring File Sharing Protocols
Configuring Windows File Sharing
Configuring Ftp Access
Configuring Rsync Access
Configuring Apple File Sharing
Configuring Nfs Access
Using External Volume Autosharing
Using Home Directories
Enabling/Disabling Home Directories
Configuring Home Directory Settings
Resetting Home Directory Permissions
Using Guest Invitations
Enabling/Disabling Guest Invitations
Configuring Guest Invitation Settings
Sending Guest Invitations
Deleting Active Guest Invitations
Collaborating on Projects
Enabling/Disabling Project Collaboration
Configuring Project Collaboration Settings
Creating Projects
Editing Projects
Accessing Network Shares
Deleting Projects
Synchronizing Files with the Rsync Server
Mounting Network Shares Using Nfs
Accessing the Administrative Share
Using Cloud Backup
About the CTERA Cloud Backup Service
How Does the Cloud Backup Service Work
Is My Data Secure
Workflow
Selecting Files and Folders for Cloud Backup
Working with Backup Sets
Enabling/Disabling Included Sets
Adding and Editing Included Sets
Deleting Included Sets
Enabling/Disabling Excluded Sets
Adding and Editing Excluded Sets
Scheduling Automatic Cloud Backup
Deleting Excluded Sets
Manually Starting Cloud Backup
Canceling the Current Cloud Backup
Suspending the Cloud Backup Service
Resuming the Cloud Backup Service
Viewing Cloud Backup Information
Preparing a Backup Seeding Hard Drive
Restricting Throughput
Restoring Files from Backup
Canceling the Current Restore Process
Restoring Appliance Configuration from Cloud Backup
Synchronizing Folders
Overview
Workflow
Setting up Clientless Backup
Using Clientless Backup
Removing Clientless Backup
Configuring Clientless Backup
Manually Starting/Stopping Clientless Backup
Disabling/Enabling Clientless Backup
Enabling File Sharing on a Pc
Enabling File Sharing in Windows Xp
Enabling File Sharing in Windows Vista
Setting up Sync Rules
Adding and Editing Sync Rules
Deleting Sync Rules
Disabling/Enabling Sync Rules
Centrally Managing CTERA Agents
Overview
Agent Licensing
Workflow
Downloading and Installing CTERA Agent
Configuring Global Settings for All CTERA Agents
Configuring Global General Settings
Configuring Global File-Level Backup Settings
Configuring Global Disk-Level Backup Settings
Configuring Global Software Update Settings
Opening the CTERA Agent Manager
Configuring the Agent
Configuring General Settings
General Settings Fields
Configuring File-Level Backup Settings
Configuring Disk-Level Backup Settings
Configuring System State Backup Settings
Selecting Files and Folders for File-Level Backup
Manually Starting Agent Backup
Stopping the Current Backup Operation of an Agent
Disabling and Enabling Agent Backups
Viewing Agent Backups
Restoring Files and Folders from the Appliance to the Agent
Viewing the Agent Status
Viewing Agent Details
Monitoring Agents
Deleting Agents
Managing Users
Overview
Adding and Editing Users
Inviting Users to Install CTERA Agent
Viewing Users
Exporting Users
Allocating Disk Quotas to Users
Deleting Users
Adding and Editing User Groups
Deleting User Groups
Managing Network Settings
Configuring Network Settings
Configuring Port Settings
Viewing Network and Port Settings
Renewing the DHCP Lease
Enabling/Disabling Link Aggregation
Setting up File Search
Overview
Workflow
Enabling/Disabling File Search
Scheduling File Index Updates
Manually Starting Index Updates
Using the File Manager
The File Manager
Navigating between Folders
Changing the Tree Pane View
Viewing File or Folder Details
Changing the Right Pane View
Downloading Files and Folders
Uploading Files
Creating New Folders
Renaming Files and Folders
Selecting Files and Folders
Deleting Files and Folders
Copying/Moving Files and Folders
Managing Projects
Managing Network Shares
Searching for Files
Adding the Appliance as a Search Provider in Your Browser
Viewing Previous Versions of Files and Folders
Monitoring Your CTERA Appliance
Viewing the Status Dashboard
Viewing Detailed Information about a Disk Drive
Viewing the Activity Monitor
Configuring Logging
Configuring Event Log Settings
Configuring Syslog Logging
Viewing Logs
Viewing System Logs
Viewing Local Backup Logs
Viewing Cloud Backup Logs
Viewing Cloud Sync Logs
Viewing Access Logs
Viewing Audit Logs
Viewing Ctera Agents Logs
Filtering Logs
Clearing Logs
Configuring Email Alerts
Exporting Logs
Configuring Mail Server Settings
Configuring Email Alert Settings
Maintenance
Viewing the Appliance Details
Configuring the CTERA Appliance Name and Location
Configuring the CTERA Appliance Time and Date
Configuring the User Interface Language
Updating the Firmware
Configuring Automatic Firmware Updates
Manually Updating the Firmware
Exporting and Importing CTERA Appliance Settings
Exporting the Configuration
Importing the Configuration
Viewing Attached UPS Device Details
Resetting the CTERA Appliance to Its Default Settings
Restarting the CTERA Appliance
Shutting down the CTERA Appliance
Managing Power Usage
Legal Information
CTERA End User License Agreement
CTERA Limited Hardware Warranty
Gnu General Public License
Gnu General Public License 3
Apache License
Declaration of Conformity
European Community
Usa & Canada
Rohs & Weee
Index
Advertisement
Quick Links
1
Installing the Ctera C200
2
Connecting to the Web Interface
Download this manual
User Guide
CTERA C-Series
July 2013
Version 4.0
Table of
Contents
Previous
Page
Next
Page
1
2
3
4
5
Advertisement
Table of Contents
Need help?
Do you have a question about the C400 and is the answer not in the manual?
Ask a question
Questions and answers
Related Manuals for Ctera C400
Storage Ctera C200 User Manual
(25 pages)
Storage Ctera C800 User Manual
Ctera c-series (370 pages)
This manual is also suitable for:
C200
C800
Table of Contents
Save PDF
Print
Rename the bookmark
Delete bookmark?
Delete from my manuals?
Login
Sign In
OR
Sign in with Facebook
Sign in with Google
Upload manual
Upload from disk
Upload from URL


Need help?
Do you have a question about the C400 and is the answer not in the manual?
Questions and answers