
Summary of Contents for Keith McMillen Instruments 12 Step
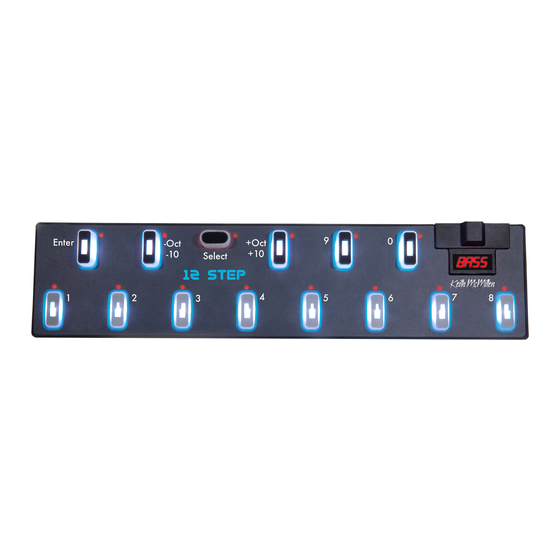
- Page 1 Keith McMillen I N S T R U M E N T S Enter +Oct -Oct S T E P Select 12 Step Reference Manual...
- Page 2 The content of this manual is furnished for informational use only, is subject to change without notice, and should not be construed as a commitment by Keith McMillen Instruments. Every effort has been made to ensure that the information in this manual is accurate. No warranties, express or implied, are made with regard to the quality, suitability, or accuracy of this document.
-
Page 3: Table Of Contents
Table Of Contents Welcome ........................1.0 Before You Begin ....................1.1 What’s In The 12 Step Package? ................... 1.2 What’s In The MIDI Expander Package? ................1.3 System Requirements ......................1.4 Conventions In This Manual ....................2.0 Getting Started .................... - Page 4 2.4.3 Changing Presets ....................... 2.4.4 Changing Octaves ...................... 3.0 Editor ......................... 3.1 Main Window Overview ...................... 3.1.1 Display Name ......................3.1.2 Connected Indicator ....................3.1.3 Main Tab Area ......................3.1.4 Presets Section ......................3.2 Note Entry Tab ........................3.3 MIDI Parameters Tab ......................
- Page 5 4.4 External Control Of 12 Step ....................4.4.1 Controlling 12 Step LEDs ..................4.4.2 Controlling 12 Step Display ..................4.4.3 Changing Presets With Program Changes .............. 4.4.4 Using The MIDI Expander ..................4.5 Factory Presets Overview ....................4.6 MIDI Note Naming Reference ....................
-
Page 6: Welcome
Welcome Hello, and welcome to the 12 Step manual! Taking the time to read this document is a huge step toward 12 Step mastery! The purpose of this document is to provide a resource with helpful, detailed information regarding the use of the 12 Step and 12 Step software. -
Page 7: Before You Begin
Before You Begin Enter +Oct -Oct STEP Select... -
Page 8: Before You Begin
1.3 System Requirements Hardware The 12 Step is a class-compliant USB MIDI device — it will work with any hardware or software that supports MIDI. The 12 Step hardware itself will work on any operating system (assuming there is native USB and MIDI support). -
Page 9: Conventions In This Manual
• Screenshots in this document were made with the Mac version of the 12 Step editor. • The term “port” will be used often throughout this manual. “Port” can refer to a physical port (e.g. a USB port) or it can refer to a virtual MIDI port or bus (used in audio software on computers/tablets to send and receive MIDI data). - Page 10 Getting Started Enter +Oct -Oct STEP Select...
-
Page 11: Getting Started
Getting Started 2.0 Getting Started This section covers information that will help get started with the 12 Step. We will introduce the 12 Step hardware, the MIDI Expander hardware, how to connect 12 Step to the world, and basic operation of the pedal. -
Page 12: Specs
(USB-mini) or connect to a computer/tablet via the main USB port (the big one). (5) Pedal Input Used to connect an expression pedal to the 12 Step. All input should use a 3.5mm (1/8”) TRS cable to work properly. Most expression pedals have a stereo 1/4” jack — an expression pedal adapter (female 1/4”... -
Page 13: Midi Expander Hardware
Flashes when MIDI is sent out of the MIDI Out port. (5) Power Port Used to power the MIDI Expander and an attached 12 Step. Just plug a USB power supply (one is provided with the Expander package) into an outlet, then connect the power supply to the POWER port on the Expander with a USB A to B cable (also provided with the Expander). -
Page 14: Specs
Getting Started (6) Expand Port Used to connect the MIDI Expander to the 12 Step. Just use a mini USB cable to connect the 12 Step’s Expand port to the Expander’s EXPAND port. Note: Only KMI MIDI controllers should be connected to the EXPAND port — other USB MIDI controllers and USB hubs will not work properly. -
Page 15: Connecting 12 Step
Select Connecting the 12 Step to a computer requires three things: a 12 Step, a computer, and a USB A to USB B cable (the “classic” USB cable). Simply plug the 12 Step’s main USB port into a USB 2.0 (or greater) port on the computer. -
Page 16: To An Ipad
Camera Connection Kit (for iPads with the older 30-pin connectors) is required to connect the 12 Step to an iPad via USB. Plug the adapter into the iPad, plug the 12 Step’s main USB port into the adapter with a USB A to B cable, and everything is ready to go. -
Page 17: To Midi Hardware
Select A KMI MIDI Expander is required to connect to MIDI hardware via MIDI cables. 1. Connect the 12 Step’s EXPAND port to the EXPAND port on the Expander using a USB A to mini-B cable. 2. Connect the Expander’s POWER port to a USB power supply (included with Expander package) using a USB A to B cable. -
Page 18: To Midi Hardware + Computer
1. Connect the 12 Step’s EXPAND port to the EXPAND port on the Expander using a USB A to mini-B cable. 2. Connect the 12 Step’s main USB port to the computer using a USB A to B cable. The 12 Step and Expander should power up. -
Page 19: Adding An Expression Pedal
3. Plug the expression pedal into the 12 Step’s Express port, and setup is complete! Note: Volume pedals do not work with the 12 Step or any KMI controller with expression pedal input. Only expression pedals are compatible. For more info, please see this FAQ. -
Page 20: Start Playing
Preset changing is handled using the 12 Step’s Select key. Simply do the following: 1. Press and hold the Select key until all of the 12 Step’s red LEDs begin to flash, then release the key. The 12 Step is now in what is referred to as “Select... -
Page 21: Changing Octaves
Similar to changing presets, octave shifting makes use of the Select button. Do the following: 1. Press and hold the Select key until all of the 12 Step’s red LEDs begin to flash, then release the key. This is referred to as “Select... - Page 22 12 Step Editor Enter +Oct -Oct STEP Select...
-
Page 23: Editor
12 Step Editor 3.0 Editor The 12 Step editor allows for up to 64 fully customizable presets to be edited and loaded onto a connected 12 Step. MIDI notes, CC messages, program changes, preset ordering/management — all this and more can be customized using the editor. -
Page 24: Display Name
Note: Not all letters are available in the drop-down menus — this is because the 12 Step’s display only has seven segments per character, making it unable to properly represent certain letters (K, M, V, W, and X). - Page 25 3. The global settings are sent to the 12 Step. 4. The setlist presets are sent to the 12 Step. Note: This action will overwrite the presets currently stored on the 12 Step board. Please be absolutely sure if this is okay before sending presets to the 12 Step.
- Page 26 12 Step Editor Import Presets from v1.0 It is possible to import presets from the previous version of the 12 Step Editor (version 1.0). See the Import All Presets from V1.0 section for more detailed information.
-
Page 27: Note Entry Tab
12 Step Editor 3.2 Note Entry Tab The Note Entry tab is where each of the 12 Step keys’ MIDI notes get set. Each key can be set up to output anywhere from 0 to 5 notes at a time. - Page 28 12 Step Editor 2. Select one of the five slots. 3. Either use the up and down arrows on the computer keyboard to increment/decrement to the desired note, or type in the desired note number. 4. Repeat for any other notes that may be needed.
- Page 29 12 Step Editor Clear All Keys Completely clears all MIDI notes from all keys. Transpose Up Transposes the selected key’s MIDI notes up by a semitone when clicked. Notes will clip at 127 (G8) if the resulting transposition would place the note out of MIDI’s range (0-127).
-
Page 30: Midi Parameters Tab
12 Step Editor 3.3 MIDI Parameters Tab MIDI Parameters tab is where more advanced/detailed MIDI parameters are set. The MIDI channel can be defined, program and bank changes can be set up, CC settings can be altered, and more. Note Entry... -
Page 31: Fixed Parameters
12 Step Editor 3.3.1 Fixed Parameters The top portion of the MIDI Parameters tab contains options related to the behavior of the 12 Step and some more general MIDI parameters (program changes, MIDI channel, bend range, etc.) that remain fixed per preset. - Page 32 7-bit MIDI message (range 0-127). This is accomplished by using two separate messages: an MSB (most significant bit) and an LSB (least significant bit). With 12 Step, values in the Bank field will set the LSB of the bank message — the MSB will be fixed at 0. The MSB is generally transmitted as a CC 0 messages, immediately followed by the LSB as a CC 32 message.
-
Page 33: Modline Section
3.3.2 Modline Section The lower portion of the MIDI Parameters tab holds the modlines — a set of options/parameters that define what MIDI messages the 12 Step should output and how it should output them. The modline section contains the following:... - Page 34 12 Step Editor (6) Curve Sets the type of curve to apply to the incoming values. For a complete list of all available tables (and what they do) see the Curves section of the Appendix. (7) Min Sets the minimum value that can be output. All values below the minimum will be clipped to this value — they are not ignored.
-
Page 35: Setlist Tab
12 Step Editor 3.4 Setlist Tab The Setlist allows up to 64 presets to be ordered in any way. This is the order that the presets will appear on the 12 Step when using Select Mode. The setlist tab looks like this:... -
Page 36: Settings Tab
12 Step Editor 3.5 Settings Tab The Settings tab is home to a couple of adjustable options related to sensitivity of the 12 Step. The Settings tab contains the following: GLOBAL SENSITIVITY SELECT SENSITIVITY — — RESET GLOBAL SENSITIVITY RESET SELECT SENSITIVITY... -
Page 37: Menu Bar Options
• Expected FW: Displays the firmware version provided in this version of the editor. This is the version that will be loaded onto a connected 12 Step when a firmware update is initiated. • Found FW: Displays the firmware version currently loaded on a connected 12 Step. - Page 38 12 Step Editor Edit Clear Preset Clears the current preset. All keys and modlines will be set to “Off”. Copy Preset Copies the currently selected preset. Can be used later to paste over a preset or paste to a new preset.
-
Page 39: Select Mode
7 in the 30s decade will load preset 37). The preset will load and be ready to go. Note: Steps 2 and 3 can be skipped if loading one of the first ten presets is desired. The 12 Step defaults to the 00s decade when first powered up. -
Page 40: Ports
When a 12 Step is connected to a computer, two virtual MIDI “ports” (or “busses”) are created — 12 Step Port 1 and 12 Step Port 2. They are the “portal” to communicating with a connected 12 Step. The ports allow for bi-directional communication between the computer and the 12 Step (and MIDI Expander if one is connected), and should appear in any MIDI-capable application when a 12 Step is connected. - Page 41 Appendix Enter +Oct -Oct STEP Select...
-
Page 42: Appendix
Appendix 4.0 Appendix 4.1 Sources Velocity Outputs a value representing the amount of force a key is triggered with. Triggering a key with more force results in higher values, triggering a key with less force results in lower values. • Range: 0-127 (no force to full force) Velocity (Inverted) An inverted version of the Velocity source. - Page 43 Appendix KeyNum Outputs the key number of the currently active key. Keys are numbered in order from left-to-right — they do not follow the actual labeling on the 12 Step board itself. • Range: 1-13 (left to right) KeyNum (Inverted) An inverted version of the KeyNum source. Instead of outputting an incrementing value from 1 to 13, the inverted version outputs a decrementing value from 127-115.
-
Page 44: Message Types
As soon as it is placed on a modline it will no longer be available for other modlines. The only exception to this is the CC message type, which may be used twice. The following message types are available in the 12 Step Editor: Note Outputs a MIDI note. -
Page 45: Curves
Appendix 4.3 Curves All available 12 Step curves: Linear A 1:1 linear “curve”. Values passing through will not be modified in any way. Sine Applies a sine curve to incoming values. Cosine Applies a cosine curve to incoming values. Exponential An exponential table. -
Page 46: External Control Of 12 Step
Appendix 4.4 External Control Of 12 Step The 12 Step can control a wide variety of MIDI software and hardware, but it can also be controlled from an external source via USB or MIDI Expander. 4.4.1 Controlling 12 Step LEDs The 12 Step’s LEDs can be controlled from an external software or hardware source using CC... -
Page 47: Changing Presets With Program Changes
— e.g. sending program change 23 will load the 23rd preset in the setlist. 4.4.4 Using The MIDI Expander It is possible to control the 12 Step LEDs, display, and presets via input to an attached MIDI Expander. When sending CCs and program change messages to control the 12 Step via the Expander, the messages must be sent on MIDI channel 16 — any other channels will be ignored... -
Page 48: Factory Presets Overview
Appendix 4.5 Factory Presets Overview The 12 Step comes loaded with a number of factory presets right out of the box. Many presets were created to showcase the various options available, and others were created with interesting chords/ progressions mapped to the keys. - Page 49 CLIP (“Live Clip Launching) This preset works in conjunction with our Ableton Live clip launching script (located in the “Extras” folder that comes with the 12 Step editor download) and is almost the exact same setup as the Chromatic Scale preset.
- Page 50 Appendix bLUE (“Blues Bass”) This preset is the same as the Blues Lead preset above, just transposed down two octaves (C1 to C2). PEnt (“Major Pentatonic”) The keys play a major pentatonic scale going from C3 to C4. There are some duplicate notes to prevent incorrect notes from being played.
- Page 51 Appendix dIA5 (“Diatonic 5ths”) The keys are laid out chromatically from C2 to C3. Notes in the key of C (the “white” keys) will also be accompanied by a diatonic fifth above each note. StC5 (“Stacked 5ths”) The keys are laid out chromatically from C2 to C3, accompanied by two perfect fifth intervals stacked on top.
- Page 52 Appendix -10S (“Minor 10ths”) The keys are laid out chromatically from C2 to C3, accompanied by a minor tenth interval above each note. 10tH (“Major 10ths”) The keys are laid out chromatically from C2 to C3, accompanied by a major interval above each note.
- Page 53 Appendix POtG (“Power Chords Toggle”) The same as the Power Chords Normal preset, except the note mode has been set to Toggle. InPO (“Inverted Power Chords”) The keys are laid out chromatically from C2 to C3. Each key will output an inverted power chord (perfect fifth, root, perfect fifth) when played.
- Page 54 Appendix dSEt (“Drum Set”) This preset is intended to be used with drums — it transmits on MIDI channel 10, which is General MIDI’s “drum” channel. The keys are mapped as follows: • Key 1 = Closed Hi-Hat • Key 2 = Low Tom 2 •...
-
Page 55: Midi Note Naming Reference
Note: Other software/hardware may follow the C4=60 naming scheme (or even C5=60), which can lead to some confusion when MIDI mapping or setting up 12 Step. All MIDI notes will appear to be an octave off (by name), but in MIDI-land they have the same note number — which is all that matters. -
Page 56: Changes From 12 Step V1.0
12 Step would operate correctly. This has now been fixed and should be working properly. In addition, control of the LEDs and display on the 12 Step is now possible via input to the MIDI Expander. Previously this was limited solely to program changes. -
Page 57: Troubleshooting
Appendix 4.8 Troubleshooting Problems may pop up every now and then when using the 12 Step — here are some suggestions that can potentially solve them. Connectivity Issues Check that you’re using the correct USB port on the 12 Step There are two USB connectors on the 12 Step hardware —... - Page 58 As a class-compliant MIDI controller, this applies to the 12 Step. The result of this is that if you have two or more audio/MIDI applications open at the same time (the 12 Step editor and Ableton Live, for example), only one of them will be able to connect to the...
- Page 59 Appendix 12 Step. Because of this it is highly recommended to never edit the 12 Step with other audio applications open — it could lead to connectivity issues, and a very confusing, frustrating experience. This does not apply solely to KMI products — this will have an effect with every class-compliant MIDI...
-
Page 60: Faq
Step editor? No. Installing the new 12 Step editor will not overwrite the old editor. The act of “installing” is really just copying a folder onto your hard drive. The 12 Step 1.0 and 12 Step 2.0 folders are named differently and do not affect one another —... - Page 61 Yes. A firmware update or reinstall will reset the 12 Step’s onboard presets to factory settings. If you have any custom presets you will need to resend them to the 12 Step using one of the editors. 4.9.6 How do I update/reload my firmware? There are a few ways firmware can be updated on a 12 Step: automatically by the editor, manually...
- Page 62 The 12 Step’s display will go blank and look non-responsive while the update is taking place — this is okay and to be expected. 8. Once done, wait for the 12 Step to boot back up. This may take a few seconds, so please be patient.
- Page 63 4.9.7 Is there a way to reset the 12 Step back to factory settings? Yes, it is possible to reset both the 12 Step to factory settings. All that needs to be done is a firmware reinstall (we just went over this in a previous question) —...
- Page 64 4.9.1 1 Can I program each key to output different MIDI messages? The only thing that can be customized per key on the 12 Step is what MIDI notes are output when pressed. All other MIDI options (program changes, CCs, aftertouch, etc.) are global to all keys.
- Page 65 12 Step). So, typically, if a device has a USB A connector on it there is a good chance the 12 Step will work with it when directly connected via USB. If a device has a USB B connector on it that generally means it won’t work.
- Page 66 Note: Volume pedals do not work with the 12 Step or any KMI controller with expression pedal input — at least, not without some modifications... With some basic soldering skills a volume pedal can be modified into an expression pedal.
- Page 67 4. Look for a device named “USB MIDI Device” and click it. 5. Delete the device by pressing the Delete key on your keyboard. 6. Plug the 12 Step back in to the computer. A new device should appear in Audio MIDI Setup with the proper name, “12 Step”.
-
Page 68: Safety Precautions
12 Step. Explosive Atmospheres Do not use 12 Step in any area with a potentially explosive atmosphere, such as a fueling area, or in areas where the air contains chemicals or particles (such as grain, dust, or metal powders). Obey all signs and instructions.
Need help?
Do you have a question about the 12 Step and is the answer not in the manual?
Questions and answers