Table of Contents
Advertisement
Quick Links
Advertisement
Table of Contents

Related Manuals for WayteQ xTAB 7X


Summary of Contents for WayteQ xTAB 7X
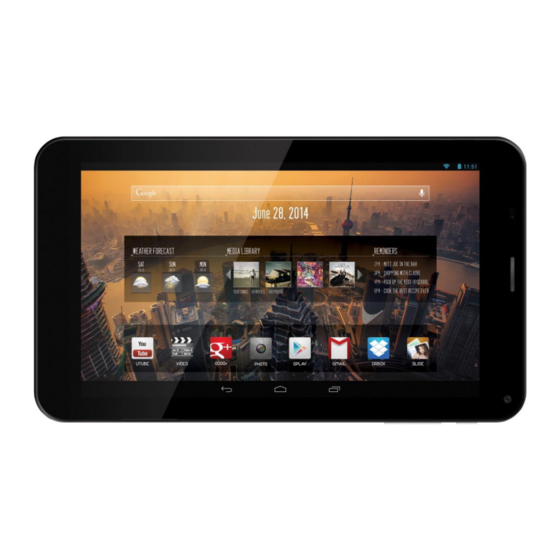
- Page 1 7x Tablet PC User’s manual...
-
Page 2: Table Of Contents
TABLE OF CONTENTS TABLE OF CONTENTS .............................. 2 INTRODUCTION ................................. 3 I - GETTING STARTED ............................... 3 Important Safety Precautions ......................3 Cleaning the Panel ..........................3 Cleaning the Tablet ..........................3 Features ............................4 Buttons Overview ..........................4 Accessories ............................5 What’s in the Box .......................... -
Page 3: Introduction
INTRODUCTION First of all, thank you very much for purchasing WayteQ product! Please read this manual carefully before using this product. This company will continue to provide new functions for the development of the product, and there will be no separate change in the case of any change in the product’s performance and functions. -
Page 4: Features
Features The tablet includes these key features: ● Displays Alarm, Browser, Calculator, Calendar, Camera, Clock, Email, File Browser, Gallery, Music, Setting, Movie Player and etc ● Displays digital photos, Play Music and Video ● Wi-Fi function to connect with your AP router for internet browsing ●... -
Page 5: Accessories
Accessories Power Adapter USB Cable (depending on the regional requirement, the plug may look different) What’s in the Box WayteQ xTAB 7x Tablet PC AC Power Adapter (5V/2A) USB Cable, OTG adapter Quick Start Guide Charging the Battery Plug the AC power adapter into tablet and into a wall outlet. -
Page 6: Ii - Functionning Of The Tablet
II - FUNCTIONNING OF THE TABLET Navigation Tablet has five home screens by default. The first time you turn on the tablet or after having factory data reset, you will see a navigation screen. * To see all you applications, touch * You can put your favorite applications on Home screen. -
Page 7: Status Bar
Status Bar At the bottom and top of the screen, the status bars mainly indicates Back icon, Home icon, Recent viewed applications icon, Current time, Wi-Fi status, 3G status, Bluetooth status and battery level, etc. Icon Action On any functional screen, tap this icon to go back one screen or exit application. -
Page 8: Iii - Settings
III - SETTINGS Set Up Wi-Fi Connection Make Wi-Fi Connection In Settings Wireless & networks Wi-Fi, slide the Wi-Fi switch to the I position. Normally, the device will automatically scan the available Wi-Fi Access Point (AP). If this does not happen, select Scan (upper right corner) to scan for the available Wi-Fi APs. -
Page 9: Set Date And Time
Set Date and Time Use Settings Data & Time to open up the data/time setting screen as shown below. Select the correct time zone. If the Wi-Fi is connected to Internet, check on the Automatic to have time set up automatically. If Wi-Fi is not connected to Internet, uncheck Automatic date &... -
Page 10: Set Up Calendar
Set Up Calendar Calendar makes you easy to stay on schedule. You can view your schedule in day/week/month/and agenda mode by touching icons at upper left corner. Swipe to scroll vertically or horizontally. When using calendar for the first time, there are some steps you shall follow: 1. -
Page 11: Create Shortcuts Or Widgets On Home Screen
Create Shortcuts or Widgets on Home Screen In order to access to frequently used applications / widgets more quickly, you can create a short cut to an application / widget and place it on the Home screen. Therefore, you don’t need to spend to look for it among the many applications / widgets on the Launcher screen. -
Page 12: Iv - Connections
IV - CONNECTIONS Wi-Fi This tablet uses the 802.11b/g/n wireless specification to transmit and receive data. For more information, refer to “Set up Wi-Fi Connection” on page 8. PC Connection Connect your tablet to a PC via USB cable. By connecting tablet to PC, you can synchronies files or transfer data directly. -
Page 13: Clock
Clock After tapping on clock icon in Launcher screen, the following screen will be shown. Tap on icon into alarm setting interface. -
Page 14: Browser
Browser Browser is used for browsing the World Wide Web. With the web browser plug-ins, you could browse websites to watch videos, download contents, and listen to music etc. 1. Tap the address field (in the title bar) to bring up the onscreen keyboard, enter website address, then tap Go. 2. -
Page 15: Calculator
Calculator To perform mathematical calculation directly on tablet by tap numbers and symbols. Downloads Files, applications and other items you download from Browser or Email will be stored in your micro SD card. Use the Downloads application to view, reopen or delete what you’ve downloaded. 1. -
Page 16: Gallery
Gallery Tap on “Gallery” in Launcher screen to open the application. 1. The first screen shows all photos and subfolders as albums. 2. Tap on a picture or album into photo thumbnail mode. (Default view) 3. Tap a thumbnail into photo single view mode. 4. -
Page 17: Music
Music Tap “Music” in the application launcher screen to get to the song screen as below: Select the Artists/Albums/songs or playlists mode to play music. Use the onscreen icons to configure how you want to play the songs. Icon Action Show playing list Turn shuffle on/off function Repeating all songs, current song or Off... -
Page 18: Movie Player
Movie Player 1. Tap “Video” in the application launcher screen. 2. Browse the video file to play from the list. 3. Tap video to start play. To search in video, simply drag white bar below video. To display controls tap video, to hide controls again tap video again. -
Page 19: Fm Radio
FM radio Tap „FM radió” icon in application launcer screen. The screen below appears: Turn off Channel list. Tap channel to hear it. Tap and hold to add to favorites or delete from favorites or edit a favorite channel. Previous channel Next channel Previous frequency (0.1 MHz backward) Next frequency (0.1 MHz-et forward) -
Page 20: Phone Calls
Phone Calls The “SIM2” slot is for micro SIM card while the “SIM1” slot is for standard sized SIM card (WCDMA/GSM). Notice: You can refer to the reception icon in the status bar to see if the service is available, or how good the reception is. The number of the bars in the icon illustrate the reception quality, the more the better. -
Page 21: Call Log
Call log Incoming Call Calls Successfully Made Missed Incoming Call Touch to delete call Answered records or go to call settings Search for Touch to make fast call Contact Notice: You can see the numbers or the contacts’ names of missed incoming calls by opening the notification panel or the dialer. -
Page 22: Vi - Product Specification
VI - Product Specification General Panel Size/Type 7" IPS, 5 points capacitive touch panel Aspect Ratio 16:9 Resolution 1024 x 600 MTK8312 Dual-core Cortex-A9 1,3 GHz Android 4.2.2 Storage Internal memory 1 GB NAND Flash 4 GB External SD card Micro SD up to 32GB Connectivity WIFI...
Need help?
Do you have a question about the xTAB 7X and is the answer not in the manual?
Questions and answers