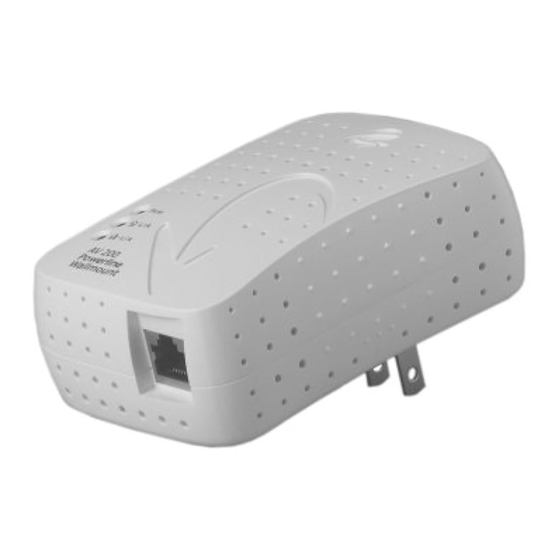
Corinex AV200 Manual
Powerline ethernet wall mount
Hide thumbs
Also See for AV200:
- User manual (50 pages) ,
- Manual (47 pages) ,
- Introduction manual (18 pages)
Table of Contents
Advertisement
Advertisement
Table of Contents

Related Manuals for Corinex AV200


Summary of Contents for Corinex AV200
- Page 1 Corinex AV200 Powerline Ethernet Wall Mount Manual...
- Page 2 Corinex AV200 Powerline Ethernet Wall Mount Corinex Communications Corp. # 670-789 West Pender Street Vancouver, BC Canada V6C 1H2 EN 61000-3-2 EN 61000-3-3 Vancouver / March.21.2006...
-
Page 3: Copyright
The content of this document is furnished for informational use only, it is subject to change without notice, and it does not represent a commitment on the part of Corinex Communications Corp. -
Page 4: End User License Agreement
5. Limitation of Liability. Corinex’s entire liability and your exclusive remedy under this EULA shall not exceed the price paid for the Software, if any. In no event shall CORINEX or its suppliers be liable to you for any consequential, special, incidental or indirect damages of any kind arising out of the use or inability to use the software, even if CORINEX or its supplier has been advised of the possibility of such damages, or any claim by a third party. - Page 5 8. Precedence. Except as set out above, where separate terms are provided by the software supplier, then, subject to this EULA, those terms also apply and prevail, to the extent of any inconsistency with this EULA. Corinex AV200 Powerline Ethernet Wall Mount...
-
Page 6: Table Of Contents
2.3 Physical Description ............... 6 2.4 Technical specification ..............8 2.5 Installing the AV200 Powerline Ethernet Wall Mount ....8 2.6 Basic Testing of the TCP/IP Setup and AV200 Network ..... 8 Web Configuration ................9 3.1 Authentication Page ................9 3.2 Main Page .................. -
Page 7: Introduction
Introduction 1.1 Overview The Corinex AV200 Powerline Ethernet Wall Mount is a network interface adapter which uses the electric power lines already in your home or office as a medium for communication. After successful installation, the AV200 Powerline network behaves like a traditional LAN for computers. -
Page 8: Installation Guide
Installation Guide Installation Guide 2.1 What this Package Contains When you receive your Corinex AV200 Powerline Ethernet Wall Mount, check to be sure that your package contains: • Corinex AV200 Powerline Ethernet Wall Mount • Straight-forward Ethernet cable • Printed Quick Start Guide •... -
Page 9: Technical Specification
85 to 265 V AC, 50/60 Hz Dimensions 148 mm L x 106 mm W x 47 mm H Transmitted Power spectral density -56 dBm/Hz Power Consumption Safety & EMI UL/EN 60950, FCC Part 15, EN 55022 EMC limits Corinex AV200 Powerline Ethernet Wall Mount... -
Page 10: Installing The Av200 Powerline Ethernet Wall Mount
AV200 Powerline Ethernet Wall Mount is connected, e.g. ping 192.168.4.1 -t (this process can be interrupted by pressing CTRL+C). 1. Ping the IP address of the computer to which the AV200 Powerline Ethernet Wall Mount is connected. If this fails, there is a problem with the Ethernet network card or with the TCP/IP protocol. -
Page 11: Web Configuration
For details on how to set up an IP address in your computer, please see chapter 5. 2. Plug in your AV200 Powerline Ethernet Wall Mount and connect it to the PC via supplied Ethernet cable. -
Page 12: Main Page
Powerline connections, MAC and IP addresses, MAC type, etc. screen main categories, „Status,“ „Additional Information,“ „Basic Settings“ and „Advanced Settings“. The menu shows your current position in the web interface. (The category is a different color and not clickable.) Corinex AV200 Powerline Ethernet Wall Mount... -
Page 13: Additional Information Page
„DHCP“ if the device is configured as a DHCP client. IP Address Shows the current IP Address of the modem. Subnet Mask Shows the subnet mask. Default Gateway IP Address Shows the Default Gateway. Corinex AV200 Powerline Ethernet Wall Mount... - Page 14 Indicates whether or not VLAN is enabled. VLAN Tag Shows the selected VLAN Tag. All traffic from the ethernet port is tagged with this tag. VLAN Priority Shows the selected priority which is inserted into the VLAN tag. Corinex AV200 Powerline Ethernet Wall Mount...
- Page 15 This can be TOS, 802.1p or Custom. If Custom, the full criterion parameters displayed below. Please see chapter 3.4.7 for additional information. Security Status Status Indicates whether or not the web interface is password protected. Corinex AV200 Powerline Ethernet Wall Mount...
-
Page 16: Change Configuration Page
(10.10.X.X and netmask 255.255.0.0 in the default state). • The adapter’s netmask can also be changed, for example to a type C (255.255.255.0) if necessary. This is a more advanced option, which you may ignore if you’re not familiar with it. Corinex AV200 Powerline Ethernet Wall Mount... - Page 17 Many users will not need to enter the Advanced settings section to ensure total security of their Powerline network. The AV200 technology supports multiple networks on a single electrical circuit. The networks are differentiated by Network Identifiers, which can be set in this section.
- Page 18 Automatic EP/AP (End Point or Access Point, depending on the other nodes in the network) or a Fixed AP (assigned Access Point). Section 4 (In-Home AV Network Topology) contains more information about the available network topologies. Corinex AV200 Powerline Ethernet Wall Mount...
- Page 19 Network Identifier (please read below for details on Network Identifiers). The AV200 technology supports multiple networks on a single electrical circuit. The networks are differentiated by Network Identifiers, which can be set in the MAC section. The Network Identifier is a character string (Network Identifier field) which simply acts as a name for the network.
- Page 20 Web Configuration The following picture shows an example of two AV200 networks with different Network Identifiers: Data transmission between adapters (called modems in the picture) is encrypted with a Triple-DES algorithm. The Encryption Key can be configured from a character string (Encryption Key field, ASCII or HEX), which is actually a passphrase.
- Page 21 Web Configuration 3.4.3.2 Network Configuration Your Corinex AV200 Powerline Wall mount can be configured to use either DHCP (automatic IP address assignment), or a fixed IP . The following parameters are used by the fixed IP configuration. In order to use the...
- Page 22 3.4.5 Multicast Configuration In order to optimize multicast traffic (video streams, etc.) between AV200 Powerline wall mounts, you can specify which wall mounts you want to receive the traffic. Others will then not be able to receive the multicast communication, and therefore the bandwidth will be used only for transmission to the intended recipients, making your broadcast, and overall network, more efficient.
- Page 23 3.4.6 VLAN Configuration When AV200 Powerline wall mounts are used for ADSL extension, it is important for the operator to be able to distinguish the type of traffic that each wall mount is generating. This is usually done by means of VLAN tagging. The AV200 technology includes the ability to tag all traffic that enters the Powerline network through each adapter’s Ethernet interface.
- Page 24 The trigger mechanism is also based on pattern recognition of a given location in each Ethernet packet. The following picture depicts the packet classification mechanism: Corinex AV200 Powerline Ethernet Wall Mount...
- Page 25 (the message ‘No password installed’ will be shown in the security con- figuration form). Consequently, the web configuration authentication will be disa- bled too. The authentication can be enabled again by setting a password. Corinex AV200 Powerline Ethernet Wall Mount...
- Page 26 FTP , type the user name (FTP User) and password (FTP Password). Then, for either FTP or TFTP , type the file name of the firmware disk image (File Name). Finally, click OK. Corinex AV200 Powerline Ethernet Wall Mount...
- Page 27 4. When the page comes up, click on Change configuration. 5. In the Firmware Update window, select TFTP and enter the IP of the TFTP server and the name of the image file, as shown in the next picture. Corinex AV200 Powerline Ethernet Wall Mount...
- Page 28 The node connected to the ADSL modem is the access point. Data and video are delivered through ADSL. The access point has to prioritize UDP video over data to avoid a jittery image when there is a heavy data download. Corinex AV200 Powerline Ethernet Wall Mount...
-
Page 29: Firmware Update Page
If the update process fails, an error message will be shown. In this situation, the wall mount can be reset without any risk, but the old firmware will still be present on the wall mount. Corinex AV200 Powerline Ethernet Wall Mount... -
Page 30: In-Home Av Network Topology
To configure a Fixed AP is optional. 4.2 Network Scenarios In this section the user is presented with a few network scenarios, explaining the application and necessary configuration. There are two types of an In-Home AV network. Corinex AV200 Powerline Ethernet Wall Mount... - Page 31 4.2.1 Single-Network Scenarios The following two sections show examples of a single In-Home AV network. 4.2.1.1 Local Area Network using two AV200 powerline Ethernet Wall Mounts The picture below shows a simple PLC (Powerline) network where two Wall Mounts are used to make a local area connection available in all outlets of the house.
- Page 32 The next picture shows a more advanced PLC (Powerline) network with three Corinex AV200 Powerline Ethernet Wall Mounts. This is a common network configuration, where Internet access and digital video are delivered through the same ADSL line. This configuration requires some QoS (Quality of Service) settings to guarantee video quality when the network is carrying large amounts of data from the Internet connection.
- Page 33 If both networks are configured at the same time, the QoS controller will be selected from all of the present APs. Corinex AV200 Powerline Ethernet Wall Mount...
-
Page 34: Network Configuration
5.1 Setting an IP Address in your computer This section explains how to set a static IP in your computer’s operating system, in order to connect to the AV200 Powerline Ethernet Wall Mount and configure it. 5.1.1 Setting up a static IP in Windows XP 1. - Page 35 4. Select Internet Protocol (TCP/IP) and click the Properties button. 5. Select Use the following IP address. Set the IP address manually in the format 10.10.1.X (for example 10.10.1.200) and mask 255.255.0.0 of local TCP/IP settings. The Default gateway box can be empty. Corinex AV200 Powerline Ethernet Wall Mount...
- Page 36 Ethernet adapter (usually it is the first Local Area Connection listed). Do not choose a TCP/IP entry which name mentions DUN, PPPoE, VPN, or AOL. Double click the Local Area Connection. The following window will appear. Corinex AV200 Powerline Ethernet Wall Mount...
- Page 37 4. Select Internet Protocol (TCP/IP) and click the Properties button. 5. Select Use the following IP address. Set the IP address manually in the format 10.10.1.X (for example 10.10.1.200) and mask 255.255.0.0 of local TCP/IP settings. The Default gateway box can be empty. Corinex AV200 Powerline Ethernet Wall Mount...
- Page 38 Enter. The previous command take eth0 as the name of the Ethernet interface and may be different on your system. You can check the status of all network interfaces by executing the command ifconfig on the console. Corinex AV200 Powerline Ethernet Wall Mount...
- Page 39 Network Configuration 5.1.5 Setting up a static IP in Mac OS 1. Open the Network Control Panel in System Preferences. 2. Select Built-in Ethernet from the pop-up menu. Corinex AV200 Powerline Ethernet Wall Mount...
-
Page 40: Improving Network Performance
With a Windows PC, simply double-click on the file tcpwin.reg, provided on the documentation CD in the „scripts“ folder. You can also run the script using the autorun feature of the CD. tcpwin.reg for use with Windows operating systems Corinex AV200 Powerline Ethernet Wall Mount... -
Page 41: Checking Network Performance
5.4 Using PLC Filters A PLC (Powerline) filter is a low-pass filter that will only allow the 50/60 Hz main voltage through. This filter blocks the Powerline signal. Corinex AV200 Powerline Ethernet Wall Mount... - Page 42 • When you want to isolate the electrical noise produced by some household appliance, because this noise falls in the PLC band and disrupts the signal from the adapters. This setup is illustrated in the picture below. Corinex AV200 Powerline Ethernet Wall Mount...
-
Page 43: Troubleshooting Guide
Troubleshooting Guide Troubleshooting Guide The Corinex AV200 Powerline Ethernet Wall Mount has been designed to be a reliable and easy-to-use network connection device. Please refer to the list below to aid in troubleshooting. The POWER LED is off. 1. Make sure the wall mount is properly plugged directly into the electrical outlet, and that the outlet has power. - Page 44 • If it’s possible, send us a scheme of your network topology also with the IP addresses for computers/router/access point, this can speed up the problem estimation. If you use any non-Corinex equipment, please specify what kind. The drawing can be made in any graphics editor, exported to one of the standard graphic formats (JPEG, GIF).
Need help?
Do you have a question about the AV200 and is the answer not in the manual?
Questions and answers