
Subscribe to Our Youtube Channel
Related Manuals for Thomas T105


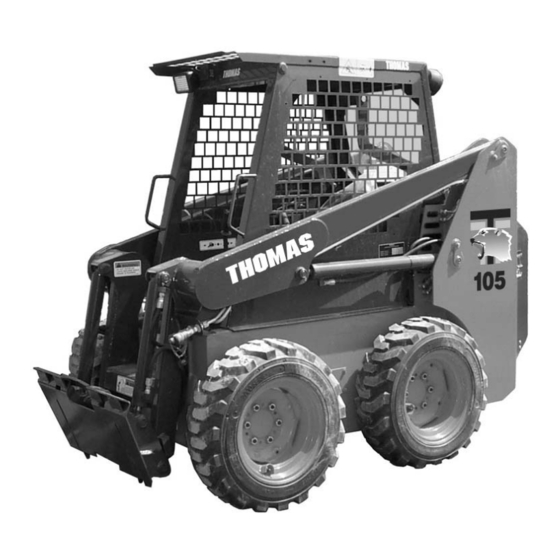
Summary of Contents for Thomas T105
- Page 1 T105 Skid Steer Loader Owner’s Operator’s Manual PUBLICATION NO. 053678 S/N LC002180-LC002185 S/N LC002192-Onward Next...
- Page 2 THE WARRANTY IS A CONDITION OF SALE OF THE PRODUCT TO PURCHASER AND WILL THEREFORE APPLY EVEN IF PURCHASER ALLEGES THAT THERE IS A TOTAL FAILURE OF THE PRODUCT. N.B. Read and practice your Thomas operating and servicing instructions. Failure to do this may void your warranty. PUBLICATION NO. 053678...
-
Page 3: Table Of Contents
Hydraulic / Hydrostatic Circuit 4. 13 Special Tools 5. SPECIFICATIONS 5. 1 Loader Specifications 5. 2 Torque Specifications 5. 3 Sound Power Level 5. 4 Decals, Warning 6. ATTACHMENTS AND BUCKETS 6. 1 Thomas Approved Buckets and Attachments Next Back... - Page 4 FOREWORD This book has been written to give the Owner / Operator necessary operating servicing and preventative maintenance instructions on the loader. Read this manual completely and know the loader before operating or servicing it. Do not do any service procedures that are not in the Operator’s manual. Only service personnel that have had training in the service of this loader can do these service procedures.
-
Page 5: Safety Precautions
1. Always drive the loader at speeds compatible with 5. Do not bypass the safety system. Consult your safety, especially when operating over rough Thomas Equipment Dealer if your safety controls are ground, crossing ditches or when turning. malfunctioning. Use jumper cables only in 2. - Page 6 1...SAFETY PRECAUTIONS 10. Whenever servicing or replacing pins in cylinder ends, buckets, etc., always use a brass drift and a hammer. Failure to do so could result in injury from flying metal fragments. 11. Cooling system operates under pressure which is controlled by the radiator cap.
-
Page 7: Instrument Panel
2...CONTROLS 2...CONTROLS 2. 1 Instrument Panel 2. 2 Seat and Seat Belt 2. 3 Seat Bar 2. 4 Parking Brake 2. 5 Throttle Control 2. 6 Lift Arm Supports 2. 7 Steering Controls 2. 8 Hand Controls 2. 9 Electric Solenoid Auxiliary 2. - Page 8 2...CONTROLS INSTRUMENT PANEL fig. 2.1 C3066 13 14 1. Lift Arm Supports: 11. Alternator Indicator Light: For safety while performing service or maintenance, This light will illuminate when the alternator is not the loader is equipped with a lift arm support device. producing sufficient current.
- Page 9 2...CONTROLS 19. Work Light Switch: This switch is a toggle switch. Push up to turn the Fully retract the lift arm IMPORTANT optional work light (if equipped) on. The light is supports before raising or lowering lift arms. located on the back of the loader. 20.
- Page 10 2...CONTROLS 2. 3 SEAT BAR 2. 4 PARKING BRAKE For operator protection the loader is equipped with a seat The loader is equipped with park brakes, located inside the bar. torque motor. The brakes are activated and de-activated by the seat bar, via charge pressure. When the seat bar is in To raise the seat bar, lift up on the bar (Fig.
- Page 11 2...CONTROLS 2. 5 THROTTLE CONTROL 2. 6 LIFT ARM SUPPORTS The diesel engine throttle control, is the lever located on For safety while performing regular service or the left hand side of the loader next to the steering control maintenance work, the loader is equipped with lift arm lever (Fig.
- Page 12 2...CONTROLS 2. 7 STEERING CONTROLS The two steering levers control speed, direction and FORWARD turning the loader. The R.H. lever controls the wheels on the R.H. side of the loader and the L.H. lever controls the wheels on the left hand side of the loader. The loader speed is controlled by the amount each lever is moved from centre or neutral position.
- Page 13 2...CONTROLS LIFT ARM and BUCKET CONTROLS: The right hand lever controls the bucket tilt cylinders (Fig. 2. 8A). Moving the left hand control lever to the left will cause the lift cylinders to extend, raising the loaders lift arms. Moving the control lever to the right causes the lift cylinders to retract, lowering the lift arms.
-
Page 14: Electrical Solenoid Auxiliary
2...CONTROLS 2. 9 ELECTRICAL SOLENOID AUXILIARY (OPTIONAL) Control Lever Switch (L.H.) A switch located in the L.H. steering control lever (Fig. 2. 9A) is used to engage the loaders auxiliary hydraulic circuit to power attachments such as post hole augers, sweepers etc. To avoid personal injury, NEUTRAL lower the lift arms, shut off the... -
Page 15: Foot Pedals
2...CONTROLS When the auxiliary circuit is not in use and before starting the To avoid personal injury, loader, ensure the switch located in the. instrument panel is in lower the lift arms, shut off the off position, otherwise starting the loader may be difficult the engine, raise the seat bar or impossible and damage to the starter may occur. -
Page 16: Quick-Tach
Push the locking levers down (4) (Fig. 2. 11B) extending the lock pins (5) through the attachment. The loader is available with a Thomas Quick - Tach. The Before operating the attachment check that the locking pins Thomas Quick - Tach is designed to fit Thomas approved are correctly engaged. -
Page 17: Electrical Panel
2...CONTROLS 2. 12 ELECTRICAL PANEL The loader is equipped with a 12 volt, negative ground electrical system. The fuse and relay panel is located in the engine compartment just in front of the battery box. The panel consist of the following: 1. -
Page 18: Operation
3...OPERATION 3...OPERATION 3. 1 Starting Instructions Pre - Starting Inspection Starting Procedure Shut - Off Procedure 3. 2 Operating Procedure 3. 3 Filling From a Pile 3. 4 Digging With a Bucket 3. 5 Leveling and Backfilling 3. 6 Auxiliary Hydraulics 3. - Page 19 3...OPERATION 3. 1 STARTING INSTRUCTIONS This engine is equipped A. Pre-Starting Inspection with glow plugs. Do not IMPORTANT use ether or any high Before starting the loader complete the energy fuels to assist following inspection: starting. Check the hydraulic oil level, engine oil level, engine coolant level and fuel supply.
- Page 20 3...OPERATION 3. 2 OPERATING PROCEDURES When learning to use the loader operate at a slow rate. Take advantage of the efficient operation of the loader. Keep the travel distance as short as possible. Keep the work area small so the cycle time is short. Keep the work area as level as possible.
- Page 21 3...OPERATION To dump the bucket (Fig. 3. 3C) push down on the heel of the For hand control units, move the L.H. control lever towards lift arm pedal to raise the lift arms. Push down on the toe of you to lower the lift arms completely down. Move the R.H. the bucket pedal small amounts as the lift arms are raising to control lever away from you and place the cutting edge of the stop material from falling off the back of the bucket.
- Page 22 3...OPERATION To level the ground with a hand control unit, raise the lift arms and tilt the bucket down by moving the R.H. control lever away from you. Move the L.H. control lever all of the way towards you (Fig. 3. 5H) to place the lift arms in the float position.
- Page 23 3...OPERATION 3. 6 AUXILIARY HYDRAULICS To operate an attachment such as a grapple fork using the auxiliary hydraulic circuit, push on the heel of the centre To avoid personal injury, or auxiliary pedal to open the grapple (Fig. 3. 6J). lower the lift arms, shut off the engine, raise the seat bar and cycle the hydraulics to...
- Page 24 3...OPERATION To avoid personal injury, lower the lift arms, shut off the engine, raise the seat bar and cycle the hydraulics to ensure they are locked. Then, unlatch the seat belt and exit WARNING the loader. Do not enter or exit with the engine running unless as specified in this manual or under specific...
- Page 25 3...OPERATION Ramps must be of Lead-acid batteries sufficient strength to contain sulfuric acid support the weight of WARNING which will damage the your skid steer. Wooden ramps can break and eyes or skin on contact. cause personal injury. Always wear goggles to avoid acid in the eyes.
- Page 26 3... OPERATION Safe Shutdown Procedures Stop machine Lower the bucket and other attachments flat on the ground Position controls in neutral Idle engine for short cool-down period Stop engine Cycle hydraulic controls to eliminate pressure Raise operator seat bar Check that lift arm/bucket controls are locked in neutral Unbuckle seat belt Remove ignition key and lock covers and closures C-361...
- Page 27 3...OPERATION 3. 11 LOWERING LIFT ARMS (ENGINE OFF) In the event that you should have an electrical failure which Then exit loader using extreme caution. If help is not renders your skid steer inoperable with the lift arms up, the available, the operator must exit the loader from the rear following procedures would apply.
-
Page 28: Daily Service Checks
4...MAINTENANCE 4...MAINTENANCE 4. 1 Preventative Maintenance Service 4. 7 Engine Maintenance Schedule Engine Specifications 4. 2 Daily Service Checks Oil Level Check Radiator Service Engine Oil and Filter Hydraulic Oil Level Replacement Air Cleaner Cooling System Fluid Tires and Wheel Nuts Fan Belt Tension Safety Equipment Fuel Filter Replacement... - Page 29 4...MAINTENANCE 4.1 PREVENTIVE MAINTENANCE SERVICE SCHEDULE ITEM SERVICE REQUIRED Check level and add if necessary. Use appropriate oil (See Section 5 Engine Oil for appropriate oil). Check level and add if necessary. Fill with 50% mixture of ethylene Radiator glycol and water. Check cooling fins for dirt. If necessary blow out with compressed air.
- Page 30 (See 4. 6 - 3) NOTE: For complete engine service details refer to the engine manufacturers service manual. Specify Kubota Part # V1305B for this manual. To avoid personal injury service repairs must be WARNING performed by an authorized Thomas dealer. Next Back...
- Page 31 4...MAINTENANCE 4. 2 DAILY SERVICE CHECK To avoid personal injury: Radiator Service Stop, Cool and Clean the engine of flammable WARNING With the engine cool remove the radiator cap and check materials before the coolant level. If adding coolant is required fill with a servicing.
- Page 32 4...MAINTENANCE Safety Equipment Engine Oil Level Do not operate the loader unless equipment shields, seat To check the oil level, stop the engine with the loader on belt, seat bar, hydraulic controls, parking brake, operator level ground, open the rear door and remove the dipstick guard and lift arm supports are working properly as well as (Fig.
- Page 33 4...MAINTENANCE 4. 3 50 HOUR SERVICE CHECK The following service check is to be performed by your To avoid personal injury, dealer after the first 50 hours of operation. lower the lift arms, shut off the engine, raise the seat bar Engine and cycle the hydraulics to ensure they are locked.
- Page 34 4...MAINTENANCE Final Drive 3. 1 Oil Level: Check lubricating oil level. If necessary add (See 4. 7 Seat Belt: Section 5 for appropriate specifications). Check seat belt condition. If necessary replace. For your safety, the loader is equipped with electrically 3.
- Page 35 If the safety controls are malfunctioning or require 4. 4 SERVICE ACCESS adjustment consult your Thomas Equipment Dealer Lift Arm Support for service. For safety while performing regular service or maintenance work, the loader is equipped with lift arm support pins.
- Page 36 4...MAINTENANCE Engine Compartment Keep the rear door The engine compartment is completely enclosed for closed except for component protection and lockable to discourage IMPORTANT servicing. Make sure the vandalism. For servicing, the rear door swings open and door is closed and the engine cover hinges up.
- Page 37 4...MAINTENANCE Adding Oil C-896 FIG 4.5B To add oil, remove the oil filler cap located at the top of the oil reservoir (Fig. 4. 6B). Check the filter screen in the filler neck for signs of damage. Add 10W30 or 20W50API Classification SE/ CD engine oil until oil is visible in the oil level sight glass (Fig.
- Page 38 A Service Override has been incorporated for use by hours operation. This filter has an indicator which Thomas Dealers. The normal position of the plunger is indicates a blocked filter. Change the filter when it down and turned into the locked position.
- Page 39 4...MAINTENANCE Oil Level Check To check the oil level, stop the engine with the loader on level ground, open the rear door and remove the dipstick (Fig. 4. 7B1). C-880 FIG 4.7.B1 C-842 Engine Oil Drain Fig. 4.7C1 Remove the oil filter (Fig. 4. 7C2). Clean the filter housing surface.
- Page 40 4...MAINTENANCE Fuel Filter Replacement The fuel filter is located in the engine compartment on the left hand side (Fig. 4. 7F). The fuel filter should be removed every 100 hours and any water or dirt found in the element drained off. Change the filter every 400 hours. To replace the filter;...
- Page 41 4...MAINTENANCE Servicing Cleaner Element To replace the air filter element carry out the following: Empty the dust cap as required.Dust should not be allowed to build up closer than 1 in. from the baffle. Remove the primary element as gently as possible.
- Page 42 4...MAINTENANCE ELECTRICAL SYSTEM Electrical Schematic 105 Light Kit Wire Harness To Fuse Box Light Kit Wire Harness C3159 Next Back Section Index...
- Page 43 4...MAINTENANCE ELECTRICAL SYSTEM Electrical Schematic 105 Light Kit Wire Harness Engine Wire Harness To Switch at Left Hand Control Lever Light Kit Wire Harness C3160 Next Back...
- Page 44 4...MAINTENANCE ELECTRICAL SYSTEM Electrical Schematic 105 Light Kit Wire Harness ROPS Wire Harness C3161 Next Back...
- Page 45 4...MAINTENANCE Battery Access The battery is located behind the LH transmission, in the engine compartment ( See Fig. 4. 9B1 & B2)). To avoid personal injury, lower the lift arms, shut off the engine, raise the seat bar Fig 4.9B1 and cycle the hydraulics to ensure they are locked.
- Page 46 4...MAINTENANCE 4.10 TIRE MAINTENANCE Tire Inflation and Service 1. 1 Upon receiving your loader, check the air 1. 8 Lubricate both tire beads and rim flanges pressure in the tires as indicated in the with soap solution. Do not use oil or table.
- Page 47 (both appropriate oil (See directions) Section 5 for Internal pump or Consult your dealer or specifications). Check motor wear caused Thomas Service Dept. for hose or fitting leak. by overspeeding Disconnected Reconnect and adjust control linkage linkage. Excessive play in...
- Page 48 4...MAINTENANCE Lift arms raise Anti-cavitation Inspect and repair or Foot pedals do Adjust foot pedal Foot pedal linkage slowly at full linkages check valve not replace not operate out of adjustment engine rpm smoothly functioning Replenish with appropriate Lubricate with a Reservoir low on Foot pedal oil (See Section 5 for...
- Page 49 Defective glow Brake will not Check fuse, If fine, consult No power to brake defective, replace plug relay release machine Dealer or Thomas Service valve solenoid Dept. Check continuity and if Defective glow defective, replace plugs Consult your Dealer or No pressure in Thomas service Dept.
- Page 50 4...MAINTENANCE Diesel Engine SYMPTOM SOLUTION PROBABLE CAUSE Engine does not start Replenish fuel No fuel Vent air Air in the fuel Change fuel and repair or replace Water in the fuel fuel system Clean Fuel pipe clogged Clean or change Fuel filter clogged Use the specified fuel or engine oil Excessively high viscosity of fuel or engine oil at low...
- Page 51 4...MAINTENANCE Diesel Engine SYMPTOM PROBABLE CAUSE SOLUTION Piston rings gap facing the same direction Excessive lubricant oil consumption Shift gap direction Oil ring worn or stuck Replace Piston ring groove worn Replace Valve stem and guide worn Replace Crankshaft bearing and crank pin bearing worn Replace Fuel mixed into lubricant oil Injection pump plunger worn...
- Page 52 4...MAINTENANCE 4.12 HYDRAULIC/HYDROSTATIC CIRCUIT Hydraulic Gear Pump Torque Torque Motor Motor Brake Valve Hydrostatic Pump Control Oil Filter 100 Micron Valve Oil Reservoir Brake Coupler Oil Filter 10 Micron Oil Cooler C3162 Next Back Section Index...
- Page 53 4...MAINTENANCE 4.12 HYDRAULIC/HYDROSTATIC CIRCUIT Auxiliary Hydraulics Lift Cylinders Tilt Cylinders Control Valve C-1008 Next Back...
- Page 54 4...MAINTENANCE 4.13 SPECIAL TOOLS ILLUSTRATION DESCRIPTION MODEL 955280 T133 AXLE INSTALLATION TOOL - To install T133’S’ axle in final drive housing. Quantity - 1 T103 960849 SEAL INSTALLATION TOOL - To install axle T103S seal in final drive housing. T133 955281 T133’S’...
- Page 55 4...MAINTENANCE 4.13 SPECIAL TOOLS Order # Illustration Description Models 916 - 30042-01 KUBOTA DRY LINER PULLER - Used for removing and installing the dry liner of the engine. 25197 Consists of: 304742 (64mm); 304743 (68mm); 30744 (75mm) 304745 (76mm); 304746 (82mm); 304747 (105mm);...
- Page 56 4...MAINTENANCE 4.13 SPECIAL TOOLS Order # Illustration Description Models 42530 T243 HDS TOOTHED BELT TENSION GAUGE Quantity -1 ADJUSTING PIN FOR T243HDS CRANKSHAFT AND CAMSHAFT 42531 Next Back...
-
Page 57: Loader Specifications
5...SPECIFICATIONS 5...SPECIFICATIONS 5. 1 Loader Specifications 5. 2 Torque Specifications 5. 3 Sound Power Level 5. 4 Decals, Warning Next Back Main Index... -
Page 58: Specifications
5...SPECIFICATIONS 5. 1 LOADER SPECIFICATIONS Dimensions – 5. 1: (With Std. Tires & Dirt Bucket) A. Overall operating height ............134. 5” (3416 mm) B. - Page 59 5...SPECIFICATIONS Controls Hydrostatic Transmission & Final Drive VEHICLE: Steering direction and speed controlled Pump type ........Two in line, axial piston by two hand operated control levers. Pump displacement ......1.5 cu. in. (25 cm Motor type ........Geroler, torque motor HYDRAULICS: Lift, bucket tilt and auxiliary hydraulic functions controlled by separate foot System relief setting ......3625 PSI (250 Bar)
- Page 60 5...SPECIFICATIONS 5. 2 TORQUE SPECIFICATIONS Loader Wheel nuts (32) ....100 - 110 lbs. ft....... .(136 - 149 N m) Hydrostatic pump mtg.
- Page 61 61 Next Back Section Index...
- Page 62 Next Back...
- Page 63 63 Next Back...
-
Page 64: Attachments And Buckets
6...ATTACHMENTS AND BUCKETS 6...ATTACHMENTS AND BUCKETS 6. 1 Thomas Approved Buckets and Attachments Next Back Main Index... - Page 65 6...ATTACHMENTS AND BUCKETS 6.1 THOMAS APPROVED BUCKETS AND ATTACHMENTS BUCKETS - DIRT/CONSTRUCTION Cat. # Description SAE Heaped Capacity (ft Approx. Weight 2093 48 inch Dirt Bucket 8. 8 274 lb. 2059 54 inch Bucket 9. 9 301 lb. PALLET FORK Cat.
Need help?
Do you have a question about the T105 and is the answer not in the manual?
Questions and answers