Table of Contents
Advertisement
Advertisement
Table of Contents

Related Manuals for MACGREGOR 26


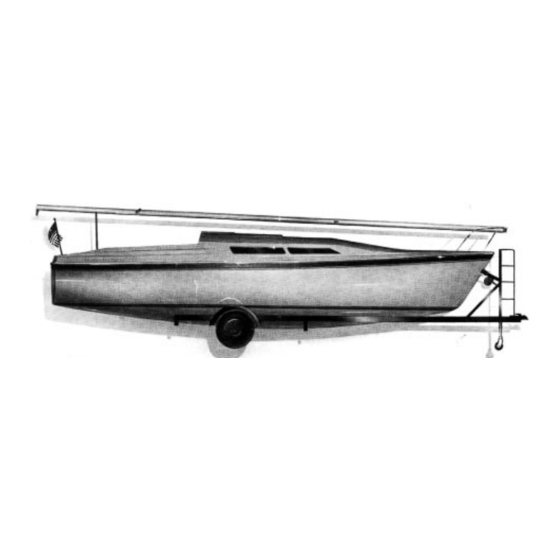
Summary of Contents for MACGREGOR 26
- Page 1 MacGregor 26 OWNER’S INSTRUCTIONS Page SPECIAL SAFETY WARNINGS GENERAL INFORMATION RIGGING THE MAST ATTACHING THE MAST TO THE BOAT ATTACHING THE MAST SUPPORT WIRES PREPARING THE BOAT FOR TRAILERING PREPARING THE TRAILER TOWING THE BOAT AND TRAILER RAISING THE MAST RAISING THE MAST WITH THE OPTIONAL SYSTEM.
- Page 2 1. ******** SPECIAL SAFETY WARNINGS ******* MANUFACTURER OR DEALER TO DETERMINE IF THE WEIGHT OF THE BOAT AND TRAILER IS DO NOT POWER OR SAIL THE MACGREGOR 26 WITHIN YOUR CAR’S TOWING CAPACITY. WITHOUT MAKING SURE THAT THE WATER BAL- LAST TANK IS COMPLETELY FULL.
- Page 3 BATTERIES ARE DANGEROUS. TREAT THEM WHEN RAISING AND LOWERING THE MAST, CAUTIOUSLY. DON’T STAND ANYWHERE WHERE THE MAST OR SUPPORT WIRES COULD FALL ON YOU IF SOME- Batteries can produce explosive gas, corrosive acid and lev- THING. OR SOMEONE. LETS GO. els of electrical current high enough to cause burns.
- Page 4 2. GENERAL INFORMATION REAR MAST SUPPORT WIRES: (BACKSTAY) TERMINOLOGY: Lay the mast on the ground. Start at the top and install the rear mast support wire (31' 4 1/2") to the stainless fitting at In the following instructions, we have tried to avoid the use the top of the mast as shown in Photo 2.
- Page 5 FORWARD SUPPORT WIRE: (FORESTAY) The forward support wire (23' 5 1/4") is attached to the bot- tom end of the 1" x 6" stainless straps with a 1/4" x 2" bolt and lock nut as shown in the Photo 4. Note that a pulley is mounted on the same bolt.
- Page 6 MAINSAIL HOISTING ROPE: (MAIN HALYARD) The rope that hoists the rear (main) sail passes through the pulley at the masthead (Photo 9) and the forward end ties off to the cleat on the right side of the mast (right when looking forward).
- Page 7 5. ATTACHING THE MAST WIRES TO THE BOAT Connect the rear mast support wire to the deck strap at the rear of the boat in exactly the same manner as the side wires. WIRE ADJUSTING CHANNELS: Attach a wire adjuster channel to the bottom end of the top and middle mast sup- FORWARD SUPPORT WIRE TURNBUCKLE: port wires, and to the rear mast support wire.
- Page 8 This is done by completing the Tire Registration Green - Right turn signal and brake light data on your warrantee card and returning it to MacGregor. Your name, address, tire serial numbers, trailer serial num- Make sure you have a good ground or you won’t have lights.
- Page 9 trailer brakes. The harder you stop, the more hydraulic pres- Make sure that the trailer is towed in a level position. It sure you generate, and the more forcefully the brakes will should never be towed with the tongue lower than the rear be applied.
- Page 10 Make sure that the mast wires are not entangled on the boat or trailer, and then raise the mast. This is best accomplished by standing on the cabin top, aft of the mast, and lifting the mast into position. Be careful not to hit a power line with the mast or rigging.
- Page 11 Take the end of the block and tackle line to the cockpit. We leave you with one repeat warning. People have been Take 3 wraps clockwise around the jib winch on the star- killed or badly injured as a result of masts or support wires board side (the right side when facing forward), insert the coming into contact with overhead power lines.
- Page 12 ALTERNATE METHOD OF TENSIONING THE WIRES. With all the rigging in place, grip the upper wire about 4 feet above the deck and pull inboard toward the center of the boat. The lower wire will go slack and allow another hole to be taken up in the adjuster channel.
- Page 14 necessary to use tools. As you tighten the wingnut, the valve 16. EMPTYING THE BALLAST TANK shaft (F), plate (D) and seal (E) are pulled up tight against Open the valve by turning the wingnut (B) counter the hull, sealing off the water access holes (G) and trapping clock-wise.
- Page 15 Pass the 1 1/2" pin through the boom and through the 18. REAR (MAIN) SAIL small ring in the forward lower corner of the sail (Photo The 38' mainsail control line is installed as shown in Photo Photo 26 Mainsail attachment, forward lower corner Photo 24 Mainsail control line...
- Page 16 Run the rope at the rear end of the boom thru the sail and tie the line tight to the cleat at the end of the boom, as shown in Photo 27. Photo 29 Batten, partially inserted .Photo 27 Mainsail attachment, lower rear corner Photo 30 Batten, fully inserted Connect the hoisting rope U shackle to the top of the sail, With the boat pointed directly into the wind, hoist the sail.
- Page 17 is in the bottom hole in the stainless steel bracket, and in the 3/8" hole that is 3 3/8" down from the top of the rudder blade. The sharper edge of the rudder blade goes to the rear. Photo 32 Jib sail, control line attachment When the jib is raised, get the hoisting line really tight.
- Page 18 if it hits something. The blade can be bolted in the up posi- hole in the front face of the pop top, and presses tight against tion for trailering. the mast. 22. CENTERBOARD The centerboard is raised and lowered by pulling on the line coming out of the galley face.
- Page 19 Do not sail with the pop top up except in the lightest wind conditions. 28. FOAM FLOTATION With the normal gear and crew, the MacGregor 26 has suffi- cient solid foam flotation blocks to keep the boat afloat in the event the cabin fills. When completely filled with water, the boat will be relatively unstable, and can roll over.
- Page 20 LEAKS: the centerboard is attached.) Bend an end wrench to reach Even though the MacGregor 26 has no under water thru hull up and hold the nut, and remove the bolts. The centerboard fittings, other than the water access system for the ballast and its hanger assembly can then be lowered out of the boat.
- Page 21 Replace tires as necessary. This warranty shall not apply to: (1) All items determined by MacGregor to be the responsi- bility of the dealer in launching or otherwise handling or preparing a new boat or vessel.
- Page 22 Corporation’s responsibility for safety against damage to the sailed unless the ballast tank is completely full and the valve boat ceases at the time the boat leaves the MacGregor Yacht is closed and sealed. Corp. facility, thereafter responsibility is either that of the common carrier or the dealer.
Need help?
Do you have a question about the 26 and is the answer not in the manual?
Questions and answers