Table of Contents
Advertisement
OWNER'S INSTRUCTIONS
PAGE
1
SPECIAL SAFETY WARNINGS
4
4
4
6
7
8
8
ATTACHING THE MAST SUPPORT WIRES
8
9
OPTIONAL MAST RAISING SYSTEM
11
12
12
13
RETURNING THE BOAT TO ITS TRAILER
13
13
13
SPECIAL SAFETY WARNINGS:
Boats, like any other form of transportation, have inherent
risks. Attentions to these warnings and instructions should
help keep these risks to a minimum.
THE WATER BALLAST TANK SHOULD BE FULL
WHEN EITHER POWERING OR SAILING.
IF THE BALLAST TANK IS NOT COMPLETELY FULL,
THE BOAT IS NOT SELF RIGHTING. (IF YOU CHOOSE
TO OPERATE THE BOAT WITH AN EMPTY TANK, SEE
THE SECTION ON OPERATING THE BOAT WITHOUT
WATER BALLAST.)
WHEN THE BALLAST TANK IS FULL:
- NO MORE THAN 6 PERSONS, 960 POUNDS.
WHEN THE BALLAST TANK IS EMPTY:
- NO MORE THAN 4 PERSON, OR 640 POUNDS.
- CREW WEIGHT CENTERED FROM SIDE TO SIDE.
- ALL SAILS REMOVED, ENGINE POWER ONLY.
- NO ONE ON THE CABIN TOP OR FORDECK.
- WAVES LESS THAN 1 FOOT.
-OPERATE WHERE WATER IS WARM AND
RESCUE IS LIKELY.
- NEVER OPERATE THE BOAT WITH A PARTIALLY
FILLED TANK.
WHEN POWERING OVER 6 MILES PER HOUR:
- RUDDERS AND DAGGERBOARD FULL UP.
- SAILS REMOVED.
- NO ONE ON THE CABIN TOP OR FOREDECK.
ALWAYS, BEFORE OPERATING THE BOAT,
CHECK TO CONFIRM THAT THE BALLAST TANK
IS FULL. THE WATER LEVEL IN THE BALLAST
TANK SHOULD BE NO MORE THAN 1" BELOW
THE LEVEL OF THE FORWARD VENT HOLE.
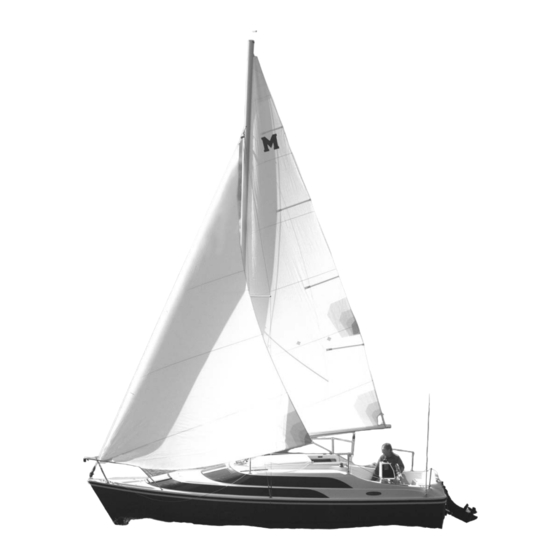
MACGREGOR 26 M
PAGE
14
15
JIB (FORWARD SAIL)
16
16
REDUCING THE AREA OF THE MAINSAIL
16
16
RUDDERS
17
17
18
18
18
19
20
20
20
22
27
SAFETY DECALS
THEN MAKE SURE THAT THE FORWARD VENT
PLUG AND THE TRANSOM VALVE ARE CLOSED
AND SECURE.
THE FOLLOWING COMMENTS EXPLAIN WHY
THE ABOVE RULES ARE NECESSARY.
STABILITY.
Unless the water ballast tank is completely full, with 1000 pounds
of water ballast, the sailboat is not self-righting. Without the
water ballast, the boat may not return to an upright position if the
boat is tipped more than 60 degrees, and can capsize like most
non-ballasted sailboats.
The MacGregor is big, but relatively light, and excessive crew
weight can overpower the basic stability of the boat. For this rea-
son, we have placed the restrictions on crew capacity, shown in
the preceeding section.
OPERATING WITHOUT WATER BALLAST.
There may be times when you wish to operate the boat with an
empty ballast tank. For example, when pulling a water skier,
when trying to conserve fuel, when a faster ride is desired, or
when you are in the process of filling the tank. Since only a few
miles per hour are lost with a full tank, we recommend that most
of your use of the boat be with a full tank. If the tank is empty,
carry no more than 4 persons, or 640 pounds.
When operating with an empty ballast tank, keep the crew weight
aft, low in the boat, and centered from side to side. Keep the crew
in the cockpit, sitting down. The rear of the hull is relatively flat,
and the nose area has a deep V to allow the boat to slide through
waves with less slamming. If there is a lot of crew weight for-
ward, the flat part of the hull bottom, which normally provides the
stability, is raised higher out of the water, and is less effective in
Page 1
JULY 17, 2007
Advertisement
Table of Contents

Related Manuals for MACGREGOR 26 M 2009


Summary of Contents for MACGREGOR 26 M 2009
- Page 1 WATER BALLAST.) non-ballasted sailboats. WHEN THE BALLAST TANK IS FULL: The MacGregor is big, but relatively light, and excessive crew weight can overpower the basic stability of the boat. For this rea- - NO MORE THAN 6 PERSONS, 960 POUNDS.
- Page 2 providing sideways stability. With the crew weight forward, the board or rudders down, you will stop really fast, and may damage nose is depressed. The deep V nose shape does not contribute the board or rudders . At high speed, the daggerboard and rudders much to stability.
- Page 3 is metal, including the mast, shrouds, boom, lifelines, rudder, tiller battery. It could blow up. Do not allow battery acid to contact or metal hardware. If possible, don’t touch anything that is wet. eyes, skin, fabrics or painted surfaces. Flush any contacted area Many experts recommend that a heavy gauge copper wire be with water immediately and thoroughly.
-
Page 4: General Information
motion of the boat or the wind causes the seat to fall into the low- ered position, someone could be hurt. Make sure the seat is secured in the open position, with the snap cable to the lifeline, every time it is opened. AVOID ENGINE EXHAUST FUMES. - Page 5 sockets as shown below. Secure the spreaders with 1/4” x 2” bolts and lock nuts. The nuts face the lower end of the mast. Tighten the nuts tight. Upper shrouds and forestay attachment LOWER SHROUDS. Spreader tube attachment The lower shrouds are installed on the lower mast brackets ( 12’ from the base of the mast) with a 3/8”...
- Page 6 shackle to the back end of the halyard. Make sure the bolt is secure. Use the 9/16 wrenches. You will not believe the chaos if the front end of the mast gets loose while you are trailering. If you just tie the mast to the bow rail, a sudden stop could catapult the mast into your car or even into the car ahead of you.
- Page 7 and people unless the rear of the trailer is blocked up. The weight at certain speeds and could cause loss of vehicle control. Over could cause the trailer and boat to tip backwards. inflation can cause a tire to blow out, which is also very danger- ous.
-
Page 8: Raising The Mast
state agency to determine whether or not trailer brakes are ATTACHING THE MAST SUPPORT required in your area. WIRES TO THE BOAT If your trailer is equipped with brakes, read the following careful- UPPER AND LOWER SHROUDS. The upper and lower ly to make sure you understand their operation. - Page 9 LIFTING THE MAST. Make sure all mast support wires except the forestay are connected to the mast and boat. Make sure that the mast wires are not entangled on the boat or trailer, and then raise the mast (below). This is best accomplished by standing on the cabin top, aft of the mast, and lifting the mast into position.
- Page 10 The following photo shows how the pulley and forward line look The wires are attached to the loop on the lifeline post with 1/4” in their position at the top end of the pole. Make sure the forward screw pin shackles. line has a good bowline knot securing it to the eye on the pole.
- Page 11 When properly tuned, all of the mast support wires should be quite snug. Forestay connection Don’t release tension on the mast raising line until the forestay is secure and the clevis pin and cotter ring are in place. Tighten down on the turnbuckle so the rig is really snug. Then Mast angle secure the turnbuckle barrel with its cotter pins.
- Page 12 forward of a straight line drawn from the top of the mast to the base of the mast. The downwind wires will be somewhat slack when sailing hard. When sailing into the wind, the mainsail takes over the task of supporting the mast from the rear. SECURE ALL COTTER PINS AND RINGS.
- Page 13 rubber portion of the plug will become fatter or skinnier as the To drain the tank, make sure both the vent and the transom valve rubber is rotated. Adjust it so that it must be forced into the hole. are open. Remove the water tank vent plug inside the boat. Pull Then, when the lever is pressed to the horizontal position, it will the boat slowly out of the water, and the water ballast will begin really grip the hole and stay put.
- Page 14 Connect the main halyard snap shackle to the top of the sail, and The upper end of the mainsheet is attached to the boom as shown start feeding the rope on the leading edge of the sail into the below. spread portion of the mast.
- Page 15 Wrap the loose end of the line around the cleat just once and then pass it through the loop that you made above the cleat. Jib, forward lower corner Clip the jib to the forestay with the bronze snaps on the sail, and tie the jib sheet.
- Page 16 There should be no scallops or sagging between the clips on the DAGGERBOARD jib sail. A loose leading edge is a very common error and hurts The daggerboard slides up and down in a watertight compartment the boat’s windward performance. (daggerboard trunk) just to the rear of the mast.
-
Page 17: Boom Vang
rudders. There are cleats near the lines to secure the rudders either caught in the outboard motor’s propeller. Tighten the rudder pivot in the up or down positions. When you are steering with the rud- bolt (3/8” x 2 1/2” bolt and lock nut) tight enough to prevent side- ders, make sure they are fully down and well secured. - Page 18 FOAM FLOTATION connects to the motor With the normal gear and crew, the MacGregor 26 has sufficient solid foam flotation material to keep the boat afloat in the event the cabin fills. When completely filled with water, the boat will be relatively unstable, and can roll over.
- Page 19 bar together should be loose enough to allow the bar to pivot as sure the vent and valve are closed except for times when the tank the engine is raised up and down. is emptying or filling. (At dockside, a hose end siphon inserted in the vent hole will empty the tank in about 12 minutes.) When powering, the engine should be connected to the rudders with the linkage bar.
-
Page 20: Limited Warranty
THIS WARRANTY SHALL NOT APPLY TO THE FOL- LOWING: (1) All items determined by MacGregor to be the responsibility of the dealer in launching or otherwise handling or preparing a new boat or vessel. - Page 21 MacGregor Yacht Corporation’s responsibility for safety against damage to the boat ceases at the time the boat leaves the MacGregor Yacht Corp. facility; thereafter responsibility is either that of the com- mon carrier or the dealer.
- Page 22 HOW TO SAIL THE MOST IMPORTANT THING YOU MUST KNOW IS the angle of the sails to the wind with the sheets (the lines that THE DIRECTION FROM WHICH THE WIND IS BLOW- connect to the rear of the jib and to the rear of the boom). The ING.
- Page 23 wind, except that the sails are pulled in closer to the centerline of the boat, and you are now trying to sail as close into the wind as you can. This is tougher to do, and the boat won’t go as fast as when sailing across the wind.
- Page 24 Normal downwind sailing Sailing downwind, jib out When sailing at right angles to the wind (called “reaching”), pull in the mainsail control line (mainsheet) and the jib control line (jibsheet) until the wind completely fills the sails. Streamers curling--bad Streamers straight--good If the sails are not pulled in far enough, the fabric near the lead- When the sails are in too far, the yarns will curl around the back- ing edge will flutter and ripple.
- Page 25 When sailing across the wind or into the wind, try to sail a con- can learn to sail quite well in a matter of hours. But it will take a stant leaning (heeling) angle. If it leans too much, sail into the lifetime to master all of the subtle little intricacies.) direction from which the wind is blowing (called “heading up”), Another complexity.
- Page 26 these lines just tight enough to keep the rear edge of the sail from wind when you let go of the wheel. When sailing into the wind, fluttering. If you get the lines too tight, the rear edge of the sail the front of the rudders should be turned about 5 degrees toward will cup toward the wind and slow the boat up a small amount.
- Page 27 The following is a reproduction of the decals that are placed on the steering pedestal and on the cabin wall inside the boat. These the decals contain important safety information, and should not be removed. If the decals become defaced or illegible, please call or write to us and we will provide new ones.
- Page 28 Page 28...
Need help?
Do you have a question about the 26 M 2009 and is the answer not in the manual?
Questions and answers