Table of Contents
Advertisement
Quick Links
Advertisement
Table of Contents

Related Manuals for SIX xenta AUTONOM

Summary of Contents for SIX xenta AUTONOM
- Page 1 User guide xenta AUTONOM...
-
Page 2: Table Of Contents
Table of contents Security requirements Electromagnetic compatibility 1.2 Where wireless technologies are used 1.3 CE declaration of conformity Product info POS terminal overview 2.2 Customer terminal overview 2.3 Display symbols 2.4 Abbreviations/Information 2.5 Payment procedure with ep2 2.6 Technical information Commissioning Installation 3.2 Configuration/Initialization... -
Page 3: Security Requirements
1 Security requirements 1.1 Electromagnetic compatibility When connecting additional or other compo- nents the “Electromagnetic Compatibility Direc- tive” (EMC) must be adhered to. 1.2 Where wireless technologies are used While driving Hearing aids Radio frequencies can interfere with electronic Under certain circumstances, terminals can systems in vehicles, such as car radios or secu- cause some hearing aids to malfunction. -
Page 4: Ce Declaration Of Conformity
The latest version of the user guide, together with any updates, can be found on our homepage at: www.six-payment-services.com Consequently, SIX Payment Services Ltd accepts no responsi- bility for the information provided in the operating instructions being current, complete or correct. Further more, to the extent permitted under the relevant legal provisions, SIX ... -
Page 5: Product Info
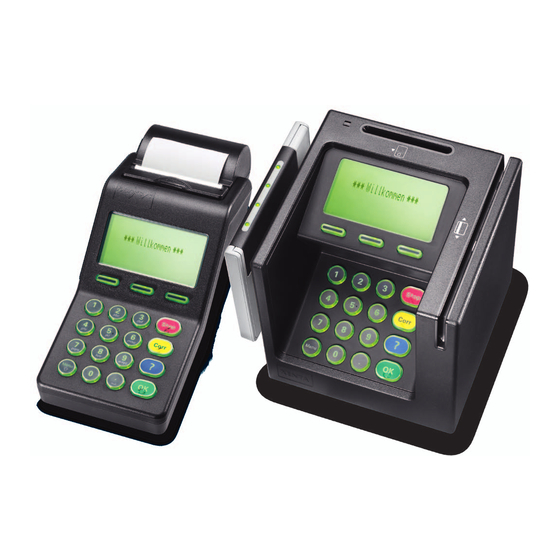
2 Product info 2.1 POS terminal overview Thermal printer Display The next step to be taken is always shown on the display. Navigation buttons You can use these three buttons to navigate through the menu (up/down/confirm). <STOP> button Active procedures can be stopped using this button. -
Page 6: Customer Terminal Overview
2.2 Customer terminal overview Chip reader For chip cards. Magnetic strip reader For cards with magnetic strips. Display The next step to be taken is always shown on the display. Navigation buttons You can use these three buttons to navigate through the menu (up/down/confirm). -
Page 7: Display Symbols
2.3 Display symbols WLAN Only appears if a WLAN card (optional) is installed and WLAN communication is also in use. WLAN is connected to an access point, the IP address is valid, and the reception strength is 100%. WLAN is connected to an access point, the IP address is valid, and the reception strength is greater than 66%. - Page 8 Only appears if a GPRS card (optional) is installed and GPRS communication is GSM/GPRS also in use. Reception strength There is a connection to the network and the reception strength is 100%. There is a connection to the network and the reception strength is greater than 80%.
-
Page 9: Abbreviations/Information
2.4 Abbreviations/Information Cards with a chip Cards which store the information needed for electronic payment on a chip must be inserted in the chip reader. Cards with a Cards which store the information needed for electronic payment on a magnetic strip magnetic strip must be pulled through the swipe reader. -
Page 10: Payment Procedure With Ep2
2.5 Payment procedure with ep2 The payment process at the point of sale is stan- – Depending on the payment function and dardised for all cards with ep2. A variety of card credit card processor, different minimum/ types are in cir culation today. Many card issuers maximum amounts, day limits, etc. -
Page 11: Technical Information
2.6 Technical information Operating temperature 0 °C to 50 °C Humidity (not condensing) 20% to 85% Power supply 100–240 VAC 50/60 Hz /0,7 A... -
Page 12: Commissioning
3 Commissioning 3.1 Installation – Position the device at its intended location – PSTN: Analog telephone cable with meter – Connect the device. pulse filter (TT83 jack) Always plug in the power supply last! – Electric cable: black two-pole plug. – Cable: ! Always attach power cable to POS terminal. ! Only the original cables delivered with the product should be used. -
Page 13: Configuration/Initialization
3.2 Configuration/Initialization Commissioning Subsequent initialization The terminal is provided to you in a non-config- Should it be necessary to re-initialize a device ured state and must be configured to be operable. for any reason, proceed as outlined on page 14. Please read the configuration sheet delivered with the device. It contains all specific data for your terminal. The terminal configuration proce- dure is described in detail in the configuration sheet. Initialization requires several m inutes. -
Page 14: Setup
3.3 Setup <STOP> <5> Setup Password is requested You can enter the terminal’s main menu using the <STOP> button. Select the “Setup” function <5>. The following terminal-specific functions can be carried out. The following functions require a password. <STOP> <5> <1> Configuration The terminal calls the service centre and obtains the latest configuration parameters in the event that they have changed. <STOP>... -
Page 15: Menu Tree (Illustration)
4 Menu tree (illustration) 4.1 Main menu To enter the menu tree below, press the <STOP> button. Main menu <1> Transactions Balances <2> Balances <1> Start user shift <3> Queries <2> End user shift <4> Settings <3> Daily closing <5> Setup <4>... -
Page 16: Transactions
4.2 Transactions Transactions <1> Purchase <2> Phone authorised <3> Reversal <4> Credit <5> Reservation <6> Purchase reserv <7> Tip <8> Cash advance <9> Mail order <0> Other transact. Other transactions <1> Phone order <2> Purch. forced acc. <3> Reserv. adjustm. <4>... -
Page 17: Functions
5 Functions 5.1 Cashier: purchase <1> Purchase The purchase is the most common transaction – The “manual recording of card data” and type in electronic payment traffic. “sub sequent cancellation” functions are either activated or deactivated, depending on – Depending on the CCC, minimum/maximum the CCC. -
Page 18: Cashier: Manual Recording Of The Card Data
5.2 Cashier: manual recording of the card data Manual recording of the card data 3-digit code is printed on the reverse side of the Should a credit card be unreadable, the card card (the last three numbers). data can be recorded manually. After you have chosen the transaction mode and To do so, you need the card number, the expiry confirmed this by pressing <OK>, manual record-... -
Page 19: Customer Handling: Card Without Pin
5.3 Customer handling: card without PIN After the cashier enters the amount, the cus- – Customer handling: card without PIN. tomer is prompted to use his or her card. – Customer handling: card with PIN Depending on the card type, the two following (see page 20). -
Page 20: Customer Handling: Card With Pin
5.4 Customer handling: card with PIN Customer handling – card with PIN Depending on the card type, it must be inserted in the chip card reader, held up to the contactless reader or pulled through the magnetic swipe reader. If the customer uses the wrong reader for his or her card, that person is instructed to use the proper reader. -
Page 21: Methods Of Payment
6 Methods of payment 6.1 Purchase authorised per telephone <2> Phone authorised This purchase mode is used when the authorisa- telephone. With the function “Phone authorised”, tion cannot be made automatically. The authori- the transaction will be recorded later. sation code is issued by a CCC representative by Cashier handling Press “2”. -
Page 22: Reversal
6.2 Reversal <3> Reversal The purchase which has just been made can be – If a daily closing or shift-end has been carried cancelled using the “Reversal” function. out in the meantime, or if the data has been transmitted, then cancellation is no longer –... -
Page 23: Credit
6.3 Credit <4> Credit A purchase that has been made can be corrected using the “Credit” function. This is used if a can- cellation is no longer possible. Cashier handling Press “4” to activate the “Credit” function. 4 : Credit Enter the password and confirm with <OK>. -
Page 24: Reservation/Purchase Reservation
6.4 Reservation/Purchase reservation <5> Reservation An amount can be reserved on the credit card or even just a partial amount can be subsequently using the “Reservation” function (e.g. for hotels, posted. rental cars, flight tickets, etc.). The entire amount Cashier handling Press “5” to activate the “Reservation” function. 5 : Reservation If the “foreign currency”... -
Page 25: Tip/Cash Advance
6.5 Tip/Cash advance <7> Tip Is only activated by CCCs for the restaurant and – If a daily closing has been performed or the hotel industry. data has been transmitted in the meantime, then the “Tip” function can no longer be used. A Tip can also be added to a purchase sales slip. -
Page 26: Mail Order/Other Transactions
6.6 Mail order/Other transactions <9> Mail order Distance purchases are processed using the SIX Payment Services Ltd offers “Saferpay”, “Mail order” function. In this case, the customer an ideal virtual solution for mail order trans- provides his or her card number, expiry date actions. -
Page 27: Balances
7 Balances 7.1 Start user shift/end user shift, daily closing, data transmission <STOP> <2> Balances You can enter the terminal’s main menu using the <STOP> button. Select the “Balances” function <2>. You then have the following options: <STOP> <2> <1> Start user shift (o) You can start a user shift autonomously when you begin working. -
Page 28: Queries (Totals), Settings
8 Queries (totals), settings <STOP> <3> Queries You can enter the terminal’s main menu using the <STOP> button. Select the “Queries” function <3>. You then have the following options: <STOP> <3> <1> Shift counter The current status of the active shift is printed out. <STOP>... -
Page 29: Maintenance And Handling
9 Maintenance and handling 9.1 Printer settings The three navigation keys can be used to modify the printer settings: Print intensity – / <F1> reduces the print intensity + / <F3> increases the print intensity Font size <F2> modifies the font size (large/small). <STOP> terminates the menu. The old settings are retained and the new ones rejected. -
Page 30: Care And Maintenance
Only persons authorised – Printer: Open the printer cover and clean the by SIX Payment Services Ltd can carry out print head with a fine brush. Never use fluids maintenance work. or cleaning agents! – Do not use any accessories with this product that are not SIX Payment Services Ltd original accessories. -
Page 31: Identifying And Solving Errors
9.3 Identifying and solving errors Host timeout No display The corresponding computer centre does not Check that all the leads are properly connected. reply. Possible reason: network overload. Important: Always connect the power supply last. Reading error, card cannot be read Clean the reading unit. -
Page 32: Changing The Paper Roll
Ordering paper rolls – www.six-payment-services.com/shop (for Switzerland) – order form – terminal hotline Your personal contact: www.six-payment-services.com/contact SIX Payment Services Ltd SIX Payment Services (Europe) S.A. Hardturmstrasse 201 10, rue Gabriel Lippmann 8005 Zurich 5365 Munsbach Switzerland Luxembourg...
Need help?
Do you have a question about the xenta AUTONOM and is the answer not in the manual?
Questions and answers