Table of Contents
Advertisement
Advertisement
Table of Contents

Related Manuals for SIX yomani AUTONOM

Summary of Contents for SIX yomani AUTONOM
- Page 1 User guide yomani AUTONOM yomani COMPACT yomani PINPAD...
-
Page 2: Table Of Contents
Table of contents Security requirements Electromagnetic compatibility 1.2 Where wireless technologies are used Product info Customer terminal 2.2 Cash register terminal (yomani AUTONOM) 2.3 Abbreviations/Information 2.4 Payment procedure with ep2 2.5 Technical information Start-up Installation 3.2 Configuration/Initialization Menu tree (illustration) Main menu 4.2 Transactions... -
Page 3: Security Requirements
1 Security requirements 1.1 Electromagnetic compatibility When connecting additional or other compo- nents the “Electromagnetic Compatibility Direc- tive” (EMC) must be adhered to. 1.2 Where wireless technologies are used While driving Hearing aids Radio frequencies can interfere with electronic Under certain circumstances, terminals can systems in vehicles, such as car radios or secu- cause some hearing aids to malfunction. - Page 4 The latest version of the user guide, together with any updates, can be found on our homepage at: www.six-payment-services.com Consequently, SIX Payment Services Ltd accepts no responsi- bility for the information provided in the operating instructions being current, complete or correct. Further more, to the extent permitted under the relevant legal provisions, SIX ...
-
Page 5: Product Info
2 Product info 2.1 Customer terminal Thermal printer (yomani COMPACT only) Chip reader For chip cards. Magnetic strip reader For cards with magnetic strips. Display The next step to be taken is always shown on the display. Navigation buttons You can use these three buttons to navigate through the menu (up/down/confirm). -
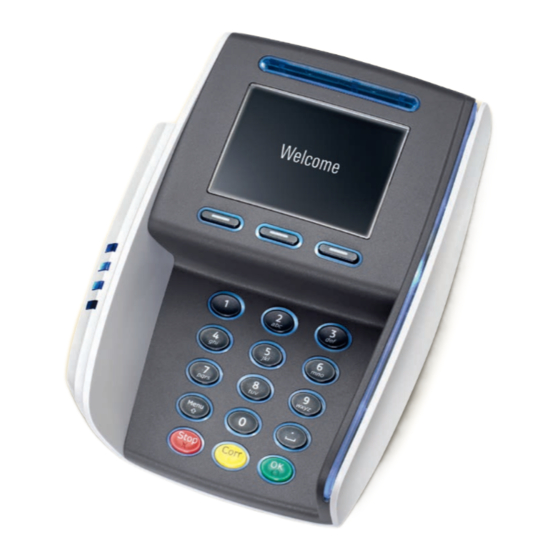
Page 6: Cash Register Terminal (Yomani Autonom)
2.2 Cash register terminal (yomani AUTONOM) Thermal printer Screen The next step to be taken is always shown on the screen. Navigation buttons You can use these buttons to move up and down in the menu. <STOP> button Active procedures can be stopped using this button. -
Page 7: Abbreviations/Information
For a PIN-based transaction, the customer must enter his/her PIN at the transaction point of sale during the payment process. Password Personal Unblocking Key RFID radio-frequency identification SIX Payment Services Ltd Terminal Transaction WLAN A Wireless Local Area Network is a “wireless” local radio network, which generally refers to a standard within the IEEE 802.11 family. -
Page 8: Payment Procedure With Ep2
2.4 Payment procedure with ep2 The payment process at the point of sale is stan- Caution for offline transactions! dardised for all cards with ep2. A variety of card Offline transactions are stored in the security types are in cir culation today. section of your terminal and submitted to the card processor by means of the daily closing. -
Page 9: Start-Up
(for contactless paying) Serial RS-232 port USB port yomani XR PINPAD and COMPACT only Ethernet/LAN port Cash register terminal (yomani AUTONOM) Cable guides Power supply port Customer terminal port Completed installation The terminal starts up und reports with an acous-... -
Page 10: Configuration/Initialization
Subsequent initialisation The yomani will generally already have been Should it be necessary to re-initialise a device commissioned by the SIX production facility. for any reason, proceed as outlined on page 24. Additional instructions are provided to you in the “Configuration instructions for yomani” delivered... -
Page 11: Menu Tree (Illustration)
4 Menu tree (illustration) 4.1 Main menu To enter the menu tree below, press the <STOP> button. Main menu <1> Transactions Balances <2> Balances <1> Begin shift <3> Queries <2> End user shift <4> Settings <3> Daily closing ▲ <5> Setup <4> Transmit. trx data Queries <1> Shift counter <2>... -
Page 12: Transactions
4.2 Transactions Transactions <1> Purchase <2> Purch. phone auth. ▲ <3> Reversal ▲ <4> Credit <5> Reservation <6> Purchase reserv. <7> Purchase w. Cashback <8> Cash advance <9> Purch. mail order <10> Other transact. Other transactions <1> Phone ordered <2> Purch. forced acc. <3>... -
Page 13: Transactions
5 Transactions 5.1 Purchase <1> Purchase The purchase is the most common transaction – yomani COMPACT: If a transaction is not suc- type in electronic payment traffic. cessful, then you will hear three short, acous- tic signals that repeat every 2 seconds. This – Depending on the CCC, minimum/maximum prompts the customer to give the terminal to amounts, day limits, etc. - Page 14 CVC/CVV (Card tion button. Verification Code/Card Verification Value). This yomani AUTONOM/yomani COMPACT If the “foreign currency” function is activated on your terminal, you must <Currency> select the desired currency.
- Page 15 yomani PINPAD Enter the transaction on the cash register as usual. On the customer terminal, press the <Corr> and <Menu> buttons in quick succession within half a second. A request to enter the card details manually will be shown on the yomani screen. Example: Credit card Reverse side of card...
- Page 16 After the cashier enters the amount, the cus- Depending on the card type, the two following tomer is prompted by the terminal to use his or procedures are possible: her card. – Customer handling: card without PIN. – Customer handling: card with PIN (see p. 17). Customer handling: Card without PIN The amount is shown.
- Page 17 Customer handling: Card with PIN The amount is shown. Depending on the card type, it must be inserted in the chip card reader, held up to the contactless reader or pulled through the magnetic swipe reader. If the customer uses the wrong reader for his or her card, that person is instructed to use the proper reader.
-
Page 18: Purchase Authorized Per Phone
5.2 Purchase authorized per phone <2> Phone authorised This purchase mode is used when the authorisa- telephone. With the function “Phone authorised”, tion cannot be made automatically. The authori- the transaction will be recorded later. sation code is issued by a CCC representative by Cashier handling Press “2”. -
Page 19: Cancellation
5.3 Cancellation <3> Cancellation The purchase which has just been made can be – If a daily closing or shift-end has been carried cancelled using the “Cancellation” function. out in the meantime, or if the data has been transmitted, then cancellation is no longer –... -
Page 20: Credit
5.4 Credit <4> Credit A purchase that has been made can be corrected using the “Credit” function. This is used if a can- cellation is no longer possible. Cashier handling Press “4”. “Credit” will be activated. 4 : Credit Enter the password and confirm with <OK>. Password (See the configuration sheet for the password) If the “foreign currency”... -
Page 21: Additional Transactions
(and the CVC, if needed) to the merchant by fax, mail or the SIX Payment Services Ltd offers an ideal virtual Internet shop. If a contract for Mail Order solution for mail order under the Saferpay brand. -
Page 22: Balances
6 Balances 6.1 Start user shift/end user shift, daily closing, data transmission <STOP> <2> Balances You can enter the terminal’s main menu using the <STOP> button. Select the “Balances” function <2>. You then have the following options: <STOP> <2> <1> Begin user shift (o) You can start a user shift autonomously when you begin working. If you attempt to make a trans- action after the end of a shift or daily closing, then the terminal automatically starts a new shift. -
Page 23: Queries (Totals), Settings
7 Queries (totals), settings <STOP> <3> Queries You can enter the terminal’s main menu using the <STOP> button. Select the “Queries” function <3>. You then have the following options: <STOP> <3> <1> Shift counter The current status of the active shift is printed out. <STOP> <3> <2> Daily counter The current status since the last daily closing is printed out. <STOP>... -
Page 24: Setup
8 Setup Setup → Password is requested <STOP> <5> You can enter the terminal’s main menu using the <STOP> button. Select the <Setup> function <5>. The following terminal-specific functions can be carried out. The following functions require a password. You can find your password in the “Configuration instructions for yomani”. <STOP> <5> <1> Configuration The terminal calls the service centre and obtains the latest configuration parameters in the event that they have changed. <STOP> <5> <2> Initialisation You can re-initialise individual or all activated card products. -
Page 25: Maintenance And Handling
The four designated pins on the phone jack must be plugged in facing up. PLEASE NOTE! SIX carries out software updates at night in reason, your payment terminal must be left order to enable you to use your payment termi- switched on at night with a constant Internet nal without interruption during the day. -
Page 26: Changing The Paper Roll
Ordering paper rolls – www.six-payment-services.com/shop (for Switzerland) – order form – terminal hotline Your personal contact: www.six-payment-services.com/contact SIX Payment Services Ltd SIX Payment Services (Europe) S.A. Hardturmstrasse 201 10, rue Gabriel Lippmann 8005 Zurich 5365 Munsbach Switzerland Luxembourg...
Need help?
Do you have a question about the yomani AUTONOM and is the answer not in the manual?
Questions and answers