Table of Contents
Advertisement
Advertisement
Table of Contents

Related Manuals for Minolta DiMAGE Xi


Summary of Contents for Minolta DiMAGE Xi
- Page 1 INSTRUCTION MANUAL...
-
Page 2: Before You Begin
OR PROPER AND SAFE USE NP-200 Lithium-ion batteries The DiMAGE Xi operates on a small, but powerful lithium-ion battery. Misuse or abuse of the lithium-ion battery can cause damage or injury through fire, electric shock, or chemical leakage. - Page 3 OR PROPER AND SAFE USE WARNING • Tape over the lithium-ion battery contacts to avoid short-circuiting during disposal; always follow local regulations for battery disposal. • If charging is not completed after the specified period elapses, unplug the charger and discontinue charging immediately .
-
Page 4: Table Of Contents
OR PROPER AND SAFE USE CAUTION • Do not use or store these products in a hot or humid environment such as the glove compartment or trunk of a car. It may damage the camera, charger, and battery which may result in burns or injuries caused by heat, fire, explosion, or leaking battery fluid. •... - Page 5 Setting the language...69 Formatting memory cards...70 Video output ...70 Viewing images on a television ...71 Data-transfer mode ...72 DiMAGE Xi system requirements...72 Connecting the camera to a computer ...73 Connecting to Windows 98 and 98SE...75 Automatic installation ...75 Manual installation ...76 Connecting to Mac OS 8.6 ...78...
-
Page 6: Names Of Parts
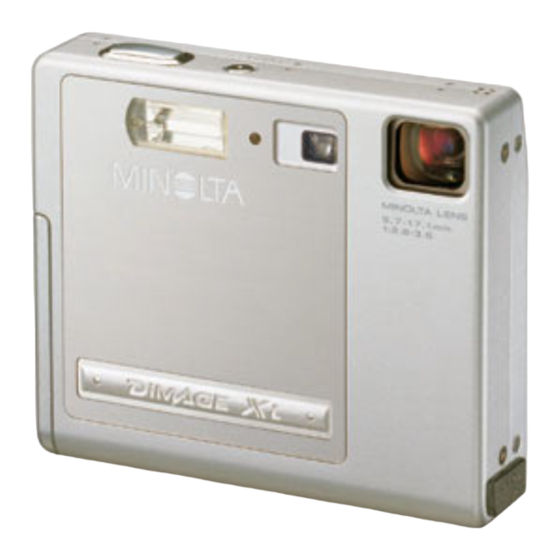
AMES OF PARTS * This camera is a sophisticated optical instrument. Care should be taken to keep these surfaces clean. Please read the care and storage instructions in the back of this manual (p. 90). Flash (p. 26) Main switch Self-timer lamp (p. -
Page 7: Getting Up And Running
For more on the AC cable, see page 86. Changing the lithium-ion battery This digital camera uses one NP-200 lithium-ion battery. Before using the battery, read the safety warnings on pages 3 and 4 of this manual. When replacing the battery, the camera should be turned off. -
Page 8: Battery-Condition Indicator
ETTING UP AND RUNNING Battery-condition indicator This camera is equipped with an automatic battery-condition indicator displayed on the LCD monitor. The icon will change from white to red when battery power is low. Full-battery icon - the battery is fully charged. This icon is dis- played for three seconds when the camera is on or switched between the recording or playback mode. -
Page 9: Installing And Removing A Memory Card
ETTING UP AND RUNNING Installing and removing a memory card Always turn off the camera and confirm the indicator lamp is not orange and blinking before changing the memory card, otherwise the card may be damaged, and data lost. An SD (Secure Digital) Memory card or MultiMediaCard must be inserted for the camera to operate. -
Page 10: Setting The Date And Time
ETTING UP AND RUNNING Setting the date and time After initially inserting a memory card and charging the battery, the camera’s clock and calendar must be set. When images are recorded, the image data is saved with the date and time of recording. Depending on the region, the menu language may also have to be set. -
Page 11: Recording Mode
ECORDING MODE RECORDING MODE This section covers the basic recording operation as well as advanced recording func- tions. To start using the camera, read pages 20 through 29. Many of the recording functions are controlled with menus. The menu navigation sections concisely describe how to change menu settings. -
Page 12: Lcd Monitor Display - Recording Mode
ECORDING MODE LCD monitor display - recording mode Microphone indicator Recording mode Flash modes (p. 26) Exposure compensation (p. 48) White balance (p. 38) Camera-sensitivity display (p. 44) Wide focus frame (p. 50) Spot focus area (p. 50) Date-imprinting indicator (p. 46) Camera-shake warning If the shutter speed falls below the point where the camera can be hand held safely, the camera-shake warning indicator will appear on... -
Page 13: Focus Lock
3m (10ft) at the telephoto position. Focus signals This digital camera has a quick, accurate autofocusing system. The focus icon in the lower right corner of the LCD monitor and the indicator lamp next to the viewfinder indi- cate the focus status. -
Page 14: Flash Modes
ECORDING MODE Flash modes The flash can be used when taking still images. To set the flash mode, simply press the flash mode/delete button (1) on the back of the camera until the desired mode is dis- played. The active flash mode is displayed in the top left corner of the LCD monitor. -
Page 15: Navigating The Recording-Mode Menu
ECORDING MODE Navigating the recording-mode menu Camera operations and recording functions are controlled on the menu. Navigating the menu is simple. The menu button turns the menu on and off. The zoom lever and left and right keys control the cursor and change settings on the menu. The enter button selects menu options and sets adjustments. -
Page 16: Continuous Advance
ECORDING MODE Drive modes The drive modes control the rate and method images are captured. Icons indicating the selected drive mode appear on the monitor. The drive mode is selected in the basic section of the recording-mode menu (p. 28). If auto reset (p.40) is active, the drive mode is reset to single-frame advance when the camera is turned off. - Page 17 ECORDING MODE Self-timer Used for self-portraits, the self-timer will delay the release of the shutter for approximately ten seconds after the shutter-release button is pressed. The self-timer drive mode is selected in the basic section of the recording-mode menu (p. 28). With the camera on a tripod, compose the picture as described in the basic recording operation section (p.
-
Page 18: Image Size
ECORDING MODE Audio recording 30 minutes of audio can be recorded without an image. The audio-recording drive mode is selected in the basic section of the recording-mode menu (p. 28). When the function is active, the live view is replaced with a blue screen. -
Page 19: The Frame Counter And Memory Card Capacity
ECORDING MODE Image quality This camera has four image-quality settings: super fine, fine, standard, and economy. Always select the desired setting before taking the picture. Image quality is set in the basic section of the recording-mode menu (p. 28). Image quality controls the rate of compression, but has no effect on the number of pixels in the image. -
Page 20: Automatic White Balance
ECORDING MODE White balance White balance is the camera’s ability to make different types of lighting appear neutral. The effect is similar to selecting daylight or tungsten film, or using color compensating filters in conventional photography. One automatic and four preset white-balance setting are available with still image and movie recording. -
Page 21: Auto Reset
ECORDING MODE Auto reset When auto reset is active, the following functions return to their program setting when the camera is turned off: Function Reset to Flash mode* Auto Drive mode Single-frame advance White balance Auto Camera sensitivity Auto LCD monitor Full display Spot focus area Wide focus frame... -
Page 22: Instant Playback
ECORDING MODE Instant playback After a still image is captured, it can be displayed on the monitor for two seconds before being saved. Instant playback shows the last frame in the series when used with the continuous- advance drive mode (p. 31). When the LCD monitor is turned off (p. -
Page 23: Camera Sensitivity - Iso
ECORDING MODE Camera sensitivity - ISO Four camera sensitivity settings can be selected with a still image: Auto, 50, 100, 200, 400; the numerical values are based on an ISO equivalent. ISO is the standard used to indicate film sensitivity: the higher the number, the more sensitive the film. -
Page 24: Setting The Date And Time
ECORDING MODE Imprinting the date and time The date of recording can be printed directly on the image. The imprinting function must be activated before the image is taken. Once activated, the date will continue to be imprinted until the function is reset: a yellow bar is displayed next the frame counter on the monitor to indicate the imprinting function is active. -
Page 25: Exposure Compensation
ECORDING MODE Exposure compensation The camera exposure can be adjusted to make the final picture lighter or darker by as much as ±2Ev in 1/3 increments with still image and movie recording. The exposure-compensation value will remain in effect until it has been reset. - Page 26 ECORDING MODE Spot AF The spot AF is used for selective focusing. Both focus and exposure are determined with the spot focus area. Press and hold the enter button (1) to switch between the wide focus frame and the spot focus area. Place the sub- ject inside the spot focus area (2) and pressing the shutter-release button part- way down to lock the focus and the...
-
Page 27: Display Button - Recording Mode
ECORDING MODE Display button - recording mode The display-information button controls the LCD monitor display. The display cycles to the next position each time the button is pressed: full display, live image only, and mon- itor off. If the display button is pressed and held, the LCD-brightness adjustment screen will appear, see page 45. -
Page 28: Playback Mode
LAYBACK MODE PLAYBACK MODE This section details how to view and edit images on the camera. Basic operation of the playback mode is covered from page 54 to 60. Detailed descriptions of the playback menu settings follow the menu navigation section. Single-frame playback display Mode indicator Magnification display (p. -
Page 29: Enlarged Playback
LAYBACK MODE Display button - playback mode The display button controls the display format. Each time the button is pressed, the display cycles through to the next format: full display, image only, index playback. Full display Display button Index playback In index playback, the left and right keys, and zoom lever moves the yellow border around the index thumbnails. -
Page 30: Navigating The Playback-Mode Menu
LAYBACK MODE Navigating the playback-mode menu In playback mode, simply press the menu button to activate the menu. The menu is used to edit images and control camera operations. Activate the playback-mode menu with the menu button. The “Basic” tab at the top of the menu will be highlighted. Use the left/right keys to highlight the appropriate menu tab;... -
Page 31: Audio Captioning
LAYBACK MODE Frame-selection screen When a marked-frames setting is chosen on the menu, the frame selection screen will appear. This screen allows multiple image and audio files to be chosen. The left and right keys move the yellow border to select the frame. -
Page 32: Deleting Image And Audio Files
LAYBACK MODE Deleting image and audio files Deleting permanently erases the image or audio file. Once deleted, a file cannot be recovered. Care should be taken when deleting files. Single, multiple, or all image or audio files on the memory card can be deleted with the playback-mode menu. -
Page 33: Creating A Dpof Print Order
LAYBACK MODE About DPOF This camera is supported by DPOF version 1.1. DPOF (Digital Print Order Format) allows direct printing of still images from digital cameras. After the DPOF file is created, the memory card is simply taken to a photofinishing service or inserted into the card slot of DPOF compatible printers. -
Page 34: Folder Name
The next three letters refer to Minolta, and the last two numbers indicate the camera used; 15 indicates a DiMAGE Xi. A date folder name also starts with the three digit serial number and is followed by one register for the year, two register for the month, and two registers for the day: 101YMMDD. -
Page 35: File # Memory
LAYBACK MODE File Number (#) Memory If file number memory is selected, when a new folder is created, the first file stored in the folder will have a number one greater than the last file saved. If the file # memory is disabled, the image file name will have a number one greater than the last image saved in the folder. -
Page 36: Formatting Memory Cards
LAYBACK MODE Formatting memory cards When a memory card is formatted, all data on the card is erased. The formatting function is used to erase all data on a memory card. Before formatting a card, copy the data to a computer or storage device. Locking images will not protect them from being deleted when the card is formatted. -
Page 37: Data-Transfer Mode
The updated version of the driver software included on the supplied DiMAGE software CD-ROM is required for the operation of the DiMAGE Xi with a computer. The new software will have no affect on the performance of the DiMAGE 7, 5, S304, S404, 2330, or X. -
Page 38: Automatic Installation
TRANSFER MODE Turn on the camera to initiate the USB connection. • While the camera is connected to a computer, the data-transfer screen will be displayed. When the camera is properly connected to the computer, a drive icon, or volume, will appear. When using Windows XP or Mac OS X, a window will open requesting instructions on what to do with the image data;... -
Page 39: Manual Installation
TRANSFER MODE Manual installation To install the Windows 98 driver manually, follow the instructions in the connecting-the- camera-to-a-computer section on page 73. When the camera is plugged into the com- puter, the operating system will detect the new device and the add-new-hardware- wizard window will open. -
Page 40: Connecting To Mac Os 8.6
TRANSFER MODE Connecting to Mac OS 8.6 To access this camera with a computer with Mac OS 8.6, the USB storage support 1.3.5.smi must be installed first. This software is supplied by Apple Computer, Inc. free of charge. It can be downloaded from the Apple web site at http://www.apple.com. To download and install this software, follow the instruction on the Apple web site. -
Page 41: Memory Card Folder Organization
TRANSFER MODE Memory card folder organization Once the camera is connected to the computer, image and audio files can be accessed by double clicking on icons. To copying images and audio recordings, simply drag and drop the file icon into a location in the computer. Drive Icon The misc. -
Page 42: Disconnecting The Camera From A Computer
TRANSFER MODE Disconnecting the camera from a computer Windows 98 and 98SE Never remove the Confirm the indicator lamp is not lit. USB cable while the Turn off the camera and then dis- viewfinder indicator connect the USB cable. lamp is lit! Windows Me, 2000 professional, and XP To disconnect the camera, click once on the unplug-or-eject-hardware icon located on the task bar. -
Page 43: Appendix
ROUBLESHOOTING This section covers minor problems with basic camera operation. For major problems or damage, or if a problem continues to reoccur frequently, contact a Minolta service facility listed on the back cover of this manual. Problem Symptom Cause The battery is dead. The auto-power-off func- tion has shut down the Nothing dis-... - Page 44 ROUBLESHOOTING Problem Symptom Cause Subject Viewfinder was used for framing. Parallax appears too is apparent with subjects closer than 1m far to the right (3ft.) at the zooms’ wide-angle position or in the image. 3m (10ft) at the telephoto position. Part of the Viewfinder The lens was partially...
-
Page 45: System Accessories (Sold Separately)
ROUBLESHOOTING Removing the driver software - Windows 1.Insert a memory card in the camera and connect it to the computer with the USB cable. Other devices must not be connected to the computer during this procedure. 2.Right click on the My-computer icon. Select “properties” from the drop-down menu. Windows XP: from the start menu go to the control panel. -
Page 46: Memory Cards
ARE AND STORAGE Camera care • Do not subject the camera to shock or impact. • Turn off the camera when transporting. • This camera is neither waterproof nor splashproof. Inserting or removing the battery or memory card, or operating the camera with wet hands may damage the camera. •... -
Page 47: Before Important Events Or Journeys
Cet appareil numérique de la classe B est conforme à la norme NMB-003 du Canada. This device complies with Part 15 of the FCC Rules. Operation Digital Camera: is subject to the following two conditions: (1) This device may not cause harmful interference, and (2) this device must accept... -
Page 48: Technical Specifications
ECHNICAL SPECIFICATIONS Number of effective pixels: 3.2 million CCD: 1/2.7-type interline complementary-color CCD with a total of 3.3 million pixels. Camera sensitivity (ISO): Automatic (between ISO 50 - 160 equivalent), ISO50, 100, 200, 400 Aspect ratio: Lens construction: 9 elements in 8 groups. Maximum aperture: f/2.8 - f/3.6 Focal length:... - Page 49 Minolta Co., Ltd. Minolta Corporation Minolta Canada Inc. Minolta Europe GmbH Reparatur/Repair Minolta France S.A.S. Minolta (UK) Limited Minolta Austria Ges. m.b.H. Minolta Camera Benelux B.V. Zonnebaan 39, P.O. Box 6000, NL-3600 HA Maarssen, The Netherlands Belgian Branch Minolta (Schweiz) AG Minolta Svenska AB Finnish Branch Minolta Portugal Limitada...
Need help?
Do you have a question about the DiMAGE Xi and is the answer not in the manual?
Questions and answers