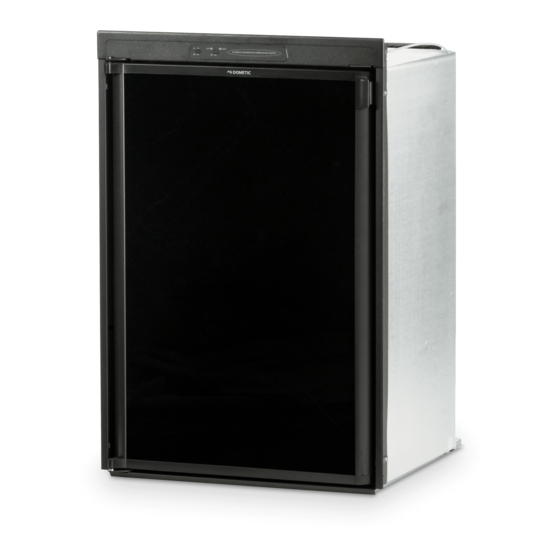
Dometic RM2351 Diagnostic Service Manual
Dometic americana & americana plus refrigerators
Hide thumbs
Also See for RM2351:
- Installation instructions manual (54 pages) ,
- Installation & operating instructions manual (40 pages) ,
- Operating instructions manual (28 pages)
Table of Contents
Advertisement
DIAGNOSTIC SERVICE MANUAL
RM 2351, RM 2354, RM 2451, RM 2454
RM 2551, RM 2554, RM 2652, RM 2662
RM 2663, RM2852, RM2862 & NDR1062
USA
SERVICE OFFICE
Dometic Corporation
2320 Industrial Parkway
Elkhart, IN 46516
574-294-2511
CANADA
Dometic Distribution
46 Zatonski Unit 3
Brantford, Ontario
CANADA N3T 5L8
519-720-9578
For Service Center
Assistance Call:
800-544-4881
Form No. 3311143.000 9/07
©2007 Dometic Corporation
LaGrange, IN 46761
AMERICANA & AMERICANA PLUS
3311143.000
Advertisement
Table of Contents

Related Manuals for Dometic RM2351


Summary of Contents for Dometic RM2351
- Page 1 SERVICE OFFICE Dometic Corporation 2320 Industrial Parkway Elkhart, IN 46516 574-294-2511 CANADA Dometic Distribution 46 Zatonski Unit 3 Brantford, Ontario CANADA N3T 5L8 519-720-9578 For Service Center Assistance Call: 800-544-4881 Form No. 3311143.000 9/07 3311143.000 ©2007 Dometic Corporation LaGrange, IN 46761...
-
Page 2: Safety Instructions
This service manual is the result of the dedica- This manual has safety information and instruc- tion of The Dometic Corporation Technical staff tions to help users eliminate or reduce the risk and its engineers in giving service people the of accidents and injuries. -
Page 3: Table Of Contents
contentS Page no. dIagnoStIc floW cHart................4 SectIon 1 oPeratIon Refrigerator Operation ...................6 SectIon 2 ac Voltage AC Voltage Requirements................9 SectIon 3 ac comPonentS Heating Element ..................10 SectIon 4 dc Voltage DC Voltage Requirements ...............10 SectIon 5 dc comPonentS DC heating Element ........ - Page 4 contentS Page no. SectIon 7 7.5 Flue Baffle.....................20 7.6 Flue Cap ....................20 7.7 Flue Tube .....................20 SectIon 8 coolIng unIt 8.1 Leveling....................21 8.2 Ventilation ....................21 8.3 Air Leaks....................23 8.4 Interior Liner Seal to Frame ..............23 8.5 Door Position ..................24 8.6 Ambient Temperature ................24 8.7 Cooling Unit ...................25 8.8 Food Storage ..................26...
- Page 5 This program will address the most common system problems associated with the RM2351, RM2354, RM2451, RM2454, RM2551, RM2554, RM2652 ,RM2662,RM2663,RM2852and RM2862 refrigerators supplied by The Dometic Corporation. Our intent is to provide you with a guideline of checks to make, should you encounter one of the following symptoms.
- Page 6 SYMPTOM CAUSE SECTION & PAGE 4, page 10 Check light on DC Volts 9, page 26 Wiring 6, page 19 LP Gas 7, page 19 Manual Gas Valve 5. page 11 Solenoid 7. page 19 Orifice 7. page 20 Burner 7.
-
Page 7: Refrigerator Operation
SectIon 1 refrIgerator oPeratIon dISPlay Panel rm2351, rm2451, rm2551, rm2652, rm2852 auto temPerature control refrigerator control Panel RM2652 & RM2852 amerIcana 2-Way model RM2662 & RM2862 Main Power Button ON/OFF 2. AUTO/GAS Mode Selector Button A. AUTO Mode indicator lamp B. -
Page 8: Operation 1
dISPlay Panel rm2354, rm2454, rm2554 rm2663 3-way dISPlay Panel rm2662, rm2862 2-Way refrigerator control Panels 3-Way 2-Way 3-Way RM2454 & RM2554 1. Main Power Button ON/OFF 2. DC Mode Selector Button 3. AUTO/GAS Mode Selector Button 4. Temperature Selector Button A. -
Page 9: Operation Instructions
oPeratIon InStructIonS oPeratIon auto thermostat A continuous 12 volt DC supply must be available for ImPortance of leVelIng a the electronic control to function. refrIgerator Press the main power ON/OFF button (1) to In an absorption refrigerator system, ammonia is liquefied the DOWN position. -
Page 10: Ac Voltage
a period of approximately 45 seconds with two min- note: Do not continue to reset GAS operation if the utes (purge) interval after each trial. If unsuccessful, the CHECK indicator lamp continues to be illuminated after CHECK indicator lamp (B) will illuminate. To restart GAS several tries. -
Page 11: Heating Element
DC power. The converter and alternator pro- duce DC power by a series of diodes that rectify alternat- ing current to DC. The Dometic control system will only tolerate up to 6 AC volts on the DC line. AC ripple can be measured by a digital voltmeter set on the AC scale at the main DC terminal block connections at the refer. -
Page 12: Dc Components
P2 connector. 5.4 Igniter The igniter used on Dometic model refrigerators operates on 12 volt DC. On gas operation the igniter senses the resistance through the flame between the electrode and burner. -
Page 13: High Voltage Cable
5.5 High Voltage cable If sparking starts during trial-for-ignition, the cable is good. If there is no sparking during trial-for-ignition, disconnect this is an energized circuit. Shock can occur DC power at the refrigerator terminal block or switch unit off. Disconnect high voltage cable from electrode. Re- if not tested properly. -
Page 14: Upper Circuit Board
Wires from control board P3 harness to relay. 5.9 lower circuit Board Terminal 85 P3-3 harness blue negative. Terminal 86 P3-4 harness blue positive. WIRING Original style control 3 way & 2 way Wires to relay from DC source and DC heater. Note: 2 Way will not have a J1 for DC heater Terminal 87 to DC heater positive. - Page 15 WIrIng orIgInal Style control 3 / 2 Way, 2 Way WIll not HaVe a J1 to dc Heater...
- Page 17 WIrIng Intergrated IgnIter control Part number 3850712013...
- Page 18 22 range, check power supply, terminal block and correct and communicates with the lower main control. The inte- power source before going on with the test. grated igniter used on certain Dometic model refrigerators operates on 12 volt DC thru the control board. On gas ac mode operation the igniter senses the resistance through the flame between the electrode and burner.
-
Page 19: Door Switch
5.10 door Switch When the low ambient control is turned on it by-passes The door switch is an open switch when the switch arm the interior light switch and turns on the interior light. The is depressed (interior light should be off). When the re- heat load of the 10 watt light bulb will cause the cooling frigerator door is open the switch is closed (interior light unit to cycle approximate every 35 to 55 minutes. -
Page 20: Lp Gas Requirements
7.2 Orifice there is a pressure test port below the solenoid valve as- The Dometic orifice is a brass alloy with a man-made ruby sembly. pressed in the center that has been laser-beam drilled in a spiral pattern. -
Page 21: Thermocouple
Anything below 10 to 13 the control board will not keep cleaned periodically, at least once a year. Clean by using the gas valve energized and turn on the check light after a flue brush, Dometic Part No. 0151404001. the 45 second trial-for-ignition. 7.4 Burner The slots in the burner should be directly below the flue tube. -
Page 22: Cooling Unit
SectIon 8 coolIng unIt typical roof Vent and Side Wall Vent 8.1 leveling Leveling is one of the requirements for proper operation of absorption refrigerators. The absorption design utilizes no mechanical pumps or compressors to circulate the re- frigerant within the system, so proper leveling must be maintained to provide the correct refrigerant flow. - Page 23 typical two Side Wall Vent application. always refer to Vent Instructions 3308666.xxx...
-
Page 24: Air Leaks
8.3 air leaks 8.4 Interior liner Seal to frame Check the gasket on the doors to be sure of a positive There is a seal that is applied to the liner in the area air seal. A simple method to check gaskets is to close where the metal frame makes contact with the interior the door on a dollar bill, then pull the dollar bill out. -
Page 25: Door Position
note: To form a proper seal, it is important not to leave any gaps. 8.5 door Position If the upper or lower door is closing too high or low against the frame, cold air leakage can occur. Adding or deleting a flat thin washer on top of the lower or middle hinge pin can raise or lower the door position. -
Page 27: Cooling Unit
120 volts AC before the ice maker can operate. erator. The water line manual shutoff valve (not part of Dometic To reduce frost formation in and on the freezing compart- unit) must be open. To start making ice, move the ice level ment, cover stored liquids and moist foods and do not bail arm to DOWN position. -
Page 28: Mold Heater
10.4 mold thermostat When the ice maker thermostat senses the preset tem- perature for ejection of the ice cubes, the fingers will start This is a single-pole, single-throw, bimetal switch. It starts to rotate, dumping any ice cubes and filling the mold with an ejection cycle by closing at 15º... -
Page 29: Timing Motor
10.9 Ice maker replacement this is an energized circuit. Shock can occur 10.7 timing motor if not tested properly. testing is to be done by a qualified service technician. This is a low-wattage, stall-type motor which is geared to the timing cam and ice ejector. It is a one RPM motor. To It may be necessary to replace the entire ice maker as- check the motor, disconnect power to the appliance and sembly. -
Page 30: Water Supply
WHITE AC NEUTRAL TO BOARD J6 BLACK AC LINE 12 VDC POSITIVE TO BOARD J5 J2 OR J3 HEATER WATER LINE 10.11 Water Supply To operate properly, the water pressure in the water sup- ply line must be between 15 lbs. PSI and 125 lbs. PSI. Lower water pressure, water turned off, or obstructions or air in the water line can cause low or no ice produc- tion. - Page 32 note tHe relatIVe PoSItIon of tHeSe comPonentS In tHe folloWIng ScHematIcS non energIzed cIrcuIt energIzed cIrcuIt after a few degrees of motor rota- tion, the timing cam switches the holding switch to its normally open position; this assures completion of the cycle.
- Page 33 once again after a few degrees of rotation the timing cam closes the Near the completion of the first rev- holding switch providing a circuit to olution, the timing cam closes the the motor that will assure completion water valve switch. However since of this revolution.
- Page 34 near the completion of the second revolution the timing cam again closes the water valve switch. this the ejection cycle ends the mo- time a circuit is completed through ment that the holding switch the water valve solenoid, its switch is closed by the timing cam.