Table of Contents
Advertisement
Advertisement
Table of Contents

Related Manuals for Solair World SWWR-26GW

Summary of Contents for Solair World SWWR-26GW
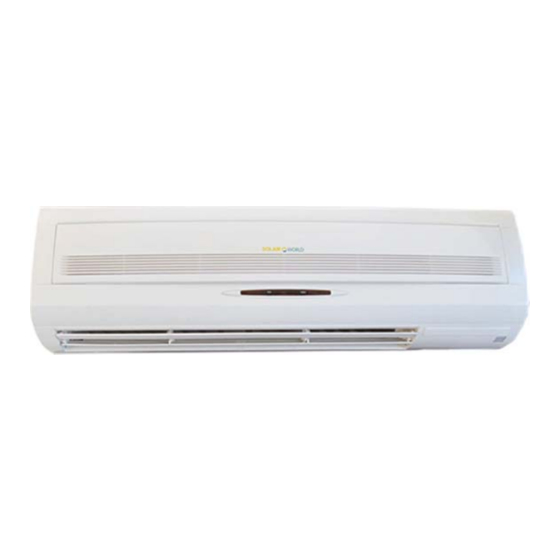
- Page 1 “An energy revolution where your comfort costs less” Relax In comfort with SolAir World’s Thermal Boosted Hybrid Air Conditioners INSTALLATION AND OPERATION INSTRUCTION MANUAL FOR: SWWR-26GW SWWR-35/35G SWWR-35GW SWWR-72/72G SWWR-60GW SWWR-35/72G SWWR-72GW...
- Page 2 Air Conditioner Installer. 2. The Installation Guide section in this manual is specifically for qualified, SolAir World Accredited Air Conditioner Installers to refer to whilst carrying out install 3. Please ensure that you read the ‘Operating Instructions’ section of this manual before using your system.
-
Page 3: Table Of Contents
Operating Instructions and Installation Guide Wall Mounted Split System Contents Note to users. Page 1 ..........................1. General Information Page 4 SWWR-35GW..............Page 5 Page 6 SWWR-60GW..............Page 7 SWWR-72GW..............Page 8 Dual Head................ Page 9 1.2 Safety Information......................Page 10 1.3 System Operating Principles.................... -
Page 4: General Information
Operating Instructions and Installation Guide Wall Mounted Split System Section 1 General Information _______________________ Page 3... - Page 5 Operating Instructions and Installation Guide Wall Mounted Split System System Specifications SolAir World SWWR-26GW Rated Cooling Capacity (Watts) 2600 Rated Heating Capacity (Watts) 2900 Rated Power Input (Volts/Hertz) 220V/50Hz/60Hz Rated Cooling Power Input (Watts) 480 - 600 Rated Cooling Input Current (Amperes) 2.00 - 2.50...
- Page 6 Operating Instructions and Installation Guide Wall Mounted Split System System Specifications SolAir World SWWR-35GW Rated Cooling Capacity (Watts) 3500 Rated Heating Capacity (Watts) 3800 Rated Power Input (Volts/Hertz) 220V/50Hz/60Hz Rated Cooling Power Input (Watts) 580 - 800 Rated Cooling Input Current (Amperes) 2.34 - 3.36...
- Page 7 Operating Instructions and Installation Guide Wall Mounted Split System SolAir World SWWR-60GW Rated Cooling Capacity (Watts) 6000 Rated Heating Capacity (Watts) 6600 Rated Power Input (Volts/Hertz) 220V/50Hz/60Hz Rated Cooling Power Input (Watts) 1160 - 1390 Rated Cooling Input Current (Amperes) 4.84 - 5.79...
- Page 8 Operating Instructions and Installation Guide Wall Mounted Split System SolAir World SWWR-72GW Rated Cooling Capacity (Watts) 7200 Rated Heating Capacity (Watts) 7900 Rated Power Input (Volts/Hertz) 220V/50Hz/60Hz Rated Cooling Power Input (Watts) 1540 - 1760 Rated Cooling Input Current (Amperes) 6.43 - 7.34...
- Page 9 Operating Instructions and Installation Guide Wall Mounted Split System SolAir World SWWR-35/35GW SWWR-72/72GW SWWR-35/72GW The Dual Head Unit has the ability for you to operate two indoor units from one outdoor unit. Each indoor unit can be operated individually and also installed in adjourning properties having the advantage of being able to be metered separately.
- Page 10 1.2 Safety Information Safety Warnings: The SolAir World Thermal Boosted Air Conditioning System should only be installed, repaired and maintained by a qualified licensed air conditioner installer. Please switch off the power to the system in the event of an electrical storm in order to prevent damage to the system.
- Page 11 Operating Instructions and Installation Guide Wall Mounted Split System 1.3 System Operating Principles * The Air Conditioning System uses both mains electrical power and solar thermal energy. The Air Conditioning System always requires mains electrical power to operate fans and electric control components.
- Page 12 Operating Instructions and Installation Guide Wall Mounted Split System 1.3 System Operating Principles ___________________________ _______________________ Page 11...
- Page 13 Operating Instructions and Installation Guide Wall Mounted Split System 1.4 System Components Please note that the graphic example below is based on the standard SolAir World Thermal Boosted front panel air inlet power plug remote signal receiver air filter air filter...
- Page 14 Operating Instructions and Installation Guide Wall Mounted Split System Section 2 Installation Guide _______________________ Page 13...
- Page 15 ______________ Non Failure Conditions When the SolAir World Air Conditioning System is turned on or off sometimes you will hear a sizzling malfunction. The SolAir World Air Conditioning System cannot instantly restart after it is stopped, even though it is switch on.
-
Page 16: Pump Down
Operating Instructions and Installation Guide Wall Mounted Split System 3.4 Trouble Shooting ______________ NOTICE If the actual pressure is higher than shown, the system is most likely over-charged, and charge should be removed. If the actual pressure is lower than shown, the system is most likely undercharged, and charge should be added. - Page 17 Operating Instructions and Installation Guide Wall Mounted Split System 2.0 Trouble Shooting Instructions relating to heating (*) are applicable only to “HEAT & COOL MODEL” (Reverse Cycle) WARNING! In the event of a malfunction (burning smell, etc.), immediately stop operation, disconnect the Power Supply Plug or turn off the circuit breaker, and consult authorized service personnel.
-
Page 18: Operating Tips
Operating Instructions and Installation Guide Wall Mounted Split System 2.0 Trouble Shooting Symptom Item to check Water is produced *During Heating operation, water may be produced from the outdoor from the out door unit dute to the Automatic Defrosting operation. unit: Has the circuit breaker been turned off? Doesn’t operate at all:... - Page 19 Operating Instructions and Installation Guide Wall Mounted Split System 2.0 Trouble Shooting _______________ E4 Troubleshooting Questionnaire Questions if the system has been operating normally before the E4 error code has appeared: 1) When does the E4 error code appear? Is it immediately after the air conditioner is turned on or does it appear after some operation? If so how many minutes from start-up to the error code appearing? 2) Check the indoor unit.
-
Page 20: Test Running
Operating Instructions and Installation Guide Wall Mounted Split System 2.0 Trouble Shooting _______________ Test Running 1. Check that all tubing and wiring are properly connected. 2. Check that the gas and liquid side service valves are fully open. Prepare remote 1. - Page 21 Operating Instructions and Installation Guide Wall Mounted Split System 2.0 Trouble Shooting ______________ NOTICE If the actual pressure is higher than shown, the system is most likely over-charged, and charge should be removed. If the actual pressure are lower than shown, the system is most likely undercharged, and charge should be added.
-
Page 22: Electrical Information
The power cord should be provided with effective grounding. The power circuit should be dedicated solely to the SolAir World System. electrical cable for SolAir World system and electrical cable for circuit... - Page 23 Notes: 1. The performance data of our products are tested under standard working conditions. 2. SolAir World air conditioners have been pre-gassed to suit these lengths of the connection pipes between the indoor and outdoor unit and are as following: * 2.6GW capacity 3.6m...
- Page 24 Operating Instructions and Installation Guide Wall Mounted Split System General Installation Information Thermal Collector Installation In ZONE 3 the unit must be installed with the panel facing the SOUTH TH or in direct sunlight to gain its best efficiency. For optimum performance the thermal collector should face SOUTH in the northern hemisphere and NORTH in the southern hemisphere.
- Page 25 60°C. the main difference between the two is the volume of the water in the water tanks. SolAir World Model No. Collector Type Volume of Water...
- Page 26 Operating Instructions and Installation Guide Ducted System 2.1 General Installation Information Heat Tube Collector The heat tube collector is mounted directly on the outdoor unit of the air conditioner. Copper refrigeration piping runs from the collector to the outdoor unit so that the heat collected in the heat tubes can be transferred to the refrigeration cycle taking place in the unit.
- Page 27 Operating Instructions and Installation Guide Wall Mounted Split System 2.2 Indoor Unit Installation Select the best Location Indoor Unit 1. There should not be any heat or steam near the unit. 2. Select a place where there are no obstacles around the unit.
-
Page 28: Fixing Installation Plate
Operating Instructions and Installation Guide Wall Mounted Split System 2.2 Indoor Unit Installation ____________________ Fixing Installation Plate The wall you select should be strong and solid enough to prevent vibration 1. Mount the installation plate on the wall with suitable fixing screws. -
Page 29: Flaring Work
Operating Instructions and Installation Guide Ducted System 2.2 Indoor Unit Installation Flaring Work procedure. Cut the pipes and the cable. 1. Use the piping kit accessory or the pipes purchased locally. 2. Measure the distance between the indoor and the outdoor unit. -
Page 30: For Right Rear Piping
Operating Instructions and Installation Guide Wall Mounted Split System 2.2 Indoor Unit Installation Check work again. Connecting the Piping Indoor 1. Prepare the indoor unit's piping and drain hose for installation through the wall. 2. Remove the plastic tubing retainer (see the figure adjacent) and pull the tubing and drain hose away from chassis.. - Page 31 Operating Instructions and Installation Guide Wall Mounted Split System 2.2 Indoor Unit Installation 4. Indoor unit installation Hook the indoor unit onto the upper portion of the installation plate.(Engage the two hooks of the rear top of the indoor unit with the upper edge of the installation plate.) Ensure that the hooks are properly seated on the installation plate by moving it left and right.
-
Page 32: For Left Rear Piping
Operating Instructions and Installation Guide Wall Mounted Split System 2.2 Indoor Unit Installation For left rear piping 1. Route the indoor tubing and the drain hose to the required piping hole position. 2. Insert the piping, drain hose, and the connecting cable 3. - Page 33 Operating Instructions and Installation Guide Wall Mounted Split System Indoor Unit Installation Wrap the insulation material around the connecting portion. 1. Overlap the connection pipe heat insulation and the indoor unit pipe heat insulation material. Bind them together with vinyl tape so that there may be no gap. 2.
-
Page 34: Installation Guide At The Seaside
If you can't meet above guide line in the seaside installation, please contact SolAir World for the _______________________ Periodiaclly (more than once a year) cleaning of the dust or salt particles stuck on the heat exchanger by using water. - Page 35 Operating Instructions and Installation Guide Wall Mounted Split System 2.3 Outdoor Unit Installation The outdoor unit should be installed on a solid foundation, preferably on rubber vibration padding to ensure stable, quiet operation. The footing bolts of the outdoor unit should be either M8 or M10 The maximum allowable gradient in any direction is 5°...
- Page 36 Operating Instructions and Installation Guide Wall Mounted Split System 2.4 Evacuate Tube Thermal Collector Installation Please handle the Evacuated Tubes with care as they are made of glass and can be easily shattered. Install the tank supports on the panel of the outdoor unit using the bolts provided and the threaded holes in the panel of the outdoor unit;...
- Page 37 Operating Instructions and Installation Guide Wall Mounted Split System 2.4 Evacuate Tube Thermal Collector Installation Insert the white plastic collars provided into the holes in the evacuated tube bracket. Lightly lubricate the black rubber seals provided with a detergent solution and slide them onto the evacuated tubes with the open end of the seal facing up towards the open end of the tube.
- Page 38 Operating Instructions and Installation Guide Wall Mounted Split System 2.5 Flat Panel Thermal Collector Installation ertically as possible. The maximum angle the panel can be installed from vertical is 10°. rmal collector and the outdoor unit is 1.5m. Please ensure that the installation site will not require more than 1.5m of refrigerant piping from the outdoor unit.
- Page 39 Operating Instructions and Installation Guide Ducted System 2.5 Flat Panel Thermal Collector Installation Lubricate the white plastic tee joint (water drain) with the detergent solution then push softly through the hole located on the right hand side of the panel, gently twist as you push to ensure that the silicon sealing ring inside isn’t dislodged;...
- Page 40 Operating Instructions and Installation Guide Wall Mounted Split System 2.6 Gassing Installation Remove the protective covering caps and connect the copper refrigerant piping from the two top connections A1 and A2 on the bottom right of the outdoor unit to the connections on the top right hand side of the thermal collector.
- Page 41 Operating Instructions and Installation Guide Wall Mounted Split System 2.6 Gassing Installation Use a spanner to loosen the stud type copper sealing attachment by half a circle upon the air pipe of A1 cut-off valve. Use an inner hexagonal wrench to loosen the center of A2 cut-off valve 90° After 7 to 11 seconds, fasten up the A2 cut-off valve.
- Page 42 Operating Instructions and Installation Guide Wall Mounted Split System 2.7 Wiring Installation ________________ Always turn off the SolAir World System power at the power switch before conducting any wiring. l l a n i l n i l n i l model has a backup heater to maintain the temperature of the water in cold weather.
- Page 43 Operating Instructions and Installation Guide Wall Mounted Split System 2.7 Wiring Installation ________________ The electrical terminations are: E = Green/Yellow wire from White cable and Green/Yellow from Black cable. N = Blue wire from the White cable and Blue wire from Black cable 1 = Brown 2 = Yellow 3 = Red wire from the Black cable.
-
Page 44: Swwr-35Gw
Operating Instructions and Installation Guide Wall Mounted Split System 2.7 Wiring Installation ________________ SWWR-26GW SWWR-35GW SWWR-60GW SWWR-72GW SWWR-35/35GW SWWR -72/72GW SWWR-35/72GW _______________________ Page 42... -
Page 45: Operating Instructions
Operating Instructions and Installation Guide Wall Mounted Split System Section 3 Operating Instructions _______________________ Page 43... -
Page 46: General Operating Instructions
Operating Instructions and Installation Guide Wall Mounted Split System 3.1 General Operating Instructions __________________________ Optimum Operation indoor temperature of 24°C is recommended to achieve a sustaina ble balance between comfort and When cooling please ensure that curtains or shutters are closed to reduce the heating effect of direct sunlight. - Page 47 Operating Instructions and Installation Guide Wall Mounted Split System 3.2 Remote Control Function ______________________ Remote Control Button Displays Signal Transmitting section Operation display Temp. adjustment button Fan speed control button Horizontal fvan control button e button Power ON/OFF button Sleep mode set button Swing button Operation Selection button Timer off button...
- Page 48 Operating Instructions and Installation Guide Wall Mounted Split System 3.2 Remote Control Function ______________________ Warning To Change Batteries Operate Automatically the appliance before it is scrapped and ensure they are disposed. Remove the back lid and insert According to the room temperature when two batteries.
- Page 49 Operating Instructions and Installation Guide Wall Mounted Split System 3.2 Remote Control Function ______________________ Caution To select the “COOL” “DRY” 1. When the room temperature is slightly lowered in the outdoor and indoor unit operate “FAN” “ON/OFF” modes occasionally for “DRY” operation. 2.
-
Page 50: Remote Control Function
Operating Instructions and Installation Guide Wall Mounted Split System 3.2 Remote Control Function _______________________ Page 48... -
Page 51: Routine Maintenance
Operating Instructions and Installation Guide Wall Mounted Split System 3.3 Routine Maintenance ____________________ Thermal Collector Always turn off the Air Conditioning System power at the power switch before conducting any maintenance. The water inside the solar collector and the copper piping entering and exiting the thermal collector can reach temperatures of up to 85°C, please take care when chec Take particular care with water exiting the water drain. - Page 52 Operating Instructions and Installation Guide Wall Mounted Split System __________________ 3.3 Routine Maintenance Front panel maintenance Air filter maintenance Cut off the power supply Please clean the air filter after using it for about 100 hours. Turn off the appliance first before disconnecting Clean as follows: from the power supply.
-
Page 53: Outdoor Unit
Wall Mounted Split System 3.3 Routine Maintenance Outdoor Unit Always turn off the SolAir World Thermal Boosted Hybrid Air Conditioning System power at the power switch before conducting any maintenance. The copper piping entering and exiting the outdoor unit can reach temperature of up to 85°C, please take care when inspecting or cleaning the outdoor unit. -
Page 54: Packing Lists
Operating Instructions and Installation Guide Wall Mounted Split System 3.5 Packing List ___________ Outdoor Unit Packing List SWWR-26GW, SWWR-35GW, SWWR-60GW Name Spec. Quatntity Outdoor Unit Low Voltage Connecting Pipe High Voltage Connecting Pipe Plastic Belting Penetration SWWR-72GW Name Spec. Quatntity... -
Page 55: Packing List
Operating Instructions and Installation Guide Wall Mounted Split System 3.5 Packing List Solar Collector Packing List 1. Vacuum Tube Name Type Insulated Tank 1 pce Vacuuum Tube 10pcs (SWW(R)-26/35GW) 11pcs (SWW(R)-60/72GW) Insulated Tank Support 1 pc Collector Tube Bracket 1 pc Ventilation Cup Groupware 1 pc Tube Supporting Bowl... - Page 56 Operating Instructions and Installation Guide Wall Mounted Split System NOTES _______ __________________ Page 54...
Need help?
Do you have a question about the SWWR-26GW and is the answer not in the manual?
Questions and answers