Table of Contents

Related Manuals for Smart I HD Vehicle Accident Camera

Summary of Contents for Smart I HD Vehicle Accident Camera
- Page 1 Drive HD Vehicle Accident Camera User Manual 16.9 Version 1 Video Windows Built-in Night 1.5” LCD Supports Mac and Windows Video Video Compatible Compatible Microphone Operation Screen 1920x1080 up to 32GB 1280x720...
-
Page 2: Table Of Contents
Contents 1. Product Overview ................1.1. Product Features ..............1.2. What’s In The Box ............... 1.3. Button Functions ..............1.4. Installation ................1.5. Basic Operation ..............2. OSD Menu ..................2.1. Menu .................. 2.2. Video Settings ..............2.2.1. Movie Size ............2.2.2. -
Page 3: Product Overview
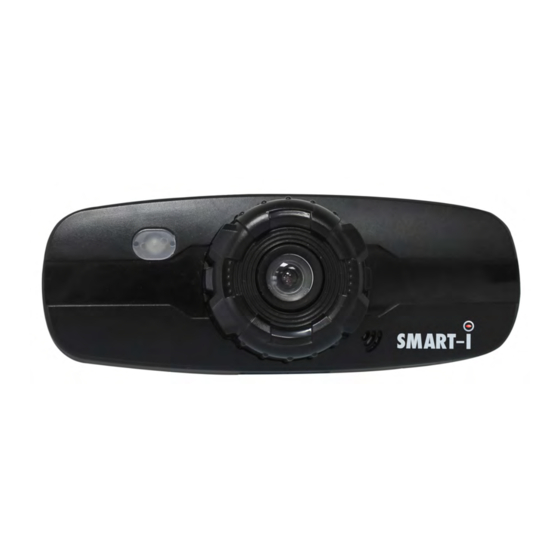
1. Product Overview Thank you for purchasing the Smart-i Drive Accident Camera from Smart-i. The Smart-i Drive records road events in HD (720P) to help drivers provide clear evidence of what really happened and help protect against false claims. The recorder is equipped with motion detection recording as well as snapshot recording. -
Page 4: Button Functions
1.3 Button Functions 1. Power Off / On Button 2. OK: Confirm key. Execution key for photograph / video recording / audio recording. 3. Reset Button 4. USB Port 5. Right Direction Key 6. Left Direction Key 7. Menu: Open Up Sub-Menu 8. -
Page 5: Installation
5. Take the ‘Car Charger’ out of the box. 6. Connect the USB end of the car charger to the Smart-i Drive and the other end to the Cigarette Lighter Power Socket in your vehicle. -
Page 6: Basic Operation
Manual - Press and hold the power On / Off button. Battery Please note the Smart-I Drive requires power all the time to be able to function. When not powered the unit’s built in battery will last enough time to close the last recording safely. -
Page 7: Osd Menu
2 OSD Menu HD (1280x720) D1 (848x480) 640 (640x480) Video Resolution O / On Date Stamp O / On Motion Detection O / On Loop Record 2 / 5 / 10 Minutes Video Loop Time O / 5 / 10 Minutes Continue On / O Video Sound... -
Page 8: Menu
2.1 Menu To enter into the system settings, press the ‘Menu’ button when in video mode. There are 2 menu options that you can choose to adjust, video and general settings. To switch between the 2 menus, press the ‘Mode’ button and then use the arrow buttons to choose between the menu options. Alternatively, to enter into the picture mode menu, press the ‘Mode’... -
Page 9: Date Stamp
2.2.2 Date Stamp The date stamp option allows you to add the time and date on the screen of the recorded videos. To adjust the time and date, go to section 2.4.5 on page 15. 2.2.3 Motion Detection By turning this function on, when a moving object is detected and the recorder will begin to record. -
Page 10: Loop Time
2.2.5 Loop Time This option allows you to change the video sizes when in loop record. By turning on this function, the unit will record for either 2, 5 or 10 minutes and then start a new video recording file. 2.2.6 Continue Turn on the continue function to enable the recorder to continue to record after the ignition has been switched off. -
Page 11: Picture Settings
Once you have adjusted the settings, press the ‘OK’ button to confirm. 2.3.1 Resolution Set the resolution of the image taken. The Smart-i Drive can take images up to 5 Megapixels. The resolution can be set to: 5 Megapixel (2592x1944) -
Page 12: Exposure
The exposure level can be adjusted from -2.0 to +2.0 (-2 being less light). 2.3.4 Driver Mode The Driver Mode option allows you to set the Smart-i Drive to take images using a timer or take several pictures at once in ‘burst’ mode. -
Page 13: General Settings
2.4 General Settings The general settings allow you to alter the following on the recorder: Sounds Power Frequency Power Save Options Date, Time and Language Formatting the SD Card LED Light Factory reset on the unit To enter into this menu, press the ‘Mode’ key when in the video or picture menu. To navigate between the options use the arrow keys. -
Page 14: Power Frequency
2.4.2 Power Frequency Set the power frequency on the recorder, this can be either 50Hz or 60Hz. 2.4.3 Power Save The power save option will allow the unit to record for longer. If the power save setting is turned on, the unit will be powered for longer without the need to re-charge as the screen will be turned off but the unit will still record. -
Page 15: Date / Time
2.4.5 Date / Time Change the Date and Time using the format shown above. This will be shown on the Date Stamp if you have turned that feature on. To adjust the date and time, use the arrow keys and press the ‘Mode’... -
Page 16: Format
2.4.8 Format Format the SD Card on the unit. Please Note: Formatting the card will erase all of the current recorded files, so please back these up before formatting. 2.4.9 LED Light The LED Light option allows you to switch the LED’s on or off. 2.4.10 Reset All Reset all the the settings to the factory default settings. -
Page 17: Version
2.4.11 Version View the version number and recorder details. -
Page 18: Recording & Playback
3 Recording & Playback 3.1 Video Recording To enter into video recording mode, turn on the recorder and press mode button until you see the icon on top of the screen. 3.1.1 Manual Recording 1. Turn on the recorder and press the ‘mode’ button until in the video record mode preview. The screen will display some general information, including current capture mode, preset size, remaining recording time. -
Page 19: Snapshot Mode
3.2 Snapshot Mode 1. To enter into snapshot recording mode, turn on the recorder and press the mode button until you see the icon on top of the screen. 2. Press the ‘OK’ key to take photo directly. 3. To set the picture parameters, press MENU key to pop-up menu. The user can set resolution, quality, white balance, etc. -
Page 20: Photo Browsing
3.4.2 Photo Browsing All photos will appear on the screen with no icon in the bottom left of the screen. When you have found the image you wish to view, press the ‘Menu’ to bring up the pop-up menu to lock or delete the files. -
Page 21: Connect To A Computer
4 Connect to a Computer There are 2 methods to connect the Smart-i Drive to a computer, Mobile HDD mode and PC Camera Mode. 4.1 Mobile HDD Mode This option will allow you to view recorded files and save them onto your computer from the memory card after it has been connected to the computer. -
Page 22: Specifications
5 Specifications Smart-i Drive Specifications 109x41x33mm Dimensions (WxHxD) Weight 1.5” Colour Screen Display USB Interface Micro SD Memory Card Up to 32GB 720P / VGA Recording Resolution Viewing Angle 72° G-Sensor Recording IR Light Photo Format: JPG. Resolution: 1.3MP Needs full time power supply Battery 0~40°C... - Page 23 Manufactured for: Smart-i, Unit 2 Valley Point, Beddington Farm Road, Croydon Surrey CR0 4WP...
Need help?
Do you have a question about the HD Vehicle Accident Camera and is the answer not in the manual?
Questions and answers