Table of Contents
Advertisement
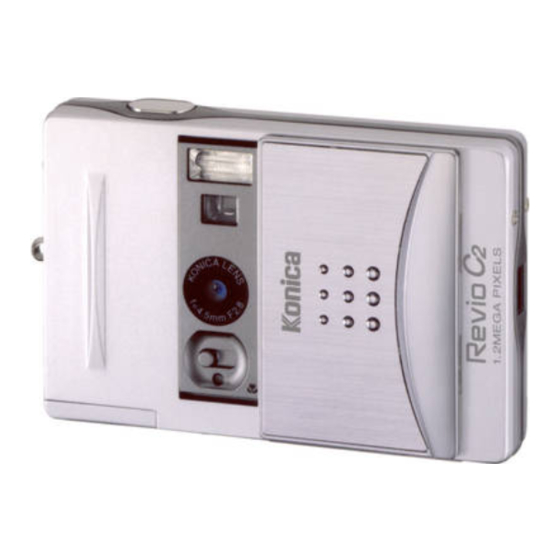
Digital Still Camera
User's Guide
Thank you for your purchase.
To ensure correct usage of this
product, please read this User's
Guide and the warranty card
carefully and keep them in a safe
place for future reference.
Before accepting the warranty card,
please make sure that the date of
purchase and the dealer's details
have been completed.
Advertisement
Table of Contents

Related Manuals for Konica Minolta Revio C2


Summary of Contents for Konica Minolta Revio C2
- Page 1 Digital Still Camera User's Guide Thank you for your purchase. To ensure correct usage of this product, please read this User's Guide and the warranty card carefully and keep them in a safe place for future reference. Before accepting the warranty card, please make sure that the date of purchase and the dealer's details have been completed.
-
Page 2: Table Of Contents
Contents Important Safety Precautions ............4 Preparations . - Page 3 On trademarks Windows 98, Windows 98SE, Windows 2000 Professional, Windows Me and Windows XP are trademarks or registered trademarks of Microsoft Corporation in the U.S. and other countries. Apple, Macintosh, Mac OS, and Power PC are trademarks or registered trademarks of Apple Computer in the U.S.
-
Page 4: Important Safety Precautions
Important Safety Precautions This product has been designed with full consideration to safety; however, please read the following ex- planations of the used symbols, warnings and cautions to ensure correct usage. The aim of the following warning and caution symbols is to prevent failures, property damage and/or in- jury to the user and other persons. -
Page 5: Internal Memory
Internal memory This product features an internal memory with a capacity of approximately 14 MB. Please note the fol- lowing points regarding the internal memory. • This product cannot be used with external memory. • Further recording is not possible when the internal memory is full. Format the memory (delete all) after downloading the images to your PC or make space by deleting unwanted images. -
Page 6: Preparations
Checking Package Contents Camera (1) Strap (1) Quick Guide (1) Warranty Card (1) Names of Parts Flash Viewfinder window Lens Macro switch DISPLAY button PLAY/REC button LCD monitor MENU button buttons AAA alkaline USB cable (1) battery (2) CD-ROM (1) Lens cover USB port Self-timer LED... -
Page 7: Recording Mode Screen
Recording mode screen Recording mode icon Flash mode icon Digital zoom icon Macro icon Picture quality icon Battery level icon Remaining number of frames Self-timer icon Exposure compensation icon and compensation value Playback mode screen Playback mode icon Digital zoom icon Picture quality icon Battery level icon Current frame number... -
Page 8: Installing The Batteries
Installing the Batteries Power supply 1. Batteries AAA alkaline batteries (supplied) Rechargeable AAA nickel-hydrogen batteries (sold separately) Inserting the AAA batteries Close the lens cover. Open the battery cover by sliding it in the direction of arrow. Insert the 2 AAA batteries with the poles aligned with the indications (+/-) inside the battery compartment. -
Page 9: Attaching The Strap
• Do not touch contacts with fingers since the battery life may decrease due to bad contact if oil or grease is deposited on the battery cover or metal parts within the battery compartment. If a contact is accidentally touched or battery life decreases, wipe with a soft, dry cloth before use. •... -
Page 10: Recording
How to Record Holding the camera • Hold the camera securely in both hands with your elbows pressed against the body for stable positioning. • Be careful not to obstruct the flash or lens with fingers or strap. How to Record Normal recording is performed with the subject at a distance of over 60 cm from the lens. -
Page 11: Recording Close-Up Subjects (Macro Recording)
Recording Close-up Subjects (Macro Recording) Macro recording is used when the subject is within a distance range of between 30 cm and 60 cm from the lens. Use the LCD monitor for macro recording as the recording range and the field of view in the viewfinder do not match. -
Page 12: Recording Still Pictures (Still)
Recording Still Pictures (STILL) For normal recording and macro recording, the REC MODE item in the REC menu should be set to “STILL”. Display the REC menu. Use the button to select Press the SET button. The REC MODE screen appears. Use the button to select “STILL”. -
Page 13: Recording Moving Pictures (Movie)
Recording Moving Pictures (MOVIE) You can record a ten-second movie. Display the REC menu. Use the button to select Press the SET button. The REC MODE screen appears. Use the button to select “MOVIE”. Press the SET button The mode becomes the MOVIE recording mode and Press the shutter button. -
Page 14: Setting The Picture Quality
Setting the Picture Quality You can select the picture quality of the image data to be recorded. Display the REC menu. Use the button to select Press the SET button. The QUALITY screen appears. Use the button to select the desired setting. The selected quality is indicated on the LCD monitor. -
Page 15: Changing The Brightness Of Images (Exposure)
Changing the Brightness of Images (EXPOSURE) The exposure can be compensated to intentionally brighten or darken the overall recorded image. The camera exposure can be adjusted up to ±1.5 at 0.5 intervals. Display the REC menu. Use the button to select Press the SET button. -
Page 16: Setting The Sharpness Of The Image (Sharpness)
Setting the Sharpness of the Image (SHARPNESS) The contours of images can be sharpened or softened. Display the REC menu. Use the button to select Press the SET button. The SETUP screen appears. Use the button to select Press the SET button. The SHARPNESS screen appears. -
Page 17: Changing The Brightness Of The Lcd Monitor (Monitor)
Adjust the “Month”, “Day”, “Hour”, and “Minute” in the same way as the “Year”. Pressing the MENU button returns you to the previous screen. When the “Minute” has been set, press the SET button. The confirmation screen appears. Press the button to select “YES”, and then press the SET button. -
Page 18: Changing The Display Language (Language)
Changing the Display Language (LANGUAGE) You can select the language to be used for the menus and guidance from Japanese, English, French or German. Display the REC menu. Use the button to select Press the SET button. The SETUP screen appears. Use the button to select Press the SET button. -
Page 19: Playback
How to Perform Play back Recorded image can be displayed on LCD monitor. Playing Back Still Pictures Open the lens cover. The LCD monitor turns on and the through-image appears. Press the PLAY/REC button. The last recorded image is displayed. For a description of the playback mode screen, see page 7. -
Page 20: Deleting Images
Use the button to select the desired item. Press the SET button. The selected item is executed. • Pressing the MENU button returns you to the previous screen. • There are items that cannot be selected if there are no images saved in the internal memory. The PLAY menu has the following structure. -
Page 21: Viewing 9 Frames Of Images Simultaneously (Index)
Deleting All Frames Display the PLAY menu. Use the button to select Press the SET button. The DELETE screen appears. Use the button to select “ALL”. Press the SET button. The screen for confirming the deletion appears. Use the button to select “YES”. Press the SET button. -
Page 22: Viewing A Slideshow Of Images (Slide Show)
Viewing a Slideshow of Images (SLIDE SHOW) You can check recorded images by playing them back at 3-second intervals. Display the PLAY menu. Use the button to select Press the SET button. The PLAY MODE screen appears. Use the button to select “SLIDE SHOW”. Press the SET button. -
Page 23: Selecting Images To Print (Dpof)
Selecting Images to Print (DPOF) Only still image can be printed. Selecting a single frame Display the image you want to print. Press the MENU button. The PLAY menu appears. Use the button to select Press the SET button. The DPOF screen appears. Use the button to select “THIS ON”. -
Page 24: Transferring Images To A Pc
After connecting the camera to your PC with the supplied USB cable, images recorded with the camera and the through-image displayed on the LCD monitor can be transferred to your PC. • Back up important data. Operating Environments 1. Windows Microsoft Windows 98, Windows 98SE, Windows 2000 Professional, Windows Me, and Windows XP Memory... -
Page 25: Installing The Usb Driver
Installing the USB Driver * The installation of the USB driver is not required for the Macintosh. * Installation of the USB driver is required when the USB mode is set to “MSDC” or “PC Camera.” Turn on your PC and start Windows. Connect the camera and your PC using the USB cable supplied. -
Page 26: Transferring Recorded Images
Transferring Recorded Images • To transfer recorded images to your PC, the USB mode should be set to “MSDC” in the REC menu. • Do not disconnect the USB cable or open the battery cover while the camera is connected to the PC. •... -
Page 27: Transferring The Through-Image Live To Your Pc
Transferring the Through-Image Live to Your PC • To transfer the through-image displayed on the camera’s LCD monitor live to your PC, the USB mode should be set to “PC CAMERA” in the REC menu. Note: Windows only Turn on your PC. Connect the camera and your PC using the supplied USB cable. -
Page 28: Appendix
Cleaning the Camera When cleaning the camera, do not use solvents such as benzene or paint thinner. After Use Remove the batteries when the camera is not going to be used for an extended period. Troubleshooting If inspection and remedial action in accordance with the following table does not solve the problem, please contact the dealer from whom you purchased the camera or a Konica Service Station. -
Page 29: Main Specifications
Main Specifications Digital still camera with LCD monitor and integrated recording and playback Type functions Active pixels 1.22 megapixels Recording medium Approximately 14 MB internal memory Super fine 1280 x 960 pixels Number of Fine 1280 × 960 pixels Recordable Images Economy 640 ×... -
Page 30: Warranty And After-Sales Service
Warranty and After-sales Service For repair, handling and care, first consult the dealer from whom you purchased the camera. Warranty (separately attached) Before accepting the warranty card, please make sure that the date of purchase and dealer of purchase and the dealer’s details have been completed. After reading the warranty, keep it in a safe place. -
Page 31: Fcc Compliance Statement
FCC Compliance Statement: Declaration of Conformity Responsible party: KONICA PHOTO IMAGING Address: 725 Darlington Avenue Mahwah, NJ 07430, U.S.A. Telephone number: (201) 574-4000 This device complies with Part 15 of the FCC Rules. Operation is subject to the following two conditions: (1) this device may not cause harmful interference and (2) this device must accept any interference received, including interference that may cause undesired operation. - Page 32 CANADA ONLY Industry Canada’s Compliance Statement: This Class B digital apparatus complies with Canadian ICES-003. Cet appareil numérique de la classe B est conforme à la norme NMB-003 du Canada...
Need help?
Do you have a question about the Revio C2 and is the answer not in the manual?
Questions and answers