Table of Contents
Advertisement
Quick Links
Download this manual
See also:
Instruction Manual
Advertisement
Table of Contents

Related Manuals for Konica Minolta 5D


Summary of Contents for Konica Minolta 5D
- Page 1 KONICA DIGITAL CAMERA Instruction Manual...
- Page 2 FCC Statement: Declaration of Conformity Trade name: Konica Model: e-mini Responsible party: KONICA PHOTO IMAGING, INC. Address: 725 Darlington Avenue Mahwar, NJ 07430, U.S.A. Telephone number: 201-574-4000 This device complies with Part 15 of the FCC Rules. Operation is subject to the following two conditions: (1)this device may not cause harmful interference and (2) this device must accept any interference received, including interference that may cause undesired operation.
-
Page 3: Table Of Contents
Contents 1. Safety Tips ... 1 2. Parts Identification ... 3 3. Loading Batteries ... 3 Important – Please Read Before You Begin 4. Taking Pictures ... 5 5. Selecting Modes ... 5 6. Installing Software ... 6 7. Connecting to a Computer ... 10 8. - Page 4 Warning Symbols and What They Mean WARNING Failure to use the product properly could result in fatal harm to the user. CAUTION Failure to use the product properly could result in minor or moderate harm to the user or in property damage. Precautions WARNING CAUTION...
-
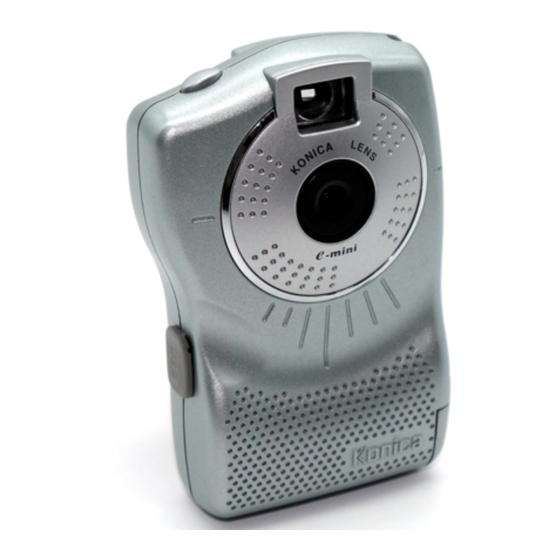
Page 5: Parts Identification
2. Parts Identification Check that the product comes complete with the following components: G Camera × 1 G Strap × 1 G Instruction manual (warranty card) × 1 Parts Identification 3. Loading Batteries Note: If recorded images remain in the camera, save them to your computer before chang- ing the batteries. - Page 6 Battery Exhaustion The status LCD will begin to blink when the batteries are almost exhausted. When the status LCD starts blinking, save recorded image files from the camera to the computer promptly and replace the batteries. After the status LCD begins to blink, images will be retained for 3 days or less, depending on the type of batteries used.
-
Page 7: Taking Pictures
4. Taking Pictures 1 Set the main switch on the side of the camera to ON (REC) (Figure 1). The status LCD on the back of the camera will display the mode, which appears initially as “Hr” (Figure 2a). A few seconds later, the display will change to show the number of the pictures that can be taken (Figure 2b). -
Page 8: Installing Software
6. Installing Software Note: Check that the operating environment of your computer meets the following require- ments. [Operating environment] Windows 98/98SE/ME Memory 32 MB or more Hard disk space 200 MB or more Interface 32,000 colors or more, 640 × 480 pixels Display or more Others... - Page 9 9 Click [Next]. The installer starts. 0 Click [Continue]. A Click [Cancel]. B Click [Finish]. C Click [Finish]. Install e-mini driver Note: The installation of the e-mini driver is required. 1 Double-click the CD- ROM icon and then the [Konica] folder in the window that opens subsequently.
- Page 10 5 Click [OK]. 6 Click [OK] to restart the computer. Install AVI Creator 1 Double-click the CD- ROM icon and then the [AVI Creator] folder in the window that opens subsequently. 2 D o u b l e - c l i c k t h e [Setup.exe] icon.
- Page 11 Macintosh Install MGI PhotoSuite 1 Turn on the computer and insert the CD- ROM disc. 2 Double-click the CD-ROM icon. 3 Double-click [English]. 4 Click [Accept]. 5 Click [Continue]. 6 Click [Install]. The installer starts. 7 Click [Quit]. Install e-mini driver Note: The installation of the e-mini driver is required.
-
Page 12: View Images
2 Attach the accessory USB connector to the USB connector of the camera and that of your computer. 4 Choose [Digital Camera (TWAIN)] from the menu in the pane on the left. 5 Choose [Konica e-mini] from [1 Choose a camera.] and click [Download]. - Page 13 6 Click an image file of your choosing and click [Capture]. Close the “Konica e-mini” dialog box and choose [Photos] in the upper right menu. The image file opens. Note: Choose Video in the upper left corner of the screen to clear all recorded image files and enable a PC camera.
- Page 14 Number of image files per second Set 10 normally. Check this option to compress image files, as for e-mailing them as an attachment. (Compressed images will have degraded image quality.) Macintosh Image files that have been recorded in continu- ous shooting mode (movie) are marked by a movie icon like that shown below.
-
Page 15: Troubleshooting
9. Troubleshooting The status LCD is blinking. The batteries are exhausted. Save recorded image files from the camera to the com- puter promptly and replace the batteries. (See page 3.) Recorded images appear barred or blurred. The camera may not be set for the local frequency. Change the anti-flicker selector switch under the battery cover. -
Page 16: Specifications
10. Specifications Image sensor CMOS sensor Number of pixels 300,000 pixels Resolution High-resolution mode: 640 x 480 pixels (VGA) Low-resolution mode: 320 x 240 pixels (QVGA) Image storage High-resolution mode: 26 (VGA) Low-resolution mode: 99 (QVGA) Movie duration About 10 seconds (*1) Memory 8 MB SDRAM Lens...
Need help?
Do you have a question about the 5D and is the answer not in the manual?
Questions and answers