Table of Contents
Advertisement
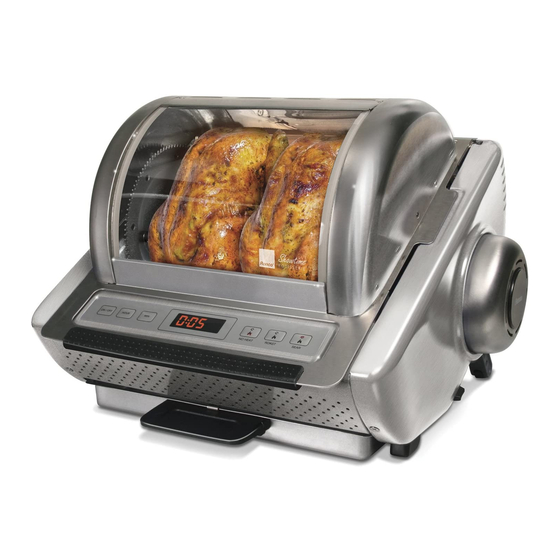
Best Rotisserie
"Dollar for dollar, the finest
kitchen appliance ever
made."
- Malcolm Gladwell,
What the Dog Saw
Rotisserie Oven
InstructIons & rEcIpEs
Set It and Forget It!
Time is precious. Just set
the timer and we'll do the
rest, leaving you more time
for family.
TM
®
Cook Like a Gourmet
Makes perfectly roasted
chickens, turkey, pork or rib
roasts, and burgers that are
delicious and healthy too!
TM
Advertisement
Table of Contents

Related Manuals for Ronco EZ-Store

Summary of Contents for Ronco EZ-Store
- Page 1 Rotisserie Oven InstructIons & rEcIpEs ® Best Rotisserie Set It and Forget It! Cook Like a Gourmet “Dollar for dollar, the finest Time is precious. Just set Makes perfectly roasted kitchen appliance ever the timer and we’ll do the chickens, turkey, pork or rib made.”...
-
Page 2: Table Of Contents
Rotisserie table of contents Important Safeguards / Cleaning & Care ..............3-5 Rotisserie Model Specs ....................6 Parts Included ......................6 Getting Started: Setting Up Your Rotisserie ..............7 Non-stick Spit Rod Assembly ................8 Rotisserie Basket ....................9 How to Tie Chicken & How to Tie Turkey ............10-11 Placing Poultry on the Spit Assembly .............. -
Page 3: Important Safeguards / Cleaning & Care
IMportAnt sAFEGuArDs the EZ-store rotisserie WILL not turn on without the back legs extended and the rotisserie in the up-right position. Heat shield,and Drip tray must also be in place. When using electrical appliances, basic safety precautions should always be taken, including the following: 1. -
Page 4: Save These Instructions
™ EZ-Store Rotisserie 16. When using the Rotisserie Baskets, be sure no small bones or other food can fall between or extend beyond the wires and catch on the Drip Tray or Heating Element or anything else during rotation. It is important to check while cooking. If the food moves around inside the Basket, stop the machine. - Page 5 Any repairs should be handled only by an authorized service facility. Call Customer Service at 1-855-85-ronco (76626) and leave a message if after standard business hours. Or you can contact us via email at support@ronco.com or visit our help desk http://support.ronco.com.
-
Page 6: Rotisserie Model Specs
™ EZ-Store Rotisserie rotIssErIE MoDEL spEcs 5250, 5260, 5270 series • Dimensions: 17.25” W x 12.75” H x 15..75” D • 15 lb Cooking Capacity NOTE: The model number is located on the back of your E-Z Store ™ Rotisserie. -
Page 7: Getting Started: Setting Up Your Rotisserie
GEttInG stArtED: Setting Up Your Rotisserie 1. REMOVE PACKING TAPE: After you’ve unpacked your Rotisserie make sure you’ve removed all of the packing tape used to secure the Rotisserie during shipment. 2. DEPLOY REAR LEGS: The legs can be extended by pushing the small RELEASE BUTTON located on the right side of the Rotisserie. -
Page 8: Non-Stick Spit Rod Assembly
™ EZ-Store Rotisserie GEttInG stArtED (cont’d) 5. SPIT ROD ASSEMBLY: One end of the spit rod is held in place by a WIRE CLIP installed on Gear Wheel A. Insert the notched end of the SPIT ROD into Gear Wheel A while squeezing the WIRE CLIP together. -
Page 9: Rotisserie Basket
Don’t put charcoal briquettes, hickory chips or anything else in the machine that is not authorized by Ronco Holdings, Inc. Do not use under cabinets. ROTISSERIE IS HOT! Always use cAutIon with Hot Food and Metal parts. The Food, Basket and the Spit Assembly get HOT! Always wear protective gloves when removing the Basket. -
Page 10: How To Tie Chicken & How To Tie Turkey
™ EZ-Store Rotisserie Always use cAutIon with Hot Food and Metal parts. The Food, Basket and the Spit Assembly get HOT! Always wear protective gloves when removing the Basket. If you feel the Oven Gloves are not insulated enough to adequately protect you from the hot surfaces you are handling, set whatever you are holding down immediately and wait until the food and the metal parts cool down. - Page 11 Depending on the model of your rotisserie, you will only be able to cook a certain size turkey. Please see below: EZ-store rotisserie series • Dimensions: 17.25” W x 12.75” H x 15..75” D •...
-
Page 12: Placing Poultry On The Spit Assembly
™ EZ-Store Rotisserie placing poultry on the spit rod Assembly There are two ways to load the Spit Rods. Keep hands clear of pointed rods as they exit from the meat. piercing poultry with rods Hold the tied poultry or meat down securely with one hand while firmly pushing the Spit Rods into the bird, through the meaty portion of the breast area. -
Page 13: A Or B Cooking Position
After the food is held securely on the Spit Rods, put the other Gear Wheel in place. The Spit Assembly can now be placed in the rotisserie. See diagram at the bottom of the page for more information about Cooking Position. -
Page 14: Loading The Spit Assembly
™ EZ-Store Rotisserie Loading the spit rod Assembly IMportAnt: Food must be centered. Put the Spit Rods through center of the food so it will be balanced and the food does not touch the Heating Element as it rotates. This is important for large foods like turkeys, standing rib roasts, 2 chickens side-by-side or any large piece of meat that goes directly onto the Spit Rods. -
Page 15: Digital Timer
Digital timer EZ-store rotisserie timer Push the ON/OFF button to turn on. Press the HOUR button to set the hours of cook time. Press the MIN button to set additional minutes for your cook time. Automatically shuts off after the allotted time and a bell sounds. Always push the ON/OFF button (if the unit is still running) before removing food. -
Page 16: Carving Platform
Rotisserie - even after you’ve carved some off. 1-855-85-ronco Call for order information Visit us online at www.ronco.com for Call the Order Desk to order supplies, more information and product availability 7 Days a Week (Leave phone message or email us: support@ronco.com... -
Page 17: Time & Temperature Chart
Estimated time and temperature chart The times and temperatures given in this booklet are only a guide for your reference and are based on foods at room temperature (not cold foods). Times can vary due to differences in meat shape, size, and the amount of fat and bone. -
Page 18: Available Accessories (Sold Separately)
™ EZ-Store Rotisserie AVAILABLE AccEssorIEs Liquid Flavor Injector (Optional Accessory) For poultry meat and seafood, just add your favorite liquid, or one of Ron’s marinades, for the best flavor you’ve ever had. Mix with water, juice, wine, soy sauce, vinegar, olive oil, etc. - Page 19 solid Flavor Injector (Optional Accessory) This expanding tip injector can be loaded with pieces of garlic or diced onions, herbs, spices, diced peppers, fruit pieces or diced ham for flavoring. For pastries try inserting chocolate chips, sprinkles, nuts and other seasonings. Plunger Expanding Tip Locking Ring...
- Page 20 ™ EZ-Store Rotisserie kabob rods (Optional Accessory) Set the completed Spit Rod Assembly in the Rotisserie, Position A (see page 13). Load the Kabobs with food then insert them into the holes on the gear wheels. Start with sharp end on the left side, then...
- Page 21 Overall length 14-3/8”. 1-855-85-ronco Call for order information Visit us online at www.ronco.com for Call the Order Desk to order supplies, more information and product availability 7 Days a Week (Leave phone message or email us: support@ronco.com...
- Page 22 ™ EZ-Store Rotisserie round BBQ rib Basket (Optional Accessory) 1. Place baby back or spare ribs in boiling water for 15 minutes. Drain ribs and let them cool. This step makes the ribs more pliable and tender and reduces fat. When cooled, cover both sides of the ribs with BBQ Seasoning.
-
Page 23: Cautions & Helpful Hints
Do not use under cabinets. Do not put charcoal briquettes, hickory chips or anything else in the machine that is not authorized by Ronco Holdings, Inc. rotisserie is Hot! Glass Door, top, back and sides of the Rotisserie, as well as the Dual Heating Tray, Drip Tray, Heat Shield and Heating Element all get very hot during use and retain heat after use. -
Page 24: Helpful Hints
5 minutes. It’s tasty and delicious. 1-855-85-ronco Call for order information Visit us online at www.ronco.com for Call the Order Desk to order supplies, more information and product availability 7 Days a Week (Leave phone message or email us: support@ronco.com... -
Page 25: Meal Suggestions & Recipes
Lamb: a bird (chicken or turkey) to grill with the Leg of Lamb Rolled in Rosemary EZ-Store Rotisserie is 15 lbs. However, and Olive Oil - up to 8 lbs. you need to be mindful of the “volume”... - Page 26 ™ EZ-Store Rotisserie recipes Roast Chicken with Lemon Herb Rub One 3½ to 4 pound Whole Chicken Rind of 2 Lemons, minced 5 Garlic Cloves, minced 1 tablespoon Dried Thyme, finely crumbled 2 teaspoons Dried Rosemary, finely crumbled 2 teaspoons Dried Sage Leaves, finely crumbled Salt and freshly Ground Pepper In a small bowl combine lemon rind, garlic, and herbs to form a slightly moist paste.
- Page 27 Jamaican Jerk Pork Tenderloin 2 Pork Tenderloins (About 1 ½ to 2 Pounds Total) 2 tablespoons Chopped Fresh Cilantro 1 tablespoon Finely Minced Fresh Ginger ¼ cup Dark Rum 2 tablespoons Fresh Lime Juice 2 tablespoons Olive Oil 2 tablespoons Light Brown Sugar 1 cup Soy Sauce ½...
- Page 28 ™ EZ-Store Rotisserie Roasted Vegetable Skewers with Balsamic Basil Marinade 1 Red Bell Pepper, cut into 1 inch pieces 1 Yellow Summer Squash, cut into ¼ inch slices 1 Zucchini cut into ¼ inch slices 16 White Button Mushrooms, stems removed 8 Green Onions, cut into 1½...
- Page 29 Mustard-Brown Sugar Glazed Pork Chops Three or Four 1 Inch thick Center Cut Pork chops ½ cup Brown Sugar ¼ cup Dijon Mustard Pinch each of Dried Thyme and Dried Sage Pat pork chops dry with a paper towel. Stir together mustard, thyme and sage. Coat pork chops well with the herb mustard.
-
Page 30: Easy Steps To Rotisserie Chicken
™ EZ-Store Rotisserie Two Original Style Roast Chickens Two 3½ to 4 pound whole chicken 2 teaspoons each of Salt and Paprika 1 teaspoon each of Onion Powder, Dried Thyme, White Pepper ½ teaspoon each of Cayenne Pepper, Black Pepper, Garlic Powder... - Page 31 Place the loaded spit rod Assembly in the proper cooking position (A or B). Posi- tion A is your standard cooking position. Position B is for smaller items or the Speed Basket Close the Glass Lid. Set the 3-Way Function to roAst. Set the Timer for 15 minutes per pound for a chicken.
-
Page 32: Warranty
YEAr LIMItED WArrAntY Ronco Holdings, Inc., warrants to the owner of this product that it is free from defects in material and workmanship for a period of one year from date of purchase. Please visit http://www.ronco.com/warranty.html and fill out your Warranty Registration Form.
Need help?
Do you have a question about the EZ-Store and is the answer not in the manual?
Questions and answers
How can I get a new instruction book in English