
Related Manuals for Coolix MPK-09CRN2


Summary of Contents for Coolix MPK-09CRN2
- Page 1 MPK-09CRN2 / MPK1-09CRN1 / MPK1-12CRN1 MOBILES KLIMAGERÄT MOBILE AIR-CONDITIONER CONDIZIONATORE PORTATILE CLIMATISEUR MOBILE MOBIEL AIRCOTOESTEL...
-
Page 3: Table Of Contents
INFORMATION SAFETY INSTRUCTIONS DESCRIPTION OF APPLIANCE ACCESSORIES OPERATION PANEL INSTALLATION AND START-UP INSTRUCTION FOR USE WATER TANK INSTALLATION CLEANING, MAINTENANCE AND STORAGE TROUBLESHOOTING WEEE PURCHASE TERMS AND CONDITIONS/WARRANTY INSTRUCTIONS FOR USE... -
Page 4: Information
CAUTION DEAR CUSTOMER, Thank you for buying a product that was developed and checked for the highest claims. Please read the use instructions document carefully before the first start up, so that you may get to know all the functions of this appliance. Keep the use instructions document for reference whenever required. - Page 5 6. Always remove the power plug from the power socket when the appliance is not in use, or when it is moved, touched or cleaned. Do not yank the cord to disengage the power plug. 7. Always switch the appliance off before disconnecting the power plug from the power socket by activating the POWER key on the operation panel.
-
Page 6: Description Of Appliance
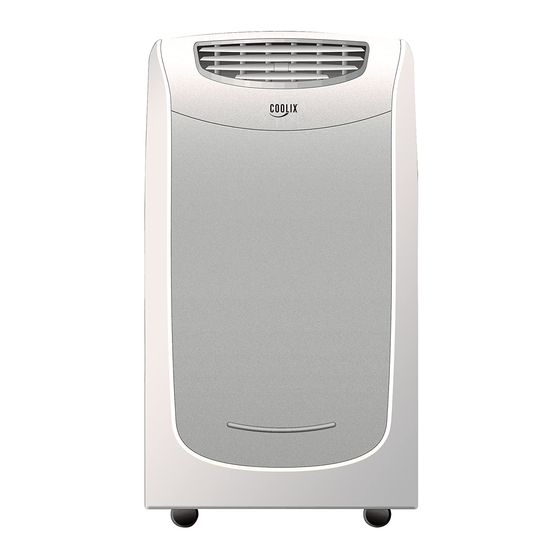
DESCRIPTION OF APPLIANCE Operation panel Vertical ventilation flap Direction regulator Horizontal ventilation flap Supporting handle (on both sides) Water tank 7. Rollers Air filter Fastening tape for power cable Outlet plug . Hot air outlet Air entry inlet Bottom outlet plug... -
Page 7: Accessories
ACCESSORIES Figure Designation Number Exhaust cable Adapter A (for permanent cable mounting) Adapter B (for provisional cable mounting) Expansion plug Tape for fastening power cable Emptying hose (continuous discharge) (Not available in some models) Emptying hose (connected to the water tank) Window panel set Check whether all the accessories are there in the packaging and read the use instructions to learn how these are to be used. -
Page 8: Operation Panel
OPERATION PANEL 1. You can switch the appliance on by pressing , the adjacent control light lights up now. Press the key again to deactivate the appliance, the control light goes off. Timer key: This key is used to determine when the appliance will be switched on automatically. key: By pressing this key you can determine when the appliance will be switched off automatically. - Page 9 key: You can select the fan speed in the Cool and Fan modes by pressing this key. The speed changes in the following sequence each time you press the key: Low – Medium – High. The currently set speed can be identified from control light that lights up next to the symbol. control light: It lights up when the water tank is full or the water tank has not been inserted correctly.
-
Page 10: Installation And Start-Up
INSTALLATION AND START-UP 1. Read all the instructions carefully before commissioning the appliance. Observe the safety instructions of this user manual in particular. 2. The appliance must be in the upright position for at least 24 hours before start up. This condition is applicable most of all after transportation. - Page 11 6. Before operating the appliance, please ensure that the air inflow and outflow apertures are not covered. The air exhaust nozzle must always be freely accessible when the appliance is in operation. 7. Removable covers and tanks must be inserted correctly before switching the appliance on. 8.
-
Page 12: Instruction For Use
INSTRUCTION FOR USE Cooling 1. Press the key till the control light lights up. 2. Now select the desired room temperature with the help of the keys. 3. The temperature can be set in the 17°C – 30°C/62°F – 88°F range. 4. -
Page 13: Water Tank
Automatic deactivation of the appliance Press the key when the appliance is switched on. 0.0 appears in the display. Press the key again to determine when the appliance will be deactivated automatically. The deactivation is set back by 30 minutes each time you press this key (from 10 hours to 60 minutes). - Page 14 5. In the Dehumidify mode, you also have the option of connecting the attached emptying hose (refer to Figure) to the outlet plug on the rear side of the appliance, and then of guiding it to the water tank. This way the condensed water flows through the hose into the water tank.
-
Page 15: Installation
INSTALLATION 1. To ensure optimal performance of the appliance, the warm air must be guided out of the room. 2. To do this, move the exhaust air hose as illustrated in the figure, with one end over the hot air outlet. 3. - Page 16 Permanent installation 1. Drill an appropriately big hole in the outer wall. It should be maximum 120 cm and minimum 30 cm from the floor. 2. Now fix Adapter A with the help of four expansion plugs and screws. 3. Fix the loose end of the exhaust hose (which you used earlier in the appliance – see above) on Adapter A. 4.
-
Page 17: Cleaning, Maintenance And Storage
CLEANING, MAINTENANCE AND STORAGE We recommend the frequent cleaning of the appliance. Follow the instructions on cleaning, maintenance and storage of the appliance to avoid possible damage to the functioning of the appliance. Important principles: 1. Do not use petrol, thinner or other chemicals to clean the appliance. 2. -
Page 18: Troubleshooting
Storage 1. If you do not want to use the appliance for a long time, please remove the bottom outlet plug on the rear side of the appliance and drain the water in the container below the appliance (if necessary, with the help of the discharge hose). 2. -
Page 19: Weee
Problem Possible cause Solution Inadequate cooling Temperature setting is too high. Lower the set temperature. The air filter is clogged with dust. Clean the air filter. Power deactivation in Heat mode Automatic overheating protection Reactivate the appliance after it has function. -
Page 20: Purchase Terms And Conditions/Warranty
PURCHASE TERMS AND CONDITIONS As purchase terms, the buyer will takeover the responsibility of correct use and maintenance of the product according to this instructions for use document. The buyer and user must himself decide how long the appliance is to be used. If you face problems with this product, please observe the instructions in the guarantee terms and conditions. - Page 22 MIDEA EUROPE GmbH Zülpicher Str. 5 40549 Düsseldorf Germany Service-Hotline DE 01805 - 12 16 17 (14 Cent pro Minute aus dem deutschen Festnetz) Service-Hotline Europe 0049 - 1805 - 12 16 17 www.mideaaircon.de info@mideaaircon.de...
- Page 23 FERNBEDIENUNG REMOTE CONTROL TELECOMANDO TELECOMMANDE AFSTANDSBEDIENING...
-
Page 25: Instructions For Use
SPECIFICATIONS PERFORMANCE CHARACTERISTICS KEYS DISPLAY OPERATION SAFETY INSTRUCTIONS INSTRUCTIONS FOR USE... -
Page 26: Specifications
INFORMATION 1. Read this use instructions document before using the remote control. 2. Keep this document for reference at a safe place. 3. All data in this document pertaining to the HEAT mode are applicable only to air-conditioners that are equipped with the Heat function. 4. -
Page 27: Keys
KEYS 12. TIMER OFF: Press this key to define the deactiva- 1. TEMP : The room temperature setting decreases tion time of the appliance. The deactivation time is on pressing this key. set back by 30 minutes each time you press this 2. -
Page 28: Display
DISPLAY NOTE The displays shown here are to facilitate understanding only. Only the selected functions are displayed when the appliance is in operation. 1. DIGITAL DISPLAY RANGE: This range basically displays the set temperature. The corresponding settings of the TIMER are displayed in the TIMER mode. -
Page 29: Operation
OPERATION Insert/replace cells The remote control requires two alkaline dry cells (LR03X2). 1. To insert the cells, remove the cover of the cell compartment and then insert the cells. Please ensure that the cells are positioned correctly (+/-). 2. Follow the same method to replace old cells. NOTE 1. - Page 30 A AUTO mode 1. Select the AUTO mode by pressing the MODE key. 2. Select the desired room temperature by pressing the TEMP keys. The most pleasant temperature settings are in the 21°C to 28°C range. 3. Press the ON/OFF key to start the air-conditioner. The FAN SPEED –...
- Page 31 C DRY mode 1. Select the DRY mode by pressing the MODE key. 2. Select the desired room temperature by pressing the TEMP keys. The most pleasant temperature settings are in the 21°C to 28°C range. 3. Start the air-conditioner by pressing the ON/OFF key. The air-conditioner is now running in the DRY mode at low blower speed.
-
Page 32: Safety Instructions
SAFETY INSTRUCTIONS 1. There should be no barrier between the remote control and the receiver of the air-conditioner; otherwise the air-conditioner will not function. 2. Keep the remote control away from all liquids. 3. Protect the remote control from high temperatures and direct sunlight. 4. - Page 34 MIDEA EUROPE GmbH Zülpicher Str. 5 40549 Düsseldorf Germany Service-Hotline DE 01805 - 12 16 17 (14 Cent pro Minute aus dem deutschen Festnetz) Service-Hotline Europe 0049 - 1805 - 12 16 17 www.mideaaircon.de info@mideaaircon.de...
Need help?
Do you have a question about the MPK-09CRN2 and is the answer not in the manual?
Questions and answers