Table of Contents
Advertisement
Advertisement
Table of Contents

Related Manuals for AWA E-6880


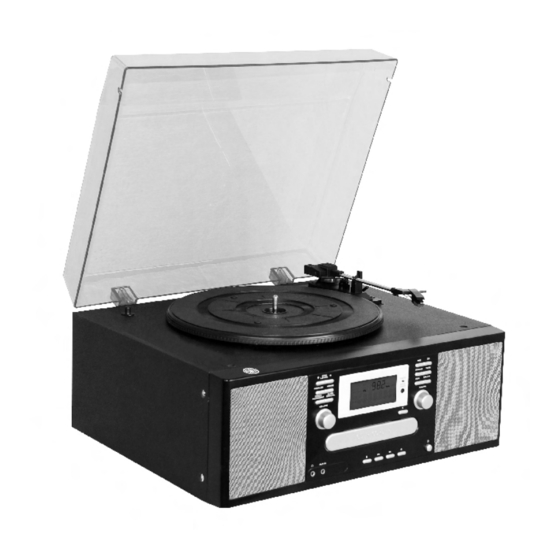
Summary of Contents for AWA E-6880
-
Page 2: Table Of Contents
CONTENT PRECAUTIONS .......................... 7 BEFORE USE ............................ 8 HANDLING RECORDS ........................ 9 CLEANING A RECORD ........................ 9 DISCS ............................ 1 2 TAPE HEADS MAINTENANCE ...................... 1 3 CONNECTIONS .......................... 1 4 PARTS OF THE TURNTABLE ...................... 1 5 UNIT FUNCTIONS ........................... 1 6 REMOTE CONTROL UNIT ... - Page 3 AUDACITY PREFERENCES ....................... 5 0 RECORDING OPERATION ........................ 5 2 GENERAL PROBLEMS FOR ALL WINDOWS VERSIONS .............. 5 7 ADJUSTMENT FOR WINDOWS 7 AND SOME VISTA SYSTEMS ONLY .......... 5 9 PREPARING TO EXPORT AND SAVE FOR MP3 FORMAT .............. 6 3 DIVIDING TRACKS .......................... 6 6 COPYING THE MUSIC FILE TO AN MP3 PLAYER ................ 7 2 USERS ....................... 7 3 AUDACITY CONFIGURING AUDACITY FOR MAC ...
- Page 4 IMPORTANT SAFETY INSTRUCTIONS FOR AUDIO PRODUCTS READ THOROUGHLY! When using electrical products, basic precautions should always be followed including: 1. Read Instructions ‐ All the safety and operating instructions should be read before the product is operated. 2. Retain Instructions ‐ The safety and operating instructions should be retained for future reference. 3. Heed Instructions ‐ All warnings on the product and in the operating instructions should be adhered to. 4. Follow Instructions ‐ All operating and user instructions should be followed. 5. Cleaning ‐ Unplug this product from the wall outlet before cleaning. Do not use liquid cleaners or aerosol cleaners. Use a damp cloth for ...
- Page 5 unless proper ventilation is provided or the manufacturer's instructions have been adhered to. 11. Power Sources ‐ This product should be operated only from the type of power source indicated on the marking label. If you are not sure of the type of power supply to your home, consult your product dealer or local power company. For products intended to operate from battery power, or other sources, refer to the operation instructions. 12. Power ‐ Cord Protection ‐ Power‐supply cords should be routed so that they are not likely to be trapped in any way. 13. Main plug ‐ The main plug is used as the disconnect device. The disconnect device should remain readily accessible. ...
- Page 6 operating instructions. Adjust only those controls that are covered by the operating instructions, as an improper adjustment of other controls may result in damage and will often require extensive work by a qualified technician to restore the product to its normal operation. e. If the product has been dropped or damaged in any way, and the product exhibits a distinct change in performance‐this indicates a need for service. 20. Replacement Parts ‐ When replacement parts are required, be sure the service technician has used replacement parts specified by the manufacturer or have the same characteristics as the original part. Unauthorized substitutions may result in fire, electric shock, or other hazards. ...
-
Page 7: Precautions
PRECAUTIONS Safety Information ‐ Caution: 1. Use of controls and adjustments or performance of procedures other than those specified herein may result in hazardous radiation exposure. 2. If this product develops trouble, contact qualified service centers, and do not use the product in defective states. Safety Precautions WARNING: To reduce the risk of fire or electric shock, do not expose this appliance to rain or moisture. CAUTION RISKS OF ELECTRIC SHOCK‐ DO NOT OPEN! To reduce the risk of fire or electric shock, do not expose this apparatus to rain or moisture. Also, do not remove the cover or back. No user serviceable parts inside. Refer servicing to qualified service personnel. The lightning flash with arrowhead symbol, within an equilateral ... -
Page 8: Before Use
BEFORE USE 1. Before use, please remove any additional tie downs, foam, etc. that were added to make the item secure while shipment. 2. Choose unit installation location carefully. Avoid placing it in direct sunlight or close to a source of heat. Also avoid locations subject to vibrations and excessive dust, cold or moisture. Keep away from sources that hum, such as transformers or motors. ... -
Page 9: Handling Records
HANDLING RECORDS 1. Do not touch the record's grooves. Only handle records by the edges or the label with clean hands. Otherwise, a dirty hand can leave a residue on the recode surface that will gradually deteriorate the quality of your record. 2. Use a soft anti‐static cloth to gently wipe the record surface if the record has become dirty. ... - Page 10 6. Manually rotate the turntable in a clockwise direction while cleaning gently into the grooves. 7. Sweep the cloth up and away and lift dust from the record surface. 8. Get rid of the dust from cloth and do it away from the turntable. 9. Repeat until you see no dust on the record. To clean on the pad (not included) 1. Wash your hands. 2. Place the pad on a dry flat surface. 3. Place a record on the pad, handling the record by edges and labeled area. 4. Dry‐clean the record if it is not very dusty and has been cleaned regularly. 5. Follow the manufacturer’s instructions for applying fluid if you decide to wet clean. Be sure no fluid drips into on the turntable. 6. Gently wipe the grooves of the record in a clockwise direction. 7. Sweep the cloth up and away and lift dust from the record surface. 8. Get rid of the dust from cloth and do it away from the record and pad. 9. Repeat until you see no dust on the record. 10 ...
- Page 11 HOW TO REPLACE THE STYLUS (NEEDLE) Caution: Check the stylus to see if it is in the middle center. NOTE: Follow third photo which is correct. • Do not remove or bend the stylus. • Do not touch the needle as it could injure your hand. • Don’t let the stylus touch the turning turntable when there is no record. • Turn off the unit's power before you replace the stylus. ...
-
Page 12: Discs
DISCS • Depending on the quality of the disc and the condition of the recording, some CD‐R/CD‐RW disc may not be playable. • Always place the disc on the disc tray with the label facing upward.(Compact discs can be played or recorded only on one side) • To move a disc from its storage case, press down on the center of the case and lift the disc out, holding it carefully by the edges. •... -
Page 13: Tape Heads Maintenance
TAPE HEADS MAINTENANCE When the sound is distorted or faint, use a special cleaning tape to clean the oxides and dust deposition thoroughly to maintain smooth head and extend its life. Steps: 1. Drop the cleanser on the cotton film in the tape. (See the right illustration.) 2. Load the cleaning tape into the cassette slot (located on the side of the unit). Cleaning will automatically begin. Take the cleaning tape out 20 seconds later. 3. When the oxides and dust deposit on the cotton film, you can replace the cotton film by a tweezers. ... -
Page 14: Connections
CONNECTIONS Caution: Switch off the power of all equipments before making connections. Read the instructions of each component you intend to use with this unit. Be sure to insert each plug securely. To prevent hum and noise, avoid bundling the signal interconnection cables together with the AC power cord. A FM Antenna While in FM mode, tune in an FM station and extend the lead to find the best position for the reception. This antenna may need to be repositioned if you move your unit to a new location. ... -
Page 15: Parts Of The Turntable
PARTS OF THE TURNTABLE A 45 RPM adaptor B Screw fixing the turntable for transportation When you transport the unit, turn the screw counterclockwise to secure the turntable. Before use, turn the screw clockwise with a coin or screwdriver. C Return indicator The indicator will light up when the tone arm return to the tone arm rest. D Cue‐level Use this lever to lift and lower the tone arm. E Tone arm rest F ... -
Page 16: Unit Functions
UNIT FUNCTIONS 1 REC LEVEL ‐ button/REC LEVEL +button In record pause mode, use these buttons to adjust the recording level. 2 FINALIZE button/ERASE button Use FINALIZE button to finalize a CD‐R/CD‐RW disc. Use ERASE button to erase or unfinalize a CD‐RW disc. 3 TRACK INCREMENT button/AUTO/MANUAL button During recording, use TRACK INCREMENT button to divide tracks. Use AUTO/MANUAL button to select the mode of track number assignment. ... - Page 17 Then insert the plug of your headphones into the PHONES jack, and adjust the volume by turning the VOLUME knob. The sound from speakers will be cut off while the headphones are plugged in. 8 AUX IN Jack Use the AUX IN Jack to listen to the external source. 9 Display 10 STOP Use this button to stop playback or recording. 11 Fast reverse Press the F.R button once to go back to the start of the current track. ...
- Page 18 21 TUNED/ST indicator It lights green when a station is correctly tuned in or when the reception is strong. It lights red when the reception is poor. It lights orange when a station is found but not properly tuned in. 22 USB OUT jack 23 CASSETTE EJECT/FAST FORWARD Press the CASSETTE EJECT/FAST FORWARD button half‐way to Fast Forward the Tape. Press button lightly and playback will resume. Press button all the way to end playback and eject Tape. ...
-
Page 19: Remote Control Unit
REMOTE CONTROL UNIT Remote Control Unit can operate the unit from a distance. When operating the remote control unit, point it towards the front panel of the unit. Even if the remote control unit is operated within the effective range, remote control operation may be impossible if there are any obstacles between the unit and the remote control. If the remote control unit is operated near other appliances which generate infrared rays, or if other remote control devices using infrared rays are used near the unit, it may operate incorrectly. Conversely, the other appliances may operate incorrectly. ... - Page 20 Do not heat or disassemble batteries and never dispose of old batteries by throwing them in a fire. REMOTE CONTROL A. OPEN/CLOSE In CD, PHONO or AUX mode, use this button to open and close the disc tray. This button does not work in FM/AM mode. B. CD Press the CD button to play a CD. C. REPEAT In CD mode, use this button to select a repeat Mode of CD. ...
- Page 21 Press the AUX button and select AUX to listen to the external source connected to the AUX IN jack. P. Radio Press the Radio button once or twice to listen to AM or FM. Q. TAPE Press the TAPE button to play a cassette. R. MUSIC SKIP In CD mode, use these buttons to skip tracks. Hold down these buttons to search for a part of a track. S. VOL+/VOL‐ Use these buttons to adjust the volume. T. PLAY/PAUSE Use this button to play/pause recording, finalizing and erasing. U. STOP Use this button to stop playback or recording. 21 ...
-
Page 22: Preparation For Use
PREPARATION FOR USE 1. Connect the AC power cord to AC outlet. 2. Remove white protective needle cover by gently pulling towards front of unit. Put on the cover when the unit is not in use to protect the stylus (needle). 3. Release TONE ARM by gently pushing hold‐down clip to the right. This will unlock tone arm from its arm rest. Re‐lock the hold‐down clip if move the unit to another location. ... -
Page 23: Basic Operation
BASIC OPERATION 1. Press the POWER switch to turn the unit on. Wait until the “‐‐‐busy” disappears on the display before going to next step. 2. Select the source by pressing the corresponding button. 3. Rotate the VOLUME knob clockwise to adjust the desired sound level. 4. Listening through Earphones/Headphones. (Not included). ... -
Page 24: Listening To The Radio
LISTENING TO THE RADIO 1. Select AM or FM using the AM/FM button. 2. Tune to the desired frequency. The volume reading is 00‐32 but no sound is heard until 18, the volume will change along with the number. The TUNED/ST. indicator has 3 colors: Green: It indicates the station is correctly tuned in or the reception is strong. Red: It indicates the reception is poor. Orange: It indicates the station is found but not properly tuned in. If the reception is poor ... -
Page 25: Listening To Tape
LISTENING TO TAPE 1. Press TAPE button. 2. Load Cassette Tape into the unit (located on side of the unit). Playback will automatically begin. 3. Press CASSETTE EJECT/FAST FORWARD button halfway to Fast Forward the Tape. Press button lightly and playback will resume. 4. Press CASSETTE EJECT/FAST FORWARD button all the way to end playback and eject Tape. LISTENING TO A RECORD 1. Press the PHONO button once to select PHONO. ... - Page 26 When playing a 45 RPM record, use the included adaptor. 4. Select the speed. 5. Gently push the clamper to the right to release the tone arm. 6. Raise the cue lever to lift the tone arm off the tone arm rest. 7. Move the tone arm gently to the edge of the record (or the starting point of a track) and the turntable will begin to turn. ...
- Page 27 raised. Playing records with the dust cover down will prevent dust from setting on the turntable. Please do not place anything on top of the turntable cover, especially while playing a record. When the record reaches its end, the tone arm automatically returns to the tone arm rest, at the same time, the return indicator will light up and the rotation stops. NOTE: It will be put off approximately 20 seconds to return to the tone arm rest when playing at 78 RPM. To stop playback manually, slightly lift the tone arm using the cue lever and return it to the tone arm rest. 27 ...
-
Page 28: Listening To Acd
LISTENING TO A CD 1. Press the CD button. 2. Press the OPEN/CLOSE button. 3. Place a disc on the tray with the printed label face up. Never place more than one disc on the tray. The disc must be placed in the center of the disc tray. If the disc is not correctly loaded, it may not be possible to open the tray again once it has closed, so you should ensure the disc is always centered on the tray. Do not force the tray by hand during opening and closing operations. 4. Press the OPEN/CLOSE button to close the tray. 5. Press the Play/Pause button to play CD. ... - Page 29 6. Press the forward button once to go the start of the next track. 7. Press the backward button once to go back to the start of the current track. Press the backward button twice to go back to the start of the previous track. Fast backward and Fast Forward You can reverse or forward to any point in a selected track by pushing and holding the fast backward or fast forward button. ...
-
Page 30: Display
DISPLAY You may view the playback time by pressing the DISPLAY button on the remote control unit, and then the display changes per each press as follows: Unfinalized CD‐R, stopped Unfinalized CD‐RW, stopped ... -
Page 31: Repeat Playback
REPEAT PLAYBACK Press the REPEAT button on the remote control unit, the repeat playback mode cycles as follows: REPEAT ALL (Repeat ALL the Tracks) Press the REPEAT button once during playback. All the tracks of the disc will be played repeatedly. REPEAT 1(Repeat one track) Press the REPEAT button a second time during playback. The current track will be played repeatedly. If you press the MUSIC SKIP button and select another track, the track you select will be played repeatedly. It is also possible to select a track to be repeated in the stop mode. Press the ... -
Page 32: Shuffle Playback
SHUFFLE PLAYBACK The tracks can be played randomly. Press the SHUFFLE button during playback. (Or in the stop mode, press the SHUFFLE button and then PLAY button.) When the SHUFFLE playback of all the tracks has been finished, the unit stops and the shuffle playback mode will be cancelled. If you press the ( ) button during shuffle playback, next track will be randomly selected and played. If you press the ( ) button, the currently played track will be played from the beginning. A track cannot be repeated during shuffle playback. ... -
Page 33: Programmed Playback
PROGRAMMED PLAYBACK You can program up to 32 tracks in the desired order. Insert a disc and select CD before beginning programming. Shuffle playback does not work during programmed playback. Programmed playback works with finalized discs only. 1. Press the PROGRAM button in the stop mode. PROGRAM indicator blinks, and P‐01 appears on the display. 2. Press the MUSIC SKIP button ( or ) to select a track. 3 Press the PROGRAM button. ... - Page 34 The track is programmed, and “P‐02” is display. Repeat step 2 and 3 to program more tracks. You can program up to 32 tracks. To cancel the program mode, press the STOP button ( ). 4. When the selection of track numbers has been finished, press the PLAY button ( ) to start program playback. To check the programmed order In the stop mode, press the MUSIC SKIP button repeatedly to show the track numbers that have been stored in memory. To add a track to the end of the program In the stop mode, press the PROGRAM button. ...
-
Page 35: Recording Operation Steps
RECORDING OPERATION STEPS Load an empty or non‐finalized CD‐R or CD‐RW disc. Select Auto/Manual Track Increment Mode; Select Auto Track Increment Sensitivity. Select Recording Source. For Recorded CD‐RW Unfinalizing Erasing Select REC To Activate Recording. Test and Adjust Recording Level. Select Play To Start Recording. Select Track Increment for Track Division if no Auto/Manual selection. Finalizing Recorded Disc Please refer to the following detailed operation instructions. For CD‐R or CD‐RW, if it is recorded and finalized, the disc may be played by ordinary CD players; if it is recorded but not finalized, it may not be possible to play the disc on ordinary CD players. 35 ... -
Page 36: Recording
RECORDING About CD‐R and CD‐RW discs • RECORD AND ERASE FEATURES: Only CD‐RW discs can be recorded and erased for many times. A CD‐R disc can be recorded only once. As soon as they have been recorded or finalized, they cannot be erased or re‐recorded. However, if space is available on the disc before finalized, additional material can still be recorded. • COMPATIBILITY A CD‐R disc can be played on most audio CD players. However, certain CD‐RW discs may not compatible with some audio CD‐players. ... - Page 37 B. Auto/Manual mode AUTO: The sequence of record tracks and sound source is identical, i.e., record or AUX. If you are busy, select AUTO division assignment mode with AUTO MANUAL button. MANUAL: The sequence of record tracks and sound source is inconsistent. All tracks will be recorded into one track. You can only divide tracks by TRACK INCREMENT button. Please note: Be sure “AUTO TRACK” shows on the display ...
- Page 38 Wait a few seconds until “busy” disappear from the display. 5. If necessary, adjust the recording level using the REC LEVEL buttons, the display will show from ‐70 to 00 to +7. 6. Press the PLAY/ PAUSE ( ) button to start recording. 7. Manual track division It is possible to divide the recording into tracks while recording. While recording is taking place, press the TRACK INCREMENT button. The current track Number will be incremented by one. The TRACK INCREMENT button works regardless of the MANUAL/AUTO REC setting. ...
- Page 39 You cannot restart recording while busy is displayed. Remember that every time the recording is paused or stopped, a new track number will always be assigned. It is not possible to record in two stages within one track. 9. To stop recording Press the STOP button ( ) to stop recording. The display will show “Busy”, after the “Busy” is disappeared, then press CD button, the display will show the record track time. 39 ...
-
Page 40: Finalizing
FINALIZING In order for a disc to become a standard CD, it must have a Table of Contents (TOC) written to it. This process is known as finalizing. THE CD MUST BE FINALIZED. 1. Press the FINALIZE button in the stop mode. “ FINALIZE” appears on the display. To cancel the finalizing process, press the STOP button ( ). 2. Press the PLAY ( ) button to start finalizing. The display will show “‐‐‐ Busy” during finalize, wait until the busy disappear to complete the finalizing. The finalizing time is subject to the contents of record, it may take few minutes in some case. When the operation has been finished, the NO TOC indicator turns off and the display returns to the track/time display. ... -
Page 41: Erase Or Unfinalize Cd
ERASE OR UNFINALIZE A CD‐RW It is possible to erase the last recorded track, it is also possible to erase a whole disc. Erase procedures are possible only on an unfinalized CD‐RW disc. If a CD‐RW disc has been finalized, unfinalize it prior to erasure. Remember that it is not possible to perform any Erase or unfinalize procedures on a CD‐R disc. 1. Press the CD button to select CD. 2. Load a recorded CD‐RW. ... -
Page 42: Erase All
ERASE and the number of the last track recorded on the disc Select this to erase the last track on the disc. ERASE ALL Select this to erase all the tracks. (1) Press and hold the Erase button till the display show “ERASE ALL”. If you want to cancel the erasing or unfinalizing process at this point, press the STOP button ( ). (2) Press play ( ) button to begin the erase. (3) Display will show 0000000 to confirm the disc is clear. The remaining time for the operation appears in the display. When the operation has been finished, the display returns to the track/time display. During erasing/unfinalizing, no buttons will work. Never turn the power off nor unplug the power cord. This operation cannot be undone. If you are going to erase a track or tracks, make sure that they are recordings that you really want to erase. ... -
Page 43: Software
SOFTWARE Audio from the PHONO, CD, TAPE, AUX and Radio can be recorded on the computer. (Note: You may also record the AM band however the recording quality may be affected by reception and computer interference. Make sure the turntable is connected to the computer and Driver Disc is inserted.) 1. To record from a record, press PHONO button. 2. To record from CD, press CD button. Load a CD onto the disc tray and close the disc tray. 3. To record from a cassette tape, press TAPE button. Then load a cassette tape partially into the unit (located on the side of the apparatus), the tape will begin playing when fully inserted. 4. To record from an external audio source, press AUX button. Then connect the cable to the AUX IN socket on the front of the apparatus, and connect the other end into HEADPHONE or LINE OUT socket of the external device. 5. To record from FM, turn the unit on and press AM/FM button once or twice to select FM. The provided CD disc contains the following software: • Audacity • USB Audio recorder USB AUDIO RECORDER SOFTWARE For the operating instruction, please refer to the other user manual named USB Audio Recorder. AUDACITY SOFTWARE The Audacity folder contains the following software: (1)audacity‐src‐1.2.6‐‐‐‐‐‐‐‐‐ For source codes (2)Audacity_for_MAC‐‐‐‐‐‐‐‐‐For Macintosh (3)Audacity_for_WIN‐‐‐‐‐‐‐‐‐For Windows (4)AUTORUN.INF (5)The GNU General Public License.html The software is compatible with Window 98, 2000, ME, XP, VISTA, 7 and ... -
Page 44: Audacity Installation And Usb Connection
AUDACITY INSTALLATION AND USB CONNECTION Connect the USB cable to the unit and into your computer. Connect the AC cord of unit. Press Power button to turn on the unit. AUDACITY FORWINDOWS USERS 1. Please insert the software disk that comes with your unit. Go to My Computer and double click the CD ROM Drive. 2. Double click Audacity folder. There are five files in the Audacity folder. Select Audacity_for_WIN for Windows system, and select Audacity_for_MAC for Macintosh system. 3. Double click the Audacity_for_WIN for Windows system, and double click the audacity‐win‐1.2.6 to install the audacity software. ... - Page 45 INSTALLING THE AUDACITY SOFTWARE 1. The Audacity Setup Wizard will appear. Click on Next to install the software. 2. Click on “I accept the agreement” and click on Next. 3. Continue to click on the Next button. ...
- Page 46 4. Click on the Install button to start installation. ...
- Page 47 7. Click on Finish to complete installation. 8. You can now open the Audacity software and start recording your files. NOTE: Once you set up Audacity, you do not need to re‐set it with each use. (For additional information, visit the Audacity website at http://audacity.sourceforge.net) 47 ...
-
Page 48: Configuring Audacity For Microsoft Windows
CONFIGURING AUDACITY FOR MICROSOFT WINDOWS AUDACITY INTERFACE Audacity Interface‐‐‐Settings and controls. 48 ... -
Page 49: Audacity Control Buttons
AUDACITY CONTROL BUTTONS Use the attribute control buttons at the top of the screen to go to beginning, Play, Record, Pause, Stop and End. Use the File, Edit, View, Project, Generate, Effect and Analyze menus to Save, Export, and edit the music. 1. Click the ( ) button to skip to start; 2. Adjust the output volume; 3. Click the ( ) button to play; 4. Click the ( ) button to record; 5. Click the ( ) button to pause the recording; ... -
Page 50: Audacity Preferences
AUDACITY PREFERENCES 1. Click the “Edit” on the Audacity interface, select “Preferences”. The screen will open up Audacity Preferences. You can see the Audio I/O, Quality, File Formats, Spectrograms, Directories, Interface, Keyboard and Mouse in the Audacity preference interface. 2. Select the recording device: microphone (USB Audio CODEC) Click the “Audio I/O” at the Audacity Preferences interface. Click the “Device” and select “microphone (USB Audio CODEC)”. Click the “Channels” and select 2 (stereo). Click the “OK”. Note: If you couldn't find the "microphone (USB Audio CODEC)" from the Device list, close the Audacity Software and re‐open then try again. 50 ... - Page 51 3. Adjust the output and input volume. NOTE: Because of the variation of different operation systems, the input volume control may not work on some individual Windows versions. Windows Vista is recommended to ensure the input volume control working properly. For more information on setup, please see ‘Setting up Audacity’ on the website below: ...
-
Page 52: Recording Operation
RECORDING OPERATION To download music from PHONO to computer: 1. Place the record on the turntable. 2. Move the tone arm over to the record to start playing. 3. Click the Record ( ) button to start recording. The waves (left and right tracks) will show on the interface. 4. At end of song, click “pause” ( ) button on computer and raise the cue lever on turntable. For the next song, replace the album or move tone arm to another desired song. Lower the cue lever on turntable to start playing the next song. Immediately press “pause” ( ) button on computer and downloading will continue. 5. Repeat steps 3 and 4 until you have finished downloading. NOTE: Do not click stop button on computer while continuously downloading songs. Remember to click pause button in between your desired songs. Press stop button on computer only when all your desired songs have been downloaded. ... - Page 53 To download music from CD to computer: 1. Press the POWER switch to turn the unit on. 2. Press the CD button and press open/close button. 3. Load a disc on the disc tray with printed label facing up. 4. Press open/close button to close the CD door and press PLAY/PAUSE button to start playing. 5. Click the Record ( ) button to start recording. The waves (left and right tracks) will show on the interface. 6. At end of song, click “pause” ( ) button on computer and press STOP button on CD. Replace the CD or press skip button to select another desired song. Press PLAY/PAUSE button to start playing the next song. Immediately press “pause” ( ) button on computer and downloading will continue. 7. Repeat steps 5 and 6 until you have finished downloading. NOTE: Do not click stop button on computer while continuously downloading songs. Remember to click pause button in between your desired songs. Press stop button on computer only when all your desired songs have been downloaded. ...
- Page 54 To download music from AUX to computer: 1. Press the POWER switch to turn the unit on. 2. Plug one end of the AUX cable (included) into the AUX IN socket on the front of the unit. 3. Plug the other end of the cable into the headphone or Line Out socket of the external source. 4. Turn on the external device, adjust the volume level and press PLAY to start playing the music. 5. Click the Record ( ) button to start recording. The waves (left and right tracks) will show on the interface. 6. To skip to another song, click “pause” ( ) button on computer and press STOP button on external device. Press skip button on external device to select another desired song. Press PLAY button on external device to start playing the next song. Immediately press “pause” ( ) button on computer and downloading will continue. 7. Repeat steps 5 and 6 until you have finished downloading. NOTE: Do not click stop button on computer while continuously ...
- Page 55 To download music from TAPE to computer: 1. Press the POWER switch to turn the unit on. 2. Load Cassette Tape into the unit (located on side of the unit), playback will automatically begin. 3. Click the Record ( ) button to start recording. The waves (left and right tracks) will show on the interface. 4. At end of cassette tape, click “pause” ( ) button on computer and press EJECT button on the cassette. Turn over or replace the cassette tape and load it to play. Immediately press “pause” ( ) button on computer and downloading will continue. 5. Repeat steps 3 and 4 until you have finished downloading. NOTE: Do not click stop button on computer while continuously downloading songs. Remember to click pause button in between your desired songs. Press stop button on computer only when all your desired songs have been downloaded. After your have finished downloading, you may play back the songs ...
- Page 56 To download music from RADIO (FM) to computer: 1. Press the POWER switch to turn the unit on. 2. Press AM/FM button once or twice to select FM. You may also record AM band, however, the Recording Quality may be affected by poor AM reception. 3. Tune in your desired station. 4. Click the Record ( ) button to start recording. The waves (left and right tracks) will show on the interface. 5. To tune a different station, at end of program click “pause” ( ) button on computer then select another desired station. Immediately press “pause” ( ) button on computer and downloading will continue. 5. Repeat steps 4 and 5 until you have finished downloading. NOTE: Do not click stop button on computer while continuously downloading songs. Remember to click pause button in between your desired songs. Press stop button on computer only when all your desired songs have been downloaded. ...
-
Page 57: General Problems For All Windows Versions
GENERAL PROBLEMS FOR ALL WINDOWS VERSIONS 1. When the turntable is connected, you cannot hear any sound if you need to listen to video or music. It is because the default playback device has been changed to USB Audio CODEC once the turntable connects to the PC. Solution1: Remove the USB cable from the PC. Solution2: Click "Start" and go to the Control Panel. Find and click “Sound” icon. Click the "Playback" tab and change the playback device. Click ok. Then sound comes out. Please note that you need to change the setting manually when you connect the USB cable with the PC. For more information on Windows system sound requires reset, please go to http://wiki.audacityteam.org/index.php?title=USB_turntables#Set_up_A udacity_to_record_from_the_turntable 2. If you want to hear the music while downloading to the computer, go to the Audacity interface. Click Edit and select “Preference”. Then click “Audio I/O” tab. And follow the following setting. Follow the setting below.Click “OK” to confirm. ... - Page 58 For more information please see ‘Set up Audacity to record from the turntable’ in website below: http://wiki.audacityteam.org/index.php?title=USB_turntables#Set_u p_Audacity_to_record_from_the_turntable 58 ...
- Page 59 ADJUSTMENT FOR WINDOWS 7 AND SOME VISTA SYSTEMS ONLY If you do not have the fluctuant wave on the Audacity interface or the sound is distorted when recording, adjust the recording level as follows: Click “Start” at the lower left corner, go to the Control Panel. In Classic View, double click the Sound icon. ...
- Page 60 Or in Control Panel Home view, click “Hardware and Sound”. Then click “sound”. ...
- Page 61 In the Sound interface, select “Recording” tab. Then, choose a recording device. (It is recommended that you to select Microphone of USB Audio CODEC which is highlighted in the picture, then click “Properties”.) Select “Levels” and adjust the Volume Reading. The reading is from 0 to 100. Normally it should be 3‐6. However, you may refer to the Input Level Indicator from the Audacity panel that doesn’t exceed 0. Then click “OK” on the Microphone properties interface and sound interface. Close the Control Panel. (Please note that there is no “Levels” tab in “Sound” panel in some operating systems, such as Windows 98, Windows 2000. For Windows 7 users and Vista users, the “Levels” tab in “Sound” panel is available.) 61 ...
- Page 62 Input Level Indicator For more information on Windows Vista http://wiki.audacityteam.org/wiki/Windows_Vista_OS For more information on Windows 7 http://wiki.audacityteam.org/wiki/Windows_7_OS You have a music download on your computer now. But the music needs to be saved and converted to WAV, Ogg, or MP3 formats before exporting. You may play back the song through your computer. 62 ...
-
Page 63: Preparing To Export And Save For Mp3 Format
Simply click the ( ) to play and turn on your computer speaker NOTE: You may visit the Audacity website at http://audacity.source forge.net. for more detailed information and operation, etc. PREPARING TO EXPORT AND SAVE FOR MP3 FORMAT Prepare for MP3 Export‐‐‐ (Additional software “lame_enc.dll” needs to be installed.) 1. Please make sure that the software disc is still inserted in your computer. 2. Click the “Edit” Tab on the Audacity interface, select “Preferences”. 3. Select the File Formats Tab and click on the Find Library Button. ... - Page 64 4. A dialog box will appear. Click “Yes”. 5. Another box appears to locate the “CD ROM”. Click “Look In” Arrow Down and select CD‐ROM. Then double click on Audacity folder and then Audacity_for_win. You will find the “lame_enc.dll” software. Click the software then click Open. 64 ...
- Page 65 6. Click on the OK Button. Now the MP3 software set up is complete and you may proceed with the exporting to MP3 format. 65 ...
-
Page 66: Dividing Tracks
DIVIDING TRACKS After you have finished downloading, you may play back the songs through your computer before exported. In stop mode, simply click ( ) SKIP TO START buton then the ( ) PLAY button. 1. Press ( ) button to return to the beginning of the first song. 2. Move cursor to the wave graphic area, left click mouse and hold then drag from left to right. Release the mouse when the highlighted reach end of first song. Highlighted ... - Page 67 See interface example below, saved as MP3 format: Complete box below: Click OK. Note: The box above will come up every time Audacity is opened, with the 1st track only. ...
- Page 68 Second song to be divided and saved: 1. Move cursor to the wave graphic beginning of 2 song. Left click mouse and hold then drag from left to right until you reach end of 2 song. 2. Click "file" tab then select "EXPORT SELECTION as MP3". 3. Follow Steps above to divide songs, one‐by‐one. To Change The Titles (For MP3 Format Only) DURING EXPORT SELECTION AS MP3: the software only provides one time to title the song being saved. All subsequent songs being divided from the same track are with the same title. To change the titles, follow the steps below: 1. Open the Recorded Music file which will show all its contents. 2. Left click to highlight the song. 3. Right click and select “Properties”, then click on “Summary”. 4. Double click on “Title” name, and then change it to your desired title. 5. Click OK. 6. Follow steps 2, 3, 4 &5 to title all songs. Note: THIS SOFTWARE EXPORT AS MP3, WAV AND OGG FORMAT. 68 ...
- Page 69 MP3, WAV AND OGG FORMAT THESE ARE DIGITAL FILE FORMATS FOR AUDIO (MUSIC) AND MOST CURRENT COMPUTERS ARE COMPATIBLE. HOWEVER, IF YOU COPY THE FILE ONTO A CD DISC (CD‐R OR CD‐RW) AND PLAY WITH ANOTHER CD PLAYER, YOU HAVE TO MAKE SURE THE CD PLAYER SUPPORTS THOSE FORMATS; OTHERWISE, THE COPIED CD DISC WILL NOT PLAY. THE SAME THING IS TRUE WITH A COPIED FILE TO BE PLAYED ON ANOTHER MP3 PLAYER. EXPORT AND SAVE FOR WAV AND OGG FORMATS When the song is finished, click the ( ) on the screen. Then raise the cue lever on the turntable. 1. Highlighted the song which you want to save then click the file tab on the audacity interface. 2. Select “Export Selection as WAV” or “Export Selection as Ogg”. To Export Selection AS WAV………… 69 ...
- Page 70 To Export Selection As Ogg 3. Once you have chosen to which file format recording should be exported, the interface below appears. Here you may provide the file name and the location where it will be saved, i.e. on the desktop. Then click “Save”. Save as WAV ...
- Page 71 Save as Ogg Note: • You have an option to save one time for all the songs into one file, after complete the download, click the file tab, select the Export as MP3, Export as WAV or Export as OGG. • Now you can copy the exported & saved music to an MP3 player. 71 ...
-
Page 72: Copying The Music File To An Mp3 Player
COPYING THE MUSIC FILE TO AN MP3 PLAYER 1. Connect MP3 player to your computer via USB cable. 2. Turn on your computer. 3. Double click on “MY COMPUTER”. 4. Locate the drive named “REMOVABLE DISK” or “MP3 PLAYER” – This is your MP3 player. 5. Double click the “REMOVABLE DISK/MP3 PLAYER” – to open the folder. It will show all files currently on your player. 6. Next locate your music files on your computer. Most people store them in their “MY MUSIC” folder. 7. Once your music folder/MP3 file folder is open, click once to highlight the song you want to send to your MP3 player. One of the following steps will copy the MP3 file: A. Right click on the highlighted song and a box will come up. Move cursor to “SEND TO” and another box will come up. If you have the option “REMOVABLE DISK”, click on it. This will send copy of MP3 file to MP3 player. B. If you do not have “REMOVABLE DISK” listed, then click on “COPY”. Go back and repeat steps 3, 4 & 5 (above). Right click in the middle of the window and a box will open. Select “PASTE” and MP3 file will be sent to MP3 player. ... -
Page 73: Audacity For Mac Users
AUDACITY FOR MAC USERS 1. Please insert the software disk that comes with your unit. Click the software disk on the desktop. 2. Double click Audacity folder. There are five folders in the Audacity folder. Select Audacity_for_MAC for Macintosh system, and select Audacity_for_WIN for Windows system. If ... -
Page 74: Configuring Audacity For Mac
CONFIGURING AUDACITY FOR MAC AUDACITY INTERFECE FOR MAC Audacity Interface‐‐‐Settings and controls. At the top of the main Audacity window, to the right of the play control buttons, you will see the input and output level meters (labeled L and R). Under the output level meter, is an icon that looks like a microphone. Next to the microphone is a black arrow that points down. Click this arrow and select Start Monitor. (If you don't see the input and output level meters, open your Preferences again as described above.) 74 ... -
Page 75: Audacity Control Buttons
AUDACITY CONTROL BUTTONS Use the attribute control buttons at the top of the screen to go to beginning, Play, Record, Pause, Stop and End. Use the File, Edit, View, Project, Generate, Effect and Analyze menus to Save, Export, and edit the music. 1. Click the ( ) button to skip to start; 2. Click the ( ) button to play; ... -
Page 76: Audacity Preferences
AUDACITY PREFERENCES 1. Click the “Audacity” on the Audacity interface, select “Preferences”. The screen will open up Audacity Preferences. You can see the Audio I/O, Quality, Import/Export, Interface, Spectrograms, Directories, Smart Recording, Theme, Keyboard and Mouse. 76 ... - Page 77 2. Select the recording device: Core Audio (USB Audio CODEC) Click the “Audio I/O” at the Audacity Preferences interface. Click the Recording “Device” and select “Core Audio (USB Audio CODEC)”. Click the “Channels” and select 2 (stereo). Click the “OK”. Note1: If you want to hear the music while downloading on the computer, make sure the third check box is selected. Note2: If you couldn't find the "Core Audio (USB Audio CODEC)" from the Device list, close the Audacity Software and re‐open then try again or insure the turntable is connect to the computer. 77 ...
- Page 78 Under the Quality tab, set the Default Sample Format to 16 bit. Select OK to save your setting and close the preferences window. 3. To set the Smart Recording To select the Smart Recording in the Audacity Preferences interface, and set the Sound Activation Level (dB) to ‐36, and then click OK. ...
- Page 79 At the top of the main Audacity window, to the right of the input and output level meters (labeled L and R), you will see the input and output volume. The left of the input and output volume, there is a volume icon. Adjust the output and input volume to maximum. NOTE: Because of the variation of different operation systems, the input volume control may not work on some individual Windows versions. Windows Vista is recommended to ensure the input volume control working properly. For more information on Mixer Toolbar, please see ‘OS X‐specific issues’ on the website below: http://wiki.audacityteam.org/index.php?title=Mixer_Toolbar_Issues For further information of Audacity on MAC OS X, please see http://wiki.audacityteam.org/wiki/Mac_Bugs 79 ...
-
Page 80: Recording Operation
RECORDING OPERATION To download music and save into computer: 1. Place the record on the turntable. 2. Move the tone arm over to the record to start playing. 3. Click the Record ( ) button to start recording. The waves (left and right tracks) will show on the interface. 4. At end of song, click “pause” ( ) button on computer and raise the cue lever on turntable. For the next song, replace the album or move tone arm to another desired song. Lower the cue lever on turntable to start playing the next song. Immediately press “pause” ( ) button on computer and downloading will continue. 5. Repeat steps 3 and 4 until you have finished downloading. NOTE: Do not click stop button on computer while continuously downloading songs. Remember to click pause button in between your desired songs. Press stop button on computer only when all your desired songs have been downloaded. After your have finished downloading, you may play back the songs through your computer. In stop mode, simply click ( ) SKIP TO START button then the ( ) PLAY button. 80 ... - Page 81 To download music from CD to computer: 1. Press the POWER switch to turn the unit on. 2. Press the CD button and press open/close button. 3. Load a disc on the disc tray with printed label facing up. 4. Press open/close button to close the CD door and press PLAY/PAUSE button to start playing. 5. Click the Record ( ) button to start recording. The waves (left and right tracks) will show on the interface. 6. At end of song, click “pause” ( ) button on computer and press STOP button on CD. Replace the CD or press skip button to select another desired song. Press PLAY/PAUSE button to start playing the next song. Immediately press “pause” ( ) button on computer and downloading will continue. 7. Repeat steps 5 and 6 until you have finished downloading. NOTE: Do not click stop button on computer while continuously downloading songs. Remember to click pause button in between your desired songs. Press stop button on computer only when all your desired songs have been downloaded. After your have finished downloading, you may play back the songs through your computer. In stop mode, simply click ( ) SKIP TO START button then the ( ) PLAY button. 81 ...
- Page 82 To download music from AUX to computer: 1. Press the POWER switch to turn the unit on. 2. Plug one end of the AUX cable (included) into the AUX IN socket on the front of the unit. 3. Plug the other end of the cable into the headphone or Line Out socket of the external source. 4. Turn on the external device, adjust the volume level and press PLAY to start playing the music. 5. Click the Record ( ) button to start recording. The waves (left and right tracks) will show on the interface. 6. To skip to another song, click “pause” ( ) button on computer and press STOP button on external device. Press skip button on external device to select another desired song. Press PLAY button on external device to start playing the next song. Immediately press “pause” ( ) button on computer and downloading will continue. 7. Repeat steps 5 and 6 until you have finished downloading. NOTE: Do not click stop button on computer while continuously downloading songs. Remember to click pause button in between your desired songs. Press stop button on computer only when all your desired songs have been downloaded. After your have finished downloading, you may play back the songs through your computer. In stop mode, simply click ( ) SKIP TO START button then the ( ) PLAY button. 82 ...
- Page 83 To download music from TAPE to computer: 1. Press the POWER switch to turn the unit on. 2. Load Cassette Tape into the unit (located on side of the unit), playback will automatically begin. 3. Click the Record ( ) button to start recording. The waves (left and right tracks) will show on the interface. 4. At end of cassette tape, click “pause” ( ) button on computer and press EJECT button on the cassette. Turn over or replace the cassette tape and load it to play. Immediately press “pause” ( ) button on computer and downloading will continue. 5. Repeat steps 3 and 4 until you have finished downloading. NOTE: Do not click stop button on computer while continuously downloading songs. Remember to click pause button in between your desired songs. Press stop button on computer only when all your desired songs have been downloaded. After your have finished downloading, you may play back the songs through your computer. In stop mode, simply click ( ) SKIP TO START button then the ( ) PLAY button. 83 ...
- Page 84 To download music from RADIO (FM) to computer: 1. Press the POWER switch to turn the unit on. 2. Press AM/FM button once or twice to select FM. You may also record AM band, however, the Recording Quality may be affected by poor AM reception. 3. Tune in your desired station. 4. Click the Record ( ) button to start recording. The waves (left and right tracks) will show on the interface. 5. To tune a different station, at end of program click “pause” ( ) button on computer then select another desired station. Immediately press “pause” ( ) button on computer and downloading will continue. 5. Repeat steps 4 and 5 until you have finished downloading. NOTE: Do not click stop button on computer while continuously downloading songs. Remember to click pause button in between your desired songs. Press stop button on computer only when all your desired songs have been downloaded. After your have finished downloading, you may play back the songs through your computer. In stop mode, simply click ( ) SKIP TO START button then the ( ) PLAY button. 84 ...
- Page 85 DIVIDING TRACKS After you have finished downloading, you may play back the songs through your computer before exporting. In stop mode, simply click ( ) SKIP TO START button then the ( ) PLAY button. 1. Press ( ) button to return to the beginning of the first song. 2. Move cursor to the wave graphic area, left click mouse and hold then drag from left to right. Release the mouse when the highlighted reach end of first song. 3. Click "file" tab then select "EXPORT SELECTION ". 4. The window will pop up a dialog box for you to complete the Metadata. Click OK button after you type in. ...
- Page 86 5. Then a window appears. Select your music file location and format, and type in your file name. Click “Save” and the song is saved on the computer. 86 ...
-
Page 87: Export And Save Files
EXPORT AND SAVE FILES When the song is finished, click the ( ) on the screen. Then raise the cue lever on the turntable. You have a music download on your computer now. You may play back the song through your computer. Simply click the ( ) to play. NOTE: You may visit the Audacity website at http://audacity.source forge.net. for more detailed information and operation, etc. 1. Click the file tab on the audacity interface. Select “Export” to save the file. ... -
Page 88: Troubleshooting Guide (Usb-Pc Recording)
TROUBLESHOOTING GUIDE (USB‐PC RECORDING) If you have any trouble with the unit, please look through problems below and see if you can solve them by yourself before calling your dealer. NO SOUND: • If you are not getting any sound into the software application, go back to the preferences as shown on previous pages and make sure you have selected the USB input for the recording device. • Power Cycle: Close Audacity, turn off the turntable, unplug the USB Cable. Then plug in the USB Cable, turn on the turntable, and reopen Audacity. • If you are not able to hear any audio as you play the record, please click on the microphone drop‐down arrow and select Monitor Input. This will enable you to hear the audio from the turntable, even if you have not record‐enabled the Audacity application. ... - Page 89 • Check the microphone slider to make sure that it is at full volume, all the way to the right as shown in below. If you are not seeing the microphone slider, please go to the Preferences menu in Audacity, click on the Interface tab and make sure that the Enable Mixer Toolbar and Enable Meter Toolbar options are checked. If they are not, please check them and then press OK. POOR SOUND Quality: • Check your stylus (needle) to make sure it is secured to the tone arm. The stylus must be connected to the tone arm whenever using the turntable. • Make sure that your RCA plugs are plugged into a source and are not touching bare metal. If you are experiencing noise through the USB, you may have interference from the RCA plugs. Be sure that the USB cable is not touching or near any other cables. • If you experience any odd sounds coming from the recording, try closing all applications, restarting the computer, and only run Audacity while recording. • Make sure that you have properly installed and calibrated the tone arm of the turntable. ...
-
Page 90: Specifications
SPECIFICATIONS AMPLIFIER section Output Power……………………………2W + 2W Frequency Response…………………60 TO 20,000 Hz TUNER section FM Section Frequency Range………………………88 TO 108 MHz AM Section Frequency Range……………………….530 TO 1600 KHz CD PLAYER section Frequency Response…………………60 TO 20,000 Hz +/‐ 4 dB Signal‐to‐Noise Ratio………………….55 dB (IEC‐A) CASSETTE DECK section Track System………………………………4 Track, 2 channel stereo Tape Speed………………………………..4.8 cm/sec Wow and Flutter………………………..0.4% (WRMS) Frequency Response…………………..125 TO 6300 Hz RECORD PLAYER section Motor…………………………………………DC servo motor Drive System………………………………Belt Driver Speeds………………………………………33‐1/3 rpm, 45 rpm and 78 rpm Wow &Flutter……………………………Less than 0.35% (WTD) S/N Ratio…………………………………..More than 50 dB Cartridge Type……………………………Ceramic Stereo Cartridge Stylus………………………………………….402‐M208‐165 SPEAKER SYSTEM section Type……………………………………………. 1‐way Impedance…………………………………. 8 ohm Input Power……………………………….. Max. 5 W ... - Page 91 GENERAL Power Requirements…………………AC 240 V ~ 50 Hz Power Consumption…………………. 30 W Dimensions (W x H x D)………………440x230x370mm Weight………………………………………. 7.2kg Standard Accessories…………………Operation Instruction Booklet 45 rpm Adaptor CD Disc of Software Driver USB Cable AUX IN Cable For continuous improvement, specifications and manual are subject to change without prior notice. 91 ...
-
Page 92: Troubleshooting Guide (Main Unit)
TROUBLESHOOTING GUIDE (MAIN UNIT) If you have any trouble with the unit, please look through this chart and see if you can solve the problem by yourself before calling your dealer. Problem Cause Solution Power does not Connect the unit to come on when the Unit is unplugged. the AC power power switch is supply. pressed. The volume is turned down (to Adjust the volume. MIN). No sound comes The input selector out of the speakers. Re‐select the does not match desired input the playback source. source. The unit is too Turn off the TV or close to a TV set or other appliance, The sound is noisy. another similar and re‐locate the appliance. unit. External factors Remove the power The unit has no such as ESD ... - Page 93 Problem Cause Solution The station is not Properly tune‐in the tuned‐in properly. desired station. Can’t listen to any A TV set is being station, or signal used nearby and is appears weak. Turn off the interfering with interfering TV set. the radio reception. Re‐orient the The sound is The antenna is not antenna until distorted. oriented properly. reception improves. Insert the CD with The CD is inserted the printed side CD stops upside down. immediately after right side up. starting, or unit The CD is dusty or pauses or stops there is Carefully clean and during play. condensation on dry the CD. the CD. The CD player is ...
- Page 94 Problem Cause Solution The sound is noisy The stylus is not Place the stylus in when playing the placed in the the middle center. record. middle center. The sound is noisy The stylus is Please change a when used for a damaged. new stylus. period of time. 94 ...
Need help?
Do you have a question about the E-6880 and is the answer not in the manual?
Questions and answers
How can I improve aerial reception
To improve aerial reception for the AWA E-6880:
- For AM reception: Turn the unit around to find the best position, as the AM antenna is internal.
- For FM reception: Extend and rotate the FM antenna to achieve clearer reception.
This answer is automatically generated