Table of Contents
Advertisement
Advertisement
Table of Contents

Related Manuals for AWA UCE1168PR


Summary of Contents for AWA UCE1168PR
- Page 1 UCE1168PR USB/SD/MP3/CD/Radio Antique Turntable I N S T R U C T I O N M A N U A L...
- Page 2 WARNING TO PREVENT FIRE OR SHOCK HAZARD DO NOT EXPOSE THIS APPLIANCE TO RAIN OR MOISTURE. CAUTION RISK OF ELECTRIC SHOCK DO NOT OPEN WARNING : SHOCK HAZARD-DO NOT OPEN LIGHTNING FLASH WITH ARROWHEAD SYMBOL - EXCLAMATION POINT - within an equilateral triangle, within an equilateral triangle, is intended to alert the is used to indicate that a specific component shall be user to the presence of uninsulated dangerous...
-
Page 3: Safety Instructions
SAFETY INSTRUCTIONS 1. READ INSTRUCTIONS - All the safety and operating instructions should be read before the appliance is operated. 2. RETAIN INSTRUCTIONS - The safety and operating instruction should be retained for future reference. 3. HEED WARNINGS - All warnings on the appliance and in the operating instructions should be adhered to. 4. -
Page 4: Location Of Control
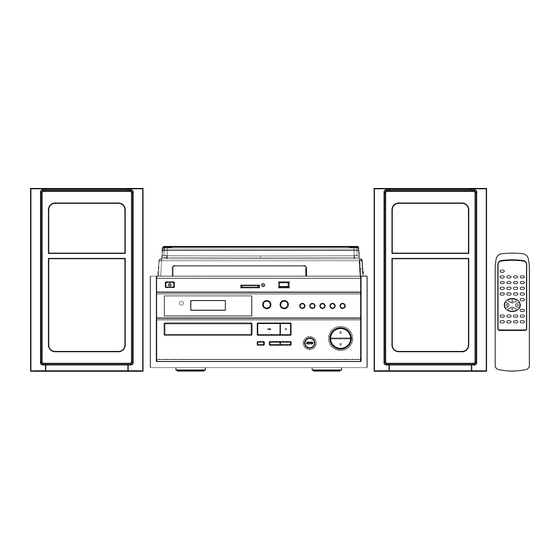
LOCATION OF CONTROL SD CARD SLOT USB SLOT MODE PHONO PROGRAM COVER BIT RATE POWER PRE-DN REMOTE PRE-UP SENSOR PLAY/PAUSE STOP/BAND CD DOOR VOL + VOL - STANDBY RECORD LCD DISPLAY OPEN / CLOSE SKIP + SKIP - FUNCTION EXTERNAL AUX - IN JACK SPEAKER (L/R) -
Page 5: Power Source
LOCATION OF CONTROL SPEED SELECTOR TONE ARM PLATTER TURNTABLE HEAD PHONO COVER ASSEMBLY 1. Push the metal bracket to rear side. 2. Connect the metal bracket to the phono cover. 3. Connect the hinge of the phono cover to the appliance. -
Page 6: Remote Control
REMOTE CONTROL 1. STANDBY 2. TIMER 3. CLOCK 4. 0 - 9 5. PROGRAM 6. INFO MONO / ST. 7. SKIP + 8. STOP / BAND 9. SKIP - 10. X-BASS 11. SLEEP 12. VOL + 13. VOL - 14. P - DOWN 15. -
Page 7: Radio Operation
RADIO OPERATION AUTOMATIC TUNING 1. Press the “FUNCTION” button to select “TUNER” mode. 2. Press the “STOP / BAND” button to select AM or FM. 3. Press the “SKIP +” or “SKIP -” button to start automatic tuning process. 4. When a station is tuned in the tuning process, it will stop automatically and you can listen to your desired station. -
Page 8: General Operation
CD / MP3 OPERATION GENERAL OPERATION PLAY / PAUSE Press to start playing CD / MP3 disc. Press again to stop playing CD / MP3 operation temporarily. Press again to resume playback. SKIP + & Press to go to the next track or back to the previous track. SKIP - Press and hold while playing until you find the point of the sound. - Page 9 CD / MP3 OPERATION PROGRAM Up to 20 tracks can be programmed for disc play in any order. Be sure to press the “STOP” button before use. 1. Press the “PROGRAM” button, the display will show “P00 000” and “PROGRAM”. 2.
-
Page 10: Usb / Sd Operation
USB / SD OPERATION GENERAL OPERATION PLAY / PAUSE Press to start playing tracks from the USB / SD card. Press again to stop playing USB / SD operation temporarily. Press again to resume playback. SKIP + & Press to go to the next track or back to the previous track. SKIP - Press and hold while playing until you find the point of the sound. -
Page 11: Phono Operation
PHONO OPERATION GENERAL OPERATION Notes: Remove the stylus protector. Be sure that the tone arm is detached from the tone arm rest before operation and resecured again afterward. 1. Set the “FUNCTION” selector to “PHONO” mode. 2. Set the “SPEED” selector to the proper speed depending on the record to be played. 3. -
Page 12: Record Operation
RECORD OPERATION ENCORDING FROM AUX IN / PHONO TURNTABLE/ RADIO * Plug in either a blank SD/MMC or a flash USB device, than select and play on the desired input. 1. Press the “RECORD” button on UNIT/REMOTE until “REC” flashing on display. Appliance will start recording. -
Page 13: Other Features
OTHER FEATURES Press the “EQ” button on remote control, each press switch the EQ function as follows: 1 - CLASSIC 2 - ROCK 3 - POP 4 - JAZZ 5 - FLAT (NORMAL) Notes: - The player not responsible for playability of MP3 in any case. Due to recording condition such as PC performance, writing software, media ability or etc. - Page 14 OTHER FEATURES SLEEP 1. Press the “SLEEP” button on remote control, display will show “90”. That means, after 90 minutes, appliance will automatically turn to standby mode. 2. Press the “SLEEP” button again to select the automatically turn off time, from 90, 80, 70, 60, 50, 40, 30, 20, 10 minutes.
-
Page 15: Timer Setting
OTHER FEATURES TIMER SETTING Timer setting must be after completed clock setting. 1. Press the “STANDBY” button to turn the unit at standby mode. 2. Press the “TIMER/ALARM” button on remote control or unit to timer on mode. Display: TIMER 3. - Page 16 OTHER FEATURES OTHER FEATURES OTHER FEATURES FIND 1. Press the “FIND” button on remote control once, the unit will start searching for song’s title which starting from “A - Z” then “0 - 9” by pressing the “SKIP+ or -” button on remote control. 2.
Need help?
Do you have a question about the UCE1168PR and is the answer not in the manual?
Questions and answers