
Related Manuals for Kodak EASYSHARE C140


Summary of Contents for Kodak EASYSHARE C140
-
Page 1: Digital Camera
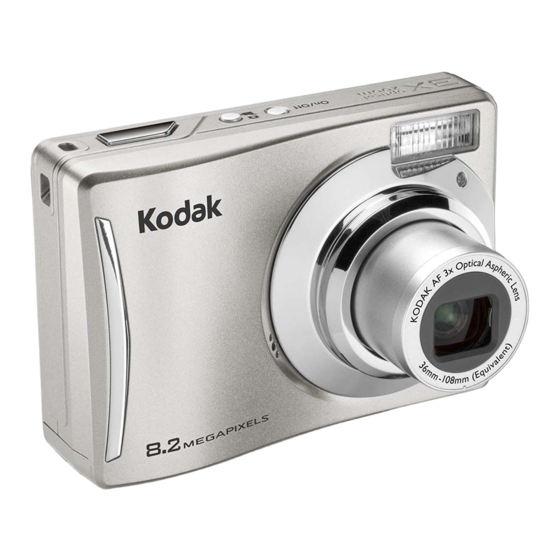
KODAK EASYSHARE C140 Digital Camera Extended user guide www.kodak.com For interactive tutorials: www.kodak.com/go/howto For help with your camera: www.kodak.com/go/c140support... - Page 2 Eastman Kodak Company Rochester, New York 14650 © Eastman Kodak Company, 2008 All screen images are simulated. Kodak, EasyShare, and Perfect Touch are trademarks of Eastman Kodak Company. 4H5263_en...
-
Page 3: Front View
Front view 1 Shutter button 2 Mode button 3 Power button 4 Flash www.kodak.com/go/support 5 Self-timer light 6 Lens 7 USB/AV Out 8 Microphone Product features... -
Page 4: Back View
Product features Back view Delete, Info, Menu, Review buttons Zoom (Telephoto/Wide Angle) button Strap post , OK button Share button SD/SDHC Card/Battery compartment Tripod socket www.kodak.com/go/support... -
Page 5: Table Of Contents
Selecting multiple pictures/videos ... 15 Playing a slide show... 16 Using the menu button in review... 18 Rotating pictures... 18 Cropping pictures... 19 Using KODAK PERFECT TOUCH Technology... 19 Copying pictures/videos... 20 Editing videos ... 20 Understanding the review icons... 23 www.kodak.com/go/support... - Page 6 8 Appendix ...46 Camera specifications ... 46 Care and maintenance ... 48 Upgrading your software and firmware... 49 Storage capacities ... 49 Important safety instructions ... 49 Battery replacement, battery life ... 50 Limited warranty ... 51 Regulatory compliance ... 53 www.kodak.com/go/support...
-
Page 7: Setting Up Your Camera
IMPORTANT: For package contents, see your product package. Attaching the strap Loading the AA batteries NOTE: If your package included rechargeable batteries and a charger, charge the batteries. (See the charger documentation.) For information on replacing batteries and extending battery life, see page www.kodak.com/go/support... -
Page 8: Turning On The Camera
Setting the language and date/time NOTE: To change language and date/time in the future, use the Setup tab Language: to change. OK to accept. Date/Time: At the prompt, press OK. to change current field. for previous/next field. OK to accept. (see page www.kodak.com/go/support 28). -
Page 9: Storing Pictures On An Optional Sd Or Sdhc Card
Inserting or removing a card while the camera is on may damage the pictures, the card, or the camera. 1 Turn off the camera. 2 Insert or remove the optional card. 3 Turn on the camera. Purchase accessories www.kodak.com/go/support Setting up your camera optional www.kodak.com/go/c140accessories... -
Page 10: Taking Pictures/Videos
NOTE: Framing marks do not appear in all modes. Multiple framing marks may appear when faces are detected. When you press the Shutter button halfway down, the framing marks attempt to follow the main subject. www.kodak.com/go/support to highlight... -
Page 11: Reviewing The Picture/Video Just Taken
Using optical and digital zoom NOTE: You may notice decreased image quality when using digital zoom. The slider pauses and turns red when the picture quality reaches the limit for an acceptable 4 x 6-in. (10 x 15 cm) print. www.kodak.com/go/support Adjust volume page 1 To zoom in picture-taking mode, press Telephoto (T). -
Page 12: Using Shortcuts
LCD. 2 Press to access functions like Flash, Exposure Compensation, Self-timer, and Auto focus. (You’ll see different functions in different modes.) 3 Press to choose a setting. To hide the shortcuts again, press Shortcuts Press to show/hide shortcuts. www.kodak.com/go/support... -
Page 13: Using The Flash
Fill (Flash On) Red Eye To turn the red eye feature on/off, see Using the Setup tab, page www.kodak.com/go/support 1 Press the Info 2 Press to highlight the Flash icon on the LCD. Press to choose a Flash mode. NOTE: You can also press shortcuts are not visible. -
Page 14: Using Different Modes
Capturing video with sound. (See NOTE: Sound cannot be played on the camera. Sound is heard after the video is transferred to your computer. Point-and-shoot simplicity when taking pictures in practically any situation. (See page button and choose Picture Size. page 10.) www.kodak.com/go/support... -
Page 15: Using Scene (Scn) Modes
Close-ups of yourself. Assures proper focus, minimizes red eye. Night Portrait Reduces red eye of people in night scenes or low-light conditions. Night Landscape Distant scenery at night. Flash does not fire. High-ISO People indoors, in low-light scenes. Sport Action pictures. www.kodak.com/go/support Taking pictures/videos to highlight SCN. -
Page 16: Taking A Video
To stop recording, press and release the Shutter button again. To review and work with videos, see NOTE: Sound cannot be played on the camera. Sound is heard after the video is transferred to your computer. www.kodak.com/go/support to highlight page... -
Page 17: Using The Self-Timer
Shutter button press. Place the camera on a tripod or flat surface. Use the same procedure to take a 2- or 10-second self-timer video, but press the Shutter button completely down. www.kodak.com/go/support 1 In any picture-taking mode, press the Info button to show shortcuts. -
Page 18: Understanding The Picture-Taking Icons
Taking pictures/videos Understanding the picture-taking icons Self timer Exposure compensation Flash mode Capture mode Tag name Pictures/time remaining Zoom slider Battery level Date stamp www.kodak.com/go/support... -
Page 19: Working With Pictures/Videos
Working with pictures/videos Reviewing pictures/videos Magnifying a picture Playing a video Playback speed Forward Reverse www.kodak.com/go/support 1 Press the Review 2 Press for previous/next picture/video. Press the Shutter button halfway down to return ■ to Capture mode. ■ To view pictures/videos as thumbnails, see page 1 Press T to magnify 1X–8X. -
Page 20: Deleting Pictures/Videos
IMPORTANT: Your camera offers a built-in Help system. CAUTION: Formatting internal memory or an SD or SDHC Card deletes all (including protected) pictures/videos. (Formatting internal memory also deletes email addresses and tag names. To restore them, see EASYSHARE Software Help.) button. button. Protecting appears See page www.kodak.com/go/support... -
Page 21: Viewing Pictures/Videos In Different Ways
Use the multi-select feature when you have two or more pictures to print, transfer, delete, etc. Multi-select is used most effectively in Multi-Up mode, Selected pictures www.kodak.com/go/support button. and highlight the appropriate tab. to highlight it. Then press the Telephoto... -
Page 22: Playing A Slide Show
Preview Show, then press OK. The slide show repeats until you press OK or until the batteries are exhausted. button. Select 2-100 pictures (see to highlight the Review tab. Highlight to highlight Loop, then page 15). See page www.kodak.com/go/support... -
Page 23: Displaying Pictures/Videos On A Television
(Image quality on a television screen may not be as good as on a computer monitor or when printed.) Sound cannot be played on the camera. Sound is heard after the video is transferred to your computer. www.kodak.com/go/support Working with pictures/videos www.kodak.com/go/c140accessories (see page 29). -
Page 24: Using The Menu Button In Review
Press the Shutter button halfway down to return to Capture mode. IMPORTANT: Your camera offers a built-in Help system. button, then the Menu button, then to find the previous/next picture. to highlight the Edit tab. button. See page See page www.kodak.com/go/support... -
Page 25: Cropping Pictures
IMPORTANT: Your camera offers a built-in Help system. Using KODAK PERFECT TOUCH Technology KODAK PERFECT TOUCH Technology helps ensure better, brighter pictures. (You cannot apply PERFECT TOUCH Technology to videos, or pictures to which PERFECT TOUCH Technology is already applied.) -
Page 26: Copying Pictures/Videos
3 Follow the screen prompts. A picture is created. (The original video is saved.) Press the Shutter button halfway down to return ■ to Capture mode. See page button, then to find a button, then to highlight See page www.kodak.com/go/support... -
Page 27: Trimming A Video
You can remove an unwanted start or end from a video, saving only the desired portion. Video Trimmed video IMPORTANT: Your camera offers a built-in Help system. www.kodak.com/go/support Working with pictures/videos 1 Press the Review video. 2 Press the Menu button, then the Edit tab. -
Page 28: Making A Video Action Print
2, 7, or 14 equally spaced frames. Manual—Choose the first and last frames; the camera chooses 2, 7, or 14 frames. Full Manual—Choose 4, 9, or 16 frames. A 4-, 9-, or 16-up picture is created. See page www.kodak.com/go/support button, then to find a to highlight... -
Page 29: Understanding The Review Icons
Understanding the review icons Video duration Select picture Shortcuts Add text tag View multi-up Play video Upload tag Favorite tag Text tag name www.kodak.com/go/support Working with pictures/videos Print tag/number of prints Protected Email tag Picture/Video number Battery level Date stamp... -
Page 30: Using The Menu Button
2 seconds—picture is taken after a 2-second delay (for a steady, shutter release on a tripod). 2 shot—first picture is taken after a 10-second delay. A second picture is taken 8 seconds later. Camera specifications, page www.kodak.com/go/support... -
Page 31: Capture Options
Unavailable in Video mode. White Balance Choose your lighting condition. Face Detect Capture Choose if faces get focus priority. www.kodak.com/go/support Capture Options IMPORTANT: Your camera offers a built-in Help system. See page None 0.5, 1.0, 2.0, 4.0 seconds High Color... - Page 32 Use available light instead of flash, if possible. The camera automatically sets the focus distance depending on the zoom position. Infinity—for distant subjects; auto-focus framing marks are unavailable. On—the camera takes up to 3 pictures while the Shutter button is pressed. www.kodak.com/go/support...
-
Page 33: Video Settings
Press Menu, , and OK to access settings Video Size Choose a video resolution. www.kodak.com/go/support Capture Options IMPORTANT: Your camera offers a built-in Help system. See page +/-2.0 EV with 1/3 EV step Green—Picture is sharp enough for an acceptable 4 x 6-inch (10 x 15 cm) print. -
Page 34: Using The Setup Tab
Delete Tag—delete a tag. Clear All—cancel selected tags. Choose a date option, or turn off the feature. Preflash—red eye preflash fires before the picture is taken. Digital Correction—red eye preflash does not fire; the camera corrects red eye. Help system. See page www.kodak.com/go/support... - Page 35 Choose the regional setting that lets you connect the camera to a television or other external device. Language Reset Camera Reset settings to their default. www.kodak.com/go/support Using the menu button Setup Options IMPORTANT: Your camera offers a built-in Help system. Favorite and Upload—pictures/videos are...
- Page 36 IMPORTANT: Your camera offers a built-in Help system. Memory Card—deletes everything on the card; formats the card. Cancel—exits without making a change. Internal Memory—deletes everything in internal memory including email addresses and tag names; formats the internal memory. www.kodak.com/go/support See page...
-
Page 37: Transferring, Printing, Tagging
1 Close all open software applications before starting the installation. NOTE: If running WINDOWS OS and installing EASYSHARE Software from the Kodak Web site, do not close the WinZip application. If prompted, allow EASYSHARE Software to access the Internet. 2 Place the KODAK EASYSHARE Software CD into the CD-ROM drive. -
Page 38: Transferring Pictures/Videos
Using the USB cable Turn on the camera. 2 Connect the KODAK USB Cable, Model U-8 (may be included). Using other options You can also use a KODAK Card Reader to transfer your pictures/videos. Purchase accessories Learn more about connecting www.kodak.com/go/c140accessories www.kodak.com/go/howto www.kodak.com/go/support... -
Page 39: Printing Pictures
PICTBRIDGE enabled Printers. You need a camera with fully charged batteries, a PICTBRIDGE enabled Printer, and a USB cable. Connecting the camera to a KODAK All-in-One Printer 1 Turn off the printer. Turn on the camera. 2 Connect the appropriate USB cable from the camera to the printer. -
Page 40: Ordering Prints Online
After you transfer pictures from the camera to your computer, you can print them from EASYSHARE Software. For details, see Help in EASYSHARE Software. Ordering prints online KODAK Gallery (www.kodakgallery.com) is one of the many online print services offered in EASYSHARE Software. You can easily: ■... -
Page 41: Tagging Your Pictures
Printing tagged pictures When you transfer the tagged pictures to your computer, the EASYSHARE Software print screen opens. For details on printing, see Help in EASYSHARE Software. www.kodak.com/go/support button. Press to locate a picture. to highlight Print, then press OK. -
Page 42: Tagging Pictures/Videos For Emailing
Transferring, printing, tagging Tagging pictures/videos for emailing It’s easy to tag pictures so that they’re ready to email using KODAK EASYSHARE Software. First, create a new email address. name” on page 36.) 1 Press the Review 2 Press to highlight Email, then press OK. -
Page 43: Assigning The Favorite Tag To Pictures/Videos
When you transfer the tagged pictures/videos to your computer, EASYSHARE Software opens and categorizes your pictures/videos with the appropriate tag. IMPORTANT: Your camera offers a built-in Help system. www.kodak.com/go/support button, then locate a picture/video. (See “Add a new email address or tag name” on button, then locate a picture/video. -
Page 44: Assigning A Tag To Pictures/Videos You Take Next
Press the Shutter button halfway down to return to Capture mode. ■ When you transfer the tagged pictures/videos to your computer, EASYSHARE Software opens and categorizes your pictures/videos with the appropriate tag. IMPORTANT: Your camera offers a built-in Help system. See page www.kodak.com/go/support... -
Page 45: Troubleshooting
■ ■ Battery life is short ■ ■ www.kodak.com/go/support Make sure the batteries are charged and installed correctly page Transfer all pictures to the computer Take another picture. Continue taking pictures. The camera is operating normally. Check the flash setting, and change as needed NOTE: The flash does not fire in all modes. -
Page 46: Computer/Connectivity Problems
Make sure the USB cable model U-8 is connected to the camera and the computer (see page Make sure EASYSHARE Software is installed (see page (see page (see page see page (see 32). (see page 31). www.kodak.com/go/support 31), (see (see... -
Page 47: Picture Quality Problems
■ To automatically set exposure and focus, press the Shutter button halfway. When the framing marks turn green, press the Shutter button completely down to take the picture. www.kodak.com/go/support (see page 48). (see page 7) or change your position so light is not 46.) -
Page 48: Direct Printing (Pictbridge Enabled Printer) Problems
Press any camera button to redisplay the menu. Make sure there is a connection between the camera and the printer (see page 33). Make sure the printer and the camera have power. Follow the prompts to resolve the issue. www.kodak.com/go/support... -
Page 49: Getting Help
If you learn nothing else about your camera, learn how to use on-camera Help. Because the more you know your camera, the more confident you become! Turning on camera Help www.kodak.com/go/support Press the Menu button then highlight a menu choice. -
Page 50: Getting Help On The Web
Get information on EASYSHARE Software Get help with the WINDOWS OS and working with digital pictures Other Get support for cameras, software, accessories, more Get information on KODAK Inkjet Products Optimize your printer for truer, more vibrant colors www.kodak.com/go/contact www.kodak.com/go/c140support www.kodak.com/go/c140accessories www.kodak.com/go/c140downloads... -
Page 51: Getting Help On The Telephone
Getting help on the telephone NOTE: If you have questions concerning this product, you may speak with Kodak customer support. Australia 1800 267 588 Austria 0179 567 357 Belgium 02 713 14 45 Brazil 0800 891 42 13 Canada 1 800 465 6325... -
Page 52: Appendix
Auto focus control—Single Face detection—Up to 5 faces Shutter speed—4–1/1400 seconds; long time exposure 0.5–4 seconds ISO speed—Auto: 80–240; Manual: 80, 100, 200, 400, 800, 1000 Exposure metering—TTL-AE; Multi- (The SD logo is a trademark of the Pattern , Center-Weight, Center-Spot www.kodak.com/go/support... -
Page 53: Image File Format
Video capture— < 80 minutes maximum VGA (640 x 480 @ 29 fps) QVGA (320 x 240 @ 29 fps) Communication with computer—USB 2.0 full speed (PIMA 15740 protocol); via USB cable model U-8 Video output—NTSC or PAL www.kodak.com/go/support Appendix... -
Page 54: Care And Maintenance
Do not allow chemicals, such as suntan lotion, to contact painted surfaces. ■ Service agreements may be available in your country. Contact a dealer of KODAK Products for more information. For digital camera disposal or recycling information, contact your local authorities. -
Page 55: Upgrading Your Software And Firmware
LCD breaks, do not touch the glass or liquid. Contact Kodak customer support. ■ The use of an accessory that is not recommended by Kodak may cause fire, electric shock, or injury. For approved accessories, visit www.kodak/go/accessories. ■ Use only a USB-certified computer equipped with a current-limiting motherboard. -
Page 56: Battery Replacement, Battery Life
Remove batteries when the product is stored for an extended time. In the unlikely event that battery fluid leaks inside the product, contact Kodak customer support. In the unlikely event that battery fluid leaks onto your skin, wash immediately with ■... -
Page 57: Limited Warranty
If Kodak is unable to repair or replace a Product, Kodak will, at its option, refund the purchase price paid for the Product provided the Product has been returned to Kodak along with proof of the purchase price paid. - Page 58 Appendix Kodak (such as adapters and cables), or claims made after the duration of this warranty. Kodak makes no other express or implied warranty for this product. In the event that the exclusion of any implied warranty is ineffective under the law, the duration of the implied warranty will be the length of the express warranty period specified on your Kodak product packaging.
-
Page 59: Regulatory Compliance
Regulatory compliance FCC compliance and advisory KODAK EASYSHARE C140 Digital Camera This equipment has been tested and found to comply with the limits for a Class B digital device, pursuant to Part 15 of the FCC Rules. These limits are designed to provide reasonable protection against harmful interference in a residential installation. -
Page 60: Waste Electrical And Electronic Equipment Labeling
(separate from municipal waste.) For more information, contact your retailer, collection facility, or appropriate local authorities; or visit www.kodak.com/go/recycle. Product weight: 130 g (4.6 oz) Korean Class B ITE... -
Page 61: Canadian Doc Statement
This device complies with Industry Canada RSS-210 and FCC Rules. Operation is subject to the following two conditions: (1) this device may not cause harmful interference, and (2) this device must accept any interference received, including interference that may cause undesired operation. www.kodak.com/go/support... - Page 62 28 date setting, 2 date stamp, 28 delete button, ii deleting during quickview, 5 from internal memory, 14 from SD/SDHC Card, 14 protecting pictures, videos, 14 displaying slide show, 16 disposal, recycling, 48 downloading pictures, 31 EASYSHARE Software, 31 www.kodak.com/go/support...
- Page 63 SD/SDHC Card, 3 software, 31 ISO speed, 26 KODAK EASYSHARE Software installing, 31 upgrading, 49 KODAK PERFECT TOUCH Technology, 19 Kodak Web sites, 43 language, 29 LCD, ii brightness, 28 reviewing pictures, 13 reviewing videos, 13 lens cleaning lens, 48...
- Page 64 14 playing a video, 13 power camera, 2 power button, i pre-tagging, 38 printing from a card, 34 from computer, 34 optimizing printer, 43 order online, 34 PICTBRIDGE, 33 tagged pictures, 34 protecting pictures, videos, 14 quickview, using, 5 www.kodak.com/go/support...
- Page 65 45 set tag, 28 setting AF zone, 26 auto power off, 29 camera sounds, 29 color mode, 25 www.kodak.com/go/support date and time, 2 date stamp, 28 exposure metering, 26 image storage, 28 ISO, 26 language, 29 LCD brightness, 28...
- Page 66 5 trimming a video, 21 troubleshooting, 39 turning camera on and off, 2 undelete, undo, 14 upgrading software, firmware, 49 URLs, Kodak Web sites, 43 transferring pictures, 31 USB/AV out, i video action print, 22 copying, 20...
Need help?
Do you have a question about the EASYSHARE C140 and is the answer not in the manual?
Questions and answers