Table of Contents
Advertisement
NOTICE D'UTILISATION ET D'INSTALLATION
Installation and operating manual - Gebruiks- en installatiehandleiding - Manual de utilización e instalación - Manual do Usuario
e da Instalação - Instrukcja obs
TATOU DIGITAL
PANNEAU RAYONNANT
Radiant panel heater - Horizontal and vertical
Warmtestraalradiator - Horizontale en verticale modellen
Emisor radiante - Versiones horizontales y verticales
Emissor radiante - Versões horizontais e verticais
Promiennik elektryczny - wersja POZIOMA i PIONOWA
F
GB
NL
SP
P
PL
RU
GUIDE À CONSERVER
PAR L'UTILISATEUR
Manual must be kept by end user
Gids te bewaren door de gebruiker
Guía que deberá ser conservada por el usuario
Guia a conservar pelo usuario
ugi i monta
u -
ł
ż
VERSIONS HORIZONTALES ET VERTICALES
Advertisement
Table of Contents

Related Manuals for Atlantic Radiant panel heater - Horizontal and vertical


Summary of Contents for Atlantic Radiant panel heater - Horizontal and vertical
- Page 1 ż TATOU DIGITAL PANNEAU RAYONNANT VERSIONS HORIZONTALES ET VERTICALES Radiant panel heater - Horizontal and vertical Warmtestraalradiator - Horizontale en verticale modellen Emisor radiante - Versiones horizontales y verticales Emissor radiante - Versões horizontais e verticais Promiennik elektryczny - wersja POZIOMA i PIONOWA GUIDE À...
-
Page 2: Table Of Contents
Contents Warning ............................28 Installation Preparing the installation of the device..................29 Unlocking the device’s hanging frame...................30 Fixing the hanging frame to the wall.....................30 Connecting the device........................31 Locking the device on the hanging frame..................32 Operation ............................33 Turning on your device ........................34 Putting your device in standby mode ..................34 Choosing your heating mode ......................35 Heating your room: how to use Comfort mode ..............36 Lowering the temperature of your room: how to use Eco mode ........37... -
Page 3: Warning
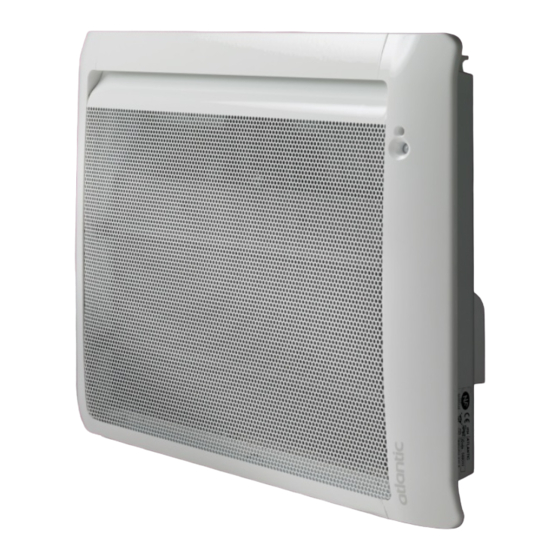
The device you have just purchased was submitted to many tests and checks ensuring its quality. We thank you for your choice ant trust. We hope you will be fully satisfied. The references for your device These are located on the right-hand side of the device. The commercial code and the serial number identify for the manufacturer the particular device you have bought. -
Page 4: Installation
Installation REPARING THE INSTALLATION OF THE DEVICE Installation guidelines - This device was designed to be installed in residential premises. In any other case, please call your distributor. - Installation must comply with the standards currently enforced in the country of use. - The device must be supplied with 230V single-phase 50Hz. -
Page 5: Unlocking The Device's Hanging Frame
’ NLOCKING THE DEVICE S HANGING FRAME We recommend that you place the device face down on the floor, taking care to protect its front surface from scratches. Take a flat- While keeping the slider bladed screw- raised, push the hanging driver and lift frame towards the bottom the slider, taking... -
Page 6: Connecting The Device
ONNECTING THE DEVICE Connection rules and regulations - The device must be supplied with 230V single-phase current at 50Hz. - The device’s power supply must be directly connected to the main supply after the circuit breaker without any intermediate switch. - The device’s power cable must be connected to the main supply via a connection box. -
Page 7: Locking The Device On The Hanging Frame
OCKING THE DEVICE ONTO THE HANGING FRAME Position the tilted Pivot the device device on brackets upwards and lift it to position it on brack- ets S2. CLIC Lower the device onto the hanging frame. A click tells you that the device is fastened and locked in place. -
Page 8: Operation
Operation Control box For your comfort and to save energy, your device is equipped with a digital-display control unit. You can set all of the device’s functions from the unit. absence and presence detector Airing function Programming / Ste the correct time and day Increase the temperature / Scroll Turn on / Change heating modes –... -
Page 9: Use
URNING ON YOUR DEVICE To turn on your device, press the Power on key (E). The device displays the ‘comfort’ temperature. When first turned on, the device is set to Comfort mode at 19°C. CTIVATING THE SCREEN If the screen is not lit up, press any button to activate the screen lighting. If the screen backlighting is not active, press any button to reac- You can now press the appropri-... -
Page 10: Choosing Your Heating Mode
HOOSING YOUR HEATING MODE You can run your device in several modes: - Comfort mode ( ) which enables you to have the right ambient temperature. - Eco mode ( ) which enables you to lower the temperature in your room when you will be away from your home for a long time or during the night, especially in bedrooms. -
Page 11: Heating Your Room: How To Use Comfort Mode
EATING YOUR ROOM HOW TO USE COMFORT MODE ESCRIPTION This mode enables you to have the ambient temperature you desire in your room. The consumption indicator lights enable you to optimise your setting (see page 48). OW TO ACTIVATE THIS MODE If the screen is not lit up, press any button to activate the screen lighting. -
Page 12: Lowering The Temperature Of Your Room: How To Use Eco Mode
OWERING THE TEMPERATURE IN YOUR ROOM HOW TO USE CO MODE ESCRIPTION We recommend that you use this mode when you will be absent for 2 to 24 hours, or during the night, especially in bedrooms. Maximum Eco temperature is 19°C. OW TO ACTIVATE THIS MODE Press the scroll key (E) several PROG... - Page 13 ROGRAMMING THE HEATING PERIOD HOW TO USE PROG MODE PROG You can program your Comfort temperature times either by using one of the three prestored programs, or by connecting the pilot wire to a programming control (Pilot wire (FP) mode is the default setting - refer to your programming control’s manual) You can connect several devices to one programmer.
- Page 14 OW TO SET THE DAY OF THE WEEK AND TIME Before programming the device, you must set the device to the correct time or make sure that the system day and time is correct. To set the day of the week and the time, hold the Programming key (C) down for several sec- The letters on the screen start...
- Page 15 To set the minutes, press the Scroll (E) key. The letters on the screen flash so that you can change the min- utes. To change the minutes, press the + (D) or - (F) key. You can now confirm your set- ting.
- Page 16 OW TO ASSIGN A DAILY PROGRAM To access the daily program, press the Programming key (C). For Monday, the ‘FP’ program is selected. (J= day - LU = Monday - FP = programming control) Two solutions are possible : a- you want to keep the selected program, b- you want to change the selected program.
-
Page 17: Programming The Heating Period: How To Use Programming Mode
OW TO ASSIGN A DAILY PROGRAM TO ALL THE DAYS OF THE WEEK Carry out the same procedure for all the days of the week, up until Sunday, either keeping the selec- ted program or changing it. Confirm the programs chosen for each day of the week by You have confirmed the daily pressing the Scroll key (E). -
Page 18: Absence Of More Than 24 Hours: Use The Frost Protection Mode
BSENCE OF MORE THAN HOURS USING THE FROST PROTECTION MODE The Frost Protection temperature is preset to 7°C (±3° C) and cannot be changed. OW TO ACTIVATE THE ROST ROTECTION MODE Press the scroll key (E) until the PROG selection arrow is on the Frost The mode selection arrow flash- Protection mode. - Page 19 OW TO USE THE ENERGY SAVING FUNCTIONS BSENCE AND PRESENCE DETECTION These functions enable your device to adapt itself to your daily life without your having to concern yourself with it. To use these functions, we recommend that you set the Comfort mode or Programming mode.
- Page 20 OW TO ACTIVATE THE ABSENCE AND PRESENCE DETECTION activate press Sweetcontrol key (A). symbol for absence / presence detection appears on the screen. If your device detects no one in the room, it automatically lowers the temperature setting progressive- ly to 3.5°C lower than the Comfort temperature setting. symbol flashes when it detects a presence.
- Page 21 OW TO USE THE ENERGY SAVING FUNCTIONS IRING FUNCTION The function enables you to stop the device from heating and to start heating again automatically when you are airing your room, thereby saving you energy. We do not recommend the use of the Airing function in corridors and rooms located close to an entrance door from outside your home or from the garage.
- Page 22 OW TO ACTIVATE THE INDOW PEN AND LOSED DETECTION activate press Aeration key (B). symbol for absence / presence detection appears on the screen. The operating instructions are for 7°C ±3°C for the whole time that your room is being aired. When you close the window, your device will return to its initial operating mode.
-
Page 23: How To Use The Energy-Saving Functions
OW TO USE THE ENERGY SAVING FUNCTIONS HE BALANCE FUNCTION Use the Balance function to set your device at an optimum temperature that is just the right balance between being comfortable and saving energy. OW TO USE THE BALANCE FUNCTION To use this function, press the Increase (D) and Decrease (F) keys simultaneously. -
Page 24: Locking The Controls
OCKING THE CONTROLS To avoid the control panel being used inopportunely, we advise you to lock it. OW TO LOCK THE CONTROLS To lock the controls, press the following keys simultaneously for several seconds: A lock appears on the screen: the - Aeration (B) and settings can no longer be changed. -
Page 25: Calibrate The Temperature
ROUBLESHOOTING ROBLEM HECKS TO BE MADE ENCOUNTERED The heating light flas- The temperature probe is disconnected or is faulty. Contact your installer. The device does not Make sure that the mode is activated. heat. If you are operating under programming, check that the programmer is in COMFORT mode. -
Page 26: Troubleshooting
ROBLEM HECKS TO BE MADE ENCOUNTERED The device’s surface It is normal for the device to be hot when it is operating; the maximum sur- is very hot. face temperature is restricted in accordance with the NF electrical perfor- mance standard. However, if you think that your device is still too hot, check that the output is suitable for the area of your room (we recommend 100W / ) and that the heater is not placed in a draught, which would interfere with its self-regulation;... -
Page 27: Warranty Conditions
FOR SALES IN NEW ZEAL ANDATLANTIC AUSTRALASIA - Phone : INSTALLER’S STAMP 0800 422 000 - Fax : 04 3800 509 FOR SALES IN AUSTRALIA ATLANTIC AUSTRALASIA PTY LTD 4/13-25 Church Street Hawthom Victoria 3122 Australia Free call : 1800 677 857... - Page 28 La durée de garantie est de 2 ans à compter de la date d’installation ou d’achat et ne saurait excéder 30 mois à partir de la date de fabrication en l’absence de justificatif. Atlantic assure l’échange ou la fourniture des pièces reconnues défectueuses à l’exclusion de tous dommages et intérêts.
Need help?
Do you have a question about the Radiant panel heater - Horizontal and vertical and is the answer not in the manual?
Questions and answers