Table of Contents
Advertisement
Advertisement
Table of Contents

Related Manuals for eInstruction TouchBoard EITB2078

Summary of Contents for eInstruction TouchBoard EITB2078
- Page 1 DualBoard ™ G ET T IN G S T ART E D...
- Page 2 GET TIN G ST ART E D eInstruction TouchBoard ™...
- Page 3 We want you to have the best experience with our products and encourage you to visit our web site at www.einstruction.com for our latest product information and updates that would be in addition to the Getting Started Guide included in the box.
-
Page 4: Table Of Contents
Gestures Table Mouse Actions Table Saving, Exporting and Printing a Workspace presentation 12-13 Storing the TouchBoard pen Mobility Solution - with eInstruction AdjustIt Pro Stand Support and Troubleshooting Hardware and Software Requirements 14-15 Appendixes A: Limited Warranty for TouchBoard B: Declaration of Conformity... -
Page 5: Einstruction Touchboard
The eInstruction TouchBoard comes with the award-winning Workspace software. Workspace enables you to create and assemble the interactive lesson content, and gives you the ability to control the content using the eInstruction TouchBoard. It also gives you the ability to incorporate and work with teaching... -
Page 6: Getting Started
8 bracket screws Mount the eInstruction TouchBoard eInstruction has provided wall-clips and self-anchoring screws to mount the eInstruction TouchBoard to the wall. However, we recommend that a skilled professional assess the strength of the wall and determine the appropriate hardware required to securely attach the board to the wall. -
Page 7: Install The Software
You will know Workspace has installed successfully by the appearance of the eInstruction icon in the panel.* Repeat steps 2, 3, and 4 using the Workspace Content DVD to install the Workspace Content. * If the eInstruction icon does not appear, reboot. -
Page 8: Workspace User Guide
Connect the eInstruction TouchBoard The eInstruction TouchBoard connects to your computer via a USB cable. A separate power supply is not necessary since the eInstruction TouchBoard is powered through the USB connection. Plug the USB cable into the USB port on the back of the board. -
Page 9: Connect The Video Projector
TouchBoard will turn red. Turn on the video projector. With the video projector aimed at the eInstruction TouchBoard, align the projected image onto the board so that it is within the board’s active area. See picture below for the active area. -
Page 10: Getting The Most Out Of Einstruction Touchboard
4 pt. calibration, able to be performed by a standard user. Manually align the projected image within the eInstruction TouchBoard’s active area. Use the projector’s built-in correction utility to correct for picture distortion. From your computer, right-click on the icon in your system tray, on your computer desktop. -
Page 11: Device Manager Calibration
Click on each calibration point on the screen as it appears. The calibration points will disappear when the calibration process is completed. For optimal accuracy, only touch the board with an eInstruction TouchBoard pen during the calibration process. -
Page 12: Gestures
Gestures; supported by Windows 7 GESTURE ACTION GESTURE USAGE ACTION Left click Move items Touch and across screen release to click Double click To open files Two quick taps and folders Hold your finger Right click To access on screen, release context-sensative after the animation. -
Page 13: Mouse Actions Table
Mouse Actions MOUSE MOUSE COMMAND ACTION USAGE ACTION Left click Opens items; Touch and highlights, ect. release to click Touch, Using two fingers Menu options. Right click Double click To open files Two quick taps and folders Move one finger Drag To drag items left or right... -
Page 14: Storing The Touchboard Pen
GWB file. The GWB file is converted and attached to a new e-mail, if there is an e-mail client installed. Print: Content can be printed from the menu bar. File>Print. Caring for your eInstruction TouchBoard Store your eInstruction TouchBoard pens Pens can be magnetically attached to the right side of the eInstruction TouchBoard for storage. -
Page 15: Support And Troubleshooting
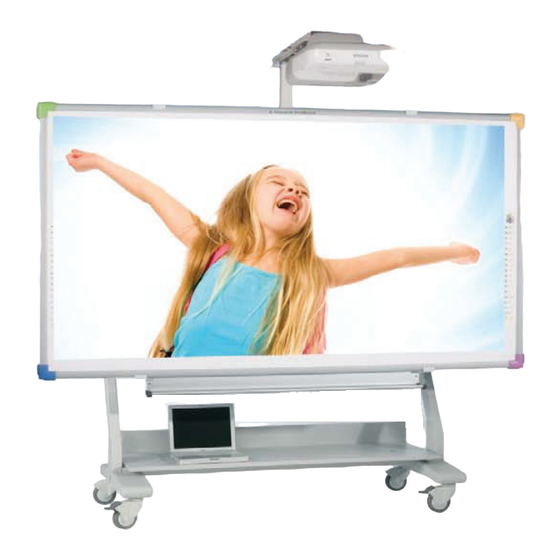
Mobile Solution of eInstruction TouchBoard For a mobile solution of the eInstruction TouchBoard please visit us at www.einstruction.com/contact-us and fill out our request for information form. Our AdjustIt Pro stand can be moved from room to room with ease, even after the eInstruction TouchBoard and projector have been mounted. - Page 16 TouchBoard Gestures eInstruction’s TouchBoard is Gestures-compatible when using a Windows 7 operating system. Software Requirements Workspace Windows Microsoft Windows Vista, or Windows 7 Intel Core2 Duo processor 2GHz equivalent or higher 2 GB RAM 650 MB hard disk space for installation (550MB additional for additional Content)
- Page 17 Complete and return the enclosed warranty registration card to ensure that your products are covered by this warranty. Coverage Parts and labor are warranted for two (2) years from the date of the first consumer purchase for the eInstruction TouchBoard, TouchBoard Pens, TouchWand, USB cable and accessories. This warranty applies to the original consumer purchaser only.
-
Page 18: Declaration Of Conformity
Declaration of Conformity The “CE“ mark on this device indicates compliance according to 2004/108/EC Declaration of conformity according to ISO/IEC guide 22 and en 45014 Manufacturer’s Name: eInstruction. Manufacturer’s Address: 1330 Teasley Lane Denton, TX 76205 declares, that the product... - Page 19 • If you need more information about the collection, reuse and recycling sys- tems in your area, please contact your local or regional waste authority. • Further information about the responsible end-of-life management of this and other eInstruction Learning products is available on our Web site at www. einstruction.com.
- Page 20 Nor does eInstruction make any commitment to update the information contained in this document. This document contains proprietary information which is protected by copyright.
- Page 21 ASY: 37-01498-01 37-01499-01 Rev. A| 36-01729-01 GETTING STARTED GUIDE...
Need help?
Do you have a question about the TouchBoard EITB2078 and is the answer not in the manual?
Questions and answers