Jenn-Air JB36NXFXLW00 Technical Education
2009 jenn-air integrated built in refrigerators
Hide thumbs
Also See for JB36NXFXLW00:
- User & care manual (52 pages) ,
- Installation manual (64 pages) ,
- Use & care manual (52 pages)

Related Manuals for Jenn-Air JB36NXFXLW00


Summary of Contents for Jenn-Air JB36NXFXLW00
- Page 1 R-108 TECHNICAL EDUCATION 2009 JENN-AIR INTEGRATED BUILT IN REFRIGERATORS JB36NXFXLW00 JS42NXFXDW00 JF42NXFXDW00 JB36NXFXRW00 JS48NXFXDW00 8178776 JOB AID 8178776...
- Page 2 GOALS AND OBJECTIVES The goal of this Job Aid is to provide information that will enable the In-Home Service Professional to properly diagnose malfunctions and repair Jenn-Air Integrated Built In Refrigerators. The objectives of this Job Aid are to: • Understand and follow proper safety precautions.
-
Page 3: Table Of Contents
GENERAL ............. . 1-1 Jenn-Air Model & Serial Number Designations ....... . 1-1 Model &... - Page 4 TABLE OF CONTENTS (continued) Fill Tube Heater ............5-5 Defrost Heater &...
-
Page 5: Jenn-Air Model & Serial Number Designations
JENN-AIR MODEL & SERIAL NUMBER DESIGNATIONS MODEL NUMBER PRODUCT GROUP J = JENN-AIR PRODUCT IDENTIFICATION CAPACITY 2 = xx CU. FT. MODEL/SERIES MODEL FEATURE VARIANTS MODEL FEATURE CODE DOOR SWING X = FRENCH DOOR YEAR OF INTRODUCTION COLOR CODE A = SATINA ON MONO CABINET... -
Page 6: Model & Serial Number Label And Tech Sheet Locations
MODEL & SERIAL NUMBER LABEL AND TECH SHEET LOCATIONS The Model/Serial Number label and Tech Sheet locations are shown below. Model & Serial Number Label Location (On Upper Right Side Of Refrigerator Liner) Tech Sheet Location (On Upper Right Side Of Machine Compartment Cover) -
Page 7: Bottom Mount Features
BOTTOM MOUNT FEATURES JB36NXFXLW00, JB36NXFXRW00... -
Page 8: French Door Features
FRENCH DOOR FEATURES JF42NXFXDW00... -
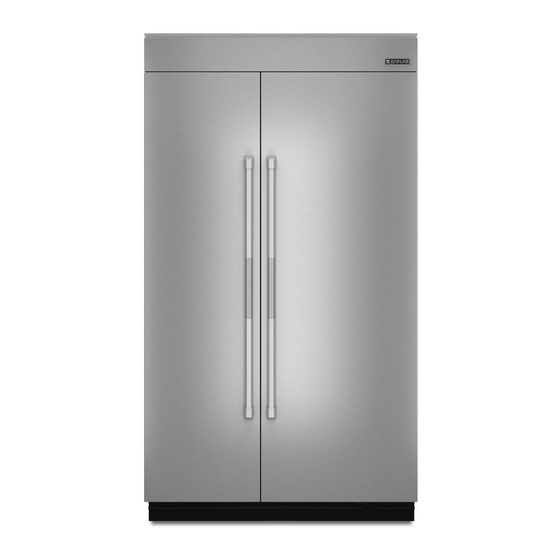
Page 9: Side By Side Features
SIDE BY SIDE FEATURES... - Page 10 — NOTES —...
-
Page 11: Installation Information
INSTALLATION INFORMATION Installation Requirements REFRIGERATOR SAFETY Your safety and the safety of others are very important. We have provided many important safety messages in this manual and on your appliance. Always read and obey all safety messages. This is the safety alert symbol. This symbol alerts you to potential hazards that can kill or hurt you and others. -
Page 12: Installation Requirements Models
Features stainless steel wrapped doors with towel bar-style handles Features stainless steel wrapped doors and new Euro-style to enhance the traditional stainless kitchen appearance. handles designed to compliment the Jenn-Air Euro kitchen suite or enhance any kitchen decor. Base Model Number: JB36NXFXDW... -
Page 13: Installation Requirements
Base Model Number: JB36NXFXDW Kit Model Numbers: JPK36BNXWSY, JPK36BNXWSF Accessories All factory parts are available through your Jenn-Air dealer or by Armoire-Style Door Panel Kit calling Jenn-Air at 1-800-JENNAIR (1-800-536-6247). In Canada, Follow the kit instructions for installation. - Page 14 Features stainless steel wrapped doors with towel bar-style handles Features stainless steel wrapped doors and new Euro-style to enhance the traditional stainless kitchen appearance. handles designed to compliment the Jenn-Air Euro kitchen suite or enhance any kitchen decor. Base Model Number: JF42NXFXDW...
- Page 15 Base Model Number: JF42NXFXDW Kit Model Numbers: JPK42FNXWSY, JPK42FNXWSF Kit Model Number: JPK42FNXWSR Accessories All factory parts are available through your Jenn-Air dealer or by calling Jenn-Air at 1-800-JENNAIR (1-800-536-6247). In Canada, call 1-800-807-6777. Door Handle Kits Armoire-Style Door Panel Kit These handle kits can be ordered to use on custom wood overlay Follow the kit instructions for installation.
- Page 16 Installation Requirements (continued) PARTS NEEDED: Six #8 x 3" (7.6 cm) wood screws (longer screws may be needed) � One or two 2" x 4" x 32" (5 cm x 10 cm x 81 cm) wood board(s) � Custom wood overlay panels - consult a qualified �...
-
Page 17: Location Requirements
Installation Requirements (continued) Location Requirements WARNING 80" - 90" (203-229 cm) 4" (10.2 cm) Explosion Hazard Keep flammable materials and vapors, such as gasoline, away from refrigerator. Failure to do so can result in death, explosion, or fire. 84" (213.4 cm) to bottom of solid soffit IMPORTANT: Observe all governing codes and ordinances. -
Page 18: Electrical Requirements
Installation Requirements (continued) Electrical Requirements Water Supply Requirements All installations must meet local plumbing code requirements. � WARNING The water supply line must come up through the floor in the � gray shaded area shown. The water shutoff should be located in the base cabinet on �... -
Page 19: Product Dimensions
Installation Requirements (continued) Product Dimensions 42" French-Door Bottom-Mount IMPORTANT: Top View The depth from the front face of the doors to the back of the � refrigerator cabinet is 24" (60.96 cm) without panels. The power cord is 84" (213 cm) long. �... -
Page 20: Cabinet And Panel Installation Options
Installation Requirements (continued) Cabinet and Panel Installation Options Side Tipping Radius (36" [91.4 cm] Models) Cabinet Depth - 25" (63.5 cm) Framed Cabinetry Top View A. 88 ⁷⁄₈ " (225.7 cm) Side Tipping Radius (42" [106.7 cm] Models) A. Refrigerator door D. -
Page 21: Fully Integrated Installation Requirements
Installation Requirements (continued) Fully Integrated Installation - Side View Cabinet Depth - 24" (60.9 cm) NOTE: A flush installation is not possible with a 24" (60.9 cm) deep opening. Framed Cabinetry Top View A. False front (optional) C. Full height grille A. -
Page 22: Panel Kit Installation Requirements
Installation Requirements (continued) Option 2 - False Front (cabinet face only) Standard Installation - Side View 6" (15.24 cm) min. 84" (213.4 cm) Standard Installation - Full Product View Standard Installation-Wood Panel Requirements IMPORTANT: A Standard installation can be achieved with either a 24" �... -
Page 23: Installation Instructions
Installation Instructions Standard Grille Bracket Custom Wood Overlay Panels Custom wood overlay panels allow you to blend the exterior of your refrigerator into the overall kitchen décor and to use custom handles for additional design flexibility. In some cases, your cabinet manufacturer may choose to work with one panel routed for the different dimensions. -
Page 24: Unpack The Refrigerator
Installation Instructions (continued) Standard Installation - Flush Grille - Open or Closed Soffit 42" (106.7 cm) Model - Door and Drawer Panels 1" (2.54 cm) Top Grille Filler " ³⁄₄ Top Grille Panel (14.55 cm) Model REFRIGERATOR REFRIGERATOR Reveal ³⁄₈" ¹⁄₈"... -
Page 25: Move The Refrigerator Into House
Installation Instructions (continued) To Install Anti-tip Boards Move the Refrigerator into House 1. Mark the stud locations on rear wall 80" to 90" (203 cm to 229 cm) above floor. 2. Securely attach one or two 2" x 4" x 32" (5 cm x 10 cm x WARNING 81 cm) boards to wall studs behind refrigerator. - Page 26 Installation Instructions (continued) 2. Connect the flexible, codes approved water supply line to the 6. Fasten the shutoff valve to the cold water pipe with the pipe water shutoff valve by threading the provided nut onto the clamp. Be sure the outlet end is solidly in the ¹⁄₄" (6.35 mm) shutoff valve as shown.
-
Page 27: Move Refrigerator To Final Location
Installation Instructions (continued) 5. Connect the 7 ft (2.13 m) flexible codes approved water Move Refrigerator to Final Location supply line to the refrigerator. NOTE: If the main water shutoff valve is behind the refrigerator, a secondary water shutoff valve may be installed WARNING in line with the water supply line at the front of the product. -
Page 28: Level And Align Refrigerator
Rollers are for moving refrigerator and not for permanent support. IMPORTANT: Jenn-Air is not responsible for the removal or addition of molding or wood overlay panels that would not allow After moving the refrigerator to its final location: access to the refrigerator for service. - Page 29 Installation Instructions (continued) NOTE: Keep the top edge of the trim piece flush with the top Side View of the refrigerator. If the trim is installed so that the top of the trim is higher than the top of the refrigerator, damage to the trim could occur when the refrigerator door is opened.
- Page 30 Installation Instructions (continued) Side View Prepare Panels (custom wood and panel kits) IMPORTANT: The process for installing wood overlay panels on the refrigerator is the same for both custom wood panels and panel kits. Door Panel 1. Place panel(s) on a firm, flat surface with the front facing down.
- Page 31 Installation Instructions (continued) Drawer Panel Remove Trim Pieces 1. Using the Phillips head flat screws (provided with refrigerator), fasten a drawer panel bracket to each side of the drawer 1. Remove all tape and door bracing from the refrigerator and panel, as shown.
- Page 32 Installation Instructions (continued) Install Door Panels Install Top Grille Panel NOTE: First open the door opposite from the one to which you are installing the door panel. 1. Lower the panel mounting bracket onto the adjustment pins at the top of the door. A.
-
Page 33: Install Handles
Installation Instructions (continued) 3. Using a ⁵⁄₃₂" Allen wrench, tighten the door stop pin. Use an Allen wrench to raise or lower the adjustment pins � which allows the door panel to swivel. A. Door panel C. Adjustment pins B. Mounting bracket 3. -
Page 34: Complete Installation
Installation Instructions (continued) 2. Insert the circular post on the back of the handle spacers into 4. Trim the skirt by scoring the proper “V” groove with a utility the holes in the door panels. knife. Break the skirt at the score line. A. -
Page 35: Product Operation
PRODUCT OPERATION THEORY OF OPERATION THE ELECTRONIC CONTROL PANEL WARNING time is sought at the lowest possible fan and compressor speed. Freezer temperatures can be set from 5°F to –5°F (–15°C to –21°C). Refrigerator tem- peratures can be set from 45°F to 33°F, (7°C to 1°C). - Page 36 of the customer setting. This will avoid concern • The difference between the actual tempera- over temperature fluctuations when the doors ture and the selected temperature settings. are opened. The customer setting will also be • The rate of temperature change. displayed during the defrost period, and 30 If the temperature increases 4°F above the minutes after defrost.
- Page 37 COMPRESSOR COMPRESSOR PROTECTION The main control board supplies a 5 vdc, peak- To protect the compressor and maintain ef- to-peak square wave, at 54 to 150 Hz, to the ficiency, minimum compressor off time is pro- inverter board. A standard VOM will read ap- grammed into the main control board.
- Page 38 AIR DOOR When entering a defrost cycle, if the bimetal is open, the time to defrost is reset to 8 hours, The air door is driven by a reversible DC stepper and the control will time through the entire motor. The motor operates on a 12 vdc, peak- 37-minute defrost period.
- Page 39 MAX COOL MODE Freezer Thermistor Max Cool changes the refrigerator tempera- If the main electronic control board senses an ture setting to 34°F (1°C) and the freezer to open or a shorted thermistor, the compressor –5°F (–21°C) for 24 hours. During Max Cool, and the evaporator fan motor will begin to op- the freezer and refrigerator temperature dis- erate on a timed on and off cycle.
- Page 40 In the Holiday Mode the following occurs: to reset the Over Temperature Alarm). • Temperature selections remain at the current MASTER ALARM RESET setting, but are not displayed. Pressing the Over Temperature Reset will turn • The Water Filter Indicator is not displayed, off the audio alarm, but does not affect the indi- but monitoring continues.
- Page 41 LOW VOLTAGE STORAGE BIN CONTROL of the evaporator fan motor. The Storage bin control also sends a 12 vdc, peak to peak BOARD square wave to the ingredient care center air There are two storage bin control boards on door to open the door. Bottom Mount Models and only one on SXS.
- Page 42 AIR CIRCULATION 36" Integrated Design Bottom Mount Refrigerator Cabinet Air Flow Schamatic It is important not to block any of the vents with In order to ensure proper temperatures, you food items. If the vents are blocked, airflow will need to permit airflow between the refrigerator be restricted, and the temperature management and freezer sections.
- Page 43 AIR CIRCULATION (continued) 42” Integrated Design French Door Bottom Mount Refrigerator Cabinet Air Flow Schematic...
- Page 44 AIR CIRCULATION (continued) 42" and 48" Integrated SXS Cabinet Air Flow Schamatic 3-10...
- Page 45 Meat Storage Guide Quick Chill Setting Store most meat in original wrapping as long Each deli pan has a Quick Chill setting. Activat- as it is airtight and moisture-proof. Rewrap if ing this selection lowers the temperature of the necessary. When storing meat longer than the pan for a period of one hour.
- Page 46 — NOTES — 3-12...
-
Page 47: Component Access
COMPONENT ACCESS This section instructs you on how to service components inside the Built-In French Door Bottom- Mount Refrigerator. The components and their locations are shown below. COMPONENT LOCATIONS WARNING Electrical Shock Hazard Disconnect power before servicing. Replace all parts and panels before operating. Failure to do so can result in death or electrical shock. -
Page 48: Articulated Hinges
42" and 48" Jenn-Air SxS Articulated Hinges Articulated hinges are needed to achieve the close tolerances when this unit is built in flush with adjoining cabinets. The wider hinge is the top hinge and the narrow hinge is the bottom hinge, see figure 1. -
Page 49: Top Door Hinge Adjustment
42" and 48" Jenn-Air SxS (continued) Top Door Hinge Adjustment Figure 6 To adjust begin by loosening the two adjustable pins on the top hinge to allow the inner panel to move. Adjust the lower pins to raise or lower the inner door panel or close the gap between the hinge and inner door as needed, see figure 6. -
Page 50: Refrigerator Door Switches And Lights
42" and 48" Jenn-Air SxS (continued) Refrigerator Door Switches and Lights WARNING The RC lights are secured to the cabinet with ¼” Hex head screws, see figure 3. Electrical Shock Hazard Disconnect power before servicing. Figure 3 Replace all parts and panels before operating. -
Page 51: Ice Maker
42" and 48" Jenn-Air SxS (continued) Ice Maker A heat shield is secured to the ice maker WARNING mold with three ¼” Hex head screws, see figure 3. Always replace the heat shield after servicing Electrical Shock Hazard Disconnect power before servicing. -
Page 52: Modular Ice Maker
42" and 48" Jenn-Air SxS (continued) Modular Ice Maker WARNING Inlet Water Tube Heater Remove three screws securing the cover to the cabinet wall, see figure 2. Electrical Shock Hazard Disconnect power before servicing. Replace all parts and panels before operating. -
Page 53: Accessing Evaporator And Related Components
42" and 48" Jenn-Air SxS (continued) Accessing Evaporator and Related Components Remove 2 screws that secure the bin spacer/ WARNING slide assemblies to the cabinet wall, see figure 2. Electrical Shock Hazard Disconnect power before servicing. Replace all parts and panels before operating. - Page 54 42" and 48" Jenn-Air SxS (continued) Accessing Evaporator and Related Components Remove 4 screws and drop down the evapo- WARNING rator fan and duct assembly, see figure 2. Electrical Shock Hazard Disconnect power before servicing. Replace all parts and panels before operating.
-
Page 55: Accessing Defrost Heater
42" and 48" Jenn-Air SxS (continued) Accessing Defrost Heater Remove the evaporator form the back wall of WARNING the cabinet. Make sure not to crimp the suc- tion line, see figure 2. Electrical Shock Hazard Disconnect power before servicing. Replace all parts and panels before operating. -
Page 56: Accessing Air Damper
42" and 48" Jenn-Air SxS (continued) Accessing air damper WARNING Electrical Shock Hazard Disconnect power before servicing. Replace all parts and panels before operating. Failure to do so can result in death or Figure 3 Figure 4 electrical shock. Damper Assembly Unplug refrigerator or disconnect power. -
Page 57: Back Panel
42" and 48" Jenn-Air SxS (continued) Back Panel Loc Ring Connectors WARNING When checking for refrigerant leaks always check the Loc Ring connectors, see figure 2 Electrical Shock Hazard Disconnect power before servicing. Replace all parts and panels before operating. -
Page 58: Thermistor Location
42" and 48" Jenn-Air SxS (continued) Thermistor Location Thermistor Resistance WARNING Electrical Shock Hazard Disconnect power before servicing. Replace all parts and panels before operating. Failure to do so can result in death or electrical shock. The freezer thermistor is located on the right side of freezer cabinet wall. -
Page 59: Removing A Refrigerator Light Socket Bottom Mount Models
REMOVING A REFRIGERATOR LIGHT SOCKET BOTTOM MOUNT MODELS WARNING Using a small flat-blade screwdriver, push in on the light socket retainer, and pull the socket out of its opening in the refrigerator liner. Light Socket Retainer Electrical Shock Hazard Disconnect power before servicing. Replace all parts and panels before operating. -
Page 60: Removing The User Interface Assembly Bottom Mount Models
REMOVING THE USER INTERFACE ASSEMBLY BOTTOM MOUNT MODELS Remove the six hex-head screws from WARNING the user interface frame and remove the frame. Electrical Shock Hazard Disconnect power before servicing. User Interface Frame Replace all parts and panels before Screws (3 of 6) operating. -
Page 61: Removing The Refrigerator Thermistor Bottom Mount Models
REMOVING THE REFRIGERATOR THERMISTOR BOTTOM MOUNT MODELS Remove the hex-head screw from the re- WARNING frigerator thermistor and pull the thermis- tor away from the liner. Electrical Shock Hazard Disconnect power before servicing. Replace all parts and panels before operating. Failure to do so can result in death or electrical shock. -
Page 62: Motorized Air Door
REMOVING THE REFRIGERATOR MOTORIZED AIR DOOR Unlock and disconnect the motorized air WARNING door connector from the wiring harness and remove the air door and cover. Motorized Air Door Connector Electrical Shock Hazard Disconnect power before servicing. Replace all parts and panels before operating. -
Page 63: Removing A Refrigerator Temp-Controlled Motorized Air Door
REMOVING A REFRIGERATOR TEMP-CONTROLLED MOTORIZED AIR DOOR Disconnect the motorized air door wire WARNING connector from the wire harness, and re- move the air door. Motorized Air Door Connector Electrical Shock Hazard Disconnect power before servicing. Replace all parts and panels before operating. -
Page 64: Removing A Temp-Controlled Drawer Coverbottom Mount Models
REMOVING A TEMP-CONTROLLED DRAWER COVER BOTTOM MOUNT MODELS WARNING Electrical Shock Hazard Center Divider Cover Screws (2 of 4) Disconnect power before servicing. Replace all parts and panels before operating. Failure to do so can result in death or electrical shock. Unplug refrigerator or disconnect power. - Page 65 REMOVING A TEMP-CONTROLLED DRAWER COVER BOTTOM MOUNT MODELS (continued) Disconnect the wire connector on the Remove the two screws from the temp- temp-controlled drawer cover from the controlled drawer cover and remove the wiring harness. cover. TC Drawer Cover Screws Left Cover Connector Right Cover Connector (8-Pin)
-
Page 66: Door
REMOVING THE HEATED FLIPPER MULLION AND AN ACTUATOR / ELECTRICAL CONTACT 42” FRENCH DOOR b) While lifting the flipper mullion, insert WARNING a small flat-blade screwdriver behind each of the three mullion retainer clips, pry the pins out of the door liner holes, and remove the flipper mullion. - Page 67 REMOVING THE HEATED FLIPPER MULLION AND AN ACTUATOR / ELECTRICAL CONTACT 42” FRENCH DOOR (continued) To remove the top or bottom heated d) Remove the two hex-head screws from flipper mullion actuator/electrical con- the actuator/electrical contact. tact: a) Open the refrigerator doors. Actuator / Electrical Contact Screws Top Mullion Actuator/...
-
Page 68: Accessing The Machine Compartment
ACCESSING THE MACHINE COMPARTMENT Three access panels enclose the machine WARNING compartment components. 1/4” Hex head screws secure panel #1 to panel #2 and panel # 2 to the cabinet and to panel #3. In most cases panels #1 and #2 need to be removed when servicing. - Page 69 ACCESSING THE MACHINE COMPARTMENT (continued) Electronic Control Board Identification Power Supply Bin Control Board Unit ON/OFF 42” FD has 2 Board Switch boards Wire Harness Main Control Board Wire Harness Connection Area AKA Gemini Connection Area Connector and Pin Number Identification Power Supply Board Main Control Board...
- Page 70 ACCESSING THE MACHINE COMPARTMENT (continued) Lock Ring Connections There are 2 Lock Ring connectors located behind the electronic control board cluster. These connectors cannot be seen or accessed without removing the top machine compartment panel. Always check these 2 connectors when looking for a refrigerant leak. Lock Ring Connections Condenser This refrigerator uses a jelly roll...
-
Page 71: Removing The Freezer Drawer Switch Bottom Mount Product
REMOVING THE FREEZER DRAWER SWITCH BOTTOM MOUNT PRODUCT Disconnect the two wires from the freezer WARNING drawer switch terminals. Locating Tab Electrical Shock Hazard Disconnect power before servicing. Replace all parts and panels before operating. Failure to do so can result in death or electrical shock. - Page 72 — NOTES — 4-26...
-
Page 73: Component Testing
COMPONENT TESTING BOTTOM MOUNT REFRIGERATORS FOR SERVICE TECHNICIAN’S USE ONLY Tech Sheet Do not discard DANGER WARNING Electrical Shock Hazard Electrical Shock Hazard Only authorized technicians should perform diagnostic Disconnect power before servicing. voltage measurements. Replace all parts and panels before operating. After performing voltage measurements, disconnect Failure to do so can result in death or electrical shock. -
Page 74: Thermistor
COMPONENT SPECIFICATIONS WARNING Electrical Shock Hazard Disconnect power before servicing. Replace all parts and panels before operating. Failure to do so can result in death or electrical shock. THERMISTOR Connect power to the refrigerator and al- low it to enter the “cooling” mode. With the refrigerator in the cooling mode, The meter should indicate approximately 5 volts DC. -
Page 75: Heated Flipper Mullion42" French Door
COMPONENT SPECIFICATIONS (continued) WARNING Electrical Shock Hazard Disconnect power before servicing. Replace all parts and panels before operating. Failure to do so can result in death or electrical shock. HEATED FLIPPER MULLION MOTORIZED AIR DOOR 42" FRENCH DOOR Contact Refer to page 4-10 for the procedure for ac- Refer to pages 4-6 &... -
Page 76: Condenser Fan Motor
COMPONENT SPECIFICATIONS (continued) WARNING Electrical Shock Hazard Disconnect power before servicing. Replace all parts and panels before operating. Failure to do so can result in death or electrical shock. CONDENSER FAN MOTOR EVAPORATOR FAN MOTOR Run the diagnostics tests (see page 6-2) Run the diagnostics tests (see page 6-2) and check for the proper operation of the and check for the proper operation of the... -
Page 77: Door/Drawer Switch
COMPONENT SPECIFICATIONS (continued) WARNING Electrical Shock Hazard Disconnect power before servicing. Replace all parts and panels before operating. Failure to do so can result in death or electrical shock. DOOR/DRAWER SWITCH FILL TUBE HEATER Unplug refrigerator or disconnect power. NOTE: The heated fill tube will be energized for 90 minutes after each ice maker Disconnect one of the wires going to the harvest and fill. -
Page 78: Defrost Heater & Bimetal
COMPONENT SPECIFICATIONS (continued) WARNING Electrical Shock Hazard Disconnect power before servicing. Replace all parts and panels before operating. Failure to do so can result in death or electrical shock. DEFROST HEATER & BIMETAL WATER VALVE Bimetal Defrost Heater Run the diagnostics tests (see page 6-2) Unplug refrigerator or disconnect power. -
Page 79: Adjusting The Freezer Door Bottom Mount Models
ADJUSTING THE FREEZER DOOR BOTTOM MOUNT MODELS WARNING Electrical Shock Hazard Disconnect power before servicing. Replace all parts and panels before operating. Failure to do so can result in death or electrical shock. Unplug refrigerator or disconnect power. Without moving the freezer drawer front, slowly open the freezer drawer, and locate NOTE: This adjustment allows you to level one of the holes in the left and right four... -
Page 80: Diagnostics & Troubleshooting
DIAGNOSTICS & TROUBLESHOOTING BOTTOM MOUNT MODELS WARNING Electrical Shock Hazard Disconnect power before servicing. Replace all parts and panels before operating. Failure to do so can result in death or electrical shock. ELECTRONIC CONTROL FEATURES • Pulsed Defrost Heat - During the defrost cycle, the heater is energized continuously The electronic control in the refrigerator for the first 2 minutes. -
Page 81: Service Diagnostics Mode
SERVICE DIAGNOSTICS MODE Temp UP key, or the Up arrow key. The routine will end automatically after all the steps are As a requirement to run the Service Diagnostics completed, or after 20 minutes have elapsed, routine, the appliance must be turned ON. whichever occurs first. -
Page 82: Service Information
SERVICE INFORMATION NOTE: Watt and pressure readings will vary, and are influenced by the existing condition of • The compressor suction and process stubs the appliance, such as an iced-up evaporator, can not be interchanged. the condition of the condenser, the defrost •... - Page 83 — NOTES —...
-
Page 84: Service And Wiring 42 And 48" Sxs
SERVICE AND WIRING 42 and 48" SXS 06-Apr-2009 09:32:57 WARNING Electrical Shock Hazard Disconnect power before servicing. Replace all parts and panels before operating. Failure to do so can result in death or electrical shock. -
Page 85: Service And Wiring 36" Bottom Mount
SERVICE AND WIRING 36" BOTTOM MOUNT 06-Apr-2009 09:32:57 WARNING Electrical Shock Hazard Disconnect power before servicing. Replace all parts and panels before operating. Failure to do so can result in death or electrical shock. -
Page 86: Service And Wiring 42" French Door
SERVICE AND WIRING 42" FRENCH DOOR WARNING Electrical Shock Hazard Disconnect power before servicing. Replace all parts and panels before operating. Failure to do so can result in death or electrical shock. -
Page 87: Example 36" Bottom Mount Refrigerator Wiring Diagram
EXAMPLE 36" BOTTOM MOUNT REFRIGERATOR WIRING DIAGRAM Always refer to the Diagram shipped with the refrigerator when servicing... -
Page 88: Example 42" And 48" Side By Side Refrigerator Wiring Diagram
EXAMPLE 42" AND 48" SIDE BY SIDE REFRIGERATOR WIRING DIAGRAM Always refer to the Diagram shipped with the refrigerator when servicing... -
Page 89: Example 42" French Door Refrigerator Wiring Diagram
EXAMPLE 42" FRENCH DOOR REFRIGERATOR WIRING DIAGRAM Always refer to the Diagram shipped with the refrigerator when servicing... - Page 90 PRODUCT SPECIFICATIONS WARRANTY INFORMATION SOURCES IN THE UNITED STATES: FOR PRODUCT SPECIFICATIONS AND WARANTY INFORMATION CALL: FOR WHIRLPOOL PRODUCTS: 1-800-253-1301 FOR KITCHENAID PRODUCTS: 1-800-422-1230 FOR ROPER PRODUCTS: 1-800-447-6737 FOR TECHNICAL ASSISTANCE WHILE AT THE CUSTOMER’S HOME CALL: THE TECHNICAL ASSISTANCE LINE: 1-800-832-7174 HAVE YOUR STORE NUMBER READY TO IDENTIFY YOU AS AN AUTHORIZED IN-HOME SERVICE PROFESSIONAL FOR LITERATURE ORDERS:...
Need help?
Do you have a question about the JB36NXFXLW00 and is the answer not in the manual?
Questions and answers