Table of Contents
Advertisement
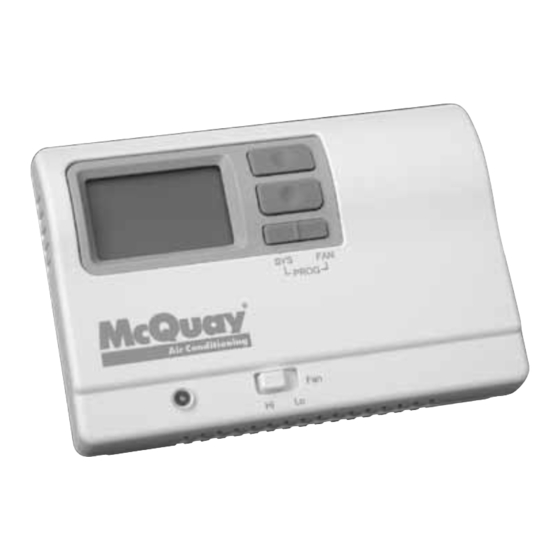
Programmable Electronic Thermostat
1 Heat/1 Cool, Auto Changeover, Fan Speed Control, Hardwire
Part No. 668811301
For replacement parts call 1-800-377-2787
©2008 McQuay International • www.mcquay.com • 800-432-1342
Installation,
Operation & Application Guide
• 7-Day, 5-2-Day or 5-1-1-Day Programmable
• Configurable
• Single-Stage Heat/Cool Systems
• Single-Stage Heat Pump Systems
• Two-Speed Fan Speed Selection
• Large Display With Backlight
• Selectable Fahrenheit or Celsius
• Compatible with Gas, Oil, or Electric
• SimpleSet™ Field Programming
• Status Indicator Light
• Relay Outputs (minimum voltage drop in thermostat)
• Remote Sensor Compatible
• Ideally Suited for:
– Residential (New Construction/Replacement)
– Light Commercial
LIA303
Group: WSHP
Supercedes: N/A
Date: 03-23-09
Advertisement
Table of Contents

Related Manuals for McQuay LIA303


Summary of Contents for McQuay LIA303
- Page 1 • SimpleSet™ Field Programming • Status Indicator Light • Relay Outputs (minimum voltage drop in thermostat) • Remote Sensor Compatible • Ideally Suited for: – Residential (New Construction/Replacement) – Light Commercial For replacement parts call 1-800-377-2787 ©2008 McQuay International • www.mcquay.com • 800-432-1342...
-
Page 2: Table Of Contents
Table of Contents Parts Diagram ..............1 Icon Descriptions . -
Page 3: Parts Diagram
Parts Diagram Up button Down button Right (fan) button RESET CONFIG Left (system) button RC/RH jumper Fan Speed Switch Field programming pins Configuration switch Reset switch... -
Page 4: Icon Descriptions
Icon Descriptions Room temperature offset activated Fan operation icon Lock mode activated Cooling operation icon Heating operation icon Specifications Electrical rating: • 24 VAC (18-30 VAC) • 1 amp maximum per terminal • 3 amp maximum total load Temperature control range: 45°F to 90°F (7°C to 32°C) Accuracy: ± 1°F (± 0.5°C) System configurations: 1-stage heat, 1-stage cool, heat pump, gas, oil, electric Timing: Anti-short Cycle: 4 minutes Backlight Operation... -
Page 5: Important Safety Information
• Use this thermostat only as described in this manual Package Contents/Tools Required Package includes: McQuay thermostat on base, thermostat cover, wiring labels, screws and wall anchors, Installation, Operation and Application Guide Tools required for installation: Drill with 3/16” bit, hammer, screwdriver... -
Page 6: To Install Thermostat
To Install Thermostat WARNING ELECTRICAL SHOCK HAZARD – Turn off power at the main service panel by removing the fuse or switching the appropriate circuit breaker to the OFF position before removing the existing thermostat. IMPORTANT: Thermostat installation must conform to local and national building and electrical codes and ordinances. -
Page 7: Wiring Diagrams
13. Configure thermostat (see Page 12) to match the type of system you have. 14. Replace cover on thermostat by snapping it in place. 15. Test thermostat operation as described in “Testing the Thermostat” (Page 19). Wiring Diagrams Hardwired 5-Wire, Single Transformer... - Page 8 Hardwired Hardwired 5 or 6-Wire, Single Transformer 6-Wire, Two Transformer (Both transformers must be in phase) IMPORTANT: Before wiring, remove pre-installed RC/RH jumper.
- Page 9 Hardwired Cool or Heat Active Reversing Valve...
- Page 10 Hardwired 5-Wire, Single Transformer...
-
Page 11: Remote Or Outdoor Sensor Installation (Optional)
Remote or Outdoor Sensor Installation (Optional) 1. Remove cover from remote sensor housing. 2. Select an appropriate location for mounting the remote sensor. 3. Mount remote sensor unit using hardware provided. 4. Install two strand shielded wire between remote sensor and thermostat. Shielded wire must be used. Do not run remote sensor wire in conduit with other wires. -
Page 12: Configuration Mode
Configuration Mode The configuration mode is used to set the McQuay thermostat to match your heating/cooling system. The McQuay thermostat functions with heat pump, air conditioning, gas, oil or electric heat systems. To configure the McQuay thermostat, perform the following steps: 1. -
Page 13: Configuration Mode Settings
Configuration Mode Settings The setup screens for Configuration Mode are as follows: 1. Temperature Scale (F or C) Choose Fahrenheit or Celsius. Press the up or down button to select. Press the right button to advance to the next screen. 2. - Page 14 4. System – Set for heat pump, non-heat pump, reversing valve operation and number of compressors in your system. Choose between two heat pump settings or gas/oil or electric. Reversing Number of Compressors Type of Choose System Valve Active or Compressor Stages Heat O –...
- Page 15 5. Lockout (0-8°, NITE, COOL-HEAT) Select the number of degrees set temperature can be changed during keypad lockout or select to lockout during NITE period only. COOL-HEAT lockout allows adjustment of the set temperatures to the maximum heat set temperature selected in Step 6 and minimum cool set temperature selected in Step 7.
- Page 16 8. Room Temperature Offset (+9°F to -9°F) (+5°C to -5°C) Adjust to calibrate displayed room temperature to match actual room temperature. Note: When not set to 0, will display Press the up or down button to select. Press the right button to advance to the next screen. 9.
- Page 17 Press the up or down button to select. Press the right button to advance to the next screen. Note: The McQuay control board provides a minimum Fan Off delay of 30 seconds, even if the thermostat is set for a 0 second delay.
-
Page 18: Mode Of Operation
The programmable fan feature can be used to recirculate air while in Program mode. It is activated during the program schedule set up. The McQuay thermostat also has a button lockout feature. This enables the thermostat to be set to the proper mode and temperature and locked so it cannot be tampered with. -
Page 19: Operating Modes
Operating Modes There are five possible operating modes for the McQuay thermostat. Off, Cool, Heat, and Cool & Heat modes are accessed by pressing the SYS (left) button. Program mode is accessed by pressing the SYS (left) and FAN (right) buttons simultaneously. -
Page 20: Program Mode
Cool and Heat Mode (Auto Changeover) • In this mode, the thermostat controls the cooling and heating systems, automatically changing over from one to the other as needed. • The timing display alternates with the set temperature every 10 seconds in the cool and heat mode. -
Page 21: Testing The Thermostat
Testing the Thermostat Once the thermostat is configured, it should be thoroughly tested. CAUTION Do not energize the air conditioning system when the outdoor temperature is below 50 degrees. It can result in equipment damage or personal injury. Heat Test 1. -
Page 22: Setting The Time And Day Of The Week
Setting the Time and Day of the Week The time and day of the week must be set for your program schedule to operate correctly. 1. Press the SYS (left) button until you are in the OFF mode. 2. Press and hold the PROG button (SYS (left) and FAN (right) buttons pressed simultaneously) in for 6 seconds. -
Page 23: Programming
Programming Program Overview The McQuay programmable thermostat has four periods (MORN, DAY, EVE, NITE) that are customizable for each day of the week. Each period will have a start time, heat temperature, cool temperature and programmable fan option. The McQuay thermostat monitors the day and time, while maintaining the specific conditions you have chosen for each period in your program. - Page 24 From any of the screens on Page 21, you can press the FAN (right) button to begin entering your program schedule. The days shown on the display will all be programmed simultaneously. Once the FAN (right) button is pressed, MORN blinks. Use the up or down button to select a different period (MORN, DAY, EVE, NITE).
-
Page 25: Lockout Feature
Lockout Feature The McQuay thermostat has a button lockout feature so the mode cannot be changed and the temperature adjustment is limited. Select the appropriate lockout from Configuration Mode Settings (Step 5, Page 13) of this guide. To activate the LOCK feature: 1. -
Page 26: Factory Preprogramming
Factory Preprogramming The McQuay thermostat comes preprogrammed with the following schedule MORN 6:00 AM 8:00 AM 6:00 PM NITE 10:00 PM MONDAY HEAT 70°F HEAT 62°F HEAT 70°F HEAT 62°F thru SUNDAY COOL 78°F COOL 85°F COOL 78°F COOL 82°F... - Page 27 Personal Program Schedule (continued) THURSDAY MORN NITE HEAT HEAT HEAT HEAT COOL COOL COOL COOL FRIDAY MORN NITE HEAT HEAT HEAT HEAT COOL COOL COOL COOL SATURDAY MORN NITE HEAT HEAT HEAT HEAT COOL COOL COOL COOL SUNDAY MORN NITE HEAT HEAT HEAT...
-
Page 28: Simpleset Tm Field Programming
SimpleSet Field Programming Requires SimpleSet Transfer Cable (668817901) This feature is used for transferring configuration and program schedule from the master to the target thermostat. All thermostats for a job can be mounted and powered up. Configure and program one thermostat. This will be the master. -
Page 29: Troubleshooting
Troubleshooting Symptom Remedy No display Check for 24 VAC at thermostat; display is blank when 24 VAC is not present Time and day of week must be reset after extended power loss System fan does not come on properly Verify wiring is correct, check Gas/Electric Configuration (see Setting 4, Page 12) All thermostat buttons are inoperative Verify 24 VAC is present;... - Page 30 This page left blank intentionally.
- Page 31 This page left blank intentionally.
- Page 32 McQuay Training and Development Now that you have made an investment in modern, efficient McQuay equipment, its care should be a high priority. For training information on all McQuay HVAC products, please visit us at www.mcquay.com and click on training, or call 540-248-9646 and ask for the Training Department.
Need help?
Do you have a question about the LIA303 and is the answer not in the manual?
Questions and answers