
Related Manuals for Lightwave LW201


Summary of Contents for Lightwave LW201
-
Page 1: Instruction Manual
Version 2.1 Wire-free Switch (1 Gang) Model Nos LW201 & LW205 Instruction Manual Connect Series www.lightwaverf.house... -
Page 2: Ec Declaration Of Conformity
EC DECLARATION OF CONFORMITY Responsible Authority: LightwaveRF PLC, Innovation Campus Birmingham Faraday Wharf Holt Street Birmingham B7 4BB Tel: +44 (0)121 250 3625 Email: enquiries@lightwaverf.com Model Number(s): JSJSLW201 & 205 Description: Wire-free Switch Directives this equipment Complies with: 2006/95/EC The Low Voltage Directive N/A 2004/108/EEC The Electromagnetic Compatibility Directive 1999/5/EC R&TTE Directive 93/68/EEC CE Marking Directive... -
Page 3: How Do I Get Started
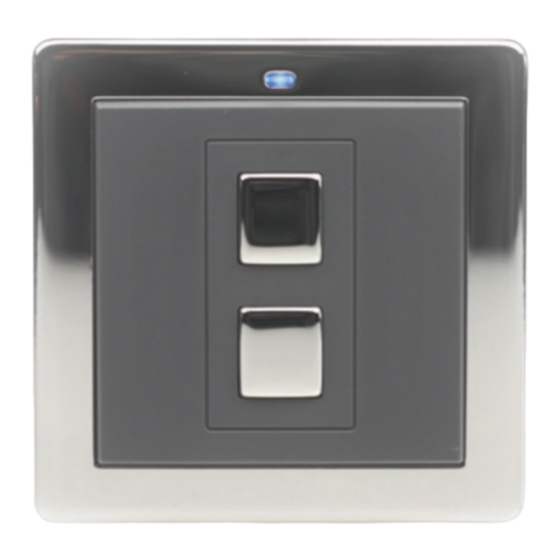
Get Started How do I get started? Please refer to the following installation and setup instructions that will guide you through the installation and setup process. What do I need? Wire-free Switch positioned anywhere. To install it, you will need simply to apply the adhesive strips provided and attach the switch to a wall or flat surface. - Page 4 Installation Overview Blue indicator LED. When illuminated, the switch is sending a command. On button. Tap to turn on linked devices or hold to raise dim level. button. Tap to turn o linked devices or hold to lower dim level. IMPORTANT: Please retain these instructions for guidance on how to link Remote Handsets and other LightwaveRF controllers.
-
Page 5: Installation
Installation Installation Surround Screw mounting holes Main switch Battery centre section compartment NOTE: It is important to install this product in accordance with the following instructions. Failure to do so may void your warranty. LightwaveRF is fully legal to install in your own home. However, if in doubt, always consult a qualified electrician. -
Page 6: Mounting To The Wall
Installation Mounting to the wall following installation instructions illustrate how to remove the Wire-free Switch faceplate and surround in order to screw the unit to a back-box. The unit does not have to be screw mounted and may instead attached using adhesive strips... - Page 7 Installation Insert the screwdriver under the tab situated at the bottom of the main switch as show. Gently remove the central section from the surround. Insert suitable screws into the mounting holes and screw to the back box. Alternatively, place the adhesive strips along the rear sides of the surround and attach to the wall.
-
Page 8: Changing The Battery
Installation Replace the centre switch unit and clip the faceplate back into place. Make sure that the faceplate hooks in from the top as shown. A sharp click will indicate that the plate has been successfully replaced. Changing the Battery battery compartment accessed from the rear of the... -
Page 9: Device Setup
Device setup Operation & setup Manual operation • Tap the ‘on’ button to switch on linked LightwaveRF devices (Blue LED indicator will illuminate). Hold the button to raise the dim level of dimmable devices. • Tap the ‘o ’ button to switch o linked LightwaveRF devices (Blue LED indicator will illuminate). - Page 10 Device setup Whilst the LightwaveRF device is in linking mode, tap a button on the Wire-free Switch. The indicator light on the target device will flash to confirm that the switch is now linked. This process can repeated control multiple LightwaveRF devices from one switch.
- Page 11 Creative ideas 1. (Easy): Group standby / dimming control Required: Wire-free Switch / Plug-in Sockets A Wire-free Switch can be used to control any number of LightwaveRF sockets, dimmers, plug-in sockets and plug-in dimmers. This means you can now dim all of your lounge lamps and main light from one attractive, wall mounted switch! You can even turn o any ‘standby’...
- Page 12 Creative ideas 2. (Intermediate): Bedside light-switches Required: Wire-free Switches, dimmer, plug-in sockets Installing extra light-switches in a room can be messy, time consuming and costly due to the cabling involved. However, if you swap your existing main light-switch for a LightwaveRF one, adding extra switches is easy because you can use a Wire-free Switch to avoid any extra cabling.
-
Page 13: Troubleshooting
Troubleshooting Problem: The switch won’t transmit and the LED does not light up. Solution: Change the switch battery. A strong battery signal is indicated by the LED light on the switch illuminating and remaining lit for 1-2 seconds after tapping the ‘on’ button. A low battery is indicated if the LED light turns o immediately, or does not illuminate at all. - Page 14 How many devices can I have on the LightwaveRF system? Each receiver device (such as a dimmer or socket) has 6 memory slots for up 6 controllers (such as a Wire-free Switch). Note: The Lightwave Link allows a number of di erent smartphones to control the socket independently, however it only uses one memory slot.
-
Page 15: Technical Specification
Technical Specification Specification RF frequency: 433.92 MHz Output rating: 3V Mounting: Standard single back-box or sticky pads Dimensions: Width 88mm, Height 88mm, Depth 14mm Warranty: 2 year standard warranty... - Page 16 Version 2.1 2 Quadrant Park Mundells Welwyn Garden City Herts AL7 1FS 01707 386035 www.lightwaverf.house...
Need help?
Do you have a question about the LW201 and is the answer not in the manual?
Questions and answers