
Related Manuals for Terumo FineTouch

Summary of Contents for Terumo FineTouch
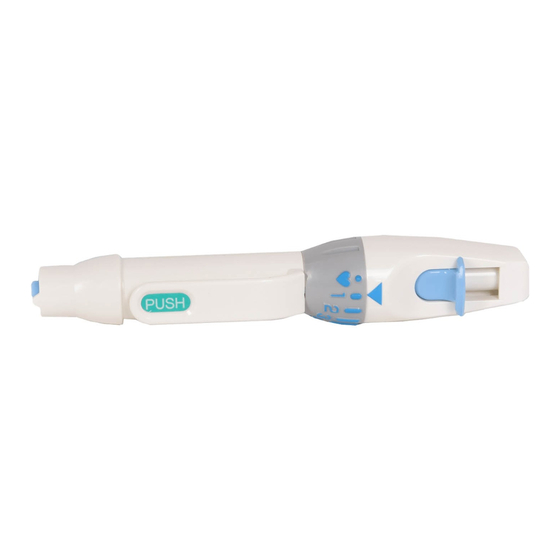
- Page 1 mmol/L Blood Glucose Meter Guide Book Blood glucose monitoring system for self-testing...
- Page 3 Caution: Carefully follow these instructions: • Before using the FINETOUCH Blood Glucose Meter carefully read through this “Guide Book” and carry out the measurements in accordance with the instructions from your physician. • Discuss any questions you might have with your physician prior to your first measurement.
- Page 4 Outline of how to use Attach the Test TIP Test TIP Meter Prick Lancet Lancing Device Draw up blood Beep Meter Completes the measurement After blood is applied to the Test TIP, glucose in the blood seconds reacts with the reagent on the Test TIP, and colours the reagent pad.
- Page 5 Contents Page Before use ..............................How to use the FINETOUCH Blood Glucose Monitoring System ................Problem solving ..........................(Read this section when you receive the wrong indication or when you are not able to measure in the usual way) Maintenance of the Meter ......................
-
Page 6: Before Use
After blood is applied to the FINETOUCH Test TIP, glucose in the blood reacts with the reagent (enzyme glucose oxidase) on the Test TIP, and colours the reagent pad. The intensity of the colour is proportional to the amount of glucose in the blood. - Page 7 • Always keep FINETOUCH products away from children. There is a risk of children accidentally swallowing the lancet, batteries, Blood Glucose Test TIP, Blood Glucose Test TIP case, etc.
-
Page 8: Lancing Device
Make sure to use FINETOUCH Test TIP with BLUE film-seal. Check if the contents of the kit are complete. If something is missing, please contact Terumo (you will find contact informa- tion at the end of the guide book). Do not use if damaged. - Page 9 Installing or replacing the batteries Placing the Close the batteries battery box Keep pressing part. Place the 2 batteries Slide the lid whilst part. with the positive end pressing Slide the lid along facing upwards. the grooves to close. • A new battery lasts around 1000 measurements or approximately a year. •...
-
Page 10: Setting Time And Date
Setting time and date After placing the batteries, make sure you set the date and time. Press the “ ” button. Beep The indication in the The date and time are displayed. display (see above) appears for 1 second. - Page 11 Set the Year. Press the “ ” button. Reduce the number with the Press here “ ” button. “ ”. Increase the number with the “ ” button. The last 2 digits of the year blink. (ex. The year 2010) “10”...
-
Page 12: Date And Time
After setting the year, press Repeat Step 3 and 4 to set “ ” button again. date and time. Press here “ ”. When you press the “ ” button after setting the minutes, you will hear a beep. The date and time are memorized and the year indication disappears from the display. - Page 13 How to use the FINETOUCH Blood Glucose Monitoring System There are basically 5 steps for the process of blood glucose measurement. Preparation p.14 Step ..........Attaching Test TIP p.16 Step ........Blood sampling p.20 ........Step Measuring p.26 ..........Step Cleaning up p.29...
- Page 14 Preparation Step Assemble all necessary materials together prior to use. FINETOUCH FINETOUCH Lancing Blood Glucose Device Meter Tissue, Alcohol swab FINETOUCH Blood FINETOUCH Glucose Test TIP Lancet Logbook/Diary...
- Page 15 Wash and dry your hands thoroughly. Dry your hands thoroughly to avoid inaccurate results. • Washing your hands with warm water stimulates blood flow to the fingertip, which may make it easier to take a blood sample. • The alternative is to disinfect the puncture site with an alcohol swab and dry the site thoroughly.
- Page 16 Using Meter and Test TIP Step Attaching Test TIP Remove the protective Press the “ ” button. cap. Beep After the beep, current time and date are shown. If you find any other indications in the display, please check page 37 – 41. Move the eject button forward.
- Page 17 If the Test TIP is left open, moisture from the air could be absorbed by the Test TIP. This could affect the measurement result. Film-seal t Make sure to use FINETOUCH Blood Glucose Test TIP with BLUE film-seal.
- Page 18 Attach the TIP case to the edge of the meter firmly. Test TIP Case Push it through. t Push the Test TIP straight onto the TIP attachment. t Push the Test TIP until you feel a “click”. If you don’t attach it firmly and correctly, a measurement error can occur.
- Page 19 Pull the TIP case straight “ ” will appear in the off to avoid damage. display. Beep You will find the Blue Beep TIP on the Meter. After two beeps, “ ” will appear. t When the Meter is off, please press the “...
-
Page 20: Blood Sampling
Using FINETOUCH Lancing Device and FINETOUCH Lancet Step Blood sampling Turn the dial to select the desired lancing depth. Make sure that the lancing depth indicator is pointing at a scale-bar on the Scale-bar Lancing dial. Dial depth indicator Shallow... - Page 21 Insert the Lancet into the FINETOUCH Lancing Device. Twist and pull the Lancet Do not push the cap to remove it from button. the Lancet. Keep Lancet cap (orange) on. Insert the Lancet until you hear a clear “Click”. Lancet cap (orange) t Only use FINETOUCH Lancet.
- Page 22 Choose the puncture site. t Choose the side of fingertip as puncture site. t Prick a different finger and a different location on your finger each time. Always choosing the same spot may harden the skin and cause calluses. Puncture site...
- Page 23 Caution Once the Lancet is detached from the FINETOUCH Lancing Device, do not reinsert it. If you reinsert the lancet, the needle will remain exposed, without the “Click” and you may have a risk of accidental needle stick injury.
- Page 24 Place the Lancet gently against the selected puncture site and press the Push button. Remove the Lancet from the puncture Place the Lancet gently site after pricking. against your finger and press the Push button. When you press the Push button, the lancet will prick your finger.
- Page 25 Gently squeeze around the puncture site to obtain a drop of blood. 2.5 mm (Size of blood drop) Recommended diameter of blood drop is around 2.5mm t To prevent blood from dripping, make sure that the puncture site is facing upward.
- Page 26 Step Measuring Gently apply the Test TIP to the Make sure that “ ” blood sample. is shown in the display. Blood Do not push the Test TIP against the skin. Do not apply the Test TIP If nothing is shown in the from the side or from a display, press the “...
- Page 27 Remaining seconds before measurement is done are shown in the display. Beep Countdown Lay the Meter down gently and wait. Disinfect the puncture site (of the finger) with an alcohol swab. Apply the leading edge of Test TIP to the blood drop until you hear “beep”.
- Page 28 After the “beep”, Record the measurement measurement results are results in your logbook/ displayed. diary. Beep Measurement is done. 500 measurement results are Caution automatically recorded. Please go to page 42 for instructions how to find Your doctor/physician will determine your individual target values for your blood previous results.
- Page 29 Cleaning up Step Cover the Test TIP Slide the eject with TIP case. button forward to remove the Test TIP. Ejector pin Hold the TIP case gently. (Do not push the TIP case onto the top of the meter too strongly.) Slide t Be sure to cover test TIP with the TIP case be- Ejector pins push the used Test TIP...
-
Page 30: Turning Off The Power
Cover the Meter with the Turning off the power. protective cap. Protective Press the “ ” button for Caution more than 1 second. If you do not use the protective cap, the inside of the Meter can get dirty and If there are no indications in the display, measurements could be affected. - Page 31 Remove the used Lancet straight from the FINETOUCH Lancing Device. Caution Dispose Do not reuse the used Lancet. Reuse may cause infection. Do not leave the Lancet attached to the FINETOUCH Lancing Device. Dispose of the used Test TIP and used...
-
Page 32: Table Of Contents
Problem Solving... How to deal with unexpected indications or how to recall the readings recorded in the Meter itself. Why is my blood glucose level measured with the meter different from the one measured in the hospitals? p.33 ......Does the blood glucose level vary according to the way it is measured? p.34 .................. -
Page 33: Why Is My Blood Glucose Level Measured With The Meter
Why is my blood glucose level measured with the meter different from the one measured in the hospitals? hospital home Blood glucose level varies all the time. It also differs according to the blood sampling point. Different time of measurement Even shortly after returning from your hospital examination, you may find that the blood glucose level measured at home, is different from the one conducted at the hospital. - Page 34 Does the blood glucose level vary according to the way it is measured? Yes, it does. In the following cases, measurement result may be af- fected and testing should be redone. You moved the leading edge of Test TIP away too early or too late during blood draw-up.
- Page 35 Measurement does not start, despite drawing up blood and Test TIP is again applied to the blood sample. If you move the Test TIP away from blood sample during draw-up of blood sample, and apply Test TIP again, air may come into the Test TIP and correct measurement result cannot be taken.
-
Page 36: Why Does The Indication
Why does the indication “ ” remain (unchanged) although blood was applied to the Test TIP? Blood sample was too small. Wipe off the blood from the puncture site and attach a new Test TIP to start a completely new measurement. -
Page 37: Error Indications In The Display
Error indications in the display When you find the following indications, follow the troubleshooting and start measurement again. Never take decisions on your treatment that are based on error indications. How to deal with it Indication Cause Page Test TIP is inserted at an angle (not Push the Test TIP firmly and correctly onto the 18,19 Meter before drawing up the blood... - Page 38 How to deal with it Indication Cause Page Environmental temperature is Move the products to a place where the out of specification (10 – 35° temperature is within 10 – 35° Celsius Celsius). and wait around 20 minutes till the indication disappears before taking the measurement.
- Page 39 How to deal with it Indication Cause Page Blood glucose value is higher Restart the measurement from the than 33.3 mmol/L. beginning. If the second measurement gives you the same measurement results, consult your physician. Blood glucose value is lower Restart the measurement from the than 1.1 mmol/L.
- Page 40 How to deal with it Indication Cause Page The Meter is out of order. Contact TERUMO. The batteries are almost Replace both batteries with new ones as empty. soon as possible. Indication blinks. Batteries are empty. Measure- Immediately replace both batteries with ment cannot be executed.
- Page 41 ” button, reset this Meter. No indication is on the display. The battery is placed incor- Install the batteries correctly. rectly. The batteries are depleted. Replace both batteries with new ones. If there is still no indication, please contact TERUMO.
-
Page 42: How To Look Up Recorded Measurement Results
How to look up recorded measurement results This Meter has a memory capacity to store up to 500 measurement results with the date and time. This allows you to access up to 500 previous measurement results at any given time. If the Meter is not on, press the Press “... - Page 43 To access previous/older Note well! readings: • When more than 500 measurements have been carried out, the oldest measurement • You can access the previous/older will be deleted to make room for the new readings by pressing the “ ” measurement.
- Page 44 Meter operation check p.50 Clean with a new cotton swab and a little water. When or “ ” Controlling the FINETOUCH disappear, attach the new Test TIP Blood Glucose Monitoring and measure. If the indication does System p.54 ........
- Page 45 How to clean the Meter When the Meter gets contaminated with blood, wipe it off with a soft fabric or tissue paper and a little water or disinfecting alcohol. Achtung Caution Do not use paint thinner or benzene. Wipe gently when you use disinfecting alcohol. The paint coating may come off. The Meter itself is not water-proof.
- Page 46 Additional functions Press both “ ” button and Erase the recorded memory “ ” button at the same in the Meter. time. Hold these buttons and turn on the Meter by pressing The memory is erased from the the “ ” button. Meter at once.
- Page 47 Keep pressing these three buttons “ ”, “ ” and “ ” for 1 second. If “ ” appears in the display, release all three buttons. “ ” disappears in 2 seconds, which means the memory has been erased. Once this process is completed, date and time are set at 12:00 on January 1st in 2010.
- Page 48 Silent mode Turn off the meter. Press the “ ” button with the “ ” button kept pressed beforehand. If “ ” appears in the display, release the “ ” button. “ ” or “ ” appears one after another, every time “...
- Page 49 The Meter has a communication terminal. Data transmission to a personal computer etc. is possible via this terminal. If you want more information about the communication apparatus, please contact TERUMO (you will find contact data at the end of the guide book).
- Page 50 Meter operation check There are two ways to check the meter, each with a different role. One is done automatically after you turn on the meter and attach the FINETOUCH Blood Glucose Test TIP (usual measurement operation). The other way of checking uses the Meter-Check TIP (Black).
- Page 51 Replace the Test TIP with a new one and take dusty. measurement again. If “ ” is still shown, even though the above processes are conducted, please contact TERUMO. Remove the Test TIP and check the Measuring window may be dirty measuring window.
- Page 52 2. Meter operation check by using the Meter-Check TIP. This meter operation check is to check the measuring window. When is shown, conduct this checking process. Turn off the meter. Press Take the Meter-Check TIP the “ ” button with the from the carrying case and “...
- Page 53 TIP back in the carrying case and start to take measurement. t When “ ” is shown: It is possible that measuring window is dirty. Go back to page 44. Conduct the operational check after cleaning the measuring window. If “ ” is still shown, contact TERUMO.
- Page 54 Controlling the FINETOUCH Blood Glucose Monitoring System FINETOUCH Control Solution is a glucose solution used to check whether the FINETOUCH Blood Glucose Meter and FINETOUCH Blood Glucose Test TIP are functioning properly. Please also read through the Instructions For Use of the FINETOUCH Control Solution before performing measurements with it.
- Page 55 Perform a quality control with the FINETOUCH Control Solution Peel off the film seal from the tip case and attach the Test TIP to the blood glucose meter. Do not discard the film seal (you will need it afterwards for carrying out the control measurement).
- Page 56 The blood glucose meter is malfunctioning or damaged. If you cannot identify the cause or solve the problem, do not use the meter and contact Terumo immediately. (contact information is mentioned at the end of this guide book).
- Page 57 Safety Cautions Ensure that the following information is clearly understood in order to use the Meter safely. Caution The following table explains the extent of damage or loss that could rise when the Meter is used Ensure that blood or devices contaminated incorrectly.
- Page 58 Once you remove the Lancet, do not attach it again. You cannot use the Lancet anymore once it is removed from FINETOUCH Lancing Do not reuse the used Lancet. Device. If you do, there is a risk that the needle It may cause blood infection.
- Page 59 Usage Precautions About the Meter About the battery Do not swallow the batteries. Do not use the Meter where it is In case of battery swallowing, immediately exposed to strong light such as consult your physician. direct sunlight. It can prevent the Meter from measuring blood glucose.
- Page 60 About Test TIP Be sure to use only FINETOUCH Blood Glucose Test Do not use a Test TIP if its case or film-seal TIP with blue film-seal. TIPs with other colour film- is open or damaged, or if any of the items is seal can not be used.
- Page 61 Storing FINETOUCH Store at room temperature (1 – 30° Celsius). Test TIP Do not store the FINETOUCH Lancing Device with the Lancet at- tached. It can cause malfunction of the lancing depth adjustment. Storing FINETOUCH If the spring is weakened, it will not be possible to sample a suf- Lancing Device ficient amount of blood.
- Page 62 Waste and Recycle of Meter and batteries Batteries and electrical/electronic equipment contain substances which can be dangerous to the environment and harmful to human health if they are not disposed of correctly. About the Meter About the battery The Meter may come into contact with Batteries must not be disposed of blood during use.
-
Page 63: Meter Specifications
Meter Specifications Name FINETOUCH Blood Glucose Meter Item code GR102M Operating conditions Temperature : 10 – 35 °C / 50 – 95 °F Relative humidity : 30 – 85% (non-condensing) Sample Fresh whole blood, capillary Sample size 1.2 µL Haematocrit... - Page 64 Product list Product name Quantity Item code FINETOUCH Blood Glucose Test TIP GC25D FINETOUCH Lancet GN4525D FINETOUCH Lancing Device GN02C About the reference method This blood glucose monitoring system is proofread by the glucose oxidase (GOD) method, calibrated using the glucose standard serum. Although this system uses whole blood as a...
- Page 65 About symbols Catalogue number Consult instructions for use Manufacturer Authorised representative in the European Community Batch code Use by date Sterilised using irradiation Do not reuse “Caution” or “Caution, consult accompanying documents” In-vitro diagnostic medical device Temperature limitation Serial number Do not throw away used batteries with general household waste.
-
Page 67: Blood Glucose Meter
According to the applicable legislations for protection of personal data, period has expired. Please send this product Terumo Europe N.V. assures you that your personal data is only kept for internal use and is handled in the strictest confidence. Your personal data back to TERUMO if it is no longer used. - Page 68 United Kingdom Free phone number: 0800 988 4617 email: diabetes@terumo-europe.com website: www.terumo-diabetes.com Before contacting Terumo or the service centre for more detailed information: • Check that all measurement equipment is present. • Have the following information at hand: Meter: Test TIP: Lot No.
Need help?
Do you have a question about the FineTouch and is the answer not in the manual?
Questions and answers