
Subscribe to Our Youtube Channel
Related Manuals for Sampo PME42MAW


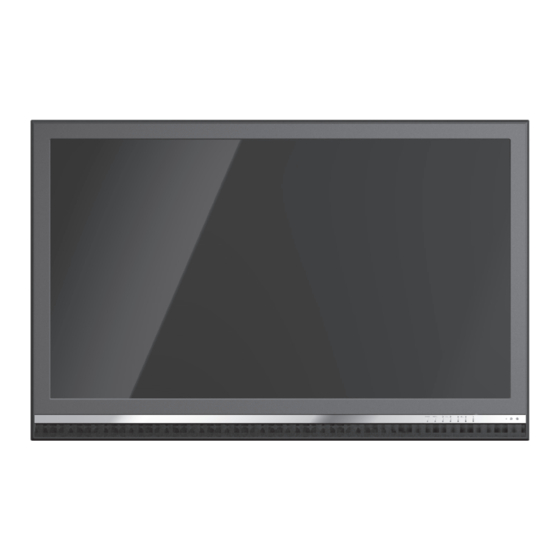
Summary of Contents for Sampo PME42MAW
- Page 1 42” LCD/LED DISPLAY LCD/LED イ イ ンチ チ ン デ デ ィ ィ スプ プ レ ス レイ イ 42” LCD/LED 디 디 스 스 플 플 레 레 이 이 ЖК/СД-ТЕЛЕВИЗОР С ДИАГОНАЛЬЮ 42" MONITOR LCD/LED 42” /LED 吋 吋 液 液 晶 晶 顯...
-
Page 2: Table Of Contents
Table of Contents Important Safety Instructions Special Notices Warnings & Precautions Cleaning & Maintenance Regulatory Notice Overview Checking the Accessories Supplied Front Panel Controls Battery Installation Rear Panel Connections Remote Control Buttons Changing Inputs Using the OSD Menu On-Screen Status Display Installation Connecting POLYCOM Video Conferencing System Connecting a VCR... -
Page 3: Important Safety Instructions
Important Safety Instructions WARNING RISK OF ELECTRIC SHOCK DO NOT OPEN WARNING: To reduce the risk of electric shock, do not remove the front or back covers. No user-serviceable parts inside. Refer servicing to qualified service personnel only. The exclamation point within a triangle The lightning flash with arrow-head is intended to tell the user that important within a triangle is intended to inform... -
Page 4: Cleaning & Maintenance
Important Safety Instructions Disconnect the unit from the main supply and refer servicing to qualified service personnel under the following conditions : Power cord or plug is damaged or frayed. Liquid has been spilled into the product and/or the unit has been exposed to water or moisture. Unit does not operate normally when the operating instructions are not followed. - Page 5 Important Safety Instructions Warning User must use shielded signal interface cables to maintain FCC compliance for the product. Provided with this display is a detachable power supply cord with IEC320 style terminations. It may be suitable for connection to any UL listed personal computer with similar configuration. Before making the connection, make sure the voltage rating of the computer convenience outlet is the same as the monitor and that the ampere rating of the computer convenience outlet is equal to or exceeds the monitor voltage rating.
-
Page 6: Checking The Accessories Supplied
navigation and adjustment keys when On Screen... -
Page 7: Overview
Overview Rear Panel Connections HDMI 1 /HDMI2 Input Connects to the digital video signals from a Set-Top Box or PC video connector. Note: HDMI 1 includes Polycom default settings, optimized for use with Polycom equipment. DVI is also supported through HDMI, using a DVI to HDMI adapter cable. -
Page 8: Quick View
Overview Remote Control Buttons Standby Power On/off Push this button to turn on the display from Standby mode. Push it again to Standby mode. POLYCOM Mode Push this key to select POLYCOM modes for optimal conference performance. Number Keypad These keys are not applicable for this display. Quick View This key is not applicable for this display. -
Page 9: Changing Inputs
Overview Changing Inputs Press the INPUT key on the control panel or the “Input” key on the remote control. Input Select Key Pressing the INPUT key will cycle the display through all available input signal sources in the follow order. COMPONENT S-VIDEO HDMI... -
Page 10: Installation
Installation Connecting POLYCOM Video Conferencing System Refer to the Administrator’s Guide included with the POLYCOM video conferencing system for configuring the monitor(s) and audio system for optimal performance. Connecting a VCR Using Composite/S-Video Connect the Composite/S-Video(4-pin DIN) connector from the VCR to the Composite / S-Video input on the back of display. -
Page 11: Connecting A Set-Top Box
Installation Connecting a DVD (con’t) Using Composite/S-Video Input Connect the Composite/S-Video (4-pin DIN) connector from the DVD to the Composite/S-Video input on the back of display. Connect the red (R) and white (L) audio jacks from the DVD to the red (R) and white (L) audio-in jacks located next to the S-Video connector. -
Page 12: Connecting An External Amplifier
Installation Connecting an External Amplifier This display can be connected to an external amplifier using the AUDIO OUT jacks located on the back of the display. Connect the red (R) and white (L) AUDIO OUT jacks from right side of the connector panel to the external amplifier. - Page 13 Installation Connecting a PC (con’t) Setting Up Your Display Using Plug and Play This display adheres to VESA Plug and Play standard to eliminate complicated and time consuming setup of displays. This display identifies itself to the computer and automatically sends the PC its Extended Display Identification Data (EDID) using Display Data Channel (DDC) protocols.
-
Page 14: Supported Resolutions
Installation Supported Resolutions Under HDMI, DVI and RGB modes, this Display supports the following resolutions: Note: This display does not support Macintosh resolution. “*”:not available for RGB Mode. -
Page 15: Menu System
Menu System Picture Adjustment Press the “Menu” key on the front panel or remote control and “Down” key to enter Picture menu. Use “Up/Down” to select the PICTURE Option from the menu. Various picture settings are available from the Picture menu. Use “Left/Right” to adjust that you wish and press “Exit”... -
Page 16: Fine Tuning Under Rgb Mode
Menu System Explanation of Various Picture Control Settings (con’t) H-POSITION Use to change horizontal position of the picture. Increase to shift the picture to the right. Decrease to shift the picture to the left. V-POSITION Use to change vertical position of the picture. Increase to shift the picture up. Decrease to shift the picture down. -
Page 17: Understanding Widescreen Modes
Menu System Understanding Widescreen Modes This display is capable of displaying a wide-screen image on the native 16:9 aspect ratio screen. However, not all available video content fits perfectly in a wide-screen (16:9) format resulting in unused screen space. This display is capable of displaying images in various formats that is suitable for various types of content depending on its size. -
Page 18: System Adjustment
Use “Left/Right” keys to change the setting. After achieving desired setting, press “Exit” key to close OSD or “Left” key to keep adjusting. PME42MAW-YYMMDD The S/W Version is only for reference. The actual version will be shown on the display OSD. - Page 19 Menu System Explanation of Various System Settings Auto Power Down When Auto Power Down is turned “ON”, the display shall automatically switch from on mode to full standby mode following 4 hours of inactivity (inactivity is defined as having no user interaction/activation of the display control buttons or remote control for a period of 4 hours).
-
Page 20: Additional Information
Additional Information Troubleshooting The following table lists possible problems and methods for remedy. Please refer to this table prior to contacting a service representative. Possible Cause Remedy Symptom 1. The power cord is disconnected. 1.Plug in the power cord. No picture is displayed. 2. -
Page 21: Specifications
Additional Information Specifications Display Panel Screen size 42” - 16:9 Aspect ratio 1920(Horizontal) x 1080p(Vertical) pixels 0.4845 mm x 0.4845 mm Number of pixels Luminance 350 cd/m Power Source Input voltage 100 ~240 Vac, 50/60 Hz Input current 1.2A Max. Power consumption 120 Watts Max. -
Page 22: Timing For Component
Additional Information Specifications Audio Signal Analog 500mV rms/more than 10K ohm. Pin Assignments For D-Sub connector (In/Loop out) 4. GND 1. RED 7. GREENGND 10. GND 13. H-SYNC 5. GND 2. GREEN 8. BULEGND 11.NC 14. V-SYNC 6. REDGND 3. BLUE 9. - Page 23 Additional Information Specifications Dimensions & Weight Width 1012mm Height 653.7mm Depth 160.5mm Net Weight 55.12lbs/25Kgs Gross Weight 68.34lbs/31Kgs Operating Temperature 0~40 C Relative Humidity 20~85% Pressure 500~380 mm/hg Non-Operating Temperature -20~60 C Relative Humidity 10~85% Pressure 500~380 mm/hg Acoustics (IHF A-weight 1 meter) 32dB Max. Sound Residual hum(at volume Max.) 100 W Max.
- Page 24 Additional Information Specifications Power Management Mode H-sync V-sync Video Power Dissipation Normal Pulse Pulse Active Normal power Less than 0.5 Watt Stand-by No pulse No pulse No video Power Saving Pulse No pulse B(blanked) Less than 0.5 Watt Power Saving No pulse Pulse B(blanked)
-
Page 25: Rs-232 Connection
Additional Information RS-232 Connection Overview This monitor is equipped with an RS-232 serial terminal for using the monitor with computer controls. The RS-232 serial terminal conforms to the RS-232 interface specification. The computer will require software application (such as Hyper Terminal) which allows the computer to send and receive control data that can support the communication parameters described in the section. - Page 26 Dual Audio Set ting SSS=Singles Stereo, DLS=Dual Left, DRS=Dual Right Display Model Name INF (Example: DSP:INF RCV CFM PME42MAW) Return Model N ame INF (Example: REA: INF RCV PME42MAW CFM) Power On Sou rce OFF=Normal (Last Memory) CP1=Component, RG1=RGB, HDM=HDMI1, HM2=HDMI2...
-
Page 27: Dimensional Drawings
Additional Information Item Color Scheme Front Bezel A170-5954 Silver Strip A170-1868 Keypad Wording Pantone 423C Red : Pantone 1795 Dark Gray : Pantone Cool Gray 11 Logo Light Gray : Pantone Cool Gray 9 Polycom wording : White... -
Page 28: Packing Break Out
Additional Information PME42MAW EXPLODED VIEW (MECHANICAL PARTS) DESCRIPTION UNIT REMARKS ITEM PART NO. PME42MAW SERIAL LABEL TLABD1142Y1- - -A MODEL LABEL TLABM1896Y1- - - - YTAPEQ075T900- - TAPE SSAKH0202Y1- - -D PE BAG SPAKA0785Y1F- - - STYROFOAM TINSE2238Y1---- ACCESSORY KIT... - Page 29 TINSE2238Y1----...
Need help?
Do you have a question about the PME42MAW and is the answer not in the manual?
Questions and answers