Chapters
Table of Contents

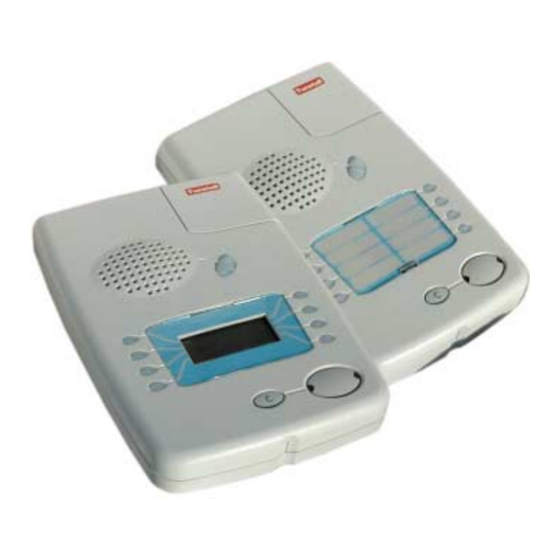
Related Manuals for Tunstall Lifeline 4000


Summary of Contents for Tunstall Lifeline 4000
- Page 1 All the reassurance you need Lifeline 4000 Advanced User Guide Tunstall Telecom Ltd., Whitley Lodge, Whitley Bridge, Yorkshire, DN14 0HR. Tel. 01977-661234 • Fax. 01977-661993 • http://www.tunstall.co.uk/ Part Number. D3607154B...
-
Page 2: Table Of Contents
All rights reserved. Neither the paper-based guide, nor the electronic version of the same, nor any portion of the text and/or images, may be copied, distributed, broadcast, or transmitted in any form or using any means howsoever, without the express written permission of Tunstall Group Ltd. Under no circumstances may the paper-based or electronic guide be edited, amended or adapted, or used for any purpose other than as an aid to using Lifeline 4000. - Page 3 Who should read this guide? As its name suggests, this guide explains the more advanced features of Lifeline 4000. It is a supplement to the main Lifeline 4000 User Guide, not a replacement. This guide is intended for interested owners/users of Lifeline 4000, care and control centre staff, as well as installers and service engineers.
- Page 4 Lifeline 4000 Advanced User Guide (B) Copyright © 2000 Tunstall Group Ltd.
-
Page 5: Common Tasks
Lifeline 4000, providing the Lifeline 4000 in question has been configured to make homecare calls. There are two types of service: timed and non-timed. For a non-timed service the provider simply enters the details into the Lifeline 4000 and the Lifeline 4000 calls the control centre to let the computers at the control centre know that a service has been delivered. -
Page 6: How Do I Register My Service Using My Radio Trigger
Every time you deliver a service you enter this number into the resident's Lifeline 4000. The Lifeline 4000 will pass this number onto the computers at the control centre so that they know you have delivered your service. You will also be given a two-digit service code for the service you provide. -
Page 7: How Do I Enter My Timed Service
4000 will pass the information back to the computers at the control centre. What if I arrive when someone else is also delivering a timed service, do I have to wait? Lifeline 4000 can time up to five different services at once. Consequently, you would only have to wait if five service providers were already each present providing a timed service. -
Page 8: Background Information On Sound
Once again, the volume can be set as high as volume 5. The user cannot set the Lifeline 4000 to use volumes 6 and 7. These volumes are only used if a call operator at a PNC3 control centre selects Increase Volume from their Call menu during a call. -
Page 9: Local Programming
Lifeline 4000 can be programmed in three ways. First, control centre staff using version 5.4 and above of PNC3 Vision can change many of the settings inside a Lifeline 4000 during a telephone call. Second, Tunstall Service Engineers, using the Lifeline 4000 Engineer's software application, can change almost all of the settings inside a Lifeline 4000. -
Page 10: Programming A Parameter
Enter the number of the parameter you wish to change and then press the key. The display will either show the word Programmed. Lifeline 4000 will beep and then wait for a valid parameter if you enter an invalid number. -
Page 11: Setting The Unit Identification Number
There are other ways in which Lifeline 4000 will switch out of local programming mode. If you do not press any key for more than 2 minutes then the Lifeline 4000 will start to beep. After 10 seconds of beeping the Lifeline 4000 will switch out of programming back into its normal waiting mode. -
Page 12: Setting The Clock
Setting the clock Lifeline 4000 has a 24-hour clock. In other words, 9.30am is displayed as 09:30. 10.15pm is displayed as 22:15. To set the time you need to enter programming mode, select parameter 171, and then enter the time as a four-digit number. -
Page 13: Entering The Alarm Telephone Numbers To Call
This makes it easier for control centres with old control centre software to program Lifeline 4000. As long as you know the correct parameter number you do not need to pay any attention to how they are numbered. - Page 14 Delete the old value using the key (display version only). Enter # and then the new value (the new telephone number), and then press End local programming by pressing the Cancel key. Lifeline 4000 Advanced User Guide (B) Copyright © 2000 Tunstall Group Ltd.
-
Page 15: Registering A Personal Radio Trigger
Registering a personal radio trigger Lifeline 4000 can accept radio inputs from Amie and GEM personal triggers, as well as the Fall Detector trigger. For background information on how radio triggers work with Lifeline 4000 please see the Lifeline 4000 User Guide. - Page 16 Press the alarm button on the radio trigger. Lifeline will beep and the words Trigger registered will be announced, and the words Programmed will be displayed if the unit has a display. End local programming by pressing the Cancel key. Lifeline 4000 Advanced User Guide (B) Copyright © 2000 Tunstall Group Ltd.
- Page 17 It is not recommended that you register a radio trigger with more than one home unit. However, it is possible. If, for example, a person lived in two properties, each with a Lifeline 4000, then it is possible for them to have one or more triggers registered with both units.
-
Page 18: Replacing The Battery
If they battery cover has been damaged then make sure you have obtained a replacement cover from your supplier. Find a flat surface near the Lifeline 4000, and cover the surface with a cloth or other soft cover to avoid marking or damaging the front of the Lifeline 4000 when it is turned over. -
Page 19: Common Installations
PIR is in position (but before you have drilled any holes). If a thick concrete beam or metal cabinet is between the PIR and the Lifeline 4000 then there is a chance that the radio signal will not get through, and you will have to select a different place to mount the PIR. -
Page 20: Inactivity Monitoring
Inactivity Monitoring If you intend to configure a Lifeline 4000 for inactivity monitoring then you may wish to look at the points raised in the previous section on installing movement detectors. In addition, there are the following points to consider:... -
Page 21: Intruder Detection
(see Trigger Types and Actions on page 44 for details of switching the external output, and chapter 4 for details of making an external connection). If you require the Lifeline 4000 to call a different series of alarm numbers when an intruder alarm is raised then: •... -
Page 22: Smoke And Fire Alarms
If you want Lifeline 4000 to call a different set of telephone numbers when a smoke alarm is triggered then: •... -
Page 23: Opening Doors
Opening doors Lifeline 4000 can be configured to open a door using a relay connected to its external output. For details of how to make a connection to the external output see chapter 4. For information on naming a user key and setting the key type to Relay, see Configuring Keys on page 26. - Page 24 Lifeline 4000 Advanced User Guide (B) Copyright © 2000 Tunstall Group Ltd.
-
Page 25: Programming Reference
Configuring Keys Each User Key on the Lifeline 4000 can be configured to perform a number of different tasks. In addition, the four Advanced Feature keys labelled A , B , C and D under the flap can be programmed to perform different tasks. -
Page 26: Assigning Key Actions
Information on making hardwired connections to either the input or output for Lifeline 4000 can be found in chapter 4 of this guide. Time on and off. If the output is turned on then it can also be made to flash (to switch on and off). - Page 27 (i.e. it will not act as an Away key or Fast Dial). The functions of the different key types are explained in the main Lifeline 4000 User Guide. However, to summarize, the Away key is used for switching the Away feature on and off.
- Page 28 Enter the parameter—press Delete the old value using the key (display version only). Enter and then press End local programming by pressing the Cancel key. Lifeline 4000 Advanced User Guide (B) Copyright © 2000 Tunstall Group Ltd.
-
Page 29: Assigning Text To User Keys
If parameter 172 is set to 0201, for example, then the first two alarm calls in a sequence cannot be cancelled, and the Cancel button will never cancel a technical alarm call. The Cancel button will only cancel normal alarms after the Lifeline 4000 begins alarm call 3. Example... -
Page 30: Messages And Warnings
Inactivity Monitoring is turned on or off. As explained earlier in this guide, this allows Lifeline 4000 to remain compatible with older control centres. The User Options parameter number is 11. To set this parameter you need to enter a 2-digit number. - Page 31 Enter the parameter—press Delete the old value using the key (display version only). Enter 4 , and then press End local programming by pressing the Cancel key. Copyright © 2000 Tunstall Group Ltd. Lifeline 4000 Advanced User Guide (B)
-
Page 32: Speech Synthesis And Language
French). The first digit determines the speech synthesis (see table below), while the second digit sets the language to be used. The second digit sets the language the Lifeline 4000 should use. The key sets the home unit to use the second language. If you do not enter a second digit, and... -
Page 33: Away Reminder
Away on, but then forget to turn it off upon their return. For Dr Hill Speaker this reason Lifeline 4000 can periodically announce Jackie Homecare Away the words Away Reminder , and the timing for this... -
Page 34: Triggers
Triggers For a Lifeline 4000 the process of receiving a trigger and raising an alarm call is a three-stage process, which can be characterized by three questions the unit asks: Does the radio trigger I have just received belong to me (i.e. this Lifeline 4000)? What sort of trigger is it—a personal trigger, a smoke alarm? - Page 35 3. Configure/check the call sequence used for the trigger type Which of the ten emergency numbers are used, and in what order, is dealt with on page 49. Copyright © 2000 Tunstall Group Ltd. Lifeline 4000 Advanced User Guide (B)
-
Page 36: Registering Radio Triggers
Lifeline listens for the number that is transmitted and puts it into the parameter you have selected. The easy way. How do you let the Lifeline 4000 know what sort of trigger you are registering? The... - Page 37 If a trigger is already registered in the parameter for Smoke Detector 1 the Lifeline 4000 will not allow you to register it in the parameter for Smoke Detector 2.
-
Page 38: Registering Triggers In The Extension Radio Trigger Parameters
PIR or treading on the pressure mat. Next, you should select parameter 61 and enter a number to tell the Lifeline 4000 the type of trigger you have just entered. You can also enter a location code in parameter 61, and these codes are explained later in this section. - Page 39 The resident needs enough time to leave the property, and enough time on return to turn the intruder detection off. Lifeline 4000 will allow the resident this time, but only for sensors that are set to be the exit/entry type.
- Page 40 The Home Care Primer trigger is the one that service providers press prior to pressing their own radio trigger. In effect, the Home Care Primer trigger says to the Lifeline 4000, prepare for a trigger that does not belong to you, and send its details to the control centre as a service provider Lifeline 4000 Advanced User Guide (B) Copyright ©...
- Page 41 Location codes. Both the TT92 and BS protocols can be used to send location information. To understand why this is important, imagine that you have been asked to set up a Lifeline 4000 in a large five-bedroomed house shared by five people. You fit radio-based smoke detectors in every bedroom, as well as the kitchen, the lounge and the hall.
- Page 42 BS priority for this call 06, as a resident pulling a cord in a toilet may well be in some distress. Lifeline 4000 Advanced User Guide (B) Copyright © 2000 Tunstall Group Ltd.
-
Page 43: Setting The Type For The Hardwired Input
If the circuit is Normally Open and the digits are set to 00, then Lifeline 4000 will only be triggered if the circuit is closed (if the connection to complete the circuit is made). The advantage of this approach is that if the wires become disconnected it will not raise a false alarm (unless the bare wires touch). -
Page 44: Trigger Types And Actions
Setting a prealarm delay of 10 seconds, for example, can be useful for the integral button (the main alarm button on the top of the Lifeline 4000), as it allows residents who have accidentally pressed it while cleaning some time to cancel the alarm call. The minimum time for this setting is 0 seconds, while the maximum is 60 seconds. - Page 45 Lifeline 4000. Home Care Management Primer is where a service provider presses a button (usually a radio trigger), and then presses their own...
- Page 46 3. Finally, we want this type of trigger to use call sequence 2, but not to switch the external output. Lifeline 4000 Advanced User Guide (B) Copyright © 2000 Tunstall Group Ltd.
- Page 47 In the example below the number entered for external output is 2. This means that pressing the key will turn the output on. Information on making hardwired connections to either the input or output for Lifeline 4000 can be found in chapter 4 of this guide.
- Page 48 End local programming by pressing the Cancel key. Imagine we are setting up a Lifeline 4000 in a house. The three residents in the house need support during the day, and all are potentially vulnerable to the cold. Consequently, we want to monitor the temperature.
-
Page 49: Call Sequences
Any particular alarm number can be tried up to nine times. If you use the Engineer’s Utility to program a Lifeline 4000 then you can set this number to be as high as fifteen. In other words, a single number in a sequence can be tried up to 15 times. However, the number of call attempts you enter for any particular alarm number can be overridden by a factory-set parameter in each Lifeline 4000. - Page 50 In the sequence entered the Lifeline 4000 will finish the sequence by calling alarm number 1 four times, then alarm number 2 four times, before calling alarm number 1 and then alarm number 2 nine times each.
- Page 51 This is an example of how such a list might be entered. The control centre numbers are entered last, with the last three spaces in the call sequence unused. Copyright © 2000 Tunstall Group Ltd. Lifeline 4000 Advanced User Guide (B)
-
Page 52: Inactivity And Temperature Monitoring
Usually, the Inactivity Time is set for 12 or 14 hours. It is possible to set the Inactivity Time for just 3 or 4 hours. However, this will cause the Lifeline 4000 to raise an inactivity call every night, as most resident will spend longer than 4 hours asleep, and hence will not move around their home. -
Page 53: Setting The Inactivity Parameter
Lifeline 4000 to Away even if they are going to the shops for just an hour or so, as Lifeline 4000 will more readily raise an inactivity alarm as it is waiting a shorter period of time before calling for help. -
Page 54: Enter Local Programming Mode By Holding Down The Key Until The Unit Beeps. Release The # Key First
Enter the parameter—press Delete the old value using the key (display version only). Enter and then press End local programming by pressing the Cancel key. Lifeline 4000 Advanced User Guide (B) Copyright © 2000 Tunstall Group Ltd. -
Page 55: Temperature Monitoring
The temperature at which an alarm will be triggered is set in the temperature sensor itself. Once a limit has been exceeded (so that the temperature is either too high or too low) the temperature sensor will send a radio trigger message to the Lifeline 4000 which will then raise an alarm. - Page 56 Enter the parameter—press Delete the old value using the key (display version only). Enter and then press End local programming by pressing the Cancel key. Lifeline 4000 Advanced User Guide (B) Copyright © 2000 Tunstall Group Ltd.
-
Page 57: Intruder Monitoring
The second digit in the example above determines whether residents hear entry tones from the Lifeline 4000 when they re-enter their house of flat and disable the alarm. If the second digit is set to one then the resident will hear entry tones. If the digit is set to two then the resident will not hear entry tones. - Page 58 Enter the parameter—press Delete the old value using the key (display version only). Enter and then press End local programming by pressing the Cancel key. Lifeline 4000 Advanced User Guide (B) Copyright © 2000 Tunstall Group Ltd.
-
Page 59: Entry/Exit Time
Enter the parameter—press Delete the old value using the key (display version only). Enter and then press End local programming by pressing the Cancel key. Copyright © 2000 Tunstall Group Ltd. Lifeline 4000 Advanced User Guide (B) -
Page 60: Call Configurations
1 for enabled (and 0 for disabled). Add 12 Hours. If you set the Lifeline 4000 to make a periodic call in twenty-eight days time then it will make its first call just 24 hours later. After this, it will call in exactly twenty-eight days time. -
Page 61: And Then Press
High resolution periodic calls Lifeline 4000 also allows high-resolution periodic calls using parameter 166, although only if periodic calls are enabled in parameter 12. If high-resolution calls are enabled then this overrides any other settings made in parameter 12. High-resolution periodic calls can take place just hours or minutes apart. -
Page 62: Personal Recipient Configuration
1, which means that the personal recipient announcements will be silenced at the Lifeline 4000. The second digit is also set to 1, which means that a confirmation call will be made once the personal recipient call has been accepted. -
Page 63: Incoming Call Timeout
Cancel key. To address this problem Lifeline 4000 can be made to end a call after a period of time. However, you should note that Lifeline will not do this sensitively—it will cut off any incoming call once the time limit entered into parameter 170 is exceeded, regardless of whether the conversation is still in full flow. -
Page 64: Mains Fail Call Configuration
Mains fail call configuration Lifeline 4000 can make an alarm call when the mains power fails and it has to switch over to using its batteries. This call takes place one hour after the mains failure. However, this can mean that every Lifeline in a town that has a power cut will try to call the control centre exactly one hour after the beginning of the power cut, thus jamming the telephone lines. -
Page 65: Tone Dialling/Pulse Dialling
End local programming by pressing the Cancel key. To set the Lifeline 4000 to enable mains fail calls, and set the mains fail time range to three hours, and the mains restored time range to two hours, and the call frequency to 0... -
Page 66: Ringing
End local programming by pressing the Cancel key. Augmented ringing interval Lifeline 4000 can be made to increase the volume of its ringing the longer an incoming call goes unanswered. The number of rings that Lifeline allows before it increases its volume is set in parameter 169. -
Page 67: Miscellaneous
Parameter 174 allows anyone programming a Lifeline to enter a date. This date will remain in the Lifeline 4000’s memory until it is next changed. This can be used for any purpose, depending upon the needs and policies of the control centre. One use might be to record the date when the unit and its connections were last checked by a member of staff. -
Page 68: Away State
Enter the parameter—press Delete the old value using the key (display version only). Enter and then press End local programming by pressing the Cancel key. Lifeline 4000 Advanced User Guide (B) Copyright © 2000 Tunstall Group Ltd. -
Page 69: External Connections
The wire should be held in place. Yellow clips, one for each connector The two input connections The three output connections Copyright © 2000 Tunstall Group Ltd. Lifeline 4000 Advanced User Guide (B) -
Page 70: Hardwired Input
The type the hardwired input can be set to (i.e. what it means) is explained in the section on Setting the trigger type, on page 39. Lifeline 4000 Advanced User Guide (B) Copyright © 2000 Tunstall Group Ltd. -
Page 71: Hardwired Output
Output on. When there is an output this situation is reversed—there is a connection made between connectors 1 and 2, while the connection between connectors 2 and 3 is lost. Copyright © 2000 Tunstall Group Ltd. Lifeline 4000 Advanced User Guide (B) - Page 72 Lifeline 4000 Advanced User Guide (B) Copyright © 2000 Tunstall Group Ltd.
-
Page 73: Parameter Index
Parameter 49, page 59 Parameter 209, page 29 Parameter 50, page 59 Parameter 21, page 15, 36 Parameter 58, page 43, 70 Parameter 210 to 214, page 29 Copyright © 2000 Tunstall Group Ltd. Lifeline 4000 Advanced User Guide (B) - Page 74 Lifeline 4000 Advanced User Guide (B) Copyright © 2000 Tunstall Group Ltd.
-
Page 75: Index
5 battery control centre tones 44 replacing 18 battery low call 64 date, configurable 67 dialling tone/pulse 65 displays card displays 9 interactive displays 9 doors opening 23 Copyright © 2000 Tunstall Group Ltd. Lifeline 4000 Advanced User Guide (B) - Page 76 9 registering timed services 7 location 41 service calls and control centres 7 and protocols 41 British Standard codes 41 codes 41 low temperature monitoring 22 Lifeline 4000 Advanced User Guide (B) Copyright © 2000 Tunstall Group Ltd.
- Page 77 65 radio trigger. See trigger; trigger: radio rechargeable battery replacing 18 Relay key 27 replacing the battery 18 ringing configuring 66 ringing, augmented 8 Copyright © 2000 Tunstall Group Ltd. Lifeline 4000 Advanced User Guide (B)
- Page 78 Home Care Primer 40 intruder 39 movement 39 temperature 40 types 34, 44–48 call progress tones 44 call visual indication 44 control centre tones 44 prealarm delay 44 types, displays 9 Lifeline 4000 Advanced User Guide (B) Copyright © 2000 Tunstall Group Ltd.
- Page 79 Copyright © 2000 Tunstall Group Ltd. Lifeline 4000 Advanced User Guide (B)
- Page 80 Lifeline Home Unit settings Unit ID: Owner/Resident/Main User: Name of person who made changes: Date: Only this page may be photocopied or printed without the written permission of Tunstall Group Ltd.
Need help?
Do you have a question about the Lifeline 4000 and is the answer not in the manual?
Questions and answers