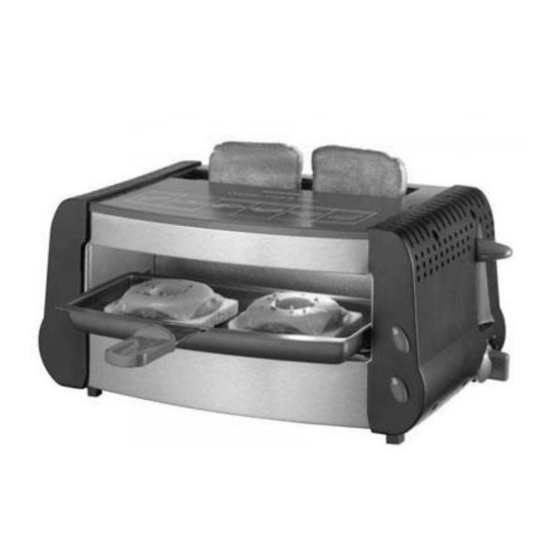
Summary of Contents for Salton SGT20
- Page 1 INSTRUCTIONS AND WARRANTY MODEL NO. SGT20 SALTON COMPACT GRILL WITH LONG SLOT TOASTER...
- Page 2 Congratulations on purchasing the Salton Compact Grill with Long Slot Toaster. Each unit is manufactured to ensure safety and reliability. Before using this appliance for the first time, please read the instruction manual carefully and keep it for future reference.
-
Page 3: Important Safeguards
Ideal for small households, university students and holiday makers For domestic use only 1 year warranty IMPORTANT SAFEGUARDS When using any electrical appliance, basic safety precautions should always be followed including the following: 1. Please read the instructions carefully before using any appliance. 2. - Page 4 13. Check the power cord and plug regularly for any damage. If the cord or the plug is damaged, it must be replaced by the manufacturer or a qualified person in order to avoid an electrical hazard. 14. Do not use the appliance if it has been dropped or damaged in any way. In case of damage, take the unit in for examination and/or repair by an authorised service agent 15.
- Page 5 27. Always operate the appliance on a smooth, even, stable surface. Do not place the unit on a hot surface. 28. Do not operate this appliance by means of an external timer or separate remote control system. 29. This appliance must only be operated on a heat resistant surface. 30.
- Page 6 41. If bread gets jammed, unplug the appliance, let it cool down fully, then carefully remove the bread that’s jamming it. Don’t use anything sharp, such as a knife or fork, you may damage the elements and may be at risk of electric shock. 42.
-
Page 7: Parts Diagram
PARTS DIAGRAM 1. Rating label (located underneath the appliance) 2. Power cord with plug 3. Toaster control lever 4. Browning/timer control dial 5. Toasting slot 6. Power switch with pilot/ indicator light (upper element) 7. Power switch with pilot indicator light (lower element) 8. -
Page 8: Before First Use
PLACEMENT OF THE COMPACT GRILL WITH LONG SLOT TOASTER When placing the appliance in your kitchen, ensure that the unit is kept away from flammable materials, and that there is sufficient space around the unit, as per the guide below: ... -
Page 9: Using The Grill
USING THE GRILL This appliance has two heating elements. Which heating element(s) you use will depend on the type of food that you are cooking. To switch on the upper element, push the upper power switch to the “ON” position. To switch on the lower element, push the lower switch to the “ON”... - Page 10 Basic Cooking Guideline: Grilling times in the table below should be used as a guideline. Different types of food vary in shape and texture – the same is true for personal preference and taste. Always refer to the food packaging or recipe for cooking guidelines. Approximate Symbol Food Type...
-
Page 11: Using The Toaster
Switch on both Grilled Sausages 8-10 the upper and lower elements. USING THE TOASTER Adjust the timing/ browning dial on the side of the unit to brown your toast to the desired level (from 60 seconds to 120 seconds). ... -
Page 12: Cleaning And Maintenance
Sweet bread products (fruit loaf, etc.) brown much quicker than ordinary bread, so should be toasted on a lower setting. Should the control lever become jammed during the toasting cycle, do not attempt to release it. Unplug the appliance and allow it to cool down before carefully removing the bread. -
Page 13: Storing The Appliance
scouring pads or scrape the walls with a metal utensil, as this may damage the surface/ finish. Do not use an abrasive cleaner, steel wool or scouring pad on the enamelled pan as it may damage the enamel finish. ... -
Page 14: Servicing The Appliance
SERVICING THE APPLIANCE There are no user serviceable parts in this appliance. If the unit is not operating correctly, please check the following: You have followed the instructions correctly That the unit has been wired correctly and that the wall socket is switched on. ... -
Page 15: Changing The Plug
CHANGING THE PLUG Should the need arise to change the fitted plug, follow the instructions below. This unit is designed to operate on 230V-240V current only. Connecting to other power sources may damage the appliance. Connect a three-pin plug as follows: The wires in this mains lead are coloured in accordance with the following code: Green/Yellow Earth... -
Page 16: Scrambled Eggs
Salt METHOD: Preheat the grill. Sprinkle chops with paprika, salt, pepper and sage. Grease the grill tray lightly and brown the chops on both sides. CHINESE MEAT BALLS Minced beef Salt Cabbage Soy sauce Onion Cooking oil Ginger METHOD: Preheat the grill. Put meat, cabbage and onions through a mincer using a coarse mincing grade, or place in a food processor. - Page 17 Onion and Parsley – Add chopped onion and parsley Chives – Add chopped chives Mushrooms – Add sliced canned or fresh mushrooms...
- Page 18 This will be deducted from any refund paid to the customer. HOME OF LIVING BRANDS (PTY) LTD (JOHANNESBURG) JOHANNESBURG TEL NO. (011) 490-9600 CAPE TOWN TEL NO. (021) 552-5161 DURBAN TEL NO. (031) 792-6000 www.homeoflivingbrands.com www.salton.co.za www.facebook.com/SaltonAppliances...


Need help?
Do you have a question about the SGT20 and is the answer not in the manual?
Questions and answers