Table of Contents
Advertisement
Quick Links
Advertisement
Table of Contents

Related Manuals for Scallop Imaging D7-180

Summary of Contents for Scallop Imaging D7-180
- Page 1 Getting Started D7 180 D7 180XR...
-
Page 2: Table Of Contents
Scallop Imaging’s 7 megapixel video surveillance cameras are the first stand-alone computational imaging systems. The imaging task is distributed among five powerful microsensors. The camera’s embedded CPUs synthesize the image data into one seamless 180° field of view. The embedded web server... -
Page 3: Connecting The Camera
Connecting the Camera You can set up and operate the D7-180 and D7-XR Cameras using a standard JavaScript-enabled browser on Windows 7 or Windows 8. PoE Operation The camera can be connected 12V DC plug over a network by a CAT-5 Ether-... -
Page 4: Installing The Camera
Installing the Camera A. Place the flush wall mount bracket (1) against a gang box and at- tach top screw, leaving screw slightly loose. B. Attach the bottom screw. C.Using a bubble level, level the mounting bracket, then finish tight- ening both screws. -
Page 5: Installing The Software
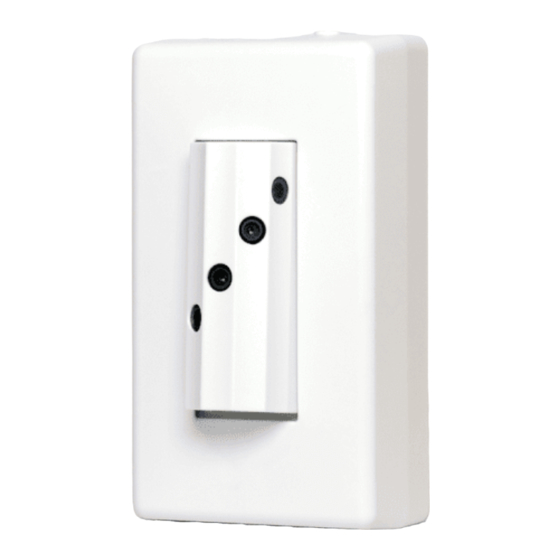
Accessories: alternative mounts If no Junction Gang Box is available, the Vertical Wall Mount (4) for straight ahead viewing, or the Angled Wall Mount (5), for angled- down viewing may also be mounted flush to the wall. Be sure to use appro- priate wall anchors (not included) to secure the mount to a drywall... -
Page 6: Software Installation
Accessing the Camera On a network Scallop Imaging IP cameras are IPV4LL compliant. If you have a DHCP server on your network, the DHCP server “router” will assign the camera an IP ad- dress automatically. If a DHCP server “router” is not on the network, the cam- era will be assigned a 169.254.x.x address. - Page 7 Click on Web Server (HTTP) on the left column and devices with the Bonjour naming protocol will be shown on the right hand column. Each D7-180 camera will be named “D7180_cam_****”, and each D7-180XR will be named “D7XR_CAM_****.” The **** will be the last 4 digits of the MAC address of the camera.
-
Page 8: Live Feed
Live Feed Screen After logging in, you will be brought to the Once you initially log on to the camera, you D7-180/D7-180XR browser site. By default, can set up user the “Live Feed” tab will be activated accounts. Setting up user... - Page 9 Live Feed Screen (continued) To choose the number of zoom windows you Note: The video will stop playing for 2-3 would like to appear on the screen click on seconds while the new the icons at the bottom of the screen. Once zoom windows appear.
-
Page 10: Video Recording
Video Recording At the top of the screen under the Live Feed tab you will also find a "Start Recording" button. Video recording using the web browser interface will save an .flv file to your computer and before recording is started, you will be prompted to set the location and name of the file to be saved. -
Page 11: Camera Settings
Camera Settings Under the Camera Settings tab, administrators will be able to access the following options: Users, Network Setup , Protocol, Recording, Im- aging, Date and Time, Error Logs, Status LED, Firmware, and System Overview. Users List Once you click the Add User button on the right hand side the window to the right will appear. -
Page 12: Network Settings
Network Settings In the Network Settings tab you have the option to change how the camera will function on the network. In some situations the user may desire to change the camera into Static mode (Manual) to match the existing network. - Page 13 Camera Settings (continued) Protocols Settings: SMTP, UPnP, and Bonjour SMTP settings: In the SMTP set- tings, you can add your email's SMTP settings and email address to send any error logs created by the camera. If prob- lems occur with your camera these logs can be sent to email addresses for troubleshoot- ing purposes.
-
Page 14: Recording Settings
Recording Settings The D7-180/D7-180XR camera has a recording function that allows you to record video from the camera. You can set this up by selecting the Camera Settings tab, and clicking on the Recording tab. This will bring you to the Recording settings Page, where you can set the recording time, the filename of the recording, and which video... -
Page 15: Imaging Settings
Camera Settings (continued) Imaging Settings The camera’s Imaging Settings has multiple functions that the user can use to obtain the best picture quality for each camera location that may have unique lighting characteristics. The Imaging Settings has 5 sections: General, Contrast, Sharpening, Video Quality and Advanced. -
Page 16: White Balance
Autoexposure Mode The camera supports two different modes of Once you have changed the settings autoexposure: Average and Independent. The to your liking, click Average mode measures light levels over the “Save Settings” and entire field of view and calculates a fixed ex- your settings now become the default posure for the entire 180°... - Page 17 Camera Settings (continued) Max Exposure Time The max exposure time control sets the maximum exposure time that the camera’s autoexposure system can take. If there are moving ob- jects close to the camera, you may need to make the maximum ex- posuretime shorter to control motion blur.
- Page 18 Band Filter The camera is shipped The band filter is used when the lighting has from the factory with temporal modulation, such as many fluores- default setitings. cent lights. For many fluorescent lights the Clicking the “Restore video will show banding artifacts that come Factory Settings”...
- Page 19 Camera Settings (continued) Contrast There are four contrast curves that can be selected to enhance the video quality for various lighting conditions. For most scenes, the None (Linear) setting yields the best result. The Shadow Detailed curve is good for dark scenes and enhances details in dark areas. The Low Contrast curve increases the contrast for scenes with low dynamic range.
- Page 20 Image Alignment The camera is set up at the factory with image sensor alignments op- timized for average distances. If the camera is installed in an area where there are objects closer to the camera or much further away, you may need to adjust the sensor alignments so that the video is seamless.
-
Page 21: Date And Time
You may also view the log here by clicking View Log. A pop up screen will appear with the log inside. You can copy and paste this log into an email and send it to Scallop Imaging if there is an issue that needs technical support. -
Page 22: Standard Terms And Conditions For Sale
Standard Terms and Condi- tions of Sale Scallop Imaging, LLC D7-180 and D7-180XR Digital Camera Limited Warranty 1. Standard Limited Warranty. Standard terms and conditions of sale are available on Scallop Imaging’s website www.scallopimaging.com. -
Page 23: Specifications
Exposure control Average, 5 zone independent Depth of Field 1 ft. to infinity Minimum illumination D7-180: 3 lux at 10 fps D7-180XR: 0.5 lux at 8 fps Image: Image size (HxV) 2 simultaneous video streams: • A standard 15 fps HD frame comprised of a... - Page 24 Field of view 180º x 48º 28 pixels per degree of field of view Image resolution Everywhere within the field of view equivalent to resolution of a 1.3 MP camera with a 33.7mm lens Compression H.264 Maximum frame rate 15 fps for SA and zoom, 1 fps for full res window Compression ratio User selectable Bandwidth requirements...
- Page 25 U.S. Patent No.: 7,262,789 and additional U.S. and international patents. www.scallopimaging.com © 2014 Scallop Imaging, LLC Specifications subject to change without notice 20140220 DW01-600-033-RevD...
Need help?
Do you have a question about the D7-180 and is the answer not in the manual?
Questions and answers