Table of Contents
Advertisement
Advertisement
Table of Contents

Related Manuals for JCM Neptune

Summary of Contents for JCM Neptune
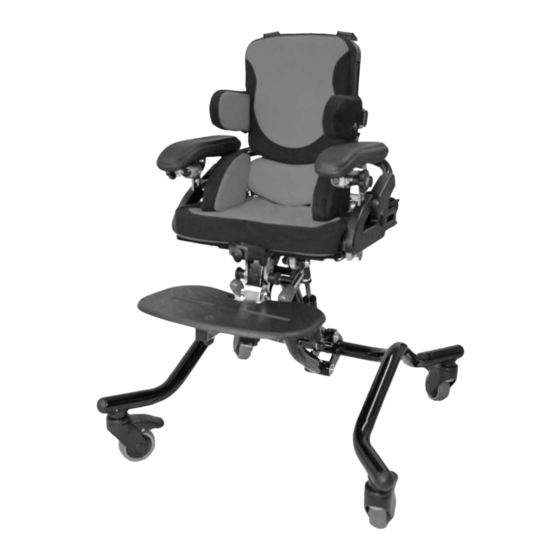
- Page 1 Neptune INSTRUCTION MANUAL...
-
Page 2: Table Of Contents
Inspecting & Reissuing of Equipment ......................19 Introduction This instruction manual contains very important information about the Neptune seating system, how to use it safely and obtain the best results from it. Please read all the information contained in this manual before using the chair and retain for future reference. -
Page 3: Measurements & Useful Info
All of the upholstery is fitted with press studs or zips to enable you to remove or replace as appropriate. Second sets of covers are available to purchase directly from JCM. For cleaning and care instructions please refer to our separate fabric brochure. -
Page 4: Operation Of Lock Levers
Operation of Lock Levers Effective Operation of Lock Levers (Where Fitted) Never remove these levers entirely as this • Continue to hold the lever out and reposition will prevent you from being able to perform the lever handle in a suitable position past the adjustments in the future. -
Page 5: Lever Use - Using Index Plungers
Lever Use - Using Index Plungers Using the Index Plungers (Locking Variety Only) • To place the plungers in an open position - Pull out the plungers to maximum tension and turn them through a half turn anti-clockwise (B). This places them in an open position (C). • To close - Turn the plungers a half turn... -
Page 6: Important Safety Advice
(see pages 8 & 9). • When fitted to an indoor base frame the Neptune should always be positioned on a level, flat floor. The Neptune chair can be moved between one working area and another. For safety ALWAYS return the product to a neutral position and lower before moving (lower in height, level the seat, ensure the back is upright etc). -
Page 7: Important Safety Advice -(Accessories)
Important - Neptune Lap Strap Fixing The Neptune is fitted with buckles as standard which can be utilised for either 2 or 4 point lap belts. The primary fittings (A) are loacted on either side at the back of the chair. The secondary fittings (B) are... -
Page 8: Important - Chest Harness Adjustment
The straps at the top of the harness should be attached to the back frame of the chair. The Neptune comes with a fixing point either side at the top back of the chair for attachment of straps and harnesses. -
Page 9: Important - Lap Strap Safety
Important - Lap Strap Safety Incorrect fitting of lap straps can put the user at serious risk. When using lap straps we recommend the following points should always be adhered to: Lap Strap Fitting adjustment strap at the buckle should be approximately 3”... -
Page 10: Adjusting Seat Depth
Adjusting Seat Depth • Pull out plungers (A) located on both sides of the seat. • Slide the seat in or out to change the length. • Release the plungers and continue to slide until the frame locks into place. If increasing the seat depth it is best to stand at the rear of the chair with the brakes applied and pull the back frame towards you. -
Page 11: Back Height Adjustment
Back Height Adjustment • Loosen the two hand wheels (A) on the plastic back panel by half a turn • Slide the plastic panel up or down to the desired height. • Tighten the two hand wheels securely to fix the back in place. May be replaced with screws requiring a 4mm Allen Key (supplied). -
Page 12: Fitting A Tray
Adjusting Arm Angle The arms fitted to your Neptune chair can be altered to sit throughout an angle range, enabling the user to level their tray no matter what tilt the chair is secured at. -
Page 13: Lateral Support Adjustment
Lateral Support Adjustment Height & Width of Supports • Loosen both bolts (A) by half a turn using the 4mm allen key provided. • Slide the pads up or down along the slot in the seat back (B) to adjust the height, and outwards to set the width and / or angle. -
Page 14: Hip Pad Adjustment
Hip Pad Adjustment Hip Pad Width • Un-tighten allen key bolt (A) by a half turn using the 4mm allen key supplied. Then slide the hip pad along the hip pad bar (B) to set at the desired width. • Re-tighten the allen key bolt (A) to secure the pad in place. -
Page 15: Legrest, Footplate & Sandal Adjustment
Legrest, Footplate & Sandal Adjustment Legrest Detachment / Attachment • Pull and lock open plunger A1 (by rotating 90°) which is on the right hand side of the seat as you are looking at the chair. • Pull and hold open the plunger A2 which is (on the left side of the seat as you are looking at the chair) to enable you to disengage the legrest from the main seating unit. -
Page 16: Cleaning & Care
In addition to the specific functional adjustment warnings specified in this manual, it should be ensured that a thorough inspection of the following should be completed at no greater than 6 month intervals: (Points listed here are generic across the JCM range and do not apply to all products). -
Page 17: Servicing Via Approved Repairer
Who should carry out the service? It is stressed that only a JCM approved repairer or a person with competent training of a Class 1 medical device should carry out this work. -
Page 18: Warranty
IMPORTANT JCM Tel: 01733 405830 JCM Seating Solutions Ltd. will not be held responsible for any damage or injury caused by incorrect use of this product. For any information or guidance on the use of this product please call our office who will put you through to your local representative or send you any additional information you may require. -
Page 19: Inspecting & Reissuing Of Equipment
Inspecting & Reissuing of Equipment Most JCM Seating Solutions Ltd. products are main construction or accessories. individually assessed for a client prior to issue. They are handed over in a controlled way to • Condition ensure optimum fit and specification, checks are... - Page 20 ® 15 -18 Maxwell Road, Woodston Industrial Estate, Peterborough, Cambridgeshire PE2 7HU Tel: 01733 405830 Fax: 01733 405838 Email: enquiries@jcmseating.co.uk © 2011 JCM Seating all rights reserved. Q.A.87 (Feb 2011)
Need help?
Do you have a question about the Neptune and is the answer not in the manual?
Questions and answers