Table of Contents
Advertisement
Advertisement
Table of Contents

Related Manuals for Harris NXAMP3801HDI


Summary of Contents for Harris NXAMP3801HDI
- Page 1 ® NEXIO AMP Generation 6 Hardware Installation and User Guide 175-100423-00 Rev A...
- Page 2 © Copyright 2013 Harris Corporation. All rights reserved. No part of this documentation may be reproduced in any form, by any method, for the purpose, without the written consent of Harris Corporation. Harris Corporation reserves the right to revise and improve its products as it chooses.
-
Page 3: Table Of Contents
Table of Contents Chapter 1 Introduction .......................7 NXAMP3801HDX/HDI Configurations ..............7 NXAMP3801HDX/HDI Software Options ..............8 Key Features ......................8 Specifications .......................10 System ......................10 Video ......................11 Audio ......................11 Video Compression Information ..............12 RAID Redundancy ..................13 Optional Operating System RAID 1 ............13 Timecode Connection Options ..............13 Remote GPI Control ...................14 Remote Serial Interface ................14 Controls ....................15... - Page 4 Table of Contents Reference Ports .................. 27 AES Audio ..................27 USB Ports ................... 27 RS232 ....................28 Fibre Channel (HDX Only) ..............28 DVI 1/ DVI 2 ..................28 Ethernet ..................... 28 GPI Ports .................... 28 COM Ports ..................29 System Installation Chapter 3 ..................
- Page 5 NXAMP3801HDX/HDI NEXIO AMP Generation 6 Hardware Installation and User Guide Remote Monitoring Using IPMI ..............41 BIOS Setup ....................41 NEXIO Monitor .....................44 To Open NEXIO Monitor ................44 Selecting Monitored Diagnostics ..............45 LCD Keypad Buttons ....................46 Chapter 6 System Drive Recovery ................47 System Recovery ....................47 Initial WIM Recovery Image ................47 Prepare the Drive for Capture .............47...
- Page 6 Table of Contents 175-100423-00...
-
Page 7: Chapter 1 Introduction
NEXIO AMP Generation 6 is available in a variety of configurations. The available configurations are shown in Table 1-1. The Software License Card provided with your server shows which configuration you have purchased. If you want to upgrade to a different configuration, contact Harris BCD Support for an additional license. Refer to Regional Service Contact Information on page 2. -
Page 8: Nxamp3801Hdx/Hdi Software Options
Chapter 1 Introduction NXAMP3801HDX/HDI Software Options The following software options are available for your NXAMP3801HDX/HDI: Software License Upgrades — The software license upgrades enable additional HD or SD channels, and optional Media Applications. Table 1-2 lists the additional software applications that are available for NXAMP3801HDX/HDI: Table 1-2 Optional Software Applications Application Description... - Page 9 NXAMP3801HDX/HDI NEXIO AMP Generation 6 Hardware Installation and User Guide Table 1-3 Key Features (Continued) Features Dual port 8 Gbps Fibre Channel support Easy integration with IP networks using Gigabit Ethernet for media transfers ...
-
Page 10: Specifications
Chapter 1 Introduction Table 1-3 Key Features (Continued) Features Single boot drive with an option for a second drive for RAID 1 Software-based codecs for coding and decoding SD and HD media Supports HD-SDI (SMPTE-292M) and AES/EBU interfaces ... -
Page 11: Video
NXAMP3801HDX/HDI NEXIO AMP Generation 6 Hardware Installation and User Guide Video Table 1-5 describes the NXAMP3801HDX/HDI video specifications: All SD and HD Input/Output Configurations require that you have registered your software. To register your software, see the Software License Card provided with your system. Table 1-5 NXAMP3801HDX/HDI Video Specifications Aspect Ratio Conversion Up/down/cross conversion support... -
Page 12: Video Compression Information
Chapter 1 Introduction Table 1-6 Audio Specifications (Continued) Inputs 4 pairs HD-BNC, unbalanced (AES/EBU) 75 termination 1V p-p nominal levels Outputs 4 pairs HD-BNC, unbalanced (AES/EBU) 75 termination 1V p-p nominal levels Processing & Storage 16, 20, or 24-bit, PCM, 48kHz Video Compression Information Table 1-7 lists HD and SD Compressions and Bit Rates for NXAMP3801HDX/HDI:... -
Page 13: Raid Redundancy
NXAMP3801HDX/HDI NEXIO AMP Generation 6 Hardware Installation and User Guide RAID Redundancy Table 1-8 lists both the Integrated and Shared Storage versions of the NXAMP3801HDX/HDI level of redundancy to protect against the failure of one or more storage drives: Table 1-8 RAID Redundancy Specifications Redundancy Specifications ... -
Page 14: Remote Gpi Control
The following is a list of the remote serial interface specifications for NXAMP3801HDX/HDI: RS-422 ports for control of up to eight channels; one port can be allocated for a VTR RJ-12 connector Harris ADC VDCP pinout. Refer to Chapter 4, Connector Pinouts on page 37. 175-100423-00... -
Page 15: Controls
NXAMP3801HDX/HDI NEXIO AMP Generation 6 Hardware Installation and User Guide Controls Table 1-12 describes the NXAMP3801HDX/HDI control specifications: Table 1-12 Control Specifications Ethernet, TCP/IP via socket or UDP Input/Output RS-422 NEXIO Native Protocol Protocols VDCP ... - Page 16 Chapter 1 Introduction 175-100423-00...
-
Page 17: Chapter 2 Chassis Components
A description of the front panel is shown in Table 2-1. The front panel of NXAMP3801HDX is shown in Figure 2-1 and front panel of NXAMP3801HDI is shown in Figure 2-2 on page 18. Front Panel - HDX Only Figure 2-1 NXAMP3801HDX... -
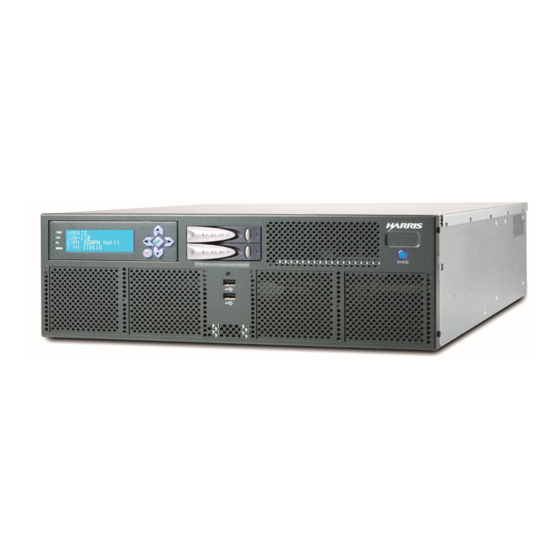
Page 18: Front Panel - Hdi Only
Chapter 2 Chassis Components Front Panel - HDI Only Figure 2-2 NXAMP3801HDI Table 2-1 NXAMP3801HDX/HDI Front Panel Item Number Description For Additional Information Figure 2-1 Figure 2-2 LED Indicators used to monitor NEXIO AMP. on page 19 LED Indicators ... -
Page 19: Front Panel Components
NXAMP3801HDX/HDI NEXIO AMP Generation 6 Hardware Installation and User Guide Front Panel Components LED Indicators The LED Indicators, Table 2-2, are used to monitor status and health of the frame. For more information on monitoring NXAMP3801HDX/HDI, see Selecting Monitored Diagnostics on page 45. -
Page 20: Fiber Optical Drive Carrier Indicator
Chapter 2 Chassis Components Power Off Button: The power off button enables you to shut down the system as described below Power Off — press and hold the power off button for 5 seconds to shut down the system. Arrow Button: The arrow buttons enable you to access information and system status. -
Page 21: Sys Id Front Panel Indicator/Switch
Drive Configuration The NXAMP3801HDX/HDI disk subsystem is factory configured with the operating system on drive 0. The NXAMP3801HDI comes with eight media drives for internal storage. Additional media drives can be purchased for added storage. Server media drives - Optional SAS3 drives in RAID 3 or RAID 6. See RAID Configurations ... - Page 22 Chassis Components Table 2-3 OS and Media Drive RAID Configuration RAID 1 RAID 3 RAID 6 (NXAMP3801HDI) (NXAMP3801HDI) Operating System-Windows 7 Ultimate (64-bit) Optional 1 - 2 Operating System as RAID 1 (Mirroring) protects data from drive failure by simultaneously writing the same data to two hard drives.
- Page 23 NXAMP3801HDX/HDI NEXIO AMP Generation 6 Hardware Installation and User Guide Table 2-3 OS and Media Drive RAID Configuration (Continued) RAID 1 RAID 3 RAID 6 (NXAMP3801HDI) (NXAMP3801HDI) Optional Optional -or- 1 -2 -plus- 3 -18 Operating System-Windows 7 Ultimate (64-bit).
-
Page 24: Nxamp3801Hdx/Hdi Back Panel
Chapter 2 Chassis Components NXAMP3801HDX/HDI Back Panel This section contains the NXAMP3801HDX/HDI rear panel connectors and their functions: The NXAMP3801HDX/HDI rear panel is shown in Figure 2-6. PLACE HOLDER Figure 2-6 NXAMP3801HDX/HDI Rear Panel The function of each connector is shown in Table 2-4. - Page 25 NXAMP3801HDX/HDI NEXIO AMP Generation 6 Hardware Installation and User Guide Table 2-4 NXAMP3801HDX/HDI Rear Panel (Continued) Item Connectors, For Additional Number Indicators, and Description Information Button Figure 2-6 RS232 9-pin D-sub connector for RS232 serial port RS232 on page 28 connection.
-
Page 26: Back Panel Components
Chapter 2 Chassis Components Table 2-4 NXAMP3801HDX/HDI Rear Panel (Continued) Item Connectors, For Additional Number Indicators, and Description Information Button Figure 2-6 IN 1 Four HD-BNC connectors for AES/EBU audio AES Audio input. Connect to these ports when using page 27 1/2, 3/4, 5/6, 7/8 AES/EBU audio and Dolby E for input 1. -
Page 27: Hd/Sd Sdi Video
NXAMP3801HDX/HDI NEXIO AMP Generation 6 Hardware Installation and User Guide HD/SD SDI Video The HD/SD SDI video ports use BNC connectors for HD-SDI and SDI video input and output. The ports can be configured for SMPTE-259M SD or SMPTE-292M HD outputs. The BNC connectors use coaxial cable to connect devices together. -
Page 28: Rs232
Chapter 2 Chassis Components USB thumb drives NXAMP3801HDX/HDI supports USB 1.0, 1.1, and 2.0. Refer to the NXUSBLTC User Guide for support of one LTC input per channel and one LTC output per channel. NXUSBLTC is ideal if you want to preserve LTC input timecode from VTRs and other sources, and if you are using downstream devices that require an LTC input, such as closed caption inserters. -
Page 29: Com Ports
NXAMP3801HDX/HDI NEXIO AMP Generation 6 Hardware Installation and User Guide COM Ports There are eight ports designated for RS-422 communications. They can all be used to control channels on the server. A VTR may be connected to any port. COM PORTS 1 - 8 can be configured to control various channels. (See Table 2-5). - Page 30 Chapter 2 Chassis Components 175-100423-00...
-
Page 31: System Installation
The system needs to be placed near a grounded power outlet. Prepare for Setup The box your NXAMP3801HDX/HDI was shipped in includes the following items listed in Table 3-1: Table 3-1 Harris supplied Products Harris Supplied Quantity NXAMP3810HDX ... -
Page 32: Choosing A Setup Location
Install the heaviest system components on the bottom of the rack first, and then work upwards. • Harris suggests that you use regulating uninterruptible power supplies (UPS) to protect the NXAMP3801HDX/HDI from power surges, voltage spikes and to keep your system operating in case of a power failure. -
Page 33: Rack Mounting Considerations
NXAMP3801HDX/HDI NEXIO AMP Generation 6 Hardware Installation and User Guide • Allow the hot plug hard drives and power supply modules to cool before touching them. • Always keep the rack's front door and all panels and components on the system closed when not servicing them to maintain proper cooling. -
Page 34: To Rack Mount Nxamp3801Hdx/Hdi
Chapter 3 System Installation To Rack Mount NXAMP3801HDX/HDI Ensure that the rack is anchored to the floor so that it cannot tip over when NXAMP3801HDX/HDI is extended out of the rack. Figure 3-1 Rack Mounting Remove the slides from the rails. Attach a slide to each side of the NXAMP3801HDX/HDI chassis using seven screws per side. -
Page 35: Connecting Nxamp3801Hdx/Hdi Redundant Power Supplies
Harris supports regular manual or scheduled scans on Server systems, during known off-line time periods when the software is not on-air or actively in use. Under these conditions, Harris agrees that such scans may be conducted while software applications are running but are not performing editing, playback, output, or other productive operations. -
Page 36: Automatic Updates
The NXAMP3801HDX/HDI system is built on a Windows 7 Ultimate 64-bit platform and, as such, comply with the platform design rules as they existed when the software was built. Harris has no control over Microsoft’s platform support or the patches which Microsoft may issue. Harris also has no control over the user-configured distribution mechanism which Microsoft uses to push updates to machines running operating system software. -
Page 37: Connector Pinouts
Connector Pinouts This chapter provides information on NXAMP3801HDX/HDI pinouts, jumper settings, Weidmüller GPI input and output circuits and connect wiring. COM PORT Pinouts RJ-12 to DB-9 Table 4-1 shows the RJ-12 to DB-9 pinout descriptions for NXAMP3801HDX/HDI. Table 4-1 RJ-12 to DB-9 Adapter RJ-12 DB-9 Connector RJ-12 Connector... -
Page 38: Gpi In
Chapter 4 Connector Pinouts GPI In Figure 4-1 shows a representative GPI In circuit pinouts. Figure 4-1 GPI Input Circuit 175-100423-00... -
Page 39: Gpi Out
NXAMP3801HDX/HDI NEXIO AMP Generation 6 Hardware Installation and User Guide GPI Out Figure 4-2 shows a representative GPI Out circuit pinouts. Figure 4-2 GPI Output Circuit 175-100423-00... -
Page 40: How To Wire Your Nexio Weidmüller Male Connectors
Chapter 4 Connector Pinouts How to Wire Your NEXIO Weidmüller Male Connectors Using a wire stripper, remove no more than 5/16” of the wire installation from each of the required wires. Refer to Figure 4-3. Make sure the installation is clean-cut with no frayed or ragged edges, trim if necessary. -
Page 41: Monitoring Your Nxamp3801Hdx/Hdi
Monitoring Your NXAMP3801HDX/HDI Status Monitoring This chapter describes how to monitor the status of the NXAMP3801HDX/HDI. Remote Monitoring Using IPMI System administrators needing remote access to monitor the performance of the NXAMP3801HDX/HDI can enable the IPMI sub-system available on their server. The IPMI is a special network port available on the back of the NXAMP3810HDX/HDI (see Back Panel Components on page 26) which allows access to the server... - Page 42 Chapter 5 Monitoring Your NXAMP3801HDX/HDI Using the keyboard up or down arrow select Configuration Address source and press the Enter key. In the second Configuration Address source window, using the keyboard up or down arrow, select either Static and go to step 6, or select DHCP and go to step...
- Page 43 NXAMP3801HDX/HDI NEXIO AMP Generation 6 Hardware Installation and User Guide Using the keyboard up or down arrow select Update IPMI LAN configuration. Figure 5-3 BMC Network Configuration Menu Press the Enter key. Figure 5-4 Update IPMI LAN Configuration In the Update IPMI LAN configuration: Use the “+/-”...
-
Page 44: Nexio Monitor
Chapter 5 Monitoring Your NXAMP3801HDX/HDI NEXIO Monitor The NEXIO AMP has a local machine monitor software call NEXIO Monitor (Figure 5-5) that runs an application in your Windows system tray (Figure 5-7). Figure 5-5 NEXIO Monitor Icon To Open NEXIO Monitor Right-click on the NEXIO Monitor icon in the system tray. -
Page 45: Selecting Monitored Diagnostics
NXAMP3801HDX/HDI NEXIO AMP Generation 6 Hardware Installation and User Guide Selecting Monitored Diagnostics The NEXIO Monitor lets you select which diagnostics to monitor. When a fault occurs both the Status and the NEXIO icon will change to one of the four fault icons seen in Table 5-1: Table 5-1. -
Page 46: Lcd Keypad Buttons
ScabFan information as shown in Table 5-2.: Table 5-2 LCD Display Navigation Sample 1 across 2 across 3 across 4 across HARRIS CPU1 FAN: 6338.03 Local Area Connectio Server Engine Status SQA-110 CPU2 FAN: 6585.37 IP: fe80:d017:ef3:1 LLM0: 0:2580 (3721336k) -
Page 47: System Drive Recovery
Initial WIM Recovery Image The initial WIM image is captured to the Harris System Recovery USB stick at the customer’s facility during initial system deployment. At the time of shipment, the Harris System Recovery USB stick does not include a WIM file. -
Page 48: Capture The Wim Image
Capture the WIM Image Use the following steps to capture a WIM image for future system recovery. Insert the Harris System Recovery USB stick into the USB port on the front or back of the NXAMP3801HDX/ HDI. Restart the system. - Page 49 On the Harris Recovery Desktop, double-click the Harris Utility Launcher icon. Figure 6-3 Harris Recovery Desktop In the Harris NEXIO Utility Launcher, click the IMAGING button to open the NxImage application. From the File menu, select Capture WIM Image to open the Capture Image dialog.
-
Page 50: Apply The Wim Recovery Image
14 Click Capture Image button. The progress and status displays in the title bar. 15 When the capture is complete, click Close. If the final WIM image does not fit on the Harris System Recovery USB stick or the third-party USB stick, you can capture the WIM image to a network share. - Page 51 13 In the Apply Image dialog, click Open to access the Select the Source Image dialog. Figure 6-7 Apply Image Dialog 14 In the Select the Source Image dialog, navigate to the Harris Recovery USB drive, open the WIM Image folder, and then double-click the applicable .wim file.
- Page 52 You must use the Browse button to select the destination drive. 17 Click the Apply Image button. The progress and status displays in the title bar. 18 Click Close to return to the Harris Recovery Desktop. 19 Restart the NXAMP3801HDX/HDI system.
-
Page 53: How To Create Or Rebuild A Raid 1 Boot Drive
How to Create or Rebuild a RAID 1 Boot Drive Your NEXIO AMP is shipped with only one boot drive. An optional boot drive can be ordered and set up as a mirrored drive known as RAID 1. Creating a New RAID 1 Boot Drive The following procedures will step you through the process of turning a single boot disk into a 2 drive RAID 1 boot volume. - Page 54 Chapter 7 How to Create or Rebuild a RAID 1 Boot Drive Select Create Volume to begin the process. Figure 7-2 Select In the Create Volume window, verify that Intel(R) C600 Series chipset SATA RAID Controller is selected. Verify that Real-Time data protection (RAID 1) under Select Volume Type is selected.
- Page 55 NXAMP3801HDX/HDI NEXIO AMP Generation 6 Hardware Installation and User Guide 13 Click the Next button. Figure 7-4 Confirm Volume Creation 14 Click Create Volume. Figure 7-5 Confirm 15 In the Volume Creation Complete window, click the OK button to confirm The Volume was Created Successfully.
- Page 56 Chapter 7 How to Create or Rebuild a RAID 1 Boot Drive 16 Do not reboot your Server. The Migrating process will take 15 to 30 minutes. Figure 7-6 Migrating Data percentage complete 17 When the migration is complete a pop-up message will appear in the tray (Figure 7-7) and the Status will display Normal...
-
Page 57: Rebuilding A Raid 1 Boot Drive
NXAMP3801HDX/HDI NEXIO AMP Generation 6 Hardware Installation and User Guide Rebuilding a RAID 1 Boot Drive An Icon in the tray (Figure 7-9) show an error. Figure 7-9 Drive error Locate the application through the Microsoft Windows start menu and select Intel Raid Storage enterprise. - Page 58 Chapter 7 How to Create or Rebuild a RAID 1 Boot Drive Install your new hard drive into a carrier. Refer to Under Volume Properties window, click on Rebuild to another disk In the Intel Raid Storage Technology enterprise window, Under Devices window, select Unknown disk (0 GB).
- Page 59 NXAMP3801HDX/HDI NEXIO AMP Generation 6 Hardware Installation and User Guide In the Intel Rapid Storage enterprise window, after the rebuild process has been completed, the unknown drive will no longer be displayed. Figure 7-14 Status Functioning Normal 10 When completed, click on the close button. 175-100423-00...
- Page 60 Chapter 7 How to Create or Rebuild a RAID 1 Boot Drive 175-100423-00...
-
Page 61: Chapter 8 Maintenance
Maintenance This chapter provides safety guidelines, tools and access information about maintaining your NXAMP3801HDX/HDI system. Installation Tools You will need the following tools for the safe and proper installation of your system. Phillips screw driver Anti-static strap Small tip screwdriver ... -
Page 62: Replacement
Chapter 8 Maintenance Press the power off button on the front panel (Figure 8-1 on page 61) for 5 seconds to remove the power supply to the system. Unplug both power cords from the system or wall outlets to remove the standby power to the system. If necessary, label and disconnect all remaining cables to the NXAMP3801HDX/HDI. -
Page 63: Hot Swap Power Supplies
NXAMP3801HDX/HDI NEXIO AMP Generation 6 Hardware Installation and User Guide Figure 8-3 CR2032 battery location Figure 8-4 Battery replacement direction Hot Swap Power Supplies Your system uses a dual-redundant hot-swappable power supply modules. These power supplies are auto-switching capable and operate at a 100v to 240v input voltage. An illuminated green light indicates that the power supply module is operating, a failed power supply module LED will not be illuminated. -
Page 64: Replacing A Power Supply Module
Chapter 8 Maintenance Replacing a Power Supply Module Unplug the power cord before removing the power supply module. Look at the status LED on each plug-in power supply module (Figure 8-5). The LED on the failed power supply module will not be illuminated. Figure 8-5 Power Supply Module To remove a plug-in power supply module: Unplug the AC power cord only to the failed plug-in power supply module. -
Page 65: Hard Drive Removal Or Replacement
NEXIO AMP Generation 6 Hardware Installation and User Guide Hard Drive Removal or Replacement The NXAMP3801HDX/HDI comes equipped with hot-swappable hard drives. Only Harris qualified hard disk drives are for use in NXAMP3801HDX/HDI chassis. CAUTION- Regardless of how many hard drives are installed, all drive carriers must remain in the drive bays to maintain airflow. -
Page 66: Replacing A Raid 1 Boot Drive
Chapter 8 Maintenance Secure the drive to the carrier with four M3 flat-head screws included in the HDD bag of your accessory box. Figure 8-7 Drive Tray with SSD or Spinner. Insert the drive and drive carrier into its bay vertically, keeping the carrier oriented so that the release button is on the right side. -
Page 67: Replacing Media Drive - Hdi Only
BIOS can cause irreparable damage to your system. If you need to update the BIOS, do not shut down or reset the system while the BIOS is updating to avoid possible boot failure. Insert the Harris supplied USB stick that contains the new BIOS binary image and power the system down. - Page 68 Chapter 8 Maintenance After you see the message of BIOS has completed the update: Press and hold the power off button (Figure 8-1 on page 61) for 5 seconds. Unplug the two power cords from the redundant power supplies. Use a grounded wrist strap designed to prevent static discharge when handling components. Loosen the two knurled captive panel screws on the back of the NXAMP3801HDX/HDI (Figure 8-2 on page 62) and slide the cover backwards toward the rear of the chassis.
-
Page 69: Fan Replacement
NXAMP3801HDX/HDI NEXIO AMP Generation 6 Hardware Installation and User Guide 13 Advanced>CPU Configuration>CPU Power Management Configuration: Power Technology = Disabled Energy/Performance Bias = Disabled 14 Advance>SATA Configuration SATA Mode = RAID Mode 15 Advanced>PCLe/PCI/PnP Configuration Load Onboard Lan 1 = Disabled Load Onboard LAN 2 = Disabled Video Priority = OFF BOARD 16 Press F4 to save and exit. - Page 70 Facing the front of the NXAMP3801: With the Fan connector on your right side (Figure 8-12) and facing down, Insert the new fan (Harris part number 131-100005Q00) into the three slots shown identified in Figure 8-13. Figure 8-12 Standalone fan...
-
Page 71: Chapter 9 Troubleshooting
Troubleshooting This chapter provides information about BIOS error beep codes, power supply modules and drive failures. BIOS Error Beep Codes During the POST (Power-On Self-Test) routines, which are performed each time the system is powered on, errors may occur. Non-fatal errors Are those which, in most cases, allow the system to continue the boot-up process. -
Page 72: Power Supply Module Failure
Check system cooling to make sure that all heatsink fans, and CPU/system fans, etc., are work properly. To replace a defective fan (Harris part number 131-100005Q00), refer to Fan Replacement page 69. If any other system cooling problems are found, contact Harris tech support. Refer to Regional Service Contact Information on page 2. CMOS Battery The CMOS is found onboard your motherboard that hold a small bit of code which helps the NXAMP3801HDX/HDI boot up in Windows. - Page 76 Harris is a registered trademark of Harris Corporation. Trademarks and tradenames are the property of their respective companies. Broadcast Communications Division 4393 Digital Way | Mason, OH USA 45030 | Tel: 1 (513) 459 3400 www.broadcast.harris.com ©2012 Harris Corporation Part Number: 175-100423-00...
Need help?
Do you have a question about the NXAMP3801HDI and is the answer not in the manual?
Questions and answers