
Subscribe to Our Youtube Channel
Related Manuals for CPS COLOR Corob D410


Summary of Contents for CPS COLOR Corob D410
- Page 1 COROB™ D410 Automatic Dispenser User’s Manual DU006C010015500 - ENGLISH Version 1.0 - R0 (November 2006)
- Page 2 (hereinafter CPS Color). A failure of a trademark to appear hereunder does not mean that CPS Color does not use the trademark in question nor does it constitute a waiver by CPS Color of any related intellectual property rights.
-
Page 3: Table Of Contents
CONTENTS - 1 CONTENTS 1 GENERAL INFORMATION......................3 Purpose and use of this manual ....................3 1.1.1 Conventionally used graphics ..................3 Identifying information ......................3 Intended and improper use ....................4 Definitions ...........................4 2 SAFETY ............................5 General warnings ........................5 Warnings on the use of colorants ....................6 Residual risks ........................7 Position of labels ........................8 Safety devices ........................9... - Page 4 2 - CONTENTS 7.3.1 External cleaning.......................36 7.3.2 Cleaning the nozzle center ..................36 Moistening the humidifier cap sponge..................37 Checking and replacing the punch tool ...................38 Refilling the humidifier system tanks..................38 8 TECHNICAL SPECIFICATIONS....................39 Technical data ........................39 Dimensions ........................40 9 APPENDIX ..........................41 Declaration of conformity .....................41 Reference standards ......................42 Warranty ...........................42...
-
Page 5: General Information
GENERAL INFORMATION - 3 1 GENERAL INFORMATION 1.1 Purpose and use of this manual This manual, inserted in the product packing, contains instructions on the use and routine maintenance needed to uphold the machine's performance over time. Read this manual carefully before using the machine. The manual is to be considered an integral part of the machine, and must be stored until it is fully dismantled. -
Page 6: Intended And Improper Use
4 - GENERAL INFORMATION 1.3 Intended and improper use The machine must be used only within the limitations set forth by the technical data and according to the procedures described in this manual. Any use other than that stated, which cannot be implied or deduced from this manual, is to be considered prohibited. -
Page 7: Safety
SAFETY - 5 2 SAFETY 2.1 General warnings COMPULSORY • Read the user’s manual carefully before carrying out any operation on the machine. • The machine must be used only for its intended purpose. • Pay close attention to the signs on the machine. •... -
Page 8: Warnings On The Use Of Colorants
6 - SAFETY 2.2 Warnings on the use of colorants DANGER The machine is suitable for use with tinting products in general. Scrupulously follow the instructions for use given on the colorant package and carefully read the SAFETY DATA SHEET that the dealer or manufacturer of the product is required to provide. -
Page 9: Residual Risks
SAFETY - 7 2.3 Residual risks Re. in the Risk Preventive measure manual Risk of crushing during the cans Wear appropriate personal protective equipment loading and unloading chapter 6 (shoes and gloves). operations. The machine must be used by a single operator. Risk of crushing during the automatic movement of the chapter 6... -
Page 10: Position Of Labels
8 - SAFETY 2.4 Position of labels CPS Color Equipment S.p.A. via Agricoltura 103 S. FELICE s/P (MO) ITALY MODEL YEAR COMMESSA CODICE MACCHINA High leakage current. WARNING Ground connection essential before connecting power supply. Max 2 A Max 2 A... -
Page 11: Safety Devices
SAFETY - 9 2.5 Safety devices Figure 2-2 1. Emergency button. 2. Shelf lower safety plate (with semiautomatic shelf). 3. Safety button to enable shelf operation (with semiautomatic shelf). DANGER In the event of a breakdown of the safety devices, it is forbidden to use components not provided by the manufacturer. - Page 12 10 - SAFETY COROB™ D410...
-
Page 13: Features
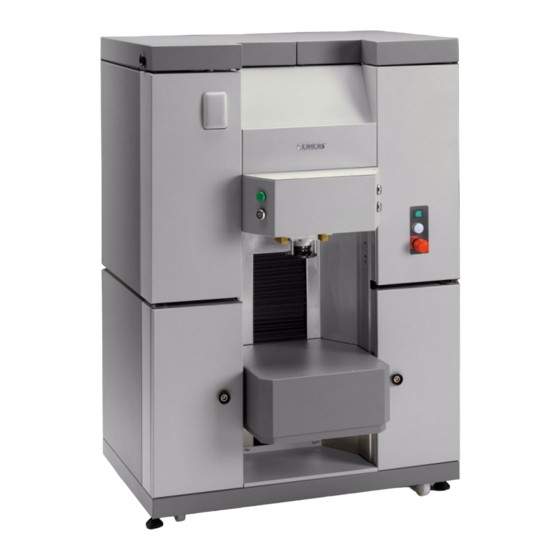
FEATURES - 11 3 FEATURES 3.1 Description of the machine The COROB™ D410 automatic dispenser is a device to automatically dispense fluid colorant products into containers (metal or plastic canisters, cans or bins) of the size indicated in this manual, pre-filled with base, to produce finished products such as paints, dyes, enamels, and inks of the desired hue, chosen by means of the machine management software. -
Page 14: Description Of Units
12 - FEATURES 3.2 Description of units Canisters The machine canisters can be of different capacities and are suitable for containing the product to be dispensed. Two covers in the upper part of the machine provide access for filling the canisters. The covers can be opened by using the special key provided. - Page 15 FEATURES - 13 Bung Hole Locator (B.H.L.) This is a system that emits a laser beam that allows the positioning of pre- punched cans, so that the hole is in line with the center of the dispensing nozzles. Figure 3-6 Nozzle humidifier cap Colorants tend to dry out;...
-
Page 16: Standard And Optional Configurations
400 mm Minimum height 60 mm 100 mm Maximum diameter 350 mm 350 mm Minimum diameter 110 mm 110 mm * Due to the high fill level of 0.5- and 1-liter cans, CPS Color advises not to perforate them. COROB™ D410... -
Page 17: Shipping, Handling And Unpacking
SHIPPING, HANDLING AND UNPACKING - 15 4 SHIPPING, HANDLING AND UNPACKING 4.1 General warnings DANGER To avoid personal injuries and property damage, use the utmost care and caution when handling the machine, and carefully follow the instructions given in this chapter. The packing must be handled only by skilled personnel using appropriate handling equipment. -
Page 18: Unpacking And Placement
16 - SHIPPING, HANDLING AND UNPACKING 4.3 Unpacking and placement 8 mm To remove the packing 13 mm To remove machine fastening screws to the pallet 1 x 14 mm To adjust machine feet 1 x 17 mm DANGER The following procedure must be carried out by at least 3 people. Store the packing material for future use, or dispose of it according to current regulations. - Page 19 SHIPPING, HANDLING AND UNPACKING - 17 3. Remove the 4 screws that fix the machine to the base of the pallet. 4. Slightly tilt the machine backwards, until the wooden beam can be removed by a third person at the side; repeat this operation, this time operating from the rear side.
-
Page 20: Standard Material Supplied
18 - SHIPPING, HANDLING AND UNPACKING 4.3.1 Standard material supplied After unpacking the machine, make sure the following items are present: Figure 4-4 1. Power supply cable. 6. Phillips screwdriver and T-wrench. 2. USB cable. 7. Spare parts for humidifier cap. 3. -
Page 21: Start-Up
START-UP - 19 5 START-UP 5.1 General warnings DANGER THIS EQUIPMENT MUST BE GROUNDED. Check the grounding of the power supply system before connecting the machine. The computer and any other devices connected to the machine via a serial line or connected to the computer itself must be powered via the auxiliary sockets. -
Page 22: Control Devices And Connections
20 - START-UP 5.2 Control devices and connections Figure 5-1 1. Machine main switch. 2. Fuse compartment. The value of fuses is shown in the technical specifications table (chapter 8). 3. Main plug. 4. Auxiliary sockets. Power supply to the computer and other equipment (calibration scale or label printer). -
Page 23: Electrical Connection And Start-Up
START-UP - 21 5.3 Electrical connection and start-up Figure 5-2 If the ON lamp does not light, make sure the emergency button is not pressed (chapter 5.5). If the computer and monitor do not come on, make sure the power cables have been properly connected to the auxiliary sockets, and that the corresponding switches have been turned on. -
Page 24: Initialization
22 - START-UP 5.4 Initialization INITIALIZATION is a preparatory phase that must be carried out when the machine is turned on. If the computer is turned off and back on again, initialization is not strictly necessary, even if required by the software; it is solely at the discretion of the operator. DANGER If the Autocap is open, initialization automatically closes it. - Page 25 START-UP - 23 After carrying out the computer shut-down procedure, shut off the machine as follows: Figure 5-3 To shut off only the computer, proceed as indicated in the figure, step 1. ORIGINAL INSTRUCTIONS...
- Page 26 24 - START-UP COROB™ D410...
-
Page 27: Using The Dispenser
USING THE DISPENSER - 25 6 USING THE DISPENSER 6.1 General warnings DANGER The machine must be used by a single operator. It is strictly forbidden to bypass and disable the safety devices and protections. Do not, for any reason, place your hands in the dispensing area whilst running the machine, except for loading and unloading the cans. -
Page 28: Loading The Can - Lift Manual Shelf
26 - USING THE DISPENSER 6.2.1 Loading the can - Lift manual shelf 1. Release the shelf by pulling the handle. 2. Raise or lower the shelf, adjusting its height based on the size of the can to be used. 3. -
Page 29: Loading The Can - Semiautomatic Shelf
USING THE DISPENSER - 27 6.2.2 Loading the can - Semiautomatic shelf Figure 6-2 This button, when pressed with the safety button, causes the shelf to rise and, when released, to stop immediately. If it is not released, the Shelf UP button shelf stops automatically when the can resting on it is detected by the photocell. -
Page 30: Use Of The Can Centering Device
28 - USING THE DISPENSER 6.2.3 Use of the can centering device Place the can in the centering ring of the suitable diameter. Figure 6-4 6.2.4 Use of the Bung Hole Locator 1. After having correctly positioned the can so as to obscure photocell (A), the laser beams will switch on. -
Page 31: Punching The Cans
USING THE DISPENSER - 29 6.2.5 Punching the cans Figure 6-6 Shelf UP button When the punching lamp is on, pressing the three buttons Shelf DOWN button simultaneously will cause the shelf to be raised to punch the can lid. SAFETY button, to enable shelf movement The green lamp on indicates that the machine is ready to execute... -
Page 32: Dispensing
30 - USING THE DISPENSER 1. When the can has been positioned so as to obscure photocell (A) (chapter 6.2.2) the green lamp will light, to indicate that is it is now possible to proceed with punching. WARNING Ensure that there is a lid on the can. 2. -
Page 33: Refilling The Canisters
USING THE DISPENSER - 31 6.4 Refilling the canisters 5 cm M A X Figure 6-8 1. Press the emergency button. 2. Using the key provided, open the machine upper covers. 3. Remove the lid of the canister to be filled. Shake the container of colorant to be poured into the canister manually. - Page 34 32 - USING THE DISPENSER DANGER When using colorants containing volatile solvents the canister top up must be carried out opening one canister at the time. If during this operation, some colorant should spill out of the canister, immediately disconnect the machine from the power mains before cleaning. 5.
-
Page 35: Troubleshooting
USING THE DISPENSER - 33 6.5 Troubleshooting Problem Cause Solution Check the connections at the back of the machine Power supply is missing. (chapter 5.3). Set the main switch to the ON position (I) (chapter Main switch in OFF position (O). 5.3). - Page 36 34 - USING THE DISPENSER COROB™ D410...
-
Page 37: Ordinary Maintenance
ORDINARY MAINTENANCE - 35 7 ORDINARY MAINTENANCE 7.1 General warnings DANGER Before carrying out any maintenance operations, you must turn off the machine and unplug the power supply cable from the mains socket outlet. DANGER During machine maintenance operations there is a high risk of contact with the coloring product; strictly follow the indications of chapter 2.2. -
Page 38: Cleaning
36 - ORDINARY MAINTENANCE 7.3 Cleaning 7.3.1 External cleaning WARNING Never use a solvent-based cleaning product or abrasive powder. Clean the photocell lenses using a cloth moistened with a mild cleansing solution; do not use alcohol or abrasive products. In case of paint spills, clean the machine immediately. 1. -
Page 39: Moistening The Humidifier Cap Sponge
ORDINARY MAINTENANCE - 37 7.4 Moistening the humidifier cap sponge In case of sponge replacement, use only those supplied with the machine. 8 mm To remove the Autocap screws DANGER IF THE MACHINE IS EQUIPPED WITH PUNCHING DEVICE, YOU MUST WEAR CUT-PROOF GLOVES. 1. -
Page 40: Checking And Replacing The Punch Tool
38 - ORDINARY MAINTENANCE 7.5 Checking and replacing the punch tool DANGER TO PERFORM THIS OPERATION YOU MUST WEAR CUT-PROOF GLOVES. 8 mm To remove the punch screws 1. Disconnect power supply (chapter 5.6). 2. Remove the two screws that fix the punch tool to the Autocap sponge support. -
Page 41: Technical Specifications
TECHNICAL SPECIFICATIONS - 39 8 TECHNICAL SPECIFICATIONS 8.1 Technical data Power supply Single-phase 100 - 240 V ~ ± 10% Frequency 50/60 Hz Fuses* F 10 A 430 W - simultaneous and sequential with semiautomatic shelf Maximum power absorbed* 180/250 W - simultaneous with manual shelf 150 W - sequential with manual shelf Noise level Level of equivalent acoustic pressure: <... -
Page 42: Dimensions
40 - TECHNICAL SPECIFICATIONS 8.2 Dimensions D410 S D410 M D410 L 950 mm 950 mm 1250 mm 720 mm 880 mm 880 mm 820 mm 980 mm 980 mm 1380 mm 1380 mm 1380 mm 1510 mm 1510 mm 1510 mm Machine 180 kg... -
Page 43: Appendix
APPENDIX - 41 9 APPENDIX 9.1 Declaration of conformity ORIGINAL INSTRUCTIONS... -
Page 44: Reference Standards
42 - APPENDIX 9.2 Reference standards CPS Color Equipment S.p.A. designs, manufactures, and subjects its machines to tests to ensure compliance with safety and electromagnetic compatibility regulations. Any changes not authorized by CPS Color Equipment S.p.A. may jeopardize this compliance.
Need help?
Do you have a question about the Corob D410 and is the answer not in the manual?
Questions and answers