Table of Contents
Advertisement
Advertisement
Table of Contents

Summary of Contents for Sangean DDR-33+
- Page 1 DDR-33+ Rersion 1...
- Page 2 iPod is a trademark of Apple Inc., registered in the U.S. and other countries. “Made for iPod” means that an electrical accessory has been designed to connect specifically to iPod and has been certified by the developer to meet Apple performance standards. Apple is not responsible for the operation of the device or its compliance with safety and regulatory standards.
-
Page 3: Table Of Contents
Contents Controls ................. 3-6 Cancelling alarms ..............25 Using the radio for the first time ..........7 Snooze function ..............26 Operating your radio ............... 8 To set the snooze time ............26 Sleep function ............... 27 Selecting a station - DAB ............9 Setting the clock manually .......... -
Page 4: Controls
Controls (front) 1. LCD display 2. Infra-red sensor 3. Loudspeakers (x 2) - Page 5 Controls (Top) 4. Dock for iPod 10. Rewind button 15. Preset button 5. Mode button 11. Snooze button 16. Alarm button 6. Tuning Up button 12. Volume Up button 17. Sleep button 7. Play / Pause / Select button 13. Volume Down button 18.
- Page 6 Controls (rear) 20. Telescopic aerial for DAB+ / FM 23. Headphone socket 21. DC power in socket 24. Auxiliary input socket 22. Line Out socket 25. USB socket for software upgrade...
- Page 7 Controls (remote control) iPod button On / Standby button Volume Down button Volume Up button Preset button Select button Info button EQ button Snooze button Fast-forward button Alarm button Sleep button Tuning Down button Light button Play / Pause button Rewind button Menu button Tuning Up button...
-
Page 8: Using The Radio For The First Time
3. Insert the adaptor plug into the DC socket located on the rear of your radio. Plug the adaptor into a standard mains outlet. The display will show “SANGEAN” for a few seconds and then the display will show “SET CLOCK”. During this time the radio is to find a DAB clock radio stations. -
Page 9: Operating Your Radio
Operating your radio 1. Press the On / Standby button to switch on your radio. The display will show “TUNING” for a few seconds. When first switched on, the radio will be in DAB mode. After each use the radio will remember the last mode used and then switch on in that mode the next time that it is used. -
Page 10: Selecting A Station - Dab
Selecting a station - DAB 1. Press the On / Standby button to switch on your radio. The display will show “TUNING” for a few seconds. 2. Press the Mode button to select DAB mode. The display will show the name of the radio station currently selected. 3. -
Page 11: Secondary Services - Dab
Secondary services - DAB 1. Certain radio stations have one or more secondary services associated with them. If a station has a secondary service associated with it then the secondary service will then appear immediately after the primary service as you press the Tuning Up button. 2. - Page 12 Displays the name of the DAB multiplex Multiplex Name to which the current station belongs. Time Displays the current time (24 hour clock). Date Displays the current date. Frequency and channel Displays frequency and channel number for the currently tuned DAB station. Bit rate Displays the digital audio bit rate for the currently tuned DAB station.
-
Page 13: Finding New Stations - Dab
Finding new stations - DAB From time to time, new DAB radio stations may become available. Or you may have moved to a different part of the country. In this case you may need to acitivate your radio to scan for new stations. In order that the radio may find the available stations it is recommended to carry out a full scan of the entire DAB Band III frequencies. -
Page 14: Manual Tuning - Dab
Manual tuning - DAB Manual tuning allows you to tune your radio to a particular DAB frequency in Band III. Any new stations found will be added to the station list. This function can also be used to assist the positioning the aerial or the radio to optimise reception for a specific channel or frequency. -
Page 15: Dynamic Range Control (Drc) - Dab
Dynamic Range Control (DRC) - DAB The DRC facility can make quieter sounds easier to hear when your radio is used in a noisy environment. There are three levels of compression: DRC 0 No compression applied. (default) DRC 1/2 Medium compression applied. DRC 1 Maximum compression applied. -
Page 16: Operating Your Radio - Fm Auto-Tune
Operating your radio - FM auto-tune 1. Fully extend the telescopic aerial located on the rear of your radio. Place the telescopic antenna so a that it is as straight as possible extending vertically either above or below the radio. 2. -
Page 17: Manual Tuning - Fm
Manual tuning - FM 1. Fully extend the telescopic aerial located on the rear of your radio. Place the telescopic antenna so a that it is as straight as possible extending either above or below the radio. 2. Press the On / Standby button to switch on your radio. 3. -
Page 18: Display Modes - Fm
Display modes - FM Your radio has a range of display options for FM mode:- The Radio Data System (RDS) is a system in which inaudible digital information is transmitted in addition to the normal FM radio programme. RDS offers several useful features. The following are available on your radio. -
Page 19: Presetting Stations
Presetting stations You may store your preferred DAB and FM radio stations to the preset station memories. There are 20 memory presets in your radio, 10 for DAB and 10 for FM. Presets are remembered by your radio in the event of a power failure. -
Page 20: Recalling A Preset Station
Recalling a preset station 1. Press the On / Standby button to switch on the radio. 2. Press the Mode button to select the desired waveband. 3. Press and release the Preset button. The display will show, for example, “Empty 1” if no station has been stored to that preset. If a preset has been stored, then the display will show either the station name (for DAB stations) or the frequency (for FM stations). -
Page 21: Ipod Docking
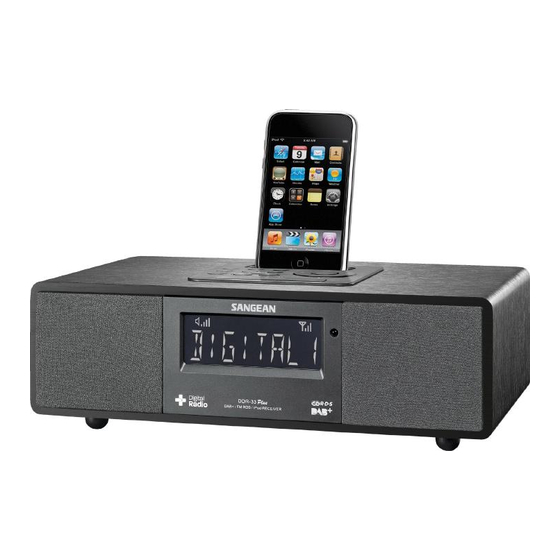
iPod docking Your radio has an iPod dock facility which allows you to play digital audio files and video soundtracks held on your iPod using the radio’s loudspeakers. Your radio uses the iPod Universal Dock connector developed for use with iPods. Recent models of iPod are supplied with Universal Dock Adapter inserts which ensure correct alignment of the iPod with the electrical connector. -
Page 22: Navigating Your Ipod
Navigating your iPod To navigate iPod menus to make selections or to change settings, you should use your iPod controls. The radio controls can be used for Previous / Next and Play / Pause functions. 1. Use the Menu button on the remote control to navigate to higher level menus on your iPod. -
Page 23: Setting The Alarm Times
Setting the alarm times Your DDR-33 plus radio has two alarms which can each be set to wake you to DAB, FM radio, iPod or buzzer alarm. The alarms may be set while the unit is in standby mode or while playing. Each alarm can be set to sound once, daily, on weekdays or at weekends. - Page 24 8. Press the Select button to enter the hour setting. The alarm minute digits will flash on the display. 9. Press the Tuning Up or Down buttons to choose the desired alarm minute. 10. Press the Select button to enter the minutes setting. The alarm day option will flash on the display.
- Page 25 16. Press the Select button to enter the alarm month setting. The alarm day will flash on the display. 17. Press the Tuning Up or Down buttons to choose the alarm day. 18. Press the Select button to enter the setting. The alarm source option will flash on the display.
-
Page 26: Cancelling Alarms
Setting the alarm times - (continued) In addition to the above procedure of setting the alarm times, you can also operate following the steps below. 1. Press the On / Standby button to switch on the radio. 2. To set the alarm times, press the Menu button to enter the setup menu. -
Page 27: Snooze Function
Snooze function 1. When the radio, iPod or buzzer alarm sounds, pressing the Snooze button will silence the alarm for the selected number of minutes. The Snooze duration can be adjusted between 5 and 20 minutes in 5 minute increments. The default setting is 5 minutes. When the Snooze button has been pressed during an alarm, the display will show the Snooze symbol .This sequence can be... -
Page 28: Sleep Function
Sleep function Your radio can be set to turn off after a preset time has elapsed. The sleep setting can be adjusted between 5 and 90 minutes in 5 minute increments. Ensure your radio is switched On. 1. When using your radio, press the Sleep button. “SLEEP” appears on the display. -
Page 29: Setting The Clock Manually
Setting the clock manually Normally your radio will set its clock automatically using the DAB radio signal. If no DAB signal is available and you need to set the time manually, please follow the procedure shown below. 1. Press the On / Standby button to switch on the radio. If necessary press and release the Mode button to put the radio into DAB or FM mode. - Page 30 9. Press the Select button to enter the minutes setting. The year will then flash on the display. 10. Press the Tuning Up or Down buttons to change the year as needed. 11. Press the Select button to enter the year setting. The month will then flash on the display.
-
Page 31: To Return To Auto Clock Set Mode
To return to auto clock set mode 1. Press the On / Standby button to switch on the radio. If necessary press and release the Mode button to put the radio into DAB mode. 2. Press and release the Menu button to enter the setup menu. “MANUAL”... -
Page 32: Clock Display
Clock display 1. When your radio is in standby mode the time will be displayed. The time is always shown using a 24 hour clock format. 2. If you don’t touch any of the keys on radio for 10 seconds while in FM / DAB / iPod mode, the time will be displayed automatically, except AUX in mode. -
Page 33: Eq Function
EQ function The sound on your sound system can be adjusted to suit your personal taste for the material that you are listening to. The DDR-33 plus has six preset equalizer modes. Alternatively, you may set the treble and bass levels to your own preferences. -
Page 34: Treble Control
Treble control 1. Press the On / Standby button to switch on the radio. If necessary press and release the Mode button to put the radio into DAB or FM mode. 2. Press and release the Menu button to enter the setup menu. “MANUAL”... -
Page 35: Bass Control
Bass control 1. Press the On / Standby button to switch on the radio. If necessary press and release the Mode button to put the radio into DAB or FM mode. 2. Press and release the Menu button to enter the setup menu. “MANUAL”... -
Page 36: Mute Function
Mute function Press the Mute button on the remote control of your radio, it will mute the output from the loudspeakers. 1. Press the Mute button to mute the sound output. The speaker volume symbol on the display will disappear. 2. -
Page 37: Software Version
Software updates for your radio may be availabe in the future. As software updates become available software and information on how to update your radio can be found at http://sg.sangean.com.tw/first/first.asp; http://www.sangean.eu/first/first.asp, or www.sangean.com.au. For more information, please contact our Head Office by sending an email to info@sangean.com. -
Page 38: System Reset
Alarms will be cancelled and snooze and sleep timer settings will be set to their default values. The display will show “SANGEAN” and after a few seconds a station scan search will be performed automatically. The display will show the progress of the DAB station search, for example “>>>>18”. -
Page 39: Headphone Socket
Headphone socket A 3.5mm stereo Headphone Socket located on the rear of your radio is provided for use with either headphones or an earpiece. Inserting a plug automatically mutes the internal loudspeaker. IMPORTANT: Excessive sound pressure from earphones and headphones can cause hearing loss. -
Page 40: Line Out Socket
Line Out socket A 3.5mm stereo Line Out socket is provided on the rear of your sound system to permit the audio signal to be fed to an external amplifier or other audio device. Inserting an audio cable into this socket will not mute the internal loudspeaker. -
Page 41: Specifications
Specifications Circuit Features Power Requirements Output Power: 2 x 2.5 Watt Mains: AC 100 - 240 volts, 50 Hz - 60 Hz only (switching adaptor) Headphone socket: 3.5mm dia Frequency Coverage Auxiliary Input socket: 3.5mm dia 87.5 - 108MHz Line out socket: 3.5mm dia DAB 174.928 - 239.200MHz Aerial System FM Telescopic aerial...
Need help?
Do you have a question about the DDR-33+ and is the answer not in the manual?
Questions and answers