Table of Contents
Advertisement
Quick Links
Advertisement
Table of Contents

Related Manuals for Sharp 25R-S100


Summary of Contents for Sharp 25R-S100
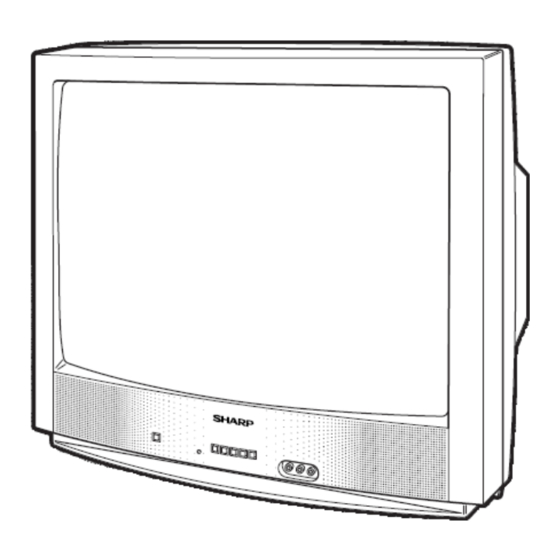
- Page 1 Brandon Campbell...
-
Page 2: Table Of Contents
Contents Introduction Specifications……………………….............……3 Included Items………...............3 Before Starting Setting up Remote……………………………………………………………………………4 Location……………………………………………………………......4 the T.V Power…………………………………………………………………………...…………4 Safety Guidelines Safety Guidelines................5 Getting Started TV Installation………….......…...........6 Using your Remote Control with a VCR and DVD......6 TV/Remote Control Layout…............7 Main Menu Set Up...................8 Blue Screen................8 Screen Language................. 9 Video Adjust.................9 Audio Select................10 Closed Captions................11 Sleep Timer.................12 Energy Save.................12 Troubleshooting Troubleshooting................ 13... -
Page 3: Specifications
Introduction This manual is designed to familiarize you with the operation of your new television system. The guide will help you to start using the television set and includes instructions for the following: • Turning ON/OFF the TV, VCR, Cable setup, and using the remote control. • Navigating through the main menu settings, basic installation, and setting up your personal preferences. • Troubleshooting and additional question and answers. The Color T.V. is fine‐tuned for appropriate sound and color. Read intructions properly to avoid unncessary damage to products(s) and hold on to them in a secure place for future use. Specifications MODEL 25R‐S100 Receiving System NTSC Screen Size 25’’ Diagonally Measured Dimensions 24 22 20 45/64’’ 11/64’’ 9/32’’ Weight 61.7 lbs. (28.0 kg) Sound Output 1.5 W (RMS) x 2 /Power Consumption /100 w Terminals Audio/Video input x 2 (Front x 1, Read x 1) AC Cord 6’ Included Items Included with the T.V. is an Infared Universal Remote Control, which can also be used to operate most T.V.s, VCRs, and Cableboxes. The remote comes with 2 AA batteries and one AC (alternating current ) cord. -
Page 4: Before Starting Setting Up Remote
Before Starting the T.V Setting up Remote Before watching the televsion, you must first set up the remote control by inserting the batteries. 1. Pull up the slit (which is located on the back of the remote) in the direction of the arrow as shown below and remove the cover using your thumbnail. 2. Insert 2 AA size batteries (supplied) by matching the + and ‐ symbols with the ones inside the remote compartment. Close slit back when finished. Location • When operating the TV, make sure to point the remote striaght at its IR sensor. Ensure that no objects are hindering the signal path between the remote control and the IR sensor on your TV. • Carry the TV by placing your hands somewhere where you can firmly grasp it, to avoid serious injury and damage. If TV is too large to carry by yourself, consider carrying it with someone else to help. • Make sure the TV is placed on a steady table or stand to guarantee that it stays safe from falling, causing serious damage to the equipment. • Do not place TV near swimming pools, bathroom sinks or tubs, or any other places near lots of water. Keep equipment away from liquids and drinks as well. • Avoid setting up TV against a wall or other closed off areas to make sure it has sufficient ventilation with free airflow. • Do not place TV where the cord will be damaged by someone stepping on it. • Do not expose the screen to direct sunlight or any other bright lights, as it may tamper the picture quality. Power • As this TV operates on 120 Volts make sure to insert the plug into the outlet carefully to avoid damaging the plug or injuring yourself. • Unplug the TV from the wall outlet when the set will not be used for a long duration (For example during a vacation away from home). This saves the power from being used even if TV is OFF. • If unusual noises or lines appear on TV screen when a nearby radio is also transmitting, turn off either the radio or the TV set to correct this. -
Page 5: Safety Guidelines Safety Guidelines
Safety Guidelines WARNING!!: Read all of these instructions carefully prior to using the television to avoid any IMPROPER USE CAN personal harm or injury when installing and using this equipment. RESULT IN POTENTIAL ELECTRICAL SHOCK OR FIRE HAZARDS. Remember to store these instructions in a safe place for later use. 1. Apply a damp cloth to clean the T.V. monitor instead of liquid or aerosol cleaners. Do not use alcohol‐based or ammonia‐based liquids. Make sure the console is unplugged. 2. Do not push any objects into the television equipment through the cabinet slots since they can touch hazardous voltage points or even short out parts that may result in an electrical shock or fire. 3. This television equipment comes with a 2‐wire polarized plug, where one of the plug’s blade is bigger than the other. This is a safety feature. If you are unable to insert the plug fully into the outlet try reversing the plug, as the plug will only fit one way into a power outlet. Ask an electiri‐ can to substitute your old outlet for a more up‐to‐date one if your plug does not fit. 4. Do not overload extensions cords and/or wall outlets as it may result in a fire or electrical shock. 5. Do not use attachments not recommended by the television equipment manufacturer as they may result in the risk of fire, electric shock or other personal injury. 6. Only use the type of power source suggested on the marking label included when using the television equipment. 7. Unplug the television from wall outlet during a lightning storm and disconnect the antenna. Doing this may prevent serious damage to the television equipment from lightning or power‐line surges. 8. Install any outside antenna system away from any overhead power lines or any other electircal light and power circuits. Use extreme care as it might be fatal to come into contact with any of them. 9. If the television has a noticable change in performance, it is time to service it. 10. Do not attempt to service this applicance yourself as opening or removing covers may expose you to dangerous voltage or other hazards. Unplug the equipment and ask a qualified service technician for assistance if one of the following occurs: ‐When the power cord becomes frayed or damaged. ‐If liquid has been spilled into the television equipment. ‐If the television equipment has been exposed to rain or water. ‐If the television equipment has been dropped or the cabinet has been damaged. 11. Follow all of the instructions, labels, and warnings marked on the television equipment. -
Page 6: Getting Started
Getting Started TV Installation Before turning on the television set: 1. Place the batteries into the remote control. 2. Connect the antenna cable into the television. 3. Plug the AC Power cord into the wall outlet. 4. Press the POWER button on the TV or the Remote Control to turn on the TV. The SELECT LAN‐ GUAGE screen will come up. 5. Press CH UP ( ) or DOWN ( ) to select “ENGLISH”, “ESPAÑOL (SPANISH)” or “ (FRANÇAIS) FRENCH”. 6. Press VOL (+) or (–) to start the EZ SETUP option. 7. Press VOL (+) and the tuner will start to search for the broadcasting and cable TV channels. The CH No. will automatically start to increase when it first appears. The first time you start the TV, it will automatically memorize the broadcasting channels. To stop the EZ SETUP process once it starts, press VOL (–) to cancel it . (To SETUP again, please refer to page 8 on SET UP. ) 8. Once EZ SETUP is complete, the lowest channel number memorized will be displayed. Using your Remote Control With a VCR and DVD Your Remote Control has been set at the factory to operate your TV and many remote control VCRs, Cable TV converters, and DVD players. However, in some cases an easy one‐time set‐up step may be necessary before the remote will operate accessory VCRs, cable TV converters and DVD players. • In this set‐up step, the remote locates and memorizes the remote control transmitter code for the VCR, Cable TV converters and DVDs. • Once “identified”, the remote sends the proper remote signals to operate your accessory. • Once the remote has “identified” the VCR or DVD player, your remote control is fully functional and ready to operate. • For detailed information on the use of the VCR or DVDs, refer to the operation manual of the VCR or DVD players. NOTE: Depending on the model year produced, brand, and type of VCR, Cable TV converter, and DVD, some models may not be compatible with the remote control. Also, some brands of the Cable TV converter Box may not enable channel selection until the ENTER is pressed. -
Page 7: Tv/Remote Control Layout
TV/Remote Control Layout NOTE: The Record button starts the recording proscess. (VCR only) NOTE: The shaded buttons on the remote control glow in the dark. Place buttons under a fluores‐ cent light to display. -
Page 8: Main Menu Screen
Main Menu Screen • Most of the settings can still be accessed through the Main Menu screen if remote is misplaced or damaged, by either pressing the MENU button or CH UP( ) and DOWN ( ) on the TV set. • Some features of your TV set will not be accessible without the remote. Contact a Sharp Ser‐ vice Center for a replacement if you lose it. Set Up •EZ SETUP: By using the channel presetting functions, you can preset your T.V. to the desired channels for viewing. Press MENU to access MAIN MENU screen. Press CH UP ( ) or DOWN ( ) to scroll to SET UP. Press VOL (+) or (–) to access SET UP mode, then press CH UP ( ) or DOWN ( ) to move to CH SETTING. Press VOL (+) or (–) to access CH SETTING mode. Press VOL (+) or (–) to access EZ SETUP mode. Press VOL (+) and the tuner will start to search for the broadcasting and cable TV channels. The CH No. will automatically start to increase when it first appears. To stop the EZ SETUP pro‐ cess once it starts, press VOL (–) to cancel it . Once EZ SETUP is completed, the lowest channel number memorized will be displayed. Blue Screen •Automatically turns the screen blue if a broadcast signal is not received. Press MENU to access MAIN MENU screen. Press CH UP ( ) or DOWN ( ) to scroll to SET UP. 3 Press VOL (+) or (–) to access SET UP mode. Press VOL (+) or (–) to access BLUE SCREEN select mode. Press VOL (+) or (–) to select ON. Press MENU to exit. -
Page 9: Language
Press VOL (+) or (–) to access SET UP mode, then press CH UP ( ) or DOWN ( ) to scroll to to LANGUAGE. Press VOL (+) or (–) to access LANGUAGE change mode. Press CH UP ( ) or DOWN ( ) to select “ENGLISH”, “ESPAÑOL (SPANISH)” or “ (FRANÇAIS) FRENCH”. Press MENU to exit. Video Adjust • Description of Adjustment Items Selected Item VOL UP (+) Button VOL DOWN (+) Button PICTURE To increase contrast To decrease contrast TNT To make skin tones To make skin tones greenish purplish COLOR To increase color To decrease color intensity intensity BRIGHT To increase brightness To decrease brightness SHARP To increase sharpness To decrease sharpness FAVORITE COLOR To choose a RED, BLUE, or STANDARD color tone RESET To return all adjustments to factory preset levels. Press MENU to access MAIN MENU screen. Press CH UP ( ) or DOWN ( ) to scroll to VIDEO ADJUST. Press VOL (+) or (–) to access PICTURE adjust mode. -
Page 10: Audio Select
Press CH UP ( ) or DOWN ( ) to channel through the desired mode. (Refer to the diagram below.) Press VOL (+) or (–) to adjust the selected setting. Repeat steps 4 and 5 to adjust the other settings. Press MENU to exit. Audio Select Press MENU to access MAIN MENU screen. Press CH UP ( ) or DOWN ( ) to scroll to AUDIO SELECT. Press VOL (+) or (–) to access AUDIO SELECT mode. Press VOL (+) or (–) to select STEREO, SAP or MONO. Press MENU to exit. NOTE: Once you select MONO mode, the TV sound remains monaural even if the TV set receives a stereo broadcast. You must switch the mode back to STEREO if you want to hear stereo sound again. -
Page 11: Closed Captions
Closed Caption “Closed Caption” is a system which allows you to view conversations, narration, and sound effects in TV programs and home videos as subscript on your TV screen, displaying a transcrip‐ tion of the audio portion of a program as it occurs. • Not all T.V. shows and videos will have this options. Look for the CC symbol to guarantee that captions will be shown. • Closed Caption broadcast can be viewed in two modes: CAPTION and TEXT. For each mode, 2 channels are available, CH1 and CH2: The [CAPTION] mode places dialogues and commentaries of T.V. shows and other news pro‐ grams near the bottom of the screen so there is a clear view of the current picture. The [TEXT] mode shows other various information (such as TV program schedule, weather forecast, etc.) over the current picture. It is independent of the TV programs. • Setting up the closed captions Press MENU to access MAIN MENU screen. Press CH UP ( ) or DOWN ( ) to scroll to CLOSED CAPTION. Press VOL (+) or (–) to access CLOSED CAPTION setting mode. Press CH UP ( ) or DOWN ( ) to choose either “MODE” or “DATA”. Press VOL (+) or (–) to change the CLOSED CAPTION settings. Press MENU to exit. NOTE: If a broadcast has CLOSED CAPTION and the MUTE button is pressed, the set enters [CAP‐ TION] mode automatically. Pressing MUTE again will return the set to its previous condition. NOTE: If any button is pressed to call up the ON SCREEN DISPLAY while viewing a CLOSED CAP‐ TION broadcast, the closed captions will disappear momentarily. NOTE: Closed Caption may malfunction (white blocks, strange characters, etc.) if signal condi‐ tions are poor or if there are problems at the broadcast source. This does not necessarily indicate a problem with your set. -
Page 12: Sleep Timer
Sleep Timer • Set the time limit for your T.V. to automatically turn off. Press MENU to access MAIN MENU screen. Press VOL (+) or (–) to access TIMER SET mode. Press VOL (+) or (–) to set a sleep time (30, 60, 90 or 120 minutes). Press MENU to exit. NOTE: Turn off the Sleep Timer by repeating the above SLEEP TIMER steps and select “– – – REMAIN” during step 3. NOTE: While SLEEP TIMER is active, the time remaining will be briefly shown on the screen at regular intervals or when the remote’s display button is pressed. Energy Save • This feature lets you lower the power consumption of your TV set, saving your money and less‐ ening the impact on the environment. When on, it reduces the TV brightness by using approxi‐ mately 20% less energy than normal Press MENU to access MAIN MENU screen. Press CH UP ( ) or DOWN ( ) to scroll to ENERGY SAVE. Press VOL (+) or (–) to access ENERGY SAVE select mode. Press VOL (+) or (–) to select ON. Press MENU to exit. -
Page 13: Troubleshooting
Troubleshooting Please check the following items before calling for service: No picture or sound| Check all cable connections. Make sure the T.V. is plugged in and turned on. Make sure that electricity is available at the AC power outlet. Picture is ok, but no sound| Check the volume and mute settings. Switch to another channel to determine if the station is the problem. No picture| Make sure that the T.V. is working properly. Press the input button to select T.V. input. Make sure the color system is set correctly. Sound is okay, but no color|Check the color control and adjust it. Check the program’s color features, because it may be a black and white movie. Picture has overlapped images| Make sure that the antenna is installed correctly. If not, adjust the antenna toward the broadcasting station. Picture has “snow”| Check the antenna and its connection. If there are problems, correct them. If all connections are tight, the problem may be with a faulty antenna or cable. Check to see if whether other signals are interfering (ex. radio)and disturbing the image. Remote control does not work: Change the batteries in the control. Remove any obstacles between the T.V.’s IR sensor and the remote control. Image is not clear| Make sure the T.V. set is in a proper location or a steady stand. Image is not centered| Adjust the Horizaontal or Vertical controls. Bad sound quality| Make sure that the audio output mode is set correctly. Make sure that the audio connection between the unit and amplifier (if used) is secure. The TV doesn’t operate normally| Disconnect the power plug for 10 seconds, then reconnect it. IF YOU STILL HAVE A PROBLEM: Please call 1‐800‐BE‐SHARP during office hours, 8 a.m.‐5 p.m. Monday ‐ Friday to ask for assistance on repairs, maintenance, and servicing. - Page 14 Sources Pictures (P) included are modified from the original Sansa 25R‐S100 Manual P1. <http://www.fixya.com/support/p217072‐sharp_25r_s100_25_tv/manual‐5549>...
Need help?
Do you have a question about the 25R-S100 and is the answer not in the manual?
Questions and answers