
Related Manuals for Partizan ADM-44U


Summary of Contents for Partizan ADM-44U
-
Page 1: Dual Streaming
Dual Streaming H.264 Multiplex 4CH/8CH Network DVR Support 3G/3.5G mobile phone/PDA (Symbian/Windows Mobile/iPhone/iPad/Blackberry/Android) Support 2xSATA User Manual V1.2... -
Page 2: Table Of Contents
INDEX 1. STARTING .................................... 7 1.1 P ................................ 7 RODUCT PECIFICATION 1.2 W ? ..........................8 HAT ARE INSIDE THIS PACKAGE 1.3 S DVR ................................9 TARTING THIS 1.3.1 Before Turning On The DVR ............................ 9 1.3.2 DVR local Setup ............................... 9 1.3.3 DVR Network Setup and Web Browser ......................... - Page 3 5.5 N ..................................43 ETTING 5.5.1 Network(Static IP/DHCP) ............................43 5.5.2 Http Port ................................. 43 5.5.3 Command Port ............................... 43 5.5.4 Media Port ................................43 5.5.5 PPPoE/DDNS(Net- Second Page] ......................... 44 5.5.6 Email Server set up for Email notify ........................45 5.5.7 UPnP and Mobile port(3 rd page in Net Setting) ....................
-
Page 4: Disclaimer Of Warranty
LIMITATION OF LIABILITY CAUTION TO REDUCE THE RISK OF ELECTRIC SHOCK, DO NOT REMOVE COVER. NO USER SERVICEABLE PARTS INSIDE. PLEASE REFER SERVICING TO QUALIFIED SERVICE PERSONNEL. This users’ WARNING TO PREVENT FIRE OR ELECTRIC SHOCK HAZARD, DO NOT EXPOSE THIS APPLIANCE TO RAIN OR MOISTURE. - Page 5 personal injury or any damage; Unauthorized disassembly, repair or modification of the product by the user; Any problems or consequential inconvenience, loss or damage, caused by connecting this product to devices of the third parties; Any claim or action for damages, brought by any photogenic subject, be it a person or organization, due to violation of privacy whereby the surveillance picture and/or saved data becomes public or is used for the purpose other than surveillance.
-
Page 6: Copyright Statement
CARING FOR THE ENVIRONMENT BY RECYCLING When you see this symbol on a product, do not dispose of the product with residential or commercial waste. Recycling your Electrical Equipment Please do not dispose of this product with your residential or commercial waste. Some countries or regions, such as the European Union, have set up systems to collect and recycle electrical and electronic waste items. -
Page 7: Starting
1. Starting 1.1 Product Specification Channel 4CH_DVR 8CH_DVR 4 Channel 8 Channel Video Input BNC_1Vp-p_75Ω BNC_1Vp-p_75Ω 4 Channel Audio Input 4 x RCA 1 x D-SUB-15 Connector Max. Resolution: VGA Output 1440x900@60Hz Support 4:3 and 16:9 display ratio Composite/TV 1 x BNC Connector 1Vp-p_75Ω Output Audio Out 1 x RCA... -
Page 8: What Are Inside This Dvr Package
Support Pelco-P、Pelco-D,Samsung , Panasonic, Philip PTZ Control and etc. Protocol Support 4 pairs of input connector, 1 relay output. Support Multi-Region Video Motion Detection and Alarm Video Lost Both Event Can Trigger Video Record(not for Video Lost, Channel selectable), E-Mail Notify, Buzzer, Automatic keep track of DVR operation and DVR Alarm Event Log History. -
Page 9: Starting This Dvr
• CD(Manuals, mobile software), please refer to Appendix D for details • Remote control with battery(option) • Audio cables for 8CH DVR(8 x RCA in + 1 x RCA out, only A-IN1 ~ A-IN4/A-OUT work) • Power adaptor with power cord •... -
Page 10: Dvr Network Setup And Web Browser
1.3.3 DVR Network Setup and Web Browser Please note that the user must have system administrator authority for the client PC, please refer to Chapter 6 for details If upgraded this DVR for new version software, it is better to delete some ... -
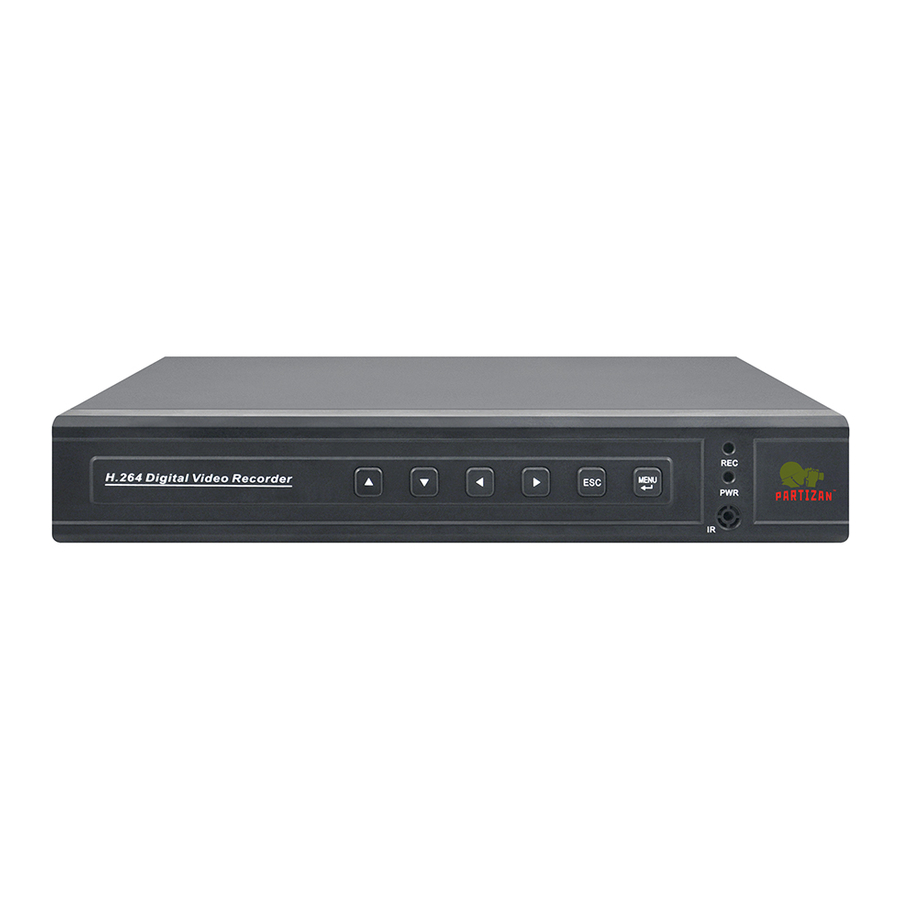
Page 11: Panels And Remote Controller
2. Panels and Remote Controller 2.1 Front Panel Please take actual front panel as quasi-: 4CH DVR 1. CH1 ~ Ch4 / Direct switch to single camera window or 4 camera windows Start and Stop time setting of playback or back up in schedule record(Chapter 4.5 Video Playback), or... - Page 12 Open camera selected with PTZ operation menu. Arrow Buttons. Press to move to selection box, press to select submenu parameters. 9. Enter Confirm operation. 10. Power LED 11. HDD LED 12. IR Window 8CH DVR(1 x SATA or 2 x SATA) 8CH DVR(2 SATA HDD, with DVDRW or HDD removable Rack) Key buttons 2 ~ 12 are same as 4CH DVR, except: 1.
-
Page 13: Back Panel
13. ALARM LED: indicate alarm happened 14. NO ALARM: Cancel Alarm and Buzzer 15. IR LED 16. DVD Burner or Removable HDD Cover 8CH DVR(1 x SATA or 2 x SATA) with complex key combination Key buttons 2 ~ 12 are same as 4CH DVR, except: 1. - Page 14 1. USB connector Connect backup devices like flash drive, portable HDD or DVD burner 2. Mouse Connector Connect USB mouse. 3. Audio Output Connectors 1 channel audio output, RCA (2Vp-p,600Ω) for 4CH DVR 4. Audio Input Connectors (AUDIO IN 1-4/1-8, only A-IN1 ~ A-IN4/A-OUT work) 4 channel audio input, RCA (2Vp-p,600Ω) for 4CH H264 DVR;...
-
Page 15: Remote Controller
2.3 Remote Controller The remote controller is an accessory to ease the user’s operations. You can do all the operations by the remote controller instead of the buttons on the front panel. Alpha-numeric Buttons (1-9, 0, 10+) Press these buttons for camera selection in most circumstances. These buttons can also be used to enter text and number DEL Button (DEL) In text editing mode, this button is used as “del”... -
Page 16: Hardware Installation
3. Hardware Installation 3.1 Basic Connections Cameras Connect the camera output to video input connector in real panel of the DVR. The video input interface is standard BNC connector, 1Vp-p, 75 Ω. Audio Connector The audio input interface is standard RCA socket, 2Vp-p, 600 Ω. The audio input resistance is a little bit high;... -
Page 17: Ptz Control Connections
Data Cable Power Cable Data Cable Power Cable Internal DVD Burner message appears only in Video Backup with MPEG4 format, please refer to Chapter 4.6 Video Backup For the internal fixed HDD installation, there is no HDD bay for it, there are 4 screw holes underneath housing bottoms, where you can secure them as below: 3.3 PTZ Control Connections Connect the PTZ control interface to RS485 T... -
Page 18: Power-On Dvr And Quick Start
4. Power-on DVR and Quick Start Power-on the DVR and wait for system program loading. The DVR will buzz and “NO Hard Disk” appears when no hard disk installed in DVR. This DVR has dual display(TV/VGA monitor), but OSD control is only side, default is VGA, you may press “ESC”... -
Page 19: Live View Screen(Status Bar)
4.1 Live View Screen(Status Bar) Single Channel display When in 4/9 split view modes, the window with highlight green border is the current selected one. User can use mouse or press 【Direction 】 buttons to switch to another channel. If the audio output device is connected, the audio can also be monitor together with video. -
Page 20: Remote Control
: System configuration : Manual record : Search, playback and backup record files : PTZ operation : Cancel alarm notification. Click this button will pop a message to show the present alarm information. Shut down the system before power off, good for HDD protection 、... -
Page 21: Video Record
HDD information will display on the windows if DVR detection HDD correctly. Click 【Formatting】to start HDD format. 4.4 Video Record There are two methods to precede record in DVR, manual record and schedule record. The priority of manual record is higher than schedule. If the record schedule is conflict with manual record, the manual record will be processed firstly until the manual record being canceled. - Page 22 Red indicates “alarm triggered recording” Grey indicates “manual recording” Manual Record Please select <Tool Bar>→<Manual Record> to let the specific channel record or not. 【 】 button to start/stop recording manually. Press ● The video recorded manually is named “common recording” ...
-
Page 23: Video Playback
every week. Unit is hour. One grid indicates one hour. Move highlight icon to a time grid using 【Direction 】 buttons. Specify the recording type by repeat pressing 【Enter 】 button or double left clicking mouse, (the color of the grid will change relevantly). Select OK to confirm settings. -
Page 24: Playback Control
highlight icon to channel selection box, press【Enter 】 button to select it or cancel selection. After setting time, channel number , move highlight icon to Search using 【 】 , 【 】 buttons, and press 【 Enter 】 button to start searching recorded video. , press 【Enter 】... -
Page 25: Video Backup
:Pause :Stop playing. :Go to next frame. :Click to switch from single camera to 4/9 camera. 4.6 Video Backup Select <Tool Bar>→<Record Search> to search, backup and playback the specific record files you needs. Set the start time and stop time as describe in 4.5 Video Playback... -
Page 26: Play Backup Video On Pc
Click [Backup] to enter into the backup screen. System will detect all the backup devices available and display them. Backup device can use USB flash drive, USB portable HDD and USB DVD Burner. Only support FAT32 file system for USB flash and HDD Please select the suitable device and record type according to requirement first, and click [Backup] to start save audio/video. - Page 27 Mouse operation is quite easy for PTZ control, just click and move, by remote control or keypad, should press “Enter” key after any function keys such as pressed to make it active. Close Speed Zoom Focus Iris More menu Direction Auxiliary Preset ⑧...
- Page 28 them in numbers for later calling. 1. Select the preset number you want to name 2. Position the camera as desired position including direction, focus, iris and zoom value. 3. Click on the set button call preset: 1. Select the preset number you want to call. 2.
-
Page 29: Dvr Setting
5. DVR Setting 5.1 Menu Tree & Operate... - Page 30 General Operations Press 【MENU 】 button to enter into system setting screen. 【 】 button to start/stop recording manually. Press ● Press 【 ‖ 】 button to play record file. Press【PTZ 】 button to enter into PTZ control screen. ...
-
Page 31: System Setting
5.2 System Setting 5.2.1 Language Change DVR menu text and OSD language depend upon your requirement. **Take effect immediately ** 5.2.2 Video Standard Change DVR and camera video system, NTSC or PAL system. **Take effect after being saved. ** 5.2.3 VGA Setting Switch different VGA output resolution, there are 800x600@60Hz, 1024x768@60Hz 1280x1024@60Hz, 1440x900@60Hz if wrong VGA resolution to make the LCD display distor ted,... -
Page 32: Password Setting And What If Forgotten
**Take effect immediately ** In order to avoid record files’ time confusion, you’d better stop recording before modifying system time 5.2.6 Password Setting and what if forgotten Choose any account to change its password (password is only digital) Default password of Admin is [888888] User is [666666] If password forgotten, turn off the machine, open this DVR case, find the JP17 jumper, it is near the SATA connector location, and find some jumper cap to make it closed(short) and hold it until “beep”... - Page 33 Add User Account Enter “ADD USER” to add user account, most 7 users accounts can be produced, and there will be warning message if exceed. Delete User account Enter “DEL USER” to delete user account...
-
Page 34: Authority Manage
Authority Manage Operation authority of DVR for “User” account can be defined by system. There are two conditions to apply restriction, Local operation and Remote access. The user accounts are not allowed to operate DVR setting. Enter “Authority Manage”, choose User account, and assign its authorities. -
Page 35: Resource Management
5.2.9 Resource Management Before set up the Chapter 5.3.4 Record Frame Rat and Chapter 5.3.7 Record Resolution for this DVR, you have to assign the resource managements first as below : System -> Advanced Setting -> Resource Management Please refer to following Resource Management table for 4CH and 8CH, these DVR have different Record and Playback mode as below: 4CH Resource Management Maximum Record/Playback resolution and frame rate... - Page 36 PAL: 25FPS(HD1, CIF), can not set up D1 in 5.3.7 Record Playback Resolution 1 Channel D1 NTSC: Record/Playback 1 Channel Encode + 3 30FPS(D1, HD1, CIF) Click only one channel D1 + 3 Channel CIF PAL: Record/Playback to have maximum Channel Encode + 2 25FPS(D1, HD1, CIF)
-
Page 37: Record Setting
5.3 Record Setting 5.3.1 Video Channel Select channel number for apply record setting. Select [ALL] for apply to all channels. 5.3.2 Record Schedule 1. The current recording channel number 2. The record schedule 3. Description of record type... -
Page 38: Video Quality
no record (white ): No recording during this time common record (blue ): Recording always move record (green ): Motion-detection triggered recording alarm record (red ): Alarm-triggered recording move and alarm record (yellow ): Recording triggered by either alarm or motion detection. -
Page 39: Osd Setting
5.3.6 OSD Setting Define OSD (On Screen Display) string. The options have as following 1) Camera’s Name and Time Stamp 2) Camera Name 3) Time Stamp 4) None Only select “Time Stamp”, can see time display when playback 5.3.7 Record Resolution Choose record resolution of the channel selected, and must choose the same resolution for all channels, please refer to Chapter 5.2.9 Resource Management for details... -
Page 40: Video Setting
5.4 Video Setting 5.4.1 Camera Channel Select camera channel for apply camera setting. Select [ALL] for apply to all channels. 5.4.2 PTZ Protocol Select PTZ device protocol. Support CLT-618, JY2000, Philip, Pelco-D, Pelco-P, Panasonic, Samsung, SYYT, TD500, Tiandy, VIDO, VTS, YAAN, Yiboer and etc. 5.4.3 PTZ Baud Rate Select PTZ device baud rate. -
Page 41: Privacy Mask(Mosaic)
Sensitivity of motion detection There are three level sensitivity of motion detection. Highest Normal Low or Disable Configure motion detection by region. Press 【>>】on screen to pop up sub windows for region setting. There are totally 16 x 12 individual blocks for a camera view. Each cell can be turn on(Blue) or off(Clear) by single mouse left-click, or press (faceplate button), or press [FN] (remote control);... -
Page 42: Motion, Video Lost And Channel Name(Video- Advanced Setting)
Support Maximum 4 regions. 5.4.8 Motion, Video Lost and Channel Name(Video- Advanced Setting) Motion Handling & Video Lost handling User can pre-define correspond actions while DVR handling the event such as motion detection, video lost, following is the action list, ... -
Page 43: Net Setting
Channel Name Setting – at most 16 characters, but only can display 11 characters 5.5 Net Setting 5.5.1 Network(Static IP/DHCP) DVR support two methods to acquire IP address, Automatic acquire IP address by DHCP client model. Manual assign IP address by Static IP model. ... -
Page 44: Pppoe/Ddns
5.5.5 PPPoE/DDNS(Net- Second Page] PPPoE Setting Click 〖>>〗to open sub window and input ADSL account and password from Internet Service Provider. DDNS Click 〖>>〗to open sub window and input DDNS account and password from DDNS Service Provider. User must apply DDNS service account at first. -
Page 45: Email Server Set Up For Email Notify
update.ods.org www.easydns.com www.justlinux.com www.dyns.cx www.hn.org www.zoneedit.com members.3322.org members.3322.org(static) members.dyndns.org members.dyndns.org(static) www.EZ-IP.net www.penguinpowered.com members.dhs.org cgi.tzo.com Auto Register DVR can configure to automatically register to CMS, input CMS Server IP address, Server Port: 8003(default) and register time interval in seconds(register to CMS server if failed);... -
Page 46: Upnp And Mobile Port(3 Rd Page In Net Setting)
The Email To field indicates the recipients of alarm emails, and the Email From field indicates the email account from which the message will be sent. You can input the Email To field and [ADD] it into the list of recipients. You can [VIEW] the list of recipients in the Email to list, where you can delete if no need any more. - Page 47 Click the , it will appear “Query port mapping status” message, and you will find the following screen shot if successful in UPnP mapping Mobile PORT By default is port: 7050, user can specify different port number, please refer to Chapter 7.
-
Page 48: Alarm Input/Output Setting
5.6 Alarm Input/Output Setting 5.6.1 Alarm Input Channel Select alarm input channel for apply record setting. Select [ALL] for apply to all channels. 5.6.2 Alarm Input Type The alarm input attribution includes N/O. and N/C. Each camera has one input pin on Terminal Block at the real panel. User must use voltage output type sensor to connect alarm input interface. -
Page 49: Event Handling
5.6.3 Event Handling User can pre-define correspond actions while DVR handling the Alarm event. Record: Start record immediately for selected channels PTZ PRESET: set up the PTZ preset position for selected channels Alarm Zoom Out: Set the pop up selected channels, please refer to Chapter 5.6.4 ... - Page 50 Please note Motion/Alarm Schedule recording dose not compliant to Motion/Alarm event(action) schedule Alarm Zoom Out Set the time interval(seconds) for channels pop out display while alarmed(Motion and Sensor) Hard Disk Full actions Alarm Out: Set the Alarm output enabled ...
-
Page 51: Maintenance
5.7 Maintenance 5.7.1 Log View 1. Select the type of log to be searched: All/ Operation/ Exception/ Alarm. 2. Select the time scope to be searched(it will display AM/PM if select correct Time Display format) 3. Click Search to display the detail information of log. Note: The maximum number of logs supported currently is 3000. -
Page 52: Software Upgrade
5.7.2 Software Upgrade The upgrade modes supported now are USB & IE Remote Software: USB:Please make sure the USB device is connected correctly and the upgrade applications have already being copied into USB root directory. We suggest to use fresh USB Flash Disk for upgrade to prevent crash, Please follow the prompts to operate. -
Page 53: Hdd Capacity
5.7.4 HDD Capacity Show DVR current HDD capacity status. 5.7.5 Hardware Version Show DVR current hardware version. 5.7.6 Software Version Show DVR current software version. 5.7.7 Software Release Date Show DVR current software release date. 5.8 Save Setting 5.8.1 Save & Exit Save all setting and exit menu. -
Page 54: Web Browser Operation(Ie Browser Only)
6. Web Browser Operation(IE Browser only) 6.1 Enable Download Un-singed ActiveX Control if necessary User’s computer need download ActiveX components for web access at the first time connect to DVR. If user’s Internet explorer prohibits the download action(the DVR software is unsigned) then please manually enable the download of un-signed ActiveX in IE. -
Page 55: Web Browser Main Screen
6.3 Web Browser Main Screen Open IE browser, input IP address of the DVR, the Login windows will appear. Check “Automation Open All Preview” to watch all cameras after login. Camera view window: Full Screen /1 camera / 4 cameras / 8 cameras cameras Camera view is previewing... -
Page 56: Alarm Notification
Camera view is idle if not opened Available Camera list: double right-click the to open the channel Tools Bar The description of icons from left to right is: Parameters: configure device parameters(set up), please refer to 6.5 Device Parameters Settings Talk-back: use channel 1 only, please open PC microphone and speakers, and DVR ... -
Page 57: Device Parameters Settings
When alarms of video loss with uploading to center occur, the alarm notification with the alarm channel number contained such as “Device alarm: video loss, channel x” will be displayed in the right up side of the main screen. 6.5 Device Parameters Settings Click , the Device Parameters will appear... - Page 58 Channel Camera setting, Record setting – please refer to 5.3 Record Setting 5.4 Video Setting as well...
- Page 59 Channel Camera setting, Sub Bitstream, Subcode – please refer to 5.3.8 Dual Streaming for Network(Record- Advanced Setting) as well For limited upload bandwidth of internet that DVRs connect, or limited streaming capability of some mobile phone/PDA, you have to adjust bandwidth of DVR to internet: [Enable Subcode] ->[Sub Bitstream] ->[Video Bitrate] ...
- Page 60 Alarm alarm input / output setting and HDD full action DeviceFirmware upgrade , time synchronize and E-mail Notify setup...
- Page 61 UserUser account and authority setting State – HDD capacity, Channel and Network status...
-
Page 62: Video Files Playback & Download
6.6 Video Files Playback & Download 6.6.1 Video Files Playback Click , the playback screen will appear. It includes video files search, playback and video files download. Video Files Search The file search part is on the right upper side of the screen, please set target, type, start time and end time there. -
Page 63: Download Video Files
The playing control bar is shown as the figure below. The descriptions of all these icons from left to right are as follows: Play ; Pause ; Stop ; Go to next frame ; Fast play option (The current speed of playing will be doubled by each clicking. -
Page 64: Water Mark Verification
6.6.4 Water Mark Verification All the record files for this DVR have watermark, but only MPEG4 format for verification. Select the “Local host” from Target, you will find the find the shown up in the files Windows: , click the , to select the MPEG4 file from your PC, which may comes from Network back up as Chapter 6.6.2 Download Video Files, or USB back up from local... -
Page 65: G/3.5G Mobile Phone/Pda Support
7. 3G/3.5G Mobile Phone/PDA Support Another state-of-the-art feature of this DVR device is transmitting live feed from the CCTV cameras to your mobile phone, so that you can have an ‘on the go’ access to your surveillance system from virtually anywhere in the world. Currently this feature is supported only for phones with the Windows Mobile, Nokia Symbian S60 3 and 5th Edition OS, Google Android, Black Berry OS 4.x and Apple iPhone 3G/3GS/iPhone 4/iPad. -
Page 66: Rd /S60 5 Th Phones
In the ensuing screen, input the Username (Admin), Password, and IP address(or DDNS) of your DVR (Server); input the mobile Port no.(default 6003), and Notes for this DVR description; click the “OK” and “Auto Connect” to save it and start to connect automatically; or click the “History”... - Page 68 IP address line Camera info. Camera view Status information line Control buttons Functional buttons Play/Stop Snap Next Full Mode Setting Exit In order to navigate between the buttons, please use the directional keys of your Symbian mobile phone. Explanation of the menu buttons and program interface: Status information line.
- Page 69 Selection of channels. If your system supports 8 or 16 channels, to switch between channel buttons 1-4, 5-8, 9-12, and 13 -16, please use functional button (see below) PTZ camera direction controls, PTZ camera Zoom, Focus and Iris controls Functional buttons: When highlighting these buttons, the name of the corresponding function will be displayed in the status information line (the first tag name).
- Page 70 Mobile phone reference list for OS S60 3rd: LG-KT610 S60 3rd_FP1 10-Feb-08 LG KS10 S60 3rd_FP1 09-Oct-06 LG-KT615 S60 3rd_FP1 30-Oct-08 Nokia 3250 S60 3rd_INIT 13-Sep-05 Nokia 5320 XpressMusic S60 3rd_FP2 22-Apr-08 Nokia 5500 Sport S60 3rd_INIT 09-May-06 Nokia 5630 XpressMusic S60 3rd_FP2 10-Feb-09 Nokia 5700...
-
Page 71: Iphone/Ipad Series
Samsung SGH-G810 S60 3rd_FP1 11-Feb-08 Samsung SGH-i400 S60 3rd_FP1 26-Apr-07 Samsung SGH-i450 S60 3rd_FP1 14-Oct-07 Samsung SGH-i520 S60 3rd_FP1 09-Oct-06 Samsung SGH-i550 S60 3rd_FP1 15-Oct-07 Samsung SGH-i560 S60 3rd_FP1 16-Oct-07 Samsung SGH-L870 S60 3rd_FP2 28-May-08 Symbian OS S60 5 Mobile Phone – Nokia 5800XM, N97, 5230, 5802XM, 5530XM and x6 7. - Page 72 Click icon to connect DVR immediately, after login DVR successfully, user can watch the remote video from mobile phone; the other icons function are as follows: switch channel,click show another 4 channel list Control PTZ camera direction, Zoom, Iris and Focus. Play / Stop button Picture Snapshot.
-
Page 73: Blackberry Series
7. 4 Blackberry Series 1) Program installation 1. Open accessory CD and copy the setup software “KWeye.cod” and “KWeye.alx” to your PC. 2. In order to be able to install applications and themes via BlackBerry Desktop Manager, firstly the PC should install Blackberry Desktop Manager. BlackBerry Desktop Manager will be known as “DM.”... - Page 74 6. You should now see something like what you see below. From this screen, click “Browse” (shown as follows). 7. Once you click “Browse” you will see a file search screen like the one below. Go to and locate where you saved the application files. Make sure you saved both the “.alx” file and “.cod”...
- Page 75 9. You can remove the program “KWeye” as the following method. To enter into Application Loader screen, on “Device application selection” you can select the application that you want to clear from your device. When the option “Action” is “Remove”, it means the program will be clear from your device.
- Page 76 ① System main interface After the installation, press “KWeye” icon in the application, it will appear the below picture(The Main page) ② System setting To set up the connection to the DVR, please first click icon to enter settings menu as below right screenshot: Server Info.
-
Page 77: Android Mobile (Google Phone Compatible)
Network Info. Network Type: Network through which you connect to the internet, like 3G, WiFi or others Click after setting to connect, or click to choose other DVR that ever set up for streaming. ③ Function buttons Click icon to connect DVR immediately, after login DVR successfully, user can watch the remote video from mobile phone;... -
Page 78: Software Operation
2. Software Operation After the installation, click the “KWeye” icon in the “All appas” to run, it will show the main page as left phot, click the Settings , it will show the right photo:... - Page 79 System Settings: As the right photo for last page, you may set up the parameters as below: Devices Info.: Address: DVR IP address or DDNS Port : Mobile Port [6003 by default] DeviceName: Description of this DVR User Name: Login User Name〖Admin〗by default Password: Password [888888 by default] Click after setting to connect, or click...
-
Page 80: Appendix
8. Appendix Appendix A-HDD Capacity/Recording Time Estimate Calculate the maximum capacity of the build-in hard disk. Timing Recording: Step 1: Calculate the maximum capacity of the hard disk needed in selected channel per hour, suppose as Si (MByte) (i is the channel number), and suppose the bit rate of the channel selected as D (Kbit/s). -
Page 81: Appendix B- Compatible Hdd List
Dc = Dt *(8*1024)/ 3600 = Dt * 2.2756 (Kbit/s) Appendix B– Compatible HDD List The other brand or model, please test by yourselves Item Model Number Size(GB) Drive WD5001ABYS, WD5000AADS SATA WD5000AVVS, WD5000AVDS SATA WD7500AACS SATA WD10EADS, WD10EVDS, WD10EALS 1000 SATA WD15EADS... - Page 82 A. Page 6 – 1.1 Product Specification: Change the Audio Input from “8 Channel/8 x RCA” to “4 Channel/4 x RCA” in the 8CH_DVR field. B. Page 8 - 1.2 What are inside this DVR package? Modify Audio cables for 8CH DVR(8 x “Audio cables for 8CH DVR(8 x RCA in + 1 x RCA out)”...
Need help?
Do you have a question about the ADM-44U and is the answer not in the manual?
Questions and answers