Saeco Intuita HD8750 User Manual
Saeco intuita full automatic espresso machine
Hide thumbs
Also See for Intuita HD8750:
- User manual (56 pages) ,
- Instructions manual (56 pages) ,
- Manual (4 pages)

Related Manuals for Saeco Intuita HD8750


Summary of Contents for Saeco Intuita HD8750
- Page 1 Register your product and get support at www.philips.com/welcome Type HD8750 USER MANUAL PLEASE READ THIS USER MANUAL CAREFULLY BEFORE USING THE MACHINE...
-
Page 2: Important Safeguards
IMPORTANT SAFEGUARDS When using electrical appliances, basic safety precautions should always be followed, including the following: 1. Read all instructions. 2. Do not touch hot surfaces. Use handles or knobs. 3. To protect against fire, electric shock and injury to persons do not immerse cord, plugs, or appliance in water or other liquid. - Page 3 CAUTION This appliance is for household use only. Any servicing, other than cleaning and user maintenance, should be performed by an authorized service center. Do not immerse machine in water. To reduce the risk of fire or electric shock, do not disassemble the machine. There are no parts inside the machine serviceable by the user.
- Page 4 ENGLISH Congratulations on your purchase of Saeco Intuita full auto- matic espresso machine! To fully bene t from the support that Saeco o ers, please register your product at www.philips.com/welcome. This user manual applies to HD8750. The espresso machine is suitable for preparing espresso cof- fees using whole co ee beans.
-
Page 5: Table Of Contents
Automatic rinse/self-cleaning cycle ....................11 Manual rinse cycle......................... 12 “INTENZA+” WATER FILTER INSTALLATION ............13 ADJUSTMENTS ....................14 Saeco Adapting System ......................... 14 Adjusting the ceramic co ee grinder .................... 14 Adjusting the aroma (co ee strength) ..................15 Adjusting the dispensing spout ..................... 16 Adjusting the co ee lenght ...................... -
Page 6: Important
ENGLISH IMPORTANT Safety instructions This machine is equipped with safety features. Nevertheless read the safety instructions carefully and only use the machine as described in these instructions to avoid accidental injury or damage. Keep this user manual for future reference. The term WARNING and this sign warn against possible severe injuries, danger to life and/or damage to the machine. -
Page 7: Caution
ENGLISH • Never insert ngers or other objects into the co ee grinder. Caution • The machine is for household use only. It is not intended for use in en- vironments such as sta kitchens of shops, o ces, farms or other work environments. -
Page 8: Installation
INSTALLATION Product overview... -
Page 9: General Description
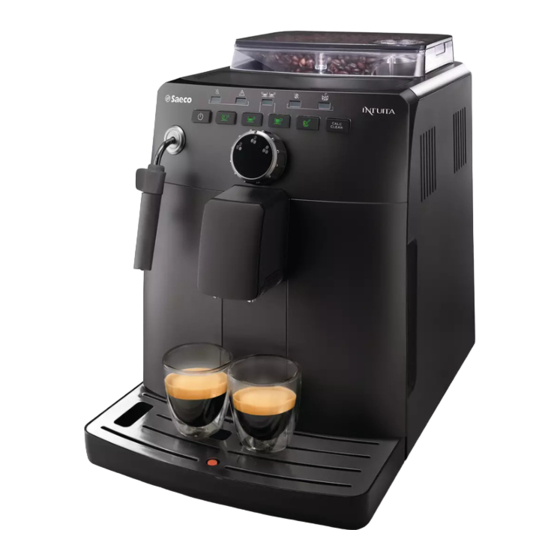
ENGLISH General description 1. Grinder adjustment knob 2. Co ee bean hopper 3. Co ee bean hopper lid 4. Control panel 5. Dispensing spout 6. Cup holder grill 7. Full drip tray indicator 8. Drip tray 9. Grease for the brew group 10. -
Page 10: Preparing For Use
ENGLISH PREPARING FOR USE Machine packaging The original packaging has been designed and constructed to protect the machine during transport. We recommend keeping the packaging material for possible future transport. Machine installation Remove the drip tray with grill from the packaging. Remove the machine from the packaging. - Page 11 ENGLISH Remove the water tank Rinse the water tank under fresh water. Fill the water tank with fresh water up to the MAX level and reinsert it into the machine. Make sure it is fully inserted. Caution: Never ll the water tank with warm, hot, sparkling water or any other liquid, as this may cause damage to the water tank and the machine.
-
Page 12: Using The Machine For The First Time
ENGLISH Switch the power button located on the back of on the machine to “I”. The “ ” button ashes on the control panel. Press the “ ” button to turn on the machine. The “ ” and “ ” lights and the “ ”... -
Page 13: Automatic Rinse/Self-Cleaning Cycle
ENGLISH Press the “ ” button to start the cycle. The machine starts the au- tomatic priming of the circuit by dispensing some water through the Pannarello. When the process is completed, the “ ”and “ ” buttons ash. The machine is in warm-up mode. -
Page 14: Manual Rinse Cycle
ENGLISH Manual rinse cycle During this process you brew a co ee and fresh water ows through the steam/hot water circuit. This takes a few minutes. Place a container under the dispensing spout. Check that the “ ”, “ ”, “ ”... -
Page 15: Intenza+" Water Filter Installation
ENGLISH “INTENZA+” WATER FILTER INSTALLATION We recommend you to install the “INTENZA+” water lter as this prevents lime scale to build up in your machine and preserves a more intense aroma to your espresso co ee. You can purchase separately the INTENZA+ water lter. Please refer to the maintenance products page in this user manual for further details. -
Page 16: Adjustments
The machine allows for certain adjustments so that you can brew the best tasting co ee possible. Saeco Adapting System Co ee is a natural product and its characteristics may change according to its origin, blend and roast. The machine is equipped with a self-adjusting system that allows the use of all types of co ee beans available on the market (not for caramelized beans). -
Page 17: Adjusting The Aroma (Co Ee Strength)
ENGLISH This adjustment can be carried out by pressing and turning the grin- der adjustment knob inside the co ee bean hopper, using the grinder adjustment key provided with the machine. Press and turn the grinder adjustment knob one notch at a time. You will taste the di erence after brewing 2-3 cups of espresso. -
Page 18: Adjusting The Dispensing Spout
ENGLISH Adjusting the dispensing spout The height of the dispensing spout can be adjusted to better t the dimensions of the cups that you wish to use. Move the dispensing spout up or down with your ngers to adjust its height as shown in the image. -
Page 19: Adjusting The Co Ee Lenght
ENGLISH Adjusting the co ee lenght The machine allows you to adjust the amount of brewed espresso accor- ding to your taste and the size of your cups. Each time the “ ” button or “ ” button is pressed, the machine brews a pre-set amount of co ee. -
Page 20: Espresso And Coffee Brewing
ENGLISH ESPRESSO AND COFFEE BREWING Espresso and Co ee Brewing Using Co ee Beans. Before brewing co ee, make sure that the water tank and co ee bean hopper are lled. Turn the aroma selector switch to select the desired aroma. Place 1 or 2 cups under the dispensing spout. -
Page 21: Steam Dispensing /Cappuccino Brewing
ENGLISH After the pre-brewing cycle, co ee begins to pour out of the dispen- sing spout. Co ee brewing stops automatically when the pre-programmed level is reached; however, it is possible to stop earlier by pressing the button again (“ ”... - Page 22 ENGLISH The machine warms-up and the “ ” “ ” buttons ash. The “ ” button turns o . When the “ ” button turns on again, the steam dispensing starts. Froth the milk by gently swirling the container and moving it up and down.
-
Page 23: Hot Water Dispensing
ENGLISH HOT WATER DISPENSING Warning: Danger of scalding! Dispensing may be preceded by small jets of hot water. The hot water/steam wand may reach high temperatures: never touch it with bare hands. Use the appropriate protective handle only. Before dispensing hot water, check that the “ ”, “... -
Page 24: Cleaning And Maintenance
ENGLISH CLEANING AND MAINTENANCE Daily cleaning of the machine Caution: Timely cleaning and maintenance of your machine is very important as it prolongs the life of your machine. Your machine gets exposed to moist, co ee and lime scale continuously! In this chapter it is described in detail which activities you need to perform at which frequency. -
Page 25: Daily Cleaning Of The Water Tank
ENGLISH Empty and clean the co ee residues drawer located in side of the ma- chine. Open the service door, remove the drawer and empty the co ee residues. Daily cleaning of the water tank Remove the small white lter or the INTENZA+ water lter (if installed) from the water tank and wash it with fresh water. -
Page 26: Weekly Cleaning Of The Pannarello
ENGLISH Weekly cleaning of the Pannarello The weekly cleaning is more thorough where you need to disassemble all parts of Pannarello. You need to perform the following cleaning operations: Remove the external part of the Pannarello. Wash it with fresh water. Remove the upper part of the Pannarello from the hot water/steam wand. - Page 27 ENGLISH Remove the co ee grounds drawer. Open the service door. Remove and clean the co ee residues drawer. To remove the brew group, press the «PUSH» button and pull it by the handle. Thoroughly wash the brew group with lukewarm water and carefully clean the upper lter.
- Page 28 ENGLISH Gently pull down the lever until it is in contact with the brew group base and the two reference signs on the side of the brew group do match. Make sure the hook to lock the Brew Group is in the correct position by rmly pressing the “PUSH”...
-
Page 29: Monthly Lubrication Of The Brew Group
Lubricate the brew group after approximately 500 cups of co ee or once a month. You can purchase separately the Saeco grease to lubricate the brew group. Please refer to the maintenance products page in this user manual for further details. -
Page 30: Monthly Cleaning Of The Co Ee Bean Hopper
ENGLISH Lubricate the shaft too. Insert the brew group in its seat until it locks into place. (see “Weekly cleaning of the brew group” chapter). Insert the co ee residues drawer. Close the service door and insert the co ee ground drawer. Monthly cleaning of the co ee bean hopper Clean the co ee bean hopper once a month when it is empty with a damp cloth to remove co ee oil. -
Page 31: Descaling
Not doing this will ultimately make your machine stop working pro- perly, and in this case repair is NOT covered by your warranty. Use the Saeco decalci er only. Its formula has been designed to ensure better machine performance. You can purchase separately the SAECO decalci er. Please refer to the maintenance products page in this user manual for further details. - Page 32 Remove the “INTENZA+” water lter from the water tank if it was instal- led. Remove the water tank and pour the entire content of the Saeco decal- ci er. Then ll the water tank with fresh water up to the MAX level.
- Page 33 ENGLISH Remove the water tank, rinse it and ll it up to the MAX level with fresh water. Place it back into the machine. Empty the drip tray and place it back. Empty the container and place it back under the steam/hot water wand and the dispensing spout.
-
Page 34: Meaning Of The Light Signals
ENGLISH MEANING OF THE LIGHT SIGNALS Control panel “Double co ee” light “Warning” light “No co ee” light “Co ee grounds “No water” light drawer” light ON/OFF button Descaling button Hot water dispensing button Steam dispensing button Espresso co ee brew button Long espresso brew button “Aroma”... - Page 35 ENGLISH Light Symbols Meaning Actions The machine is dispensing hot water. STEADY ON The machine is brewing one cup of espresso STEADY ON The machine is brewing two cups of espresso. STEADY ON The machine is brewing one cup of co ee. STEADY ON The machine is brewing two cups of co ee.
- Page 36 ENGLISH Light Symbols Meaning Actions The machine is dispensing steam/frothing milk. STEADY ON The machine needs to be Start the descaling cycle. If you don’t descale descaled. regularly, the machine will stop working properly. This is not covered by your warranty. The machine is in the desca- You can pause the cycle by pressing the STEADY ON...
-
Page 37: Troubleshooting
If you are unable to solve the problem with the information below, visit www.philips.com/support for a list of frequently asked questions or contact the Philips Saeco hotline in your country. You nd its contact details in the warranty booklet by-packed separately or on www.philips.com/support. - Page 38 Machine of the First Time"). This might occur when the ma- Brew a few cups of co ee as de- chine is automatically adjusting scribed in chapter "Saeco Adapting the dose. System". The dispensing spout is dirty. Clean the dispensing spout.
-
Page 39: Energy Saving
ENGLISH ENERGY SAVING Stand-by The Saeco full automatic espresso machine is designed for energy saving- proven by the Class A energy label. After 30 minutes of inactivity, the machine turns o automatically. If a product has been brewed, the machine performs a rinsing cycle. -
Page 40: Technical Specification
If you need service or support, please visit the Philips website at www.philips.com/support or contact the Philips Saeco hotline in your country. You nd its phone number in the warranty booklet by packed separately or on www.philips.com/support. -
Page 41: Ordering Maintenance Products
If you have any di culties obtaining maintenance products for your machi- ne, please contact the Philips Saeco hotline in your country. You nd its contact details in the warranty booklet by-packed separately or on www.philips.com/support. - Page 44 The manufacturer reserves the right to make changes without prior notice. www.philips.com/saeco...