Advertisement
Quick Links
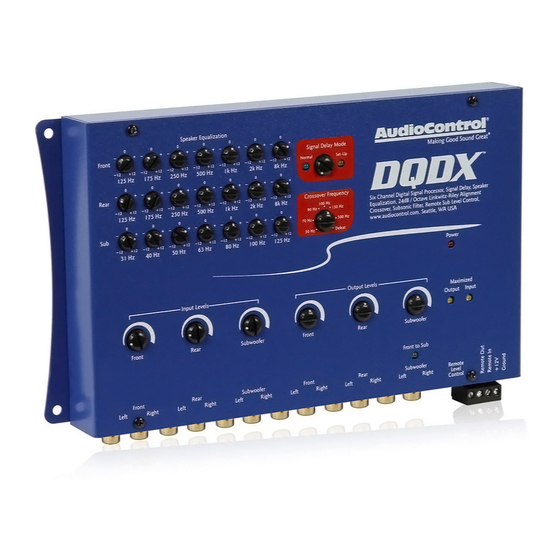
Six Channel Pre-amp Processor with Signal Delay, Equalization and
Selectable Electronic Crossover
Key Features of The DQDX
Here are some of the unique features of the AudioControl DQDX:
• User-friendly Signal Delay to control the acoustical alignment between the
left and right channels plus the front and subwoofer channels
• Individual equalization controls for the front, rear and subwoofer channels
for simple yet precise system tuning
• Fully adjustable 24dB/Octave Linkwitz-Riley electronic crossover
• PFM (Program Frequency Match) Subsonic Filter
• Six channels of RCA line level inputs
• ACR-3 Dash Control Remote allows for control of the subwoofer level
plus processing bypass
• Discrete Input and Output level controls with clipping indicators
• Remote turn on output provides a 12-volt trigger to turn on
your amplifier
• Built in Pink Noise for easy Signal Delay and Equalizer tuning
and system set-up
• Bulletproof 5 year warranty
(when installed by an authorized AudioControl dealer)
The DQDX is your gateway to amaz-
ing sound from any aftermarket audio
system. It is a compact, six channel,
high-performance signal processor with
independent multi-channel equaliza-
tion and signal delay to custom tune
the system plus a selectable electronic
crossover for precise system set-up.
Making Good Sound Great
®
In short; the DQDX can "Make
Good Sound Great"!
®
®
page 1
Advertisement

Related Manuals for Audio Control DQDX

Summary of Contents for Audio Control DQDX
- Page 1 Good Sound Great”! Key Features of The DQDX Here are some of the unique features of the AudioControl DQDX: • User-friendly Signal Delay to control the acoustical alignment between the left and right channels plus the front and subwoofer channels •...
-
Page 2: Quick Install Guide
Just connect these to the front and rear inputs on the DQDX and switch the “Sub to Front” jumper to the ON position. There is a more detailed of the jumpers located under the cover in the section titled “Under The Cover”... - Page 3 ACR-3 remote knob down for about four seconds. This will switch the outputs of the DQDX from music to Pink Noise. When you are done setting up the Equalizer you can just press and hold the remote again for 4 seconds and it will turn the Pink Noise output off.
- Page 4 RCA Line Level outputs, connect them to the three sets of corresponding inputs on your DQDX. If the source unit only has one output, the Front to Sub circuitry in your DQDX selectively routes the Front input channels to the subwoofer channels when you have the jumper in the appropriate position (see the next section on “Under The Cover”...
- Page 5 ➐ ➑ ➒ 3 Equalization Controls - To custom tune your system, the DQDX gives you dedicated equalization controls for the Front, Rear, and Subwoofer outputs. See the section on Equalization Optimization on page 10 for a more detailed description on how to set these adjustments for optimum performance.
- Page 6 4 seconds, the outputs of the DQDX will turn from music to Pink Noise. This will assist in the proper setting of the EQ and Delay. When the DQDX is in Normal mode, pressing the remote momentarily will defeat all processing on the DQDX (Equalizer and Signal Delay).
- Page 7 Under the Covers - Internal Jumpers You can optimize your DQDX using most of the controls mounted on the top of the chassis. However, we recognize there are situations where advanced users may have the need to configure the DQDX for specific applications.
- Page 8 Basic DQDX installation using 4 channel input and 6 channel output Typical DQDX installation Using a DQDX and The Epicenter from AudioControl to achieve maximum sound quality and bass page 8...
- Page 9 The following steps will guide you in delaying the appropriate speakers for just a few milliseconds, so the DQDX is able to allow the different signals to arrive at the same time putting the driver in perfect acoustical alignment.
- Page 10 Once you have everything where you want it you are done! Easy right? Now just go back to the Signal Delay knob on the cover of the DQDX and turn it counter clockwise back to Normal mode (the blue light will come on) and you are ready to move to the next step of set-up.
- Page 11 The key in this area is to have enough speak- ers and power to produce the amount of bass you desire but don’t use the controls on the DQDX to try and force your speakers to produce sounds they can’t. Too much bass boost creates a condition called “speakerus explodus”, which is not pretty to hear or watch.
- Page 12 Many autosound systems start a gradual decline in this area which is why speaker placement is very important. The DQDX only gives you a few controls in this area because too much boosting can really make a speaker sound un-natural.
- Page 13 If you are hearing music, go back to step #2… If you are hearing voices, please go see a doctor! 4 Starting with the DQDX input level controls, adjust the control knob clockwise until the Input Maximized LED just begins to flicker. Do not continue to turn past this point.
-
Page 14: Custom Installation
Front input signal to feed the Subwoofer outputs, when you do not have a Subwoofer input signal available. This allows your DQDX to accept front and rear inputs channels and give you Front, Rear, and Subwoofer output channels. Refer to the Under The Cover section to learn more on jumper selection. - Page 15 DQDX. With this diagram you can follow each input through the proces- sor. If you do have an issue with the hook-up of your DQDX and need to call for technical assistance, please have this diagram available so we can help you trace the problem and get your system up and running and sounding as awesome as we know it can.
-
Page 16: The Warranty
4 You cannot let anybody who isn’t: (A) the AudioControl factory; (B) somebody authorized in writing by AudioControl to service your DQDX. If anyone other than (A) or (B) messes with your DQDX, that voids your warranty. 5 The warranty is also void if the serial number is altered or removed, or if the DQDX has been used improperly. - Page 17 This is the only warranty given by AudioControl. This warranty gives you specific legal rights that vary from state to state. Promises of how well the DQDX will perform are not implied by this warranty. Other than what we have covered in this warranty, we have no obligation, express or implied.
- Page 18 Weight ....................3 lbs ©2014 AudioControl, Inc. All rights reserved AudioControl, Making Good Sound Great and DQDX are all trademarks of AudioControl Inc. This manual was conceived, designed, and written on a cold and windy day in the Pacific Northwest which is what the locals from Seattle call “spring.”...
Need help?
Do you have a question about the DQDX and is the answer not in the manual?
Questions and answers