
Related Manuals for Bauhn AMiD-972XS


Summary of Contents for Bauhn AMiD-972XS
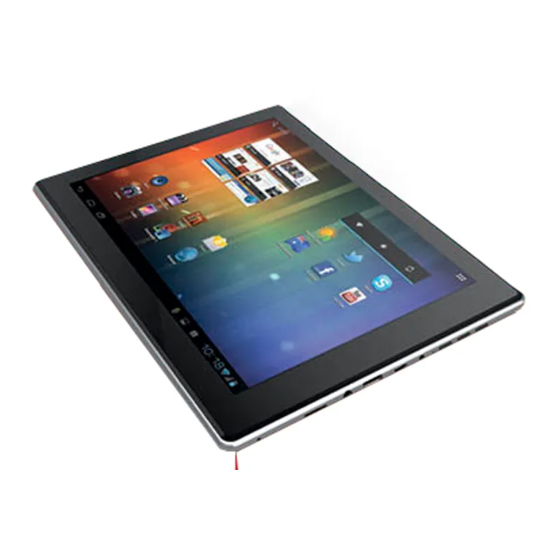
- Page 1 9.7” Android Tablet Computer with 16GB Internal Memory Model Number: AMiD-972XS INSTRUCTION MANUAL After Sales Support Telephone: 1300 886 649 Email: info@tempoaustralia.com.au...
-
Page 2: Table Of Contents
Contents Warranty Details Welcome General Safety Instructions Parts List Getting Started • Charging the tablet • MID status and notifications Operation • Buttons • Switch on/off the device • Turn on/off the screen • MID screen operation • Main screen • Applications and widgets • Add and manage desktop icons • Change wallpaper... - Page 3 Contents (Cont.) • Device • Personalisation • System • Camera • Downloaded files management • System updating • Special notice • Firmware reset Specifications Repair and Refurbished Goods or Parts Notice...
-
Page 4: Warranty Details
9.7” Android Tablet Computer with 16GB Internal Memory Warranty Details The product is guaranteed to be free from defects in workmanship and parts for a period of 12 months from the date of purchase. Defects that occur within this warranty period, under normal use and care, will be repaired, replaced or refunded at our discretion, solely at our option with no charge for parts and labour. -
Page 5: Welcome
Welcome ® Congratulations on choosing to buy a BAUHN product. By doing so you now have the assurance and peace of mind that comes with purchasing a product made by one of the leading manufacturers. All products brought to you by BAUHN ®... -
Page 6: General Safety Instructions
General Safety Instructions Read this manual thoroughly before first use and keep it in a safe place for future reference, along with the completed warranty card, purchase receipt and carton. The safety precautions enclosed herein reduce the risk of fire, electric shock and injury when correctly adhered to. - Page 7 General Safety Instructions (Cont.) • D isposal: When discarding this device, observe local regulations and dispose of it appropriately for recycling. Contact your local authorities for advice on facilities. Maintenance • K eep the device dry. Do not let the device, battery or charger come into contact with water vapor or operate it with wet hands.
-
Page 8: Parts List
Parts List After Sales Support Telephone: 1300 886 649 Email: info@tempoaustralia.com.au... - Page 9 Parts List (Cont.) Power button Volume up button Volume down button DC charger socket Mini USB port Mini HDMI output Headphone socket TF (SD card) slot Microphone 10 Front camera 11 Status light 12 Speaker 1 13 Rear camera 14 Speaker 2 After Sales Support Telephone: 1300 886 649...
-
Page 10: Getting Started
Getting Started Charging the tablet Before using your Android Tablet for the first time, you need to fully charge the battery. You can use the DC adaptor or a computer USB cable for charging. • While charging, with the tablet turned off, the status light is red. When fully charged, the status light will turn off. -
Page 11: Operation
Operation Buttons There are 3 buttons located on the side of the tablet that allow you to turn the tablet on/off and adjust the volume level. To use, gently press the desired button. You will feel a soft click. Switch on/off the device Power button • L ong press to turn on. -
Page 12: Mid Screen Operation
Operation (Cont) MID screen operation Click / Short When using the on-screen keyboard, opening an Press application or selecting items Long Press Press and hold for several seconds on an item (such as a text box or web page link) to display the action or submenu for an item, if available. - Page 13 Operation (Cont.) After unlocking the screen, you will see the last item you had open or the main screen, which has five windows or pages. You can view the pages by dragging your finger left and right across the screen. Every page has a 3D effect square frame.
- Page 14 Operation (Cont.) Icons Description From left to right: Current Time, Wi-Fi Signal Status, SIM Signal Status, Bluetooth Status, Battery Status (depends on current applications). Click to display a list of applications and widgets. Click to search for a file or application on the tablet, or to search the internet.
-
Page 15: Applications And Widgets
Operation (Cont.) Applications and widgets Enter applications Click to enter the list of all applications and widgets. Click on the APPS tab in the top left corner. • T his window will display a list of the applications you have installed. • A s you install more applications, the first page will fill up and the application icons will automatically spread onto other pages. - Page 16 Operation (Cont.) Enter widgets Click to enter the list of all applications and widgets. Click on the WIDGETS tab in top left corner. Widgets are icons created by some applications to allow quick access to various features or to display information without the need to open the associated application.
-
Page 17: Add And Manage Desktop Icons
Operation (Cont.) Add and manage desktop icons Add desktop icons At the application list or widget list, long press any application or widget and the device will shift into desktop, then drag them to any place on the desktop. Desktop shortcuts management To create a folder on the main screens, just drag and overlay any icon onto another icon, then release. - Page 18 Operation (Cont.) Then you can view the folder contents by clicking on the folder icon and it will display as pictured below. You can change the icon positions inside the folder by long pressing them, then dragging to the new position. If you want to remove an icon from the folder, long press the icon and drag to outside the folder.
-
Page 19: Change Wallpaper
Operation (Cont.) Delete desktop shortcuts Long press any icon on the desktop and this icon will pop up. To delete the icon, drag the icon onto the top of and let go when it is a red colour. This also works for deleting folders and widgets. Change wallpaper Press and hold any blank area on the screen and the below menu will appear. -
Page 20: Connect With Computer
Operation (Cont.) Gallery Choose from the pictures your in your MID camera gallery or any pictures downloaded in the device. Dynamic pictures Choose a dynamic picture. Wallpaper Choose from the default wallpapers. Connect with computer Connect the device with a computer using a USB cable. When connected with a computer, the screen will show as below. -
Page 21: Applications
Applications Browser Click to open the browser. When you click in the address bar, the device will automatically pop up the keyboard. After Sales Support Telephone: 1300 886 649 Email: info@tempoaustralia.com.au... - Page 22 Applications (Cont.) Click to open a new browser window. Click to close the current browser window. Click at the top right corner to show the browser menu. When the internet signal is poor and the web page does not load, click “Refresh”...
-
Page 23: Screen Compatibility
Applications (Cont.) Screen compatibility When the device is installed with programs designed for small screen and cannot show in full screen, a screen zoom menu will pop up. You must confirm it to open those programs. Background applications Click the “background applications” (recent applications) on-screen button to show all programs running in the background. -
Page 24: Gmail
Applications (Cont.) Gmail You can use the device to access your emails stored in your Gmail account. Click to start the Gmail application. You will be asked to login with your Gmail account details or create a Gmail account if you do not have one. Read mail Touch any mail to read it;... -
Page 25: Get And Install Applications
Applications (Cont.) Get and install applications There are two ways to get applications software: download through this device or copy from a computer. Option 1: Download using a ‘Market’ or ‘Store’ application Download applications software using applications such as Google’s “Play Store”. Below are photos showing the process of downloading “Angry birds” from “Play Store”. -
Page 26: Uninstall Applications
Applications (Cont.) Uninstall applications • O pen the applications window and click , then click on “Apps” from the menu on the left. • I n the window on the right-hand side, use the tabs at the top and scroll up and down through the list of applications until you find the application you wish to uninstall. -
Page 27: Settings
Settings The setting function on the Android MID is like that on a mobile phone or computer control panel. You can access the settings page by clicking the notification bar or “setting” icon in the applications list. Wireless connection • C lick “Wi-Fi” to open the Wi-Fi function. • T o the right of the label “Wi-Fi”... - Page 28 Settings (Cont.) Connecting Wi-Fi When the Wi-Fi network is not encoded, it will connect with the device automatically. For information security reasons, be careful using unprotected Wi-Fi sources. When you click on an encoded Wi-Fi, a window will pop up to input a password.
- Page 29 Settings (Cont.) Bluetooth Enable or disable bluetooth 1. Click “Settings” at the main menu or applications list. 2. In the “Wireless & networks” menu, click “Bluetooth”. 3. Click the On/Off button in the menu on the left to turn Bluetooth on or off. Change Bluetooth device name By default, the Bluetooth device will have a name.
-
Page 30: Usb & Micro Sd Card (Tf Card)
Settings (Cont.) Connect with keyboard, mouse or other devices You can connect the device with a keyboard, mouse or other parts through USB cable or Bluetooth, then use them like a traditional computer. If you want to use many USB devices, you will need to use a powered USB hub to provide power to the devices. -
Page 31: Hdmi Output
Settings (Cont.) HDMI output You can display the screen contents of your MID on a TV using the mini HDMI output connection. 1. Using a ‘Mini HDMI to HDMI’ cable, attach the MID to the HDMI socket of your TV. 2. Turn on your TV and select the HDMI input. 3. -
Page 32: Device
Settings (Cont.) Device Sound Set all sound options here. Click on “Volumes” to change the volume levels for multimedia players and applications, and also for notifications and alarms. After Sales Support Telephone: 1300 886 649 Email: info@tempoaustralia.com.au... - Page 33 Settings (Cont.) Display Brightness, wallpaper, auto-rotate, font size. Storage Internal storage: space for installation of applications (APK software) Internal SD card: space for file storage External SD card: storage space on the removable SD card (if inserted) After Sales Support Telephone: 1300 886 649 Email:...
-
Page 34: Personalisation
Settings (Cont.) Battery Show battery balance and consumption. Applications Here you can manage applications, such as uninstall them or clear application data. Personalisation After Sales Support Telephone: 1300 886 649 Email: info@tempoaustralia.com.au... - Page 35 Settings (Cont.) Accounts and sync This allows you to add an account to the tablet and enable or disable the synchronisation settings for each, such as mail service. You can also remove accounts by clicking on them, then click on the menu button in the top right and select ‘Remove account’.
- Page 36 Settings (Cont.) Language and input In this area you can change the system language and change settings for the keyboard. Keyboard Some applications can open the keyboard automatically; others require you to click in an input field/area first. You can hide the keyboard by pressing the down arrow that appears where normally the on-screen back button would be.
- Page 37 Settings (Cont.) Text selection - Copy, Share, Find • P ress and hold on one of the words you wish to select. The word will highlight in blue and a blue tab will appear at both ends. • P ress and drag the blue tabs to highlight the text you wish to select. • C hoose the task you wish to perform from the menu that appears at the top of the screen.
-
Page 38: System
Settings (Cont.) Backup and reset Reset to factory settings: When some applications or the device itself cannot work properly, you can use this function to return the tablet to factory default settings. But you will lose all user installed applications and data. It is therefore important that you back up important data first. -
Page 39: Camera
Settings (Cont.) Development NOTE: T his section contains settings for advanced Android users only, such as Application Developers. By default all settings in this area are set to “Off”. About tablet Displays some information about the device. CPU Mode Setting Allows you to change the device’s performance speed. You can select from Power Saving, Normal and Performance. The default option is Normal. Selecting Performance will reduce the operation time of the device when on battery. -
Page 40: Downloaded Files Management
5. Gently press down at the same time (and continue to hold) both the Power button and the Volume down ( - ) button. 6. After a few moments you may see the BAUHN logo, continue holding the buttons. After several seconds the unit will display a green Android Robot. -
Page 41: Special Notice
3. Gently press down at the same time (and continue to hold) both the Power button and the Volume down ( - ) button. 4. After a few moments you may see the BAUHN logo, continue holding the buttons. After several seconds the unit will display a menu in blue text. -
Page 42: Specifications
Specifications Processor & Memory Processor Amlogic Cortex A9 8726-MX Dual Core 1.5GHZ CPU RAM Size RAM Type DDR3 RAM Layout 4 x 256MB System feature NAND Flash On Board 16GB Display Size IPS 9.7" 4:3 Display Resolution 1024x768 Touch Panel Capacitive 5 Point Multitouch 1 x Mini USB 2.0 1 x Micro SD Card Socket (TF Card Socket) I/O Ports 1 x Mini HDMI socket 1 x 3.5mm Headphone socket... - Page 43 Specifications (Cont.) Video Formats H.264, MKV, WMV/VC-1, MPG, MPEG, DAT, AVI, MOV, MPEG-4, RM. JPG, MPEG-2MP, MPEG-1MP Audio Formats RM, WMA, AAC, MP3, OGG, FLAC Adobe Flash Flash 11.0 Size / Weight / OS Weight 0.6kg Power AC 100-240V, 50-60Hz; DC 5V/2A adaptor Battery Li+ 3.7V 5000mAh Operation Time Wi-Fi >...
-
Page 44: Repair And Refurbished Goods Or Parts Notice
9.7” Android Tablet Computer with 16GB Internal Memory Repair and Refurbished Goods or Parts Notice Unfortunately, from time to time, faulty products are manufactured which need to be returned to the supplier for repair. Please be aware that if your product is capable of retaining user-generated data (such as files stored on a computer hard drive, telephone numbers stored on a mobile telephone, songs stored on a portable media player, games saved on a games console or files stored on a USB memory stick) during the process of...
Need help?
Do you have a question about the AMiD-972XS and is the answer not in the manual?
Questions and answers