Table of Contents
Advertisement
Advertisement
Table of Contents

Related Manuals for Small HD DP4

Summary of Contents for Small HD DP4
-
Page 2: Table Of Contents
Battery Plates: ..................9 Powering with AC/DC Power: ............. 11 The DP4-EVF: ................... 12 Overview ..................... 12 Attaching the VF to the DP4 ..............13 Detaching the VF from the DP4: ............14 Using the DP4-EVF ................15 Using the DP4 ..................16 Operating the Menus ................ - Page 3 False Color ..................22 1:1 Mapping ..................23 Input Menu ..................24 Changing inputs: ................24 System Menu ..................25 Misc Menu ..................26 PIP Menu ..................... 26 Accessories ....................27 Attaching the Acrylic Screen Protector ..........27 Attaching the Sunhood ............... 28 Updating Firmware .................
-
Page 4: Product Introduction
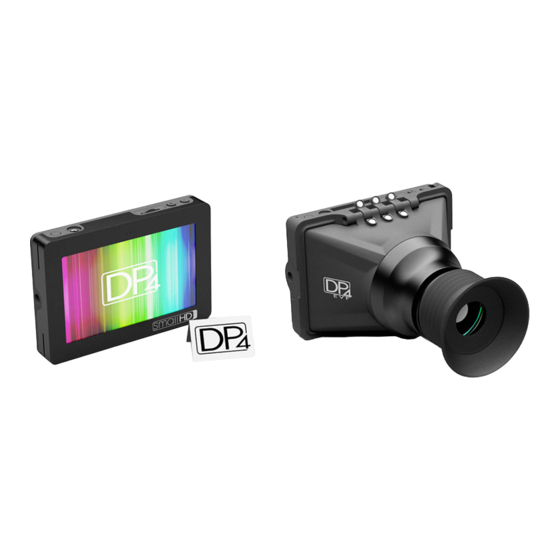
DP4 Monitor An optical loupe accessory designed to attach to the DP4 Field Monitor. This flip-up eyepiece adds the functionality of an EVF to the DP4, but does not remove its functionality as a monitor. The DP4-EVF Monitor/Viewfinder Combo The Resulting combination the “DP4”... -
Page 5: Caring For Your Dp4 Monitor
* The DP4’s max input voltage is 18vDC. Over powering can result in damage to your DP4. SmallHD is not liable for any damage due to overpowering the unit. * Not all power sources are created equal. Using off-brand (non- Canon) LP-E6 batteries can result in undesired performance and longevity issues. -
Page 6: Caring For Your Dp4-Evf Viewfinder
Caring for your DP4-EVF Viewfinder * Heed all instructions listed above regarding the DP4 Monitor * Do not expose the entrance of the EVF lens to direct sunlight. Doing so can magnify the sun and cause damage to the screen. -
Page 7: What Should Be In The Box
What should be in the box: DP4 Monitor: 1. DP4 Field Monitor 2. Sunhood 3. Mini-HDMI Cable (1.5ft) 4. YPbPr Breakout Cable (4ft) 5. Hotshoe Ball Mount 6. US Power Supply 7. Acrylic Screen Protector 8. SmallHD Cleaning Cloth VF Only: 1. -
Page 8: Dp4 Diagram
DP4 Diagram / Composite Out P a g e... -
Page 9: Powering The Dp4
* AC/DC Power, using the Barrel Power input on the back of the unit. The Power Switch The DP4 has a dual position power switch that distinguishes between using battery power, or the rear DC barrel power input. The switch has a depressed state (down) and a raised state (up). -
Page 10: Battery Plates
The recommended method is to insert a small flat-head screwdriver into the corner slot where the battery plate meets the metal body, then pull towards the rear of the DP4, lifting the corner of the plastic plate away from the metal DP4 housing. - Page 11 Replacing Battery Plates: Replacing battery plates is as simple as aligning the plate to the back of the DP4 and pressing in on the 4 corners. You should hear 4 audible “click” noises to confirm that it is completely attached.
-
Page 12: Powering With Ac/Dc Power
Powering with AC/DC Power: The DP4 has a barrel power input for powering from a wall using the included power supply, or from other sources such as Anton Bauer batteries. The specifications of this plug are below: **ALWAYS CHECK POLARITY BEFORE USING ANY POWER SOURCE THAT ISN’T THE INCLUDED POWER SUPPLY. -
Page 13: The Dp4-Evf
The DP4-EVF: The DP4-EVF as a unit combines the DP4 Monitor (aka "DP4") and the DP4 Viewfinder Loupe Accessory (aka "VF"), which simply fixes to the front of the DP4 without the need for screws or adhesive. Overview 12 |... -
Page 14: Attaching The Vf To The Dp4
Attaching the VF to the DP4 * Hold the VF with one hand and with the other, put one side of the DP4 in place, and then firmly press down on the other side to snap the VF in place. -
Page 15: Detaching The Vf From The Dp4
Detaching the VF from the DP4: Using your thumb, pull one of the side tabs of the VF back, then release the DP4 from that side—the other side will come out on its own once the first side is free. -
Page 16: Using The Dp4-Evf
Using the DP4-EVF * The DP4-EVF incorporates magnets and a hinge to operate in two modes, closed and open. This makes it easy to quickly go from shooting mode to review mode, since you will not have to fiddle with latches or screws. -
Page 17: Using The Dp4
Using the DP4 Operating the Menus 1 – Navigation Scroll Wheel * Click to activate Main Menu * Click to select items in menu * Scroll right and left to adjust values *(From no menu) Scroll any direction to access Preset menu 2 –... -
Page 18: The Preset Menu
4 – Press the back button (button A) to exit the preset menu NOTE: The DP4 (version 1.0 of firmware) comes with the default brightness set to 5. This is because the DP4 is very bright, and using the DP4 in EVF mode with the brightness at 10 can cause discomfort. -
Page 19: Dslr Scale Presets
The DSLR Scale presets are factory defined presets that enable the input signal from a variety of DSLR cameras to fill the screen of the DP4. Most monitors are unable to achieve this function. Special logic is in play when these presets are activated that keeps... -
Page 20: Assigning Function Buttons
Assigning Function Buttons The DP4 has two buttons that can be assigned to custom functions for a convenient one press on/off of your favorite features. While not in any menus: 1 – Press and hold either of the two buttons (A or B) for 3 seconds and release 2 –... -
Page 21: Image Menu
Image Menu The image menu controls Brightness, Contrast, Hue, Saturation, Sharpness and Gamma. Below is a description of each. Function Range Description Controls the maximum Brightness 0-100 black point of the signal. Controls the maximum Contrast 0-100 white point of the signal. Also known as Tint or 0-100 Phase. -
Page 22: Advanced Menu
Advanced Menu The Advanced menu provides access to the many software tools of the DP4 to, among other things, aid in focus and exposure. Some of the functions are explained in greater detail in later pages, marked by the asterisk (*). -
Page 23: False Color
IRE levels are. This is a quick way to gauge the exposure levels within an image in a very clear way. The DP4 currently has two different types of False Color. False Color HML (High / Mid / Low) Meaning High, Medium, Low, has colors for over-exposed, under- exposed and mid-range. -
Page 24: 1:1 Mapping
This is also called “Pixel to Pixel”. When viewing HD signals (720p and up), only a portion of the image will be displayed on the DP4 as 1:1 Mapping essentially performs a "zooming" effect on the native HD image. -
Page 25: Input Menu
Input Menu The DP4 has 3 inputs to choose from: 1 – HDMI 2 – YPbPr (SD/HD Component) 3 – Composite (SD Only) Changing inputs: 1 – Navigate to the “Input” sub menu with the scroll wheel 2 – Scroll to the desired input 3 –... -
Page 26: System Menu
On, Off either from batteries or line power. Toggles power to the USB Power Off, 5V USB port, on or off. Reverts the DP4 back Factory Reset to factory defaults Disables green input Display On, Off indicator text on top... -
Page 27: Misc Menu
PIP Menu The DP4 allows two signals (1 HD and 1 SD) to be displayed simultaneously using the PIP or POP function, located in this menu. -
Page 28: Accessories
With the screen protector in place, the DP4 is much less vulnerable to damage. The screen protector is fixed to front of the DP4 using a temporary adhesive. To apply: 1 – Remove the 2 protective stickers from the front and back of... -
Page 29: Attaching The Sunhood
Attaching the Sunhood The DP4 Sunhood uses Velcro to fix to the front of the DP4. It works by looping through the two slots on the sides of the battery plate, and then reattaching to itself. Start by feeding one side of the Velcro strap into the slot, and then pulling it tight so the edge of the sunhood is flat against the surface of the front of the DP4. -
Page 30: Updating Firmware
4 – Insert the thumb drive into the included adapter cable and plug the mini-usb cable into the mini-usb port of the DP4 5 – Hold down the scroll wheel and then turn the DP4 on. 6 – On screen instructions will inform when the process is complete. -
Page 31: Specifications
Specifications Size 4.3 inch (diagonal) Viewing Area 3.69” x 2.21” (93.7mm x 56.2mm) Resolution 800x480 (RGB Pixels) Native Aspect Ratio 15:9 Color 16.7 Million Colors (8 bit) Brightness 350 Nits (cd/m2) Contrast Ratio 800:1 Viewing Angle 160/160 Horizontal/Vertical Signal INPUTS Signal OUTPUTS HDMI (Type A) HDMI (Type A) Loop through... -
Page 32: Warranty
Warranty The DP4 comes with a one year limited hardware warranty. The limited hardware warranty covers defects in materials and workmanship of our products. Warranty specifics: Warranty period begins on date of shipment Warranty is non-transferable; products not purchased directly from SmallHD or SmallHD approved affiliates and distributors do not qualify for warranty coverage. -
Page 33: Thank You
Thank You! Most importantly, we value your patronage. If you have any questions about general or extreme use, or want access to the latest documentation, videos, firmware and general information, please visit www.smallhd.com. 32 | P a g e... - Page 34 33 | P a g e...
Need help?
Do you have a question about the DP4 and is the answer not in the manual?
Questions and answers