Advertisement
Quick Links
Advertisement

Summary of Contents for x-erfit 580
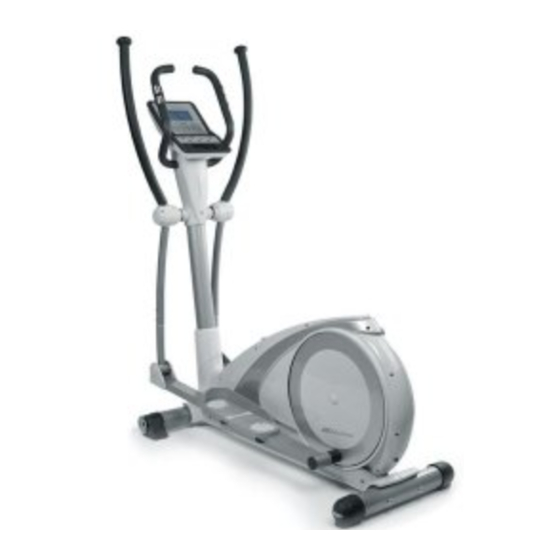
- Page 1 USER’S MANUAL Exerfit 580 USER’S MANUAL BUILT FOR HEALTH...
-
Page 2: Safety Instructions
SAFETY INSTRUCTIONS • To ensure the best safety of the exerciser, regularly • Please note that levers amd other adjustment check it on damages and worn parts. mechanisms are not projecting into the area of movement during the work-out. • If you pass on this exerciser to another person or if •... - Page 3 • Assemble the exerciser as per assembly instructions and be sure to only use the strucutral parts provided with the exerciser and designed for it. Prior to the assembly, make sure the contents of the delivery is complete by referring to the parts list of the assembly and operating instructions.
-
Page 4: Exploded Drawing
EXPLODED DRAWING 7 18 47 84 23 85 86 87 48 56 84 47 16 70 62 79... -
Page 5: Part List
Part List part no. description specification q'ty Main frame Front stabilizer D76x1.5Tx480L Allen bolt M8*90L M8x1.25x90L Rear foot cap D76*86 Front foot cap (left) D76*120L Front foot cap (right) D76*120L Curved washer D22*D8.5*1.5T D22xD8.5x1.5T Spring washer D15.4*D8.2*2T D15.4xD8.2x2T Buffer D9*D5.8*13 Allen bolt M8*20L M8x1.25x20L Front post... - Page 6 Mushroom cap D1 1/4"*45L Extension spring D3*D19*67L tension cable D1.5x800L Blot M6*15L M6*1.0*15L Blot M8*35L M8*1.25*35L Flat washer D21*D8.5*1.5T Crank axle D20*116L Magnet Cross screw ST3.5*1.27*15L Computer SM-2690-76,CLASS A handpulse WP1007-12B(D22.2) Pulse cable 600L flat washer D25xD8.5x2T rear computer cage 340*150*50 front computer cage 380*150*50...
-
Page 7: Checklist (Contents Of Package)
CHECKLIST (CONTENTS OF PACKAGE) & 67 & 68... - Page 8 STEP 1 (x4) M8*1.25*90L D15.4*D8.2*2T D22*D8.5*1.5T Step-1 1) Assemble the front stabilizer (2) and rear stabilizer (19) onto the main frame (1) by using the square neck bolt (3), the curved washer (6) and the spring washer (7). 2) Adjust the proper height by turning the wheel of rear foot cap (4).
- Page 9 STEP 2 (x4) M6*1*45L D14*D6.5*0.8T D40*M6*12 Step-2 1) Assemble the left and right pedal (21L&21R) on the pedal supporting tube (11) by using the screw (20),flat washer (73) and knob (77). 2) 3 optional positions for the pedals...
- Page 10 STEP 3 (x8) M8*1.25*20L D15.4*D8.2*2T D22*D8.5*1.5T Step-3 1) Suggest assembling this step by two persons. 2) First, lift up the cover for handlebar post (49) like fig. (a), then connect computer cable (29 & 30) like fig.(b) 3) Insert the handlebar post (10) on the main frame and tighten it like fig. (c) by using the curved washer (6), the spring washer (7) and the Allen bolt (9).
- Page 11 STEP 4 (x4) M5*10L Step-4 1) Connect the computer cable (29) with the computer (64), then fix the computer (64) on the handlebar post (10) by using the screws(76).
- Page 12 STEP 5 (x2) M8*1.25*100L D22*D8.5*1.5T D22*D8.5*1.5T D15.4*D8.2*2T M8*1.25*8T Step-5 1) Assemble the left and right fixed handlebar (72L &72R) on the handlebar post (10) by using the Allen bolt (17), the curved washer (6), the spring washer (7) and the domed nut (18).
- Page 13 Step 6 Step-6 1) Fix the front computer cage (68) & rear computer cage (67) on the front post (10) using screws (90&91).
- Page 14 SM2690-67 Instruction Manual BUTTON FUNCTIONS︰ To increase the function value. DOWN To decrease the function value. MODE To confirm the setting value. RESET To clear the setting value and reverse to exercise selection main menu. START/STOP To start or stop training RECOVERY To test hear rate recovery status.
- Page 15 drawing 3 3. Manual is glittering in the sleep mode, (drawing 3),you may press UP and DOWN to select training mode MANUAL / PROGRAM / USER PROGRAM / H.R.C. / WATT (drawing 4~7) and press MODE for confirmation. The monitor will enter MANUAL mode for training without selection. drawing 4 drawing 5 drawing 6...
- Page 16 preset level is 1. (drawing 11)。 darwing 10 drawing 11 5-2 After load level selected, you may preset function values for TIME, DISTANCE, CALORIES, and PULSE by pressing UP/DOWN button and press MODE for confirmation. (drawing 12~15) 5-3 Pressing START button to start training. drawing 12 drawing 13 drawing 14...
- Page 17 Note : 1. Stop training or no signal over 4 minutes, the screen will off and enter into power saving mode. 2. When computer displays abnormally, please plug-out the adapter and plug-in again. 3. MP3 compatible, user may plug in MP3 player to MP3 plug jack.
- Page 18 IMPORTANT INFORMATION REGARDING SERVICE In you have any problems, please contact Mylna Service. Our consultants have extensive experience and will help you with questions about products, installation, ordering spare parts or any errors and omissions. We would like you to contact us before contacting the store so we can offer you the best help. Please visit our website www.xerfit.fi - here you will find information about the products and user manuals in Finnish and English.

Need help?
Do you have a question about the 580 and is the answer not in the manual?
Questions and answers
I can not find the charger. Can I buy a new one somewhere and which one do I need?
jaki zasilacz do orbiterka