Panasonic CQ-C7403U Operating Instructions Manual
Wma mp3 cd player/receiver
Hide thumbs
Also See for CQ-C7403U:
- Operating instructions manual (114 pages) ,
- Service manual (68 pages)
Table of Contents
Advertisement
Quick Links
¡Please read these instructions (including "Limited Warranty" and "Customer Services Directory") carefully before using this product
and keep this manual for future reference.
¡Prière de lire attentivement ces instructions (y compris la "Garantie limitée" et le "Répertoire des services à la clientèle") avant
d'utiliser ce produit et conserver ce mode d'emploi pour s'y référer ultérieurement.
¡Lea con atención estas instrucciones antes de utilizar el producto y guarde este manual para poderlo consultar en el futuro.
CQ-C7403U/C7303U
Model:
(CQ-C7403U)
TEXT
WMA MP3 CD Player/Receiver
Récepteur/lecteur CD avec lecture WMA/MP3
Reproductor de CD, WMA y MP3/receptor
C7203U/C7103U
Operating Instructions
Operating Instructions
Manuel d'instructions
Manuel d'instructions
Manual de Instrucciones
Manual de Instrucciones
®
(CQ-C7403U/
C7303U)
Advertisement
Chapters
Table of Contents

Related Manuals for Panasonic CQ-C7403U


Summary of Contents for Panasonic CQ-C7403U
- Page 1 ® WMA MP3 CD Player/Receiver Récepteur/lecteur CD avec lecture WMA/MP3 Reproductor de CD, WMA y MP3/receptor CQ-C7403U/C7303U Model: C7203U/C7103U (CQ-C7403U) Operating Instructions Operating Instructions Manuel d’instructions Manuel d’instructions Manual de Instrucciones Manual de Instrucciones TEXT (CQ-C7403U/ C7303U) ¡Please read these instructions (including “Limited Warranty” and “Customer Services Directory”) carefully before using this product and keep this manual for future reference.
-
Page 2: Safety Information
They contain instructions about how to use the sys- from improper connections and operations. The meanings of tem in a safe and effective manner. Panasonic assumes no the pictographs are explained below. It is important that you responsibility for any problems resulting from failure to fully understand the meanings of the pictographs in order to observe the instructions given in this manual. - Page 3 For maximum safety, have it installed by your dealer. If any part of your body or clothing comes into contact with Panasonic is not liable for any problems resulting from your battery liquid, wash it with plenty of water. ●...
-
Page 4: Before Reading These Instructions
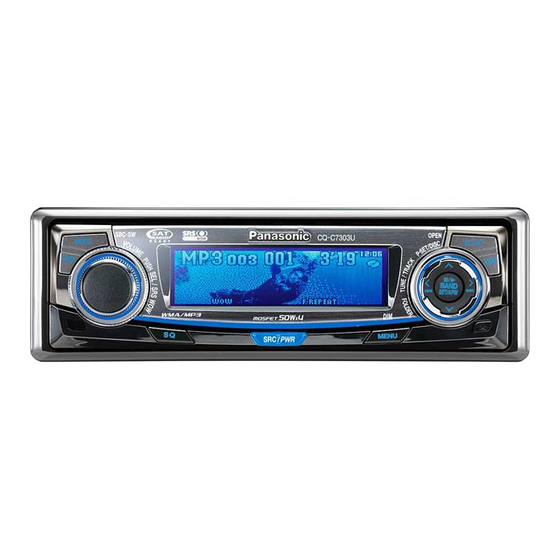
This operating instruction manual is for 4 models CQ-C7403U, CQ-C7303U, CQ-C7203U and CQ-C7103U. The difference among these models’ are mentioned below. All screens and main body illustrations in this book represent CQ-C7403U unless otherwise specified. Models CQ-C7403U... - Page 5 SCAN REPEAT TUNE TUNE DISP DISP NUMBER CAR AUDIO Remote Control Unit Power Connector Mounting Collar Trim Plate (including a battery) CQ-C7403U/C7303U: (CR2025) (YEFC05654) (EUR7641010) (YGAJ021009) (YEFX0217222) CQ-C7203U/C7103U: (YEFC051010) Q'ty: 1 Q'ty: 1 Q'ty: 1 Q'ty: 1 Lock Cancel Plate...
- Page 6 833-8855 Accessory Purchases: Link : “Servicentres locator” under “Customer sup- Purchase Parts, Accessories and Instruction Books port” online for all Panasonic Products by visiting our Web Site at: http://www.pasc.panasonic.com Panasonic Factory Service: or, send your request by E-mail to: Vancouver Toronto npcparts@panasonic.com...
- Page 7 This warranty only applies to products purchased and serv- iced in the United States or Puerto Rico. This warranty is extended Panasonic Canada Inc. warrants this product to be free from defects only to the original purchaser of a new product which was not sold “as is”.
-
Page 8: Features
31) ¡ DVD Changer * This software is downloadable from Panasonic Web site The optional adapter (Conversion Cable for DVD/CD (http://panasonic.co.jp/pas/en/software/customize/index.html) Changer: CA-CC30U) allows you to connect the option- al Panasonic DVD changer unit (CX-DH801U). -
Page 9: Table Of Contents
Sound Control ¡ Radio ¡ CD Player ¡ MP3/WMA Player ¡ Audio Setting ¡ Function Setting (Security Setting etc.) ¡ Display Setting ¡ Customize the Display ¡ Troubleshooting ¡ Error Display Messages ¡ Notes on Discs ¡ Maintenance ¡ Specifications CQ-C7403U/C7303U/C7203U/C7103U... -
Page 12: Preparation (Clock Adjustment Etc.)
Stick your thumbnail into the groove, and push the Note: Battery Information: holder in the direction of Battery Type: Panasonic lithium battery (CR2025) the arrow, and at the (Included in the remote control) same time. Battery Life: Approximately 6 months under normal use... - Page 13 : Backward Press [ ] to select “CLOCK ADJ”. Press [BAND] (SET) to confirm the Press [BAND] (SET) to confirm the adjustment. display. Press [MENU]. For using the remote control, hold down [SEL] (MENU) for 2 sec. or more. CQ-C7403U/C7303U/C7203U/C7103U...
-
Page 26: Mp3/Wma Player
( Caution: Never assign the “.mp3”, or “.wma” file name extension to a file that is not in the MP3/WMA format. This may not only pro- duce noise from the speaker damage, but also damage your hearing. CQ-C7403U/C7303U/C7203U/C7103U... -
Page 27: Folder Selection Order/File Playback Order
¡ “ROOT” appears when displaying the root folder personally. name. No warranty Above description complies with our investigations as of December 2005. It has no warranty for reproducibility and displayability of MP3/WMA. CQ-C7403U/C7303U/C7203U/C7103U... -
Page 32: Customize The Display
In such further information. a case, try customizing again. ¡ The default image exists on the Panasonic Web site. If Panasonic Web site: you would like to restore it, download the image from (http://www.panasonic.co.jp/global/) the site. -
Page 33: Troubleshooting
If the described suggestions do not solve the problem, it is ¡ Do not use the unit in an irregular condition, for recommended to take the unit to your nearest authorized Panasonic example, without sound, or with smoke or a foul Servicenter. - Page 34 The power fails The safety device works. unintentionally. Consult your dealer, or your nearest Panasonic Servicenter. Antenna installation or wiring of antenna cable is faulty. Check whether the antenna mounting position and its wiring are correct. In addition, check to see whether the antenna ground is securely connected to Poor reception or the chassis.
- Page 35 There is a flaw or foreign material on the disc. Remove the foreign material, or use a flawless disc. For MP3/WMA, refer to Sound skipping or the description about MP3/WMA. noise Playing VBR (Variable Bit Rate) files may cause sound skipping. Play Non-VBR files. CQ-C7403U/C7303U/C7203U/C7103U...
- Page 36 The sensor is exposed to direct sunlight. (The remote control unit may not be operable when the sensor is exposed to direct sunlight. In such a case, the system is not faulty.) aBlock off sunlight to the sensor. CQ-C7403U/C7303U/C7203U/C7103U...
-
Page 37: Error Display Messages
Create a new disc if necessary. A WMA file can be copyrighted. (After 5 seconds) The file protected by copyright is not playable. To next file automatically No disc. System Upgrade Guidebook Note: Refer to the for error messages regarding optional products. CQ-C7403U/C7303U/C7203U/C7103U... -
Page 38: Notes On Discs
Your product is designed and manufactured to ensure the minimum of maintenance. Use a soft cloth for routine exterior cleaning. Never use benzine, thinner, or other solvents. If the fuse blows out, consult your dealer, or your nearest authorized Panasonic Servicenter. Warning ¡... -
Page 39: Specifications
Bass; ±12 dB at 60 Hz, Treble; ±12 dB at 16 kHz Equalizer Center Frequency 60, 160, 400, 1 k, 3 k, 6 k, 16 k Hz (CQ-C7403U/C7303U), Band 1 (60, 80, 100, 200 Hz), Band 2 (500, 1k, 2k, 3k Hz), Band 3 (10k, 12k, 15k, 18k Hz) - Page 40 Panasonic Consumer Panasonic Sales Company, Panasonic Canada Inc. Electronics Company, Division of Panasonic Puerto 5770 Ambler Drive, Division of Panasonic Rico, Inc. (“PSC”) Mississauga, Ontario Corporation of North America Ave. 65 de Infanteria, Km. 9.5 L4W 2T3 One Panasonic Way, Secaucus, San Gabriel Industrial Park, http://www.panasonic.ca...
- Page 69 Software Operation Manual IMAGE STUDIO Ver.3.0.0 Please read these instructions carefully before using this product and save this manual for future use. This version of IMAGE STUDIO is available in English only.
- Page 70 Copyright Law of Japan and other countries and related international conventions. (2) Grant of License Panasonic Co., Ltd. grants to you a non-exclusive right to use the Software within the scope of your private use for the purpose of processing your original digital image data so that it may be displayed on your car audio unit.
- Page 71 (8) Termination of the Agreement Should the user breach any provision of the present Agreement, it shall be terminated automatically without giving any notice to him/her. Should the present Agreement be so terminated, he/she should immediately destroy the Software concerned. (9) Observation of Laws and Ordinances The user should observe the export control and related laws and other applicable laws and ordinances of the country in which the user uses the Software.
- Page 72 Table of Contents Introduction ......................5 What is IMAGE STUDIO? ....................... 5 Operation Flow ........................5 Differences among the software programs for each car audio unit ............. 7 Operating Environment......................7 Supported File Formats ......................7 Format for Writing to CD-R/RW Discs..................8 The Number of Frames to Be Created..................
-
Page 73: Introduction
This is an application to process images (still and moving images) recorded by digital cameras, video cameras etc., so that they can be used as background screens, opening screens and ending screens for Panasonic car audio units. Supported car audio units:... - Page 74 You can also download (free-of-charge) provided image data from the Panasonic web site. The provided image data cannot be processed with IMAGE STUDIO. Panasonic owns the copyrights for this application and the provided image data. Copying and commercial use of these without permission are forbidden by law.
-
Page 75: Differences Among The Software Programs For Each Car Audio Unit
172 x 54 pixels CQ-C8303U CQ-C9901U/N/W 512 Colors 256 x 64 pixels CQ-C9801U/W, CQ-C9701U/N 4-tone 256 x 80 dots CQ-C7703N/W, CQ-C7413U, CQ-C7403U, CQ-C7303U/N/W, CQ-CB8901U, CQ-C8401U/W, 4-tone 160 x 54 dots CQ-C8301U/N, CQ-C8351N, CQ-C7401U/W, CQ-C7301U/N/D CQ-C9800U/N/W, CQ-C9700U/N/W, 4-tone 256 x 80 dots... -
Page 76: Format For Writing To Cd-R/Rw Discs
Format for Writing to CD-R/RW Discs Do not write data on a CD-R/RW disc if, by so doing, the maximum allowed number of files listed below will be exceeded. If files are written on a CD-R/RW disc in a number which exceeds the maximum number of files allowed as given in the table below, it will not be possible to use the excess files. -
Page 77: Assigning File Extensions
Windows XP operating system is used as an example in these instructions. If another operating system is used i.e. Windows Me or Windows 2000, some of the displays and procedures will be different. Assigning file extensions For Windows XP (The display is different in Windows Me or Windows 2000.) Click [start]. -
Page 78: Installing Image Studio
When the previous version of IMAGE STUDIO has been installed on your PC, remove it before installation of IMAGE STUDIO version 3.0.0. (page 12) Visit the IMAGE STUDIO download site on the Panasonic web site. http://panasonic.co.jp/pas/en/software/customize/index.html Follow the instructions on the site to download IMAGE STUDIO. - Page 79 Click to select an install type and click [Next]. As for the install type, please refer to page 7. Click [Next]. If you click [Change], you can select the directory in which the program is to be installed. Click [Install].
-
Page 80: Uninstalling Image Studio
Uninstalling IMAGE STUDIO For Windows XP (The display is different in Windows Me or Windows 2000.) Click [start]. Click [Control Panel]. Click [Add or Remove Programs]. Click [Change or Remove Programs]. Click [Panasonic IMAGE STUDIO]. Click [Change/Remove]. (continued on the next page) - Page 81 Never check these boxes. Check [Remove] and click [Next]. Click [Yes]. Click [Finish]. The program has been uninstalled. For Windows Me/Windows 2000 Select [start] [Settings] [Control Panel]. Select [Add/Remove Programs]. From [Install/Remove], select [Panasonic IMAGE STUDIO] and remove it.
-
Page 82: Running Image Studio
(The display is different in Windows Me or Windows 2000.) Click [start]. Select [All Programs] [Panasonic] [Panasonic IMAGE STUDIO]. Panasonic IMAGE STUDIO will start up. Pre-dialog menu Top screen of IMAGE STUDIO For Windows Me/Windows 2000 Select [start] [Programs] [Panasonic] [Panasonic IMAGE STUDIO]. -
Page 83: Basic Screens
Basic Screens Pull-down menus (pages 16 to 17) Preview screens File: Items relating to file handling Upper screen: The image specified by the frame Edit: Items relating to image editing (original image) View:Changes the image view. Lower screen: The image converted into a Help: Reference material relating to this application 4096/512/64-color image or a 4-tone image (colors or tones to be saved) -
Page 84: Pull-Down Menus
Pull-Down Menus Defaults of the size Model Size CQ-C8803U/N/W, CQ-C8413U, 172 x 54 pixels CQ-C8403U/N/W, CQ-C8313U, CQ-C8303U CQ-C9901U/N/W 256 x 64 pixels CQ-C8401U/W, CQ-C8301U/N, CQ-C8351N, 160 x 54 dots CQ-C7401U/W, CQ-C7301U/N/D, CQ-CB8901U Others 256 x 80 dots Items relating to file handling Goes to the Pre-dialog. - Page 85 Changes the image view * Enlarges or reduces the display size. Fits into the display window size. Rotates the image 90 degrees clockwise. Rotates the image 90 degrees counterclockwise. *“AVI” and “GIF (movie)” files cannot be supported. Reference material relating to this application Changes a suitable model to another.
-
Page 86: Context Menu
Context Menu Right-clicking the mouse, a useful context menu is displayed. When main screen is displayed Scroll display Moves the start frame up when it is below the end frame. Moves the end frame up when it is below the start frame. Resets the start frame size to the default. -
Page 87: Pre-Dialog Menu
Pre-dialog Menu Pre-dialog shown below will be displayed when the application starts or [NEW] is selected from the pull-down menu. Pre-dialog 1 Goes to the pre-dialog 2. (page 38) Goes to the pre-dialog 2. Goes to the pre-dialog 2. (page 31) Closes the pre-dialog. -
Page 88: Change The Suitable Car Audio Model To Another After Installation
Change the suitable car audio model to another after installation You can change the suitable model of application to another after installation. Accordingly, you do not have to reinstall it even if you select an unsuitable install type. Moreover, you can make the images for 2 models or more by using only an application. -
Page 89: Creating A Graphic Pattern
Creating A Graphic Pattern Editing a Graphic Pattern From a Moving Image File (AVI/GIF) You can cut out portions of the moving image up to a designated maximum of frames for each model (page 7) and save them as a graphic pattern. Target file: AVI/GIF (AVI files other than the following formats are not guaranteed: 24-bit and non-compression or RLE compression format) Click [New] from the [File] pull-down menu. - Page 90 Select a start frame of the loading image with the image loading operation buttons. Move the slider to the left or right to display the frame to start loading. Image loading operation buttons : Pause : Play : Stop (return to the start position) : Reverse and fast forward : Step reverse and step fast forward : Move to the start position for image loading...
- Page 91 A file extension (pfm) will be added to the file name. Do not add any file extension other than “pfm” to the file name. If you delete or change the file extension, the images will not be displayed properly by the Panasonic car audio unit.
-
Page 92: Editing A Graphic Pattern (Scroll Display) From A Still Image File
Editing a Graphic Pattern (Scroll Display) From a Still Image File You can edit a moving image to scroll between any 2 locations of a still image file. Target files: BMP, JPG, JPEG, PNG and GIF Click [New] from the [File] pull-down menu. Click [Create graphic pattern] from the pre-dialog menu. - Page 93 A file extension (pfm) will be added to the file name. Do not add any file extension other than “pfm” to the file name. If you delete or change the file extension, the images will not be displayed properly by the Panasonic car audio unit.
-
Page 94: Editing A Graphic Pattern (Wipe Display) From A Still Image File
Editing a Graphic Pattern (Wipe Display) From a Still Image File You can edit images so that the display is overwritten from top, bottom, left or right. Target files: BMP, JPG, JPEG, PNG and GIF Click [New] from the [File] pull-down menu. Click [Create graphic pattern] from the pre-dialog menu Click [Wipe Movie]. - Page 95 Select an image file for the background and click [Open]. Open the selected file. Check that the file type is BMP, JPG, JPEG, PNG or GIF. The file open dialog will be displayed twice (the former for foreground and the latter for background) successively when [Wipe Movie] is clicked.
- Page 96 A file extension (pfm) will be added to the file name. Do not add any file extension other than “pfm” to the file name. If you delete or change the file extension, the images will not be displayed properly by the Panasonic car audio unit.
-
Page 97: Editing Opening And Closing Messages
Editing Opening and Closing Messages The number of frames cannot be specified. Opening message: 30 (60 for 2004 models) frames Closing message: 20 (40 for 2004 models) frames Click [New] from the [File] pull-down menu. Click [Create opening message] or [Create closing message] from the pre-dialog menu. - Page 98 file name. Do not add a file extension other than “pfo” or “pfe” to the file name. If you delete or change the file extension, the images will not be displayed properly by the Panasonic car audio unit.
-
Page 99: Editing The Created Graphic Pattern
Editing the Created Graphic Pattern You can edit moving images that have been created to add, delete or reorder frames. In addition, you can add frames by copying them from other moving image files. Click [New] from the [File] pull-down menu. Click [Edit movie] from the pre-dialog menu. - Page 100 Click [Edit]. The Edit Movie screen will be opened. The image on the screen shown on the left cannot be edited. Open Opens another moving image file Cuts the selected frame. for editing. (Reference file) [CTRL+X] Copy Copies the selected frame. [CTRL+C] Copy Copies the selected frame.
- Page 101 Edit the graphic pattern. To insert a copied frame into a different position: Select the frame to be inserted. Click [Copy]. Select the insert destination frame. Click [Paste]. The copied frame will be inserted. Note: ...
- Page 102 To insert a cut frame into a different position: Select the frame to be inserted. Click [Cut]. The selected frame will be cut. Select the insert destination frame. Click [Paste]. The cut frame will be inserted. Note: ...
- Page 103 To delete a frame: Select the frame to delete. Click [Delete] or press [Delete]. The selected frame will be deleted. Note: You cannot add frames, when the number of total frames exceeds the designated number. (page 7) ...
- Page 104 To insert a frame from another graphic pattern file: Click [Open]. Select the graphic pattern file and click [Open]. The selected file will be opened. Select the frame to be inserted. Click [Copy]. Select the insert destination frame. ...
- Page 105 file name. Do not add any file extension other than “pfm”, “pfo” or “pfe” to the file name. If you delete or change the file extension, the images will not be displayed properly by the Panasonic car audio unit.
-
Page 106: Creating Still Images
Creating Still Images Target files: BMP, JPG, JPEG, PNG and GIF Note: You cannot create a still image from a moving image file (file extension: avi). Still images cannot be set as openings or closings. Click [New] from the [File] pull-down menu. Click [Create still image]. -
Page 107: Inserting Text Into A Still Image
Inserting Text Into a Still Image Click [Type tool]. The Input Text screen will be displayed. Enter your text. Click [OK]. Confirm the input text and close the Input Text screen. (Common) Text Drags the text to move it. ... - Page 108 A file extension (pfs) will be added to the file name. Do not add any file extension other than “pfs” to the file name. If you delete or change the file extension, the images will not be displayed properly by the Panasonic car audio unit.
-
Page 109: Process The Image With Dithering Or Effects
Process the image with dithering or effects Dithering This is a process to modify color images to tones for use by supported car audio units. Select the type of dithering according to the image to be loaded. Check [Dithering]. ... - Page 110 Dithering patterns (for 4-tone) Dithering 1 Dithering 2 The effect varies depending on images to which dithering is applied. Select your favorite dithering after trying Ditherings 1 - 3. Dithering 3 Halftone A continuous tone like those seen in photographs. The granularity is less apparent than in dithering.
-
Page 111: Adjusting Rgb Tone Depths And Tone Thresholds
Adjusting RGB Tone Depths and Tone Thresholds You can configure the settings for the depth of the 3 primary colors (R: red, G: green and B: blue) and for the threshold for each tone when the image is converted to blue 4-tones. ... - Page 112 preview screen For Color images: Adjust the brightness while viewing the preview screen. Adjust the depth for each of the 3 primary colors (R: red, G: green and B: blue). Darker -------------------- Brighter Click [OK]. The changes will be saved. ...
-
Page 113: Effects
Effects You can modify the loaded image by adding effects such as contrast and brightness. Check [Effect]. Select the types of effects. Make adjustments with the slider. Types of effects Contrast Adjusts the contrast. Sharpen Adjusts the strength/weakness of the outline. Reverse Inverts negative and positive.
Need help?
Do you have a question about the CQ-C7403U and is the answer not in the manual?
Questions and answers