Advertisement
SPY-DVR4 / SPY-DVR8 / SPY-DVR16
1.0 INTRODUCTION
1.1 Main menu
2.0 SYSTEM TOOLS
2.1 User Management
2.2 HDD management
2.3 System maintenance
2.4 Factory setting
3.0 SYSTEM SETUP
3.1 General Setup
3.2 Screen Setup
3.3 Encode Setup
3.4 Record Setup
3.5 Network Setup
3.5.1 PPPOE Setup
3.5.2 DDNS Setup
Instructions
3.5.3 E-mail Setup
3.6 Video detection
3.7 PTZ Control
4.0 VIDEO INFORMATION
4.1 Video Playback
4.2 Video Backup
5.0 SYSTEM
5.1 System info
5.2 System logout
6.0 TECHNICAL INFORMATION
6.1 Technical Parameters
1
Advertisement
Table of Contents

Related Manuals for Spyclops SPY-DVR4

Summary of Contents for Spyclops SPY-DVR4
- Page 1 SPY-DVR4 / SPY-DVR8 / SPY-DVR16 Instructions 1.0 INTRODUCTION 3.5.3 E-mail Setup 3.6 Video detection 1.1 Main menu 3.7 PTZ Control 2.0 SYSTEM TOOLS 4.0 VIDEO INFORMATION 2.1 User Management 4.1 Video Playback 2.2 HDD management 4.2 Video Backup 2.3 System maintenance 2.4 Factory setting...
-
Page 2: System Specifications
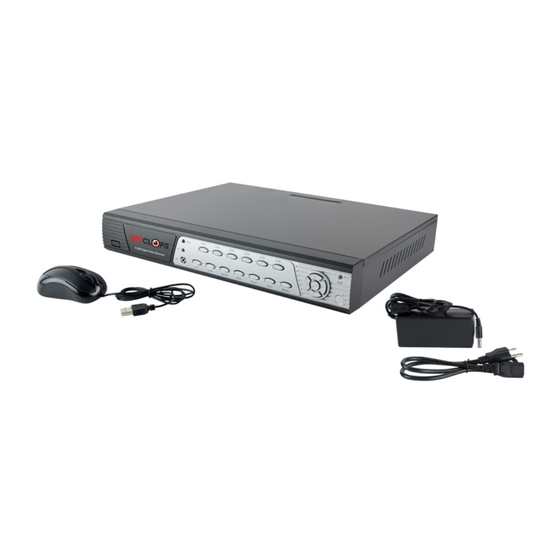
Congratulations on purchasing the SpyClops H.264 DVR Security System System Specifications: • Multi-camera digital video recorder which includes motion detection, key buzzer alarm, e-mail and area masking • The DVR uses state of the art H.264 video compression technology to maximize your recording time and optimize your video quality. - Page 3 6. RCA audio IN and OUT 1. BNC video in from cameras 7. VGA output to monitor 2. Video out to TV (BNC to RCA cable) 8. RJ45 ethernet port 3. HDMI output 9. Mouse/USB backup 4. RS485 port for PTZ camera control 10.
- Page 4 1.0 INTRODUCTION 1.1 Main Menu Introduction Right click the mouse and you will find the main menu (it can also be accessed by pressing the “MENU” key). The main menu consists of the following components: • X1 view Click to view which channel you want to view •...
-
Page 5: System Tools
2.0 SYSTEM TOOLS 2.1 User Management • The default admin user has no password set up, to set up a password you need to highlight admin, then select “set password”. Skip the “old password” field (since it defaulted blank) and add a “new password”. -
Page 6: System Setup
2.3 System maintenance • Perform a System update, Logo update or Resource update from USB storage and click start 2.4 Factory setting • Factory reset “all” or each setup choice you choose 3.0 SYSTEM SETUP 3.1 General Set-up • Date time: This option is used to set up the date and time. If the wrong information is left populated, the DVR will not record properly *Note: click “Apply”... -
Page 7: Screen Size
• Standard: “PAL” is default setting. “NTSC” is the standard for North America and will need to be selected for a clearer picture. If you are outside of North America you will need to check to see what standard your country uses *Note: Any time you change the resolution, the system will have to be rebooted to make changes 3.2 Screen Set-up •... - Page 8 3.3 Encode Set-up *Note: If you have your target bitrate, but are having trouble achieving an acceptable quality video, you will have to cut back in some aspect. The contributing factors that will lead to a higher video bitrate are the amount of pixels (the resolution of the video), the frame rate, and the amount of motion present •...
- Page 9 • Frame rate: The frame rate is how many unique consecutive images are displayed per second in the video to give the illusion of movement. Keep in mind, that the minimum limit that our brain needs to perceive moving frames as a video is 24 Frames per Second, so there is no big difference between 24 and 30 fps except the higher frame rate will effect your bandwidth and data storage 3.4 Record Setup: Use your mouse and click the right button to select “Setup”...
-
Page 10: Network Setup
*Note: Make sure before configuring network settings that you have an Ethernet cable connected from your DVR to your router 3.5 Network Setup: • DHCP: When first setting up for network access, check the “DHCP” box and “OK” then right click twice to save. - Page 11 • DDNS: Click “√” in check box to enable. Select the dropdown box and choose noip or dyndns. Input the URL that was assigned to you when you set up your account, and then enter the username and password for your DDNS account. Click “OK”. Don’t forget to right click twice to save changes.
-
Page 12: Video Detection
3.6 Video detection: Select “Setup”, select “System setup”, select “Video detection” • Channel: Choose which camera view you want to set up detection on • Sensitivity: Choose the right trigger video detection sensitivity. “Highest” is very sensitive, while “Lowest” lets some movement occur before recording •... - Page 13 3.7 PTZ Setup: *Note: To control the PTZ, You must connect the wires to the RS-45 port on the back of the DVR • Channel: Choose which camera view you want to work with • Protocol: Choose the “protocol” required for your device. Both protocols require an additional RS-485 data cable •...
-
Page 14: Video Information
4.0 VIDEO INFORMATION 4.1 Video Playback: Right click and select “Video Playback”, or go to “setup”, and then “video playback” • Channel: Either choose the channel you want to view, or you can select all channels to view everything that has been recorded and hit “search” •... - Page 15 5.0 SYSTEM 5.1 System info: • HDD info: This shows the model, capacity, amount of data used and status (formatted or unformatted) of all HDD that are installed. • System version: This option shows the device name and model, the serial number, HardWare version, SoftWare version and built time.
-
Page 16: Smartphone Access
6.0 SMARTPHONE ACCESS 5.1 EseeNet+ app: • I-Phone/I-Pad: For I-Phone or I-Pad users use this link to install Esee Net+ https://itunes.apple.com/sr/app/eseenet+/id789619158?mt=8 • Android: For Android users, use this link to install Esee Net+ https://play.google.com/store/apps/details?id=com.ESeyeM • To add a device, select the + next to My Device. •... -
Page 17: Technical Information
6.0 TECHNICAL INFORMATION 6.1 Technical Parameters Model 4 channel DVR 8 channel DVR 16 channel DVR Hard Drive 1 SATA, 500GB included 2 SATA, 1GB included 2 SATA, 1GB included (Expandable to 2TB) (Expandable to 2TB) (Expandable to 2TB) Operation system Embedded Linux operation system Operation interface Graphical user interface (GUI), mouse, front panel...
Need help?
Do you have a question about the SPY-DVR4 and is the answer not in the manual?
Questions and answers