Table of Contents
Advertisement
Thank you for purchasing our product.
Please read this User s Manual before
using the product.
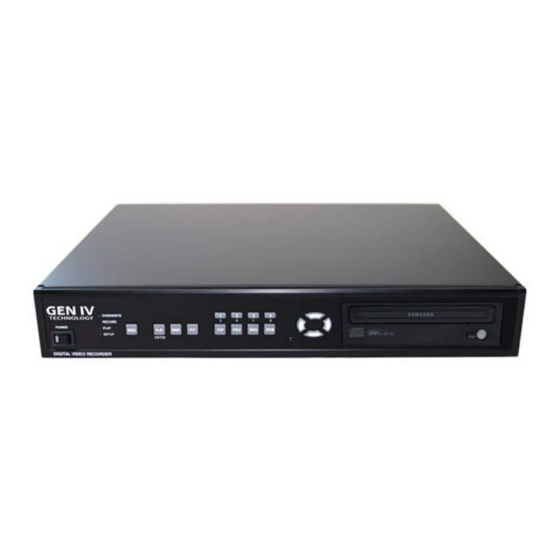
STAND-ALONE DVMR
8 Channel Digital Video Multiplex Recorder
User Manual
VER 2.0
The most stable and reliable real stand-alone Digital Video Multiplex Recorder
8 CH STAND-ALONE DVMR
ALL ABOUT IMAGE RECOGNITION & PROCESSING
ALL ABOUT IMAGE RECOGNITION & PROCESSING
Advertisement
Table of Contents

Related Manuals for Gen IV Technology 8 CH STAND-ALONE DVMR


Summary of Contents for Gen IV Technology 8 CH STAND-ALONE DVMR
- Page 1 STAND-ALONE DVMR 8 Channel Digital Video Multiplex Recorder User Manual VER 2.0 The most stable and reliable real stand-alone Digital Video Multiplex Recorder 8 CH STAND-ALONE DVMR ALL ABOUT IMAGE RECOGNITION & PROCESSING ALL ABOUT IMAGE RECOGNITION & PROCESSING...
- Page 2 8 channel stand-alone DVMR 8 channel stand-alone DVMR ALL ABOUT IMAGE RECOGNITION & PROCESSING ALL ABOUT IMAGE RECOGNITION & PROCESSING ALL ABOUT IMAGE RECOGNITION & PROCESSING SAFETY PRECAUTIONS CAUTION RISK OF ELECTRIC SHOCK. DO NOT OPEN! CAUTION : TO REDUCE THE RISK OF ELECTRICAL SHOCK, DO NOT OPEN COVERS. NO USER SERVICEABLE PARTS INSIDE.
- Page 3 8 channel stand-alone DVMR 8 channel stand-alone DVMR ALL ABOUT IMAGE RECOGNITION & PROCESSING ALL ABOUT IMAGE RECOGNITION & PROCESSING ALL ABOUT IMAGE RECOGNITION & PROCESSING ALL ABOUT IMAGE RECOGNITION & PROCESSING FCC INFORMATION A CLASS A computing device subject to certification by the Commission shall be identified pursuant to par.2.925 et Seq of the chapter.
-
Page 4: Table Of Contents
Table of Contents 8 channel stand-alone DVMR 8 channel stand-alone DVMR ALL ABOUT IMAGE RECOGNITION & PROCESSING ALL ABOUT IMAGE RECOGNITION & PROCESSING ALL ABOUT IMAGE RECOGNITION & PROCESSING Chapter 1 . Product package 1-1. The contents of package 1-2. Name and function of each button (front panel) 1-3. - Page 5 8 channel stand-alone DVMR Menual for Remote Viewer Software(TCP/IP) 8 channel stand-alone DVMR ALL ABOUT IMAGE RECOGNITION & PROCESSING ALL ABOUT IMAGE RECOGNITION & PROCESSING Speed of playback in DVMR unit according to scan rate set in 4-7-b). About this document Scan rate set in 4-7-b) Before installing stand alone DVMR, be sure to thoroughly review and follow the instructions in this User’s Manual.
-
Page 6: Chapter 1 . Product Package
5. Search recorded pictures via IP network Chapter 1 . Product Package 1-1. The contents of package 1. 8 ch stand-alone DVMR unit Function of each button in search window : 1: Power switch. Press power switch to quit. 2: Full screen button. Press full screen button to search recorded picture channel by channel in full screen. -
Page 7: Name And Function Of Each Button (Front Panel)
1. Unit Description 8 channel stand-alone DVMR Menual for Remote Viewer Software(TCP/IP) 8 channel stand-alone DVMR ALL ABOUT IMAGE RECOGNITION & PROCESSING ALL ABOUT IMAGE RECOGNITION & PROCESSING 1-2. Name and function each button (front panel) OVERWRITE POWER RECORD PLAY MENU PLAY MODE... -
Page 8: Name And Function Of Each Button (Rear Panel)
1. Unit Description 8 channel stand-alone DVMR 8 channel stand-alone DVMR Menual for Remote Viewer Software(TCP/IP) ALL ABOUT IMAGE RECOGNITION & PROCESSING ALL ABOUT IMAGE RECOGNITION & PROCESSING 7) : Set button. 2 different set buttons a) Setting : Press this button to input IP Address(or select a unit of 16 ch DVMR unit among many) and others and to set circular monitoring interval and scan rate, to assign folder where you want 1-3. -
Page 9: Chapter 2. Installation Procedure
2. Installation 8 channel stand-alone DVMR Menual for Remote Viewer Software(TCP/IP) 8 channel stand-alone DVMR ALL ABOUT IMAGE RECOGNITION & PROCESSING ALL ABOUT IMAGE RECOGNITION & PROCESSING Chapter 2. Procedure 2-1. Camera Connection Connect the camera to the CAMERA INPUT on the Rear Panel of the system. LEVEL VIDEO …... -
Page 10: Monitor Connection (S-Vhs)
2. Installation 8 channel stand-alone DVMR 8 channel stand-alone DVMR Menual for Remote Viewer Software(TCP/IP) ALL ABOUT IMAGE RECOGNITION & PROCESSING ALL ABOUT IMAGE RECOGNITION & PROCESSING 3. How to get IP for DVMR unit There is 2 different ways to input IP address and other data into DVMR unit. 2-3. -
Page 11: Sensor Connection
2. Installation 8 channel stand-alone DVMR Menual for Remote Viewer Software(TCP/IP) 8 channel stand-alone DVMR ALL ABOUT IMAGE RECOGNITION & PROCESSING ALL ABOUT IMAGE RECOGNITION & PROCESSING c) ADSL(ADLS modem with PPPoE protocol) line with static IP or dynamic IP. PPPoE protocol DHCP SETUP in DVMR unit... -
Page 12: Hdd Connection
2. Installation 8 channel stand-alone DVMR 8 channel stand-alone DVMR Menual for Remote Viewer Software(TCP/IP) ALL ABOUT IMAGE RECOGNITION & PROCESSING ALL ABOUT IMAGE RECOGNITION & PROCESSING Chapter5. Manual for Remote Viewer Software(TCP/IP) 2-7. HDD connection General description : TCP/IP option enables users to view live pictures, search recorded pictures, or control PTZ camera via Internet line, far apart from the DVMR unit, and users can store selected recorded pictures on HDD of client PC. -
Page 13: Chapter 3. Operation
4. Configuration 3. Operation 8 channel stand-alone DVMR 8 channel stand-alone DVMR ALL ABOUT IMAGE RECOGNITION & PROCESSING ALL ABOUT IMAGE RECOGNITION & PROCESSING ALL ABOUT IMAGE RECOGNITION & PROCESSING Chapter 3. Operation 3-1. DVMR SYSTEM log-in 4-4. Arrangement RS-232C and RS-485 pin 1) Press [MENU] button to enter the Enter the password Pin No. -
Page 14: Recording
3. OPeration 4. Configuration 8 channel stand-alone DVMR 8 channel stand-alone DVMR ALL ABOUT IMAGE RECOGNITION & PROCESSING ALL ABOUT IMAGE RECOGNITION & PROCESSING ALL ABOUT IMAGE RECOGNITION & PROCESSING 4-2. Configuration 3-2. Recording 1. PLAY Indicates camera title. Changes to Playback Mode from Default title is CH-1, CH-2, …... - Page 15 4. Configuration 3. Operation 8 channel stand-alone DVMR 8 channel stand-alone DVMR ALL ABOUT IMAGE RECOGNITION & PROCESSING ALL ABOUT IMAGE RECOGNITION & PROCESSING ALL ABOUT IMAGE RECOGNITION & PROCESSING Chapter 4 . Specification and configuration PIP rotates in sequence 4.
- Page 16 3. Operation 3. Operation 8 channel stand-alone DVMR 8 channel stand-alone DVMR ALL ABOUT IMAGE RECOGNITION & PROCESSING ALL ABOUT IMAGE RECOGNITION & PROCESSING 9. FACTORY DEFAULT 6. SEQ Press [ENTER] button when half-tone green bar is in on 1.In live mode, full screen or 4-split screen rotate in sequence, whenever you press [SEQ] button shortly. FACTORY DEFAULT.
-
Page 17: Playback
3. Operation 3. Operation 8 channel stand-alone DVMR 8 channel stand-alone DVMR ALL ABOUT IMAGE RECOGNITION & PROCESSING ALL ABOUT IMAGE RECOGNITION & PROCESSING 3) Example of Port Forwarding 3-3. Playback Because ADSL is the most popular Internet service widely available in most of countries, we explain more details about how to connect DVMR unit to ADSL line via Router or Gateway, to allow 1. - Page 18 3. Operation 3. Operation 8 channel stand-alone DVMR 8 channel stand-alone DVMR ALL ABOUT IMAGE RECOGNITION & PROCESSING ALL ABOUT IMAGE RECOGNITION & PROCESSING 8. TCP/IP SETUP 5) Playback Speed Setup Press [ENTER] button when half-tone green bar is on TCP/IP SETUP.
-
Page 19: Setup
3. Operation 3. Operation 8 channel stand-alone DVMR 8 channel stand-alone DVMR ALL ABOUT IMAGE RECOGNITION & PROCESSING ALL ABOUT IMAGE RECOGNITION & PROCESSING 5) BAUDRATE SETUP 3-4. SETUP To control PTZ camera connected to DVMR unit, you 1. Basic Operation have to set baud rate of communication between PTZ BAUDRATE SETUP camera and DVMR unit. - Page 20 3. Operation 3. Operation 8 channel stand-alone DVMR 8 channel stand-alone DVMR ALL ABOUT IMAGE RECOGNITION & PROCESSING ALL ABOUT IMAGE RECOGNITION & PROCESSING 2) ALARM SETUP 3. DISPLAY SETUP In DVMR system, 8 alarm input, one for each channel, 1) Edit camera title and 1 alarm output(relay out) is provided, and we can set ALARM SETUP...
-
Page 21: Hdd Management
3. Operation 3. Operation 8 channel stand-alone DVMR 8 channel stand-alone DVMR ALL ABOUT IMAGE RECOGNITION & PROCESSING ALL ABOUT IMAGE RECOGNITION & PROCESSING 6. HDD MANAGEMENT Press [ENTER] button when half-tone green bar is on Fix motion detection area cell by cell HDD MANAGEMENT. - Page 22 3. Operation 4. Configuration 8 channel stand-alone DVMR 8 channel stand-alone DVMR ALL ABOUT IMAGE RECOGNITION & PROCESSING ALL ABOUT IMAGE RECOGNITION & PROCESSING 4. TIME/DATE SETUP 3) TIME INTERVAL Press [ENTER] button when half-tone green bar is on TIME INTERVAL implies recording speed, and 1/1 TIME/DATE SETUP.
Need help?
Do you have a question about the 8 CH STAND-ALONE DVMR and is the answer not in the manual?
Questions and answers