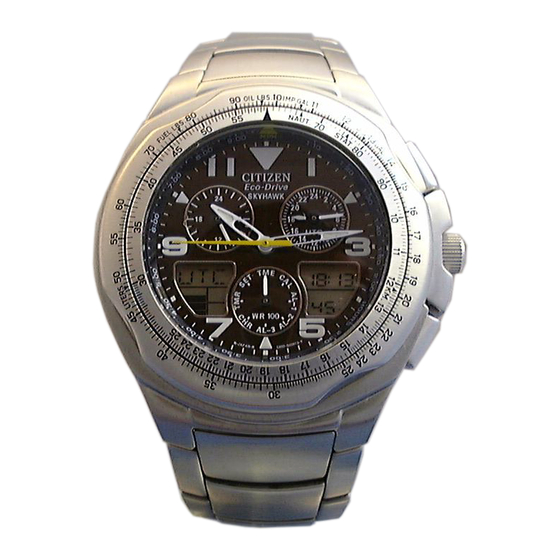
Citizen C650 Instructions Manual
Movement caliber
Hide thumbs
Also See for C650:
- Technical information (34 pages) ,
- User manual (41 pages) ,
- Abbreviated user manual (4 pages)
Table of Contents
Advertisement
Setting Instructions for Movement Caliber C650
Contents
(click on a topic)
1.
2.
3.
SECIFICATIONS
4.
5.
6.
7.
8.
9.
10.
11.
12.
13.
14.
15.
16.
17.
POWER CONSERVATION FEATURE
18.
19.
NOTES REGARDING HANDLING OF THIS WATCH
20.
USING THE BEZEL REGISTER RING
21.
CARE OF YOUR WATCH
Advertisement
Table of Contents

Subscribe to Our Youtube Channel
Related Manuals for Citizen C650


Summary of Contents for Citizen C650
-
Page 1: Table Of Contents
Setting Instructions for Movement Caliber C650 Contents (click on a topic) FEATURES BEFORE USING SECIFICATIONS NAME OF COMPONENTS AND MAJOR FUNCTIONS SWITCHING THE MODE (DISPLAY FUNCTIONS) CHECKING O-POSITION OF EACH HAND ACCESSING TIMES OF DATES OF MAJOR CITIES SWITCHING ANALOG TIME AND DIGITAL TIME... -
Page 2: Features
Return to Table of Contents 1. FEATURES This watch is a combination solar-powered watch that contains a solar cell in its face that drives the watch hands, alarm, chronograph, timer and numerous other functions by converting light energy into electrical energy. -
Page 3: Specifications
Return to Table of Contents 3. Specifications C650 Movement Caliber Number Accuracy Within +/- 15 seconds per month (when worn at normal temperatures of C to 35 C/(41 F to 95 Operating temperature range Watch operating temperature range : 0... -
Page 4: Name Of Components And Major Functions
Return to Table of Contents 4. NAMES OF COMPONENTS AND MAJOR FUNCTIONS Name /Mode Time Calendar Alarm 1 Alarm 2 Alarm Chronograph Timer Zone Setting (1) Mode Hand AL-1 AL-2 AL-3 (2) Hour Hand Always Indicates Hours (3) Minute Hand Always Indicates Minutes (4) Second Hand Always Indicates Seconds... -
Page 5: Switching The Mode (Display Functions)
Return to Table of Contents 5. SWITCHING THE MODE (DISPLAY FUNCTIONS) In addition to the time and date modes, this watch is also equipped with three additional modes consisting of the alarm, chronograph and timer modes. The mode can be switched by turning the crown. Check the current mode with the mode hand. - Page 6 Return to Table of Contents O-Position Correction (Setting to the Watch Base Position) When setting the 0-position of each hand, always make sure to turn the crown forward (clock- wise) to set each hand to its 0-position in the clockwise direction. 1.
-
Page 7: Accessing Times Of Dates Of Major Cities
Return to Table of Contents 7. ACCESSING TIMES OR DATES OF MAJOR CITIES The time of date of major cities pre-registered in this watch can be easily accessed by pressing the buttons. <Access Procedure> Turn the crown to set the mode hand to the time [TME] or calendar [CAL] mode. When button (A) is pressed, the times or dates of major cities are displayed while scrolling up each time it is pressed. -
Page 8: Switching Analog Time And Digital Time
Return to Table of Contents 8. SWITCHING ANALOG TIME AND DIGITAL TIME This watch is able to switch between analog time display and digital time display. <Switching Procedure> 1. Turn the crown to set the mode hand to the time [TME) mode. 2. -
Page 9: Setting The Date (Date Is Corrected By Digital Display)
Return to Table of Contents 10. SETTING THE DATE (DATE IS CORRECTED BY DIGITAL DISPLAY) 1. Turn the crown and set the mode hand to the calendar [CAL] mode. 2. Press either button (A) or button (B) to access the city to be corrected. 3. -
Page 10: Using The Alarm Mode
Return to Table of Contents 11. USING THE ALARM MODE The alarm setting procedure and other procedures for alarm use are the same for Alarm 1, 2 and 3. Only the tone that sounds is different. The alarm sounds for 15 seconds when the set time is reached once a day. When the alarm is sounding, it can be turned off by pressing button (A) or (B). -
Page 11: Using The Chronograph
Return to Table of Contents <Switching Alarm ON and OFF> The alarm can be switched ON and OF by pulling out the crown to the first click even when not in the alarm correction state. 1. Pull out the crown to the first click in the alarm mode to allow the alarm to be switched ON and OF. 2. -
Page 12: Using The Timer
Return to Table of Contents 13. USING THE TIMER The timer can be set to a maximum of 99 minutes in 1-minute units. When the set time has elapsed, a tone indicating that the set time is up sounds for about 5 seconds, after which the timer returns to the timer initial setting display. -
Page 13: Using Zone Setting
Return to Table of Contents 14. USING ZONE SETTING The zone setting function enables only those cities for which "SET" has been selected to be easily accessed (displayed) in each mode. Daylight savings time can be also be set for each city. In addition, the user is also able to arbitrarily register one city and time difference. -
Page 14: All Reset
Return to Table of Contents 6. Turn the crown to display the time difference. 7. After setting, return the crown to the normal position. <Characters and Symbols Used in City Names> • Letters of the alphabet (A to Z) • Numbers (0-9) •... -
Page 15: Functions Unique To Solar-Powered Watches
Return to Table of Contents 4. This fully lit display is canceled when the crown is returned to the normal position. After canceling, a confirmation tone is sounded after which each of the hands perform a demonstration movement in the order of the second hand, minute hand, UTC minute hand, UTC hour hand and 24 hour hand to indicate that the all-reset procedure is finished. - Page 16 Return to Table of Contents [Insufficient Charging Warning Function] (Analog Display) Regardless of the display (Mode) of the watch at the time, when the watch becomes insufficiently charged, the watch changes to the time display and the second hand begins to move at two-second-interval movement.
- Page 17 Return to Table of Contents [Time Setting Warning Function] (Analog Display) The watch stops when insufficient charging continues for about 1.5 days. When the watch is charged by exposing to light after having stopped due to insufficient charging, each hand is rapidly advanced to the base position and stops.
- Page 18 Return to Table of Contents 17. Power Save Features [Power Save 1] When power is not generated as a result of the solar cell not being exposed to light, the second hand stops when it reaches the zero seconds position and the watch automatically enters the power save state to inhibit power consumption of the secondary battery.
- Page 19 Return to Table of Contents [Manual Power Save] When not using the watch for an extended period of time, activating the manual power save function after first charging the watch until all three bars of the graphic display of the secondary battery charge indicator are lit enables the watch to be stored for a longer period of time.
-
Page 20: General Reference For Charging Times
Return to Table of Contents 18. GENERAL REFERENCE FOR CHARGING TIMES The time required for recharging varies according to the model of the watch (color of the dial, etc). The following times are shown below to serve only as a reference. Recharging time refers to the amount of time the watch is continuously exposed to light. -
Page 21: Using The Register Ring
Return to Table of Contents 20. Using the Register Ring NOTE: The bezel design may vary depending on the model. [Calculation function] Speed Index Outer Scale Note the following points when (distance scale) using this function. Use the calculation function of this Inner Scale watch only as a guide. - Page 22 Return to Table of Contents scale (time scale), Thus, the estimated flight time is 2 hours and 30 minutes. 7. Difference in altitude The difference in altitude can be obtained from the rate of descent and the descent time. Example: Obtain the difference in altitude when an aircraft continues descending for 23 minutes at a rate of 250 feet per minute.
- Page 23 Return to Table of Contents 3) Proportion Example: 30/20 = 60/x Operation: Align "30" on the outer scale with ‘20’ on the inner scale, Then, ‘60’ on the outer scale corresponds to ‘40’ on the inner scale. At this point, the proportion for every value on the inner and outer scales is 30:20.
- Page 24 Return to Table of Contents PRECAUTIONS ABOUT CARE AND HANDLING OF WATCHES TEMPERATURE CARE that water resistant quality remains at factory specifications. Avoid temperature extremes. Exposing your watch to high temperatures, such as placing it on the dashboard of a vehicle CARE FOR METAL BRACELETS or use in a hot tub, may cause the watch to malfunction, To extend the life and maintain the good appearance of the...
-
Page 25: Water Resistance
Water Resistance The water-resistant quality of our timepieces is offered in varying degrees depending on the model. This ranges from non-water resistant models to those suitable for SCUBA diving. Water resistance of our timepieces is measured in BAR or Barometric Pressure. Each BAR of pressure is equal to 14.5 pounds per square inch of pressure.
Need help?
Do you have a question about the C650 and is the answer not in the manual?
Questions and answers