Shindaiwa T282 Owner's And Operator's Manual
Hide thumbs
Also See for T282:
- Owner's/operator's manual (72 pages) ,
- Operator's manual (28 pages) ,
- Owner's/operator's manual (28 pages)
Table of Contents
Advertisement
Quick Links
English................1
Español.........SP_1
Françias........FR_1
SHINDAIWA OWNER'S/OPERATOR'S MANUAL
T282 TRIMMER
T282X TRIMMER
Minimize the risk of injury to yourself and others! Read this
manual and familiarize yourself with the contents. Always wear
WARNING!
eye and hearing protection when operating this unit.
T282
T282X
Part Number 89027 Rev. 11/08
Advertisement
Table of Contents

Subscribe to Our Youtube Channel
Related Manuals for Shindaiwa T282


Summary of Contents for Shindaiwa T282
- Page 1 English....1 Español..SP_1 Françias..FR_1 SHINDAIWA OWNER’S/OPERATOR’S MANUAL T282 TRIMMER T282X TRIMMER T282 T282X Minimize the risk of injury to yourself and others! Read this manual and familiarize yourself with the contents. Always wear WARNING! eye and hearing protection when operating this unit.
-
Page 2: Table Of Contents
If you have questions regarding your 282 Series, or if you do not understand some- thing in this manual, contact your local authorized Shindaiwa dealer. You may also contact Shindaiwa Inc. at the address printed on the back of this Manual. -
Page 3: Safety
Safety Labels READ THE OPERATOR’ S M ANUAL WEAR HEARING AND ANSI Z8 7 .1 APPROVED EYE PROTECTION T282 50 FEET (15m KEEP BYSTANDERS AWAY AT LEAST 5 0 FEET (1 5 m) BEWARE OF THROWN OR... - Page 4 Safety (continued) The Properly Equipped Operator Wear hearing protection devices and a Always wear eye protection such as broad-brimmed hat or helmet. A helmet goggles or safety glasses to shield is required when using a blade-equipped against thrown objects. brushcutter to clear small trees. Always wear a harness when operating the unit .
-
Page 5: Product Description
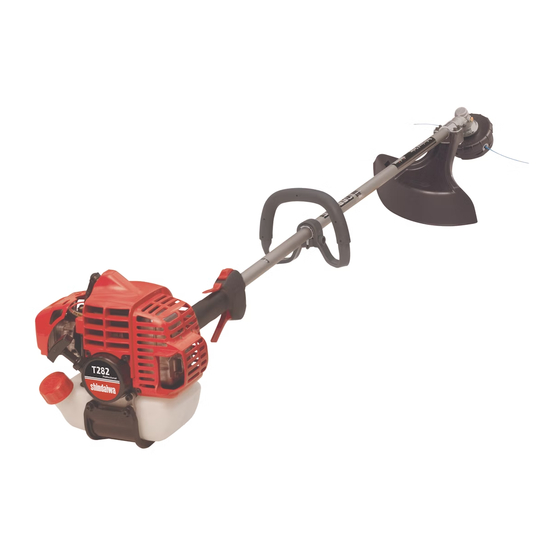
Product Description T282 Ignition Switch Fuel Tank T282X Throttle Outer Tube Trigger Ignition Switch Throttle Strap Interlock Gearcase Cutting Handle Attachment Shield Grip Fuel Tank Outer Tube Throttle Trigger Trimmer Head Barrier Gearcase Hanger Cutting Attachment Shield Trimmer Head Using the illustration as a guide, famil-... -
Page 6: Assembly
Assembly ■ Prior to Assembly This unit comes fully assembled with the Kit containing cutting attachment shield, mounting bracket and hardware, exception of the cutting attachment shield Before assembling, make sure you have all this owner’s/operator’s manual and tool and cutting attachment. the components required for a complete kit for routine maintenance. - Page 7 Assembly (continued) Cutting Attachment Shield Insert the cutting attachment shield T282 between the outer tube and the cutting attachment mounting plate. NOTE: Outer Tube Socket-Head Bracket It may be necessary to loosen the retain- Cap Screws ing nut and clamp screw to adjust cutting attachment shield mounting plate.
- Page 8 Lock Nut Adjuster Tighten the locknut. Reinstall the air cleaner cover. Adjust as required to obtail 4-6 mm free play Install trimmer head T282 Retaining Plug To install a trimmer head onto a T282X, first remove the shaft bolt, bolt guard Holder (see the next page).
- Page 9 Assembly (continued) Installing Brushcutter Blade T282X Turn the unit upside down so the gear Shaft Bolt case output shaft is facing UP and remove the shaft bolt, bolt guard and Bolt Guard holder B from the gear case shaft. Align the hole in blade holder A with Holder B the matching hole in the gear case flange and then temporarily lock the...
-
Page 10: Mixing Fuel
ISO-L-EGD per- CAUTION! formance requirements. Shindaiwa One is rec- ommended for use in all Shindaiwa low emis- Mix and pour fuel outdoors where sions engines. Shindaiwa One also includes a there are no sparks and flames. -
Page 11: Starting The Engine
Starting the Engine IMPORTANT! Engine ignition is controlled by a two position switch mounted on the throttle housing labeled, “I” for ON or START and “O” for OFF or STOP. WARNING! WARNING! Never start the engine from Keep all parts of your body the operating position. -
Page 12: Stopping The Engine
Adjusting engine idle in the field. the trimmer to your Shindaiwa dealer for inspection. Checking Unit Condition NEVER operate the unit with the cutting The cutting attachment may be spin-... -
Page 13: Important
Adjust the length of the shoulder strap so that you can hold and operate the machine comfortably. Cutting grass with a trimmer head Your Shindaiwa unit may be equipped with Engine Operating Speeds CAUTION! one of several Shindaiwa trimmer head mod- Operate at full throttle while cutting grass. -
Page 14: Blade Thrust
DO NOT cut between the 10 o’clock and 5 WARNING! Eight o’clock positions. O'clock DO NOT use 2-tooth or non- Shindaiwa approved 4-tooth cutting blades with Shindaiwa trimmers and brushcutters. Five O'clock Vertical Cuts Hold the brushcutter with the blade at a WARNING! Cut on the left side 90°... -
Page 15: Maintenance
■ DO NOT use 2-tooth or NON- Spark Plug WARNING! Shindaiwa approved 4-tooth cut- ting blades on Shindaiwa trimmers Keep the spark plug and wire connections Non-standard accessories, or brushcutters. tight and clean. cutting attachment, or replacement ■... -
Page 16: Hour Maintenance
Gear shaft grease into the gear case until old collar grease is pushed out. Use only lithium- base grease such as Shindaiwa Gear Without cutting attachment installed on gearcase Case Lubricant or equivalent. ■ Remove mainshaft and lubricate both ends of the splines. - Page 17 If damage, splitting or deterioration is noted, the unit should be removed from service until it can be inspected or repaired by a Shindaiwa- trained service technician. CAUTION! Make sure you do not pierce the fuel line with the end of the hooked wire.
-
Page 18: Long Term Storage
30° Shindaiwa Tornado Blade ™ Round File To sharpen the cutters on a Shindaiwa WARNING! Tornado™ Blade, use a 7/32-inch round file. File the leading edge of each tooth to Sharpen only the cutting teeth a razor edge. The top plate of each tooth of a blade. -
Page 19: Troubleshooting Guide
Troubleshooting Guide ENGINE DOES NOT START What To Check Possible Cause Remedy Faulty recoil starter. Consult with an authorized servicing dealer. Fluid in the crankcase. Does the engine crank? Internal damage. Loose spark plug. Tighten and re-test. Good compression? Excess wear on cylinder, piston, Consult with an authorized servicing rings. - Page 20 Troubleshooting Guide (continued) LOW POWER What To Check Possible Cause Remedy Operator is overworking the unit. Operate at slower rate. Carburetor mixture is too lean. Consult with an authorized servicing Is the engine overheating? dealer. Improper fuel ratio. Refill with fresh, clean unleaded gasoline with a pump octane of 87 or higher mixed with a 2-cycle mixing oil that meets or exceeds ISO-L-EGD and/ or JASO FD classified oils at 50:1 gasoline/oil ratio.
- Page 21 Troubleshooting Guide (continued) ADDITIONAL PROBLEMS What To Check Possible Cause Remedy Clean or replace the air filter. Clogged air filter. Replace the fuel filter. Clogged fuel filter. Poor acceleration. Consult with an authorized servicing Lean fuel/air mixture. dealer. Idle speed set too low. Adjust: 2,750 (±250) min Switch turned off.
-
Page 22: Emission System Warranty Statement
You are responsible for presenting your small off-road engine to an authorized Shindaiwa Corporation Dealer as soon as a prob- Your engine exhaust and evaporative emission control system lem exists. The warranty repairs should be completed in a rea- includes parts such as the carburetor, fuel tank, the ignition sys- sonable amount of time, not to exceed 30 days. - Page 23 NOTES...
- Page 24 © 2008 Shindaiwa Inc. 11975 SW Herman Rd. 6-2-11, Ozuka-Nishi, Part Number 89027 Tualatin, Oregon 97062 Asaminami-Ku, Hiroshima Rev. 11/2008 Shindaiwa is a registered trademark of Shindaiwa Inc. U.S.A. 731-3167, Japan Specifications subject to change without notice. Telephone: 503 692-3070 Telephone: 81-82-849-2220 Fax:...
Need help?
Do you have a question about the T282 and is the answer not in the manual?
Questions and answers