Table of Contents
Advertisement
Quick Links
EN
BL04650-201
DIGITAL CAMERA
Before You Begin
X100T
First Steps
Basic Photography
Owner's Manual (Basic Operations)
and Playback
Thank you for your purchase of this product.
Parts of the Camera
■ Product website:
Menus
http://fujifilm-x.com/x100t/
Appendix
For Your Safety
■ Additional information may be found in online manuals available from:
http://fujifilm-dsc.com/manuals/
Advertisement
Table of Contents

Related Manuals for FujiFilm X100T


Summary of Contents for FujiFilm X100T
- Page 1 BL04650-201 DIGITAL CAMERA Before You Begin X100T First Steps Basic Photography Owner’s Manual (Basic Operations) and Playback Thank you for your purchase of this product. Parts of the Camera ■ Product website: Menus http://fujifilm-x.com/x100t/ Appendix For Your Safety ■ Additional information may be found in online manuals available from:...
-
Page 2: Before You Begin Supplied Accessories
Before You Begin Before You Begin Supplied Accessories Supplied Accessories The following items are included with the camera: • Protective covers (× 2) NP-95 rechargeable battery BC-65N battery charger USB cable • Shoulder strap • Owner’s Manual (this manual) Lens cap Clip attaching tool Metal strap clips (×... -
Page 3: About This Manual
About This Manual About This Manual Symbols and Conventions Symbols and Conventions The following symbols are used in this manual: Q This information should be read before use to ensure correct operation. R Additional information that may be helpful when using the camera. Memory Cards Memory Cards Pictures are stored on optional SD, SDHC, and SDXC memory cards, referred to in this manual as “mem-... -
Page 4: Product Care
Use a blower to remove dust from the lens and monitor, then gently wipe with a soft, dry cloth. Any remaining stains can be removed by wiping gently with a piece of FUJIFILM lens-cleaning paper to which a small amount of lens-cleaning fl uid has been applied. Care should be taken to avoid scratch-... -
Page 5: Table Of Contents
Basic Photography and Playback Taking Photographs ............... 14 Appendix Appendix Viewing Pictures ................16 FUJIFILM X100T Product Information ........50 Viewing Pictures Full Frame ............16 Free FUJIFILM Apps ............... 50 Viewing Photo Information ............17 Caring for the Camera ..............51 Playback Zoom ................ -
Page 6: First Steps Attaching The Strap
First Steps First Steps Attaching the Strap Attaching the Strap Attach the strap clips to the camera and then attach the strap. Open a strap clip. Place the strap clip on an eyelet. Use the clip attaching tool to open a strap clip, Hook the strap eyelet in the clip opening. - Page 7 Attaching the Strap Attach a protective cover. Fasten the strap. Place a protective cover over the eyelet as Fasten the strap as shown. Repeat Steps 5–6 shown, with the black side of the cover toward for the second eyelet. the camera. Repeat Steps 1–4 for the second eyelet.
-
Page 8: Charging The Battery
Charging the Battery Charging the Battery The battery is not charged at shipment. Charge the battery before use. • The camera uses an NP-95 rechargeable battery. • The battery takes about 4 hours to fully charge. Place the battery in the charger. Plug the charger in. - Page 9 Charging the Battery Q Unplug the charger when it is not in use. Q Remove dirt from the battery terminals with a clean, dry cloth. Failure to observe this precaution could prevent the battery from charging. Q Do not affi x stickers or other objects to the battery. Failure to observe this precaution could make it impossible to remove the battery from the camera.
-
Page 10: Inserting The Battery And A Memory Card
Inserting the Battery and a Memory Card Inserting the Battery and a Memory Card Insert the battery and memory card as described below. Open the battery-chamber cover. Insert the battery. Slide the battery-chamber latch as shown and Using the battery to keep the battery latch open the battery-chamber cover. - Page 11 Inserting the Battery and a Memory Card Insert the memory card. Close the battery-chamber cover. Holding the memory card in the orientation shown, slide it in until it clicks into place at the back of the slot. Removing the Battery and Memory Card Removing the Battery and Memory Card Before removing the battery or memory card, turn Click!
-
Page 12: Turning The Camera On And Off
Turning the Camera on and Off Turning the Camera on and Off Rotate the ON/OFF switch to ON to turn the camera Battery Level Battery Level on. Select OFF to turn the camera off . After turning the camera on, check the battery level in the display. -
Page 13: Basic Setup
Basic Setup Basic Setup A language-selection dialog is displayed the fi rst Highlight a language START MENU time the camera is turned on. Set up the cam- and press MENU/OK. ENGLISH era as described below (you can reset the clock FRANCAIS or change languages at any time using the DEUTSCH... -
Page 14: Basic Photography And Playback
Basic Photography and Playback Basic Photography and Playback Taking Photographs Taking Photographs This section describes how to take pictures using program AE (mode P). Adjust settings for program AE. Shutter speed : Select A (auto) Exposure compensation : Select ±0 Focus mode : Select S (single AF) Aperture : Select A (auto) Confi rm that P appears in the display. - Page 15 Taking Photographs Ready the camera. Focus frame Focus frame Hold the camera steady with both hands and brace your elbows against your sides. Shaking or unsteady hands can blur your shots. To prevent pictures that are AUTO EVF/LCD out of focus or too dark (un- derexposed), keep your fi n- R If the subject is poorly lit, the AF-assist illumina- gers and other objects away...
-
Page 16: Viewing Pictures
Viewing Pictures Viewing Pictures Viewing Pictures Full Frame Viewing Pictures Full Frame To view pictures full frame, press a. 100-0001 Additional pictures can be viewed by pressing the selector left or right or rotating the focus ring. Press the selector or rotate the ring right to view pictures in the order recorded, left to view pictures in re- verse order. -
Page 17: Viewing Photo Information
Viewing Pictures Viewing Photo Information Viewing Photo Information The photo information display changes each time the selector is pressed up. Basic data Info display 1 Info display 2 12/31/2050 10:00 AM LENS 23.0mm F5.6 FOCAL LENGTH 23.0mm COLOR SPACE sRGB LENS MODULATION OPT. -
Page 18: Playback Zoom
Viewing Pictures Playback Zoom Playback Zoom Rotate the command dial right to zoom in on the current picture, left to zoom out (to view multiple images, rotate the command dial left when the picture is displayed full frame). Press DISP/BACK or MENU/OK to exit zoom. -
Page 19: Multi-Frame Playback
Viewing Pictures Multi-Frame Playback Multi-Frame Playback To change the number of images displayed, rotate the command dial left when a picture is displayed full frame. Rotate left to view more images. 100-0001 100-0001 Rotate right to view fewer images. Use the selector to highlight images and press MENU/OK to view the highlighted image full frame (to zoom in on the selected image, rotate the command dial right when the picture is displayed full frame). -
Page 20: Deleting Pictures
Deleting Pictures Deleting Pictures To delete individual pictures, multiple selected FRAME FRAME pictures, or all pictures, press the b button when Delete pictures one at a time. a picture is displayed full frame and choose from Press the b button in full-frame playback and the options on the following pages. -
Page 21: Selected Frames
Deleting Pictures SELECTED FRAMES SELECTED FRAMES ALL FRAMES ALL FRAMES Delete multiple selected pictures. Delete all unprotected pictures. Press the b button in full-frame playback and Press the b button in full-frame playback and choose SELECTED FRAMES. choose ALL FRAMES. Highlight pictures and press MENU/OK to select A confi rmation dialog will be displayed;... -
Page 22: Basic Movie Recording And Playback
Basic Movie Recording and Playback Basic Movie Recording and Playback Recording High-Defi nition (HD) Movies Recording High-Defi nition (HD) Movies Viewing Movies Viewing Movies The camera can be used to record short high- During playback, movies 12/31/2050 10:00 AM defi nition movies. are displayed as shown at right. -
Page 23: Viewing Pictures On A Computer
• MyFinePix Studio (available for download from the website below) can be used to copy pictures to a com- puter, where they can be stored, viewed, organized, and printed. http://fujifilm-dsc.com/mfs/ • RAW FILE CONVERTER (available for download from the website below) can be used to view RAW images on your computer. -
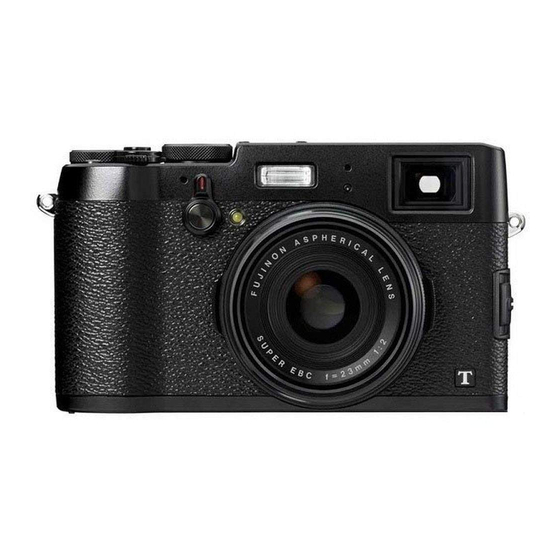
Page 24: Parts Of The Camera Parts Of The Camera
Parts of the Camera Parts of the Camera Parts of the Camera Parts of the Camera... - Page 25 Parts of the Camera Shutter button ON/OFF switch Diopter adjustment control Exposure compensation dial Fn button (function button 1) VIEW MODE button a (playback) button Shutter speed dial Battery latch b (delete) button (playback mode) Hot shoe Memory card slot Flash Battery chamber Fn button (function button 6)
- Page 26 Parts of the Camera The Selector The Selector The Command Dial The Command Dial Press the selector up ( w ), left ( e ), right ( r ), or down ( t ) to highlight items and press MENU/OK ( q ) to se- lect.
- Page 27 Parts of the Camera ■ Mode S: Shutter-Priority AE The Aperture Ring and Shutter Speed Dial The Aperture Ring and Shutter Speed Dial Use the aperture ring and shutter speed dial to Take pictures at the selected shutter speed. The choose from modes P, S, A, and M.
- Page 28 Parts of the Camera The VIEW MODE Button The VIEW MODE Button Press the VIEW MODE button to cycle through displays as shown below. VIEW VIEW FINDER FINDER E EYE SENSOR EYE SENSOR: Automatic display VIEWFINDER ONLY: Viewfi nder only selection using eye sensor VIEW FINDER...
- Page 29 Parts of the Camera The Viewfi nder Selector The Viewfi nder Selector Use the viewfi nder selector to switch between the electronic viewfi nder (EVF), the optical viewfi nder (OVF), and the OVF dual display. AUTO Dual display The Hybrid (EVF/OVF/Dual Display) Viewfi nder The Hybrid (EVF/OVF/Dual Display) Viewfi nder The features of the diff erent displays are described below.
- Page 30 Parts of the Camera ■ Shooting: Optical Viewfi nder The DISP/BACK Button The DISP/BACK Button Standard Information off The DISP/BACK button controls the display of indi- cators in the viewfi nder and LCD monitor. AUTO ■ Shooting: Electronic Viewfi nder Standard Information off...
- Page 31 Parts of the Camera ■ Shooting: LCD Monitor ■ Playback: Electronic Viewfi nder/LCD Monitor Standard Information off Standard Information off 12/31/2050 10:00 AM 12/31/2050 10:00 AM 12/31/2050 10:00 AM FAVORITES NEXT Favorites Info display Info display Q The optical viewfi nder can not be used for playback.
- Page 32 Parts of the Camera The Focus Mode Selector The Focus Mode Selector Choose how the camera focuses. • M (manual): Focus manually using the lens focus ring. Choose for manual control of focus or in situations in which the cam- era is unable to focus using autofocus.
- Page 33 Parts of the Camera Diopter Adjustment Diopter Adjustment The Indicator Lamp The Indicator Lamp The camera is equipped with diopter adjustment to accom- modate individual diff erences in vision. Rotate the diopter adjustment control until the viewfi nder display is in sharp The indicator lamp shows camera status as fol- focus.
- Page 34 Parts of the Camera The DRIVE Button The DRIVE Button The AEL/AFL Button The AEL/AFL Button Drive settings include burst shooting and brack- Lock exposure and/or focus. eting options.
- Page 35 The Q Button The Q Button The Wi-Fi Button The Wi-Fi Button View and change camera settings. Highlight Connect via Wi-Fi to smartphones running the items using the selector and use the command free FUJIFILM smartphone app. dial to choose an option.
-
Page 36: Camera Displays
Camera Displays Camera Displays The following types of indicator may be displayed during shooting and playback. In the description that follows, all available indicators are shown for illustrative purposes; the indicators actually displayed vary with camera settings. ■ Shooting: Optical Viewfi nder * a: indicates that no memory card is inserted and that pictures will be stored in the camera’s internal memory. - Page 37 Camera Displays ND (Neutral Density) fi lter indicator Electronic level Dynamic range Depth-of-fi eld preview Distance indicator Film simulation Conversion lens Sensitivity White balance Location data download status Exposure indicator Shutter type Monitor sunlight mode Aperture Continuous mode Movie mode Shutter speed Self-timer indicator Time remaining...
- Page 38 Camera Displays ■ Shooting: Electronic Viewfi nder/LCD Monitor * a: indicates that no memory card is inserted and that pictures will be stored in the camera’s internal memory.
- Page 39 Camera Displays ND (Neutral Density) fi lter indicator Film simulation Metering Focus check Dynamic range Shooting mode Depth-of-fi eld preview Focus warning Focus indicator Conversion lens Temperature warning Manual focus indicator Location data download status Control lock Focus mode Monitor sunlight mode Silent mode indicator Shutter type Movie mode...
- Page 40 Camera Displays ■ Playback: Electronic Viewfi nder/LCD Monitor Q The optical viewfi nder can not be used for playback. 12/31/2050 10:00 AM 12/31/2050 10:00 AM 100-0001 100-0001...
- Page 41 Camera Displays Date and time Photobook assist Shutter speed Intelligent face detection indicator DPOF print indicator Playback mode indicator Red-eye removal indicator Battery level Mark for upload to Pro focus mode, pro low-light mode Image size/quality Favorites Location data Film simulation Protected image Dynamic range Silent mode indicator...
-
Page 42: Menus
Menus Menus Using the Menus: Shooting Mode Using the Menus: Shooting Mode Use the shooting menus to adjust shooting settings. The options available vary with the shooting mode selected. Using the Shooting Menu Using the Shooting Menu Press MENU/OK to display the shooting menu. Press the selector right to display options for the highlighted item. -
Page 43: Shooting Menu Options
Using the Menus: Shooting Mode Shooting Menu Options Shooting Menu Options G AUTOFOCUS SETTING AUTOFOCUS SETTING q SHARPNESS SHARPNESS Adjust autofocus settings. Sharpen or soften outlines. N ISO r HIGHLIGHT TONE HIGHLIGHT TONE Control the camera’s sensitivity to light. Adjust the appearance of highlights. O IMAGE SIZE s SHADOW TONE IMAGE SIZE... - Page 44 Using the Menus: Shooting Mode v DISP. CUSTOM SETTING DISP. CUSTOM SETTING v INTERLOCK SPOT AE & FOCUS AREA INTERLOCK SPOT AE & FOCUS AREA Choose the items displayed in the viewfi nder and LCD Choose whether the camera meters the current focus frame when p SPOT is selected for C PHOTOMETRY.
-
Page 45: Using The Menus: Playback Mode
Using the Menus: Playback Mode Using the Menus: Playback Mode Using the Playback Menu Using the Playback Menu Press the a button to enter playback mode. Press the selector up or down to highlight the desired option. Press MENU/OK to display the playback menu. Press MENU/OK to select the highlighted op- PLAYBACK MENU RAW CONVERSION... -
Page 46: Playback Menu Options
RESIZE RESIZE V instax PRINTER PRINT Create a cropped copy of the current picture. instax PRINTER PRINT Print pictures on optional FUJIFILM instax SHARE print- D PROTECT PROTECT ers. Protect pictures from accidental deletion. J DISP ASPECT... -
Page 47: The Setup Menu
The Setup Menu The Setup Menu Using the Setup Menu Using the Setup Menu Display the setup menu. Adjust settings. 1.1 Press MENU/OK to display the menu for the 2.1 Press the selector up or down to highlight current mode. a menu item. -
Page 48: Setup Menu Options
The Setup Menu Setup Menu Options Setup Menu Options F DATE/TIME I FOCUS RING DATE/TIME FOCUS RING Set the camera clock. Choose the direction in which the focus ring is rotated to increase the focus distance. N TIME DIFFERENCE TIME DIFFERENCE j FOCUS CHECK Switch the camera clock instantly from your home time FOCUS CHECK... - Page 49 SHUTTER COUNT instax PRINTER CONNECTION SETTING View the approximate number of times the shutter has Adjust settings for connection to optional FUJIFILM been released. Other actions may also increment the instax SHARE printers. counter, for example turning the camera off , changing...
-
Page 50: Appendix
Appendix Appendix For more information on FUJIFILM digital camera, visit the websites listed below. FUJIFILM X100T Product Information FUJIFILM X100T Product Information Free FUJIFILM Apps Free FUJIFILM Apps Optional accessories and support information FUJIFILM apps give you more opportunities to can be found on the following website. -
Page 51: Caring For The Camera
Caring for the Camera Caring for the Camera To ensure continued enjoyment of the product, observe the following precautions. ■ Water and Sand Storage and Use Storage and Use If the camera will not be used for an extended pe- Exposure to water and sand can also damage the riod, remove the battery and memory card. -
Page 52: For Your Safety
For Your Safety For Your Safety IMPORTANT SAFETY INSTRUCTIONS • Read Instructions Read Instructions: All the safety and operating instructions This video product should not be placed in a built-in instal- mast and supporting structure, grounding of the lead-in wire should be read before the appliance is operated. -
Page 53: Safety Notes
About the Icons or electric shock. Contact your FUJIFILM dealer. sonnel under the following conditions: The icons shown below are used in this document to indi- Do not allow water or foreign objects to enter the Do not allow water or foreign objects to enter the •... - Page 54 Do not use voltages other than Do not use voltages other than CAUTION CAUTION FUJIFILM dealer to request internal cleaning every the power supply voltage shown. the power supply voltage shown. The use of other two years. Please note that this service is not free power sources can cause a fi...
- Page 55 For Your Safety ■ Storage • If the camera will not be used for an extended period, re- The Battery and Power Supply Performance may be impaired if the battery is left unused move the batteries. Note that the camera clock will be reset. Note: Check the type of battery used in your camera and for extended periods when fully charged.
- Page 56 This section applies to all camera models. Use only ment. Consult with hospital or airline staff before using the the camera to impact or physical shocks while images are FUJIFILM AC power adapters designated for use with this camera in a hospital or on an aircraft. being recorded.
-
Page 57: Notices
For Your Safety FCC Caution: Any changes or modifi cations not expressly ap- Canada portable RF exposure limit set forth for an uncon- NOTICES proved by the party responsible for compliance could void trolled environment and are safe for intended operation as To prevent fi re or shock hazard, do not expose the unit the user’s authority to operate this equipment. - Page 58 • Use only as part of a wireless network. Use only as part of a wireless network. FUJIFILM does not accept liability for damages result- ing from unauthorized use. Do not use in applications requiring a high degree of reliability, for example in medical devices or other systems that may directly or indirectly impact human life.
- Page 59 Memo Memo...
- Page 60 7-3, AKASAKA 9-CHOME, MINATO-KU, TOKYO 107-0052, JAPAN http://www.fujifilm.com/products/digital_cameras/index.html...